Pioneer AVIC-5000NEX Owner's Manual
Pioneer AVIC-5000NEX Manual
 |
View all Pioneer AVIC-5000NEX manuals
Add to My Manuals
Save this manual to your list of manuals |
Pioneer AVIC-5000NEX manual content summary:
- Pioneer AVIC-5000NEX | Owner's Manual - Page 1
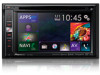
Operation Manual MULTIMEDIA NAVIGATION RECEIVER AVIC-8000NEX AVIC-7000NEX AVIC-6000NEX AVIC-5000NEX AVIC-X8610BS Notice to all users: This software requires that the product is properly connected to your vehicle's parking brake and depending on your vehicle, additional installation may be required. - Pioneer AVIC-5000NEX | Owner's Manual - Page 2
first-time startup 17 Regular startup 17 - A message about the map database 17 Turning off the display 17 2 En How to use the screens 18 - Switching screens using the touch panel keys 18 - Switching screens using the hardware buttons 19 Supported AV source 20 Displaying the AV operation screen 20 - Pioneer AVIC-5000NEX | Owner's Manual - Page 3
point 43 Using traffic information Receiving real-time traffic information (TMC) 45 Checking the traffic incidents on the map 45 Checking useful information about your trip Checking useful information 46 Customizing preferences of the navigation Customizing the navigation settings 47 - Restoring the - Pioneer AVIC-5000NEX | Owner's Manual - Page 4
memory 59 Updating Bluetooth software 60 63 - Using the preset dial lists 64 Receiving a phone call 64 - Answering an incoming iPod compatibility 69 Android™ device compatibility 75 Selecting a band 75 Manual tuning 75 Seek tuning 77 Operating with the hardware buttons 77 HD Radio™ reception - Pioneer AVIC-5000NEX | Owner's Manual - Page 5
search) 95 Playing files in random order 95 Setting a repeat play range 95 Switching the media file type 96 Operating with the hardware buttons 96 Playing compressed video files Using the touch panel keys 97 Reading the screen 98 Starting procedure (for Disc) 98 Starting procedure (for USB/SD) 98 - Pioneer AVIC-5000NEX | Owner's Manual - Page 6
currently playing (link search) 107 Operating with the hardware buttons 107 Playing back music from a music app other than iPod music, as the iPod source 107 - the hardware buttons 122 Using iDatalink Activating iDatalink Maestro 123 - Checking the device number 123 - Updating the iDatalink Maestro - Pioneer AVIC-5000NEX | Owner's Manual - Page 7
service 130 Using the touch panel keys 130 Reading the screen 131 Starting procedure 132 Manual Operating with the hardware buttons 140 Using an HDMI source Starting procedure (for camera) 145 Setting the video signal 145 Using Navigation info window 149 Setting automatic switching to the navigation - Pioneer AVIC-5000NEX | Owner's Manual - Page 8
156 Displaying the firmware version 158 Updating firmware 158 Checking sensor 185 Setting the video signal for the rear view camera 186 Language code chart for DVDs 187 Favorite menu Selecting a shortcut 188 Removing a shortcut 188 Common operations Setting the time and date - Pioneer AVIC-5000NEX | Owner's Manual - Page 9
218 - iOS 218 - iTunes 218 Using app-based connected content 218 - Pandora® 219 - Aha Radio 219 HDMI 219 MHL 219 IVONA Text-to-Speech 219 Notice regarding video viewing 219 Notice regarding DVD-Video viewing 219 Notice regarding MP3 file usage 219 Map coverage 220 Using the LCD screen correctly 220 - Pioneer AVIC-5000NEX | Owner's Manual - Page 10
Buttons on this product are described in ALL CAPITALS, BOLD lettering: e.g.) HOME button, MODE button 8000NEX 7000NEX Terms used in this manual "Front display" and "Rear display" In this manual, the display". "Video image" "Video image" in this manual indicates moving images of DVD-Video, DivX®, - Pioneer AVIC-5000NEX | Owner's Manual - Page 11
first time after installation. ! If this product fails to operate properly. ! If there appears to be problems with the op- eration of the system. ! If your vehicle position is shown on the map with a significant positioning error. 1 Turn the ignition switch OFF. 2 Press the RESET button with a pen - Pioneer AVIC-5000NEX | Owner's Manual - Page 12
the parts and the main features using the buttons. 8000NEX 7000NEX 1 2 3 4 5 6 78 a b 9 6000NEX 5000NEX X8610BS 8 a 7 2 3 4 5 6 c d b 1 1 LCD screen 2 VOL (+/-) button Press to adjust the AV (Audio and Video) source volume. 3 MAP button ! Press to display the Map screen. = For details of the - Pioneer AVIC-5000NEX | Owner's Manual - Page 13
faceplate to ex- cessive shock or disassemble it. ! Never grip the buttons tightly or use force when removing or attaching the detachable faceplate. ! the detachable faceplate is removed from this product. When you release your finger, the bottom of the detachable faceplate separates slightly - Pioneer AVIC-5000NEX | Owner's Manual - Page 14
Doing so may break this product. Adjusting the LCD panel angle 8000NEX 7000NEX 1 Press the h button. The following screen appears. p The adjusted angle of the LCD panel memory card by the procedure described in this manual. ! Do not press the h button when an SD memory card is not fully inserted. Doing - Pioneer AVIC-5000NEX | Owner's Manual - Page 15
with some SD memory cards. Inserting an SD memory card 8000NEX 7000NEX 1 Press the h button. The following screen appears. 4 Press the h button. The LCD panel closes. Ejecting an SD memory card 8000NEX 7000NEX 1 Press the h button. The following screen appears. 2 Touch the following key. Opens the - Pioneer AVIC-5000NEX | Owner's Manual - Page 16
the SD memory card out straight. Connecting and disconnecting an iPod Connecting your iPod = For details of the connections, refer to the Installation Manual. Disconnecting your iPod % Pull out the cables after confirming that no data is being accessed. 2 1 USB cable 2 USB storage device Unplugging - Pioneer AVIC-5000NEX | Owner's Manual - Page 17
map data may be displayed. p This message is displayed the first time you turn on this product each month. Turning off the display You can turn off the display at night or when the screen is too bright. % Press and hold the MODE button last was the navigation screen. Read the terms carefully, - Pioneer AVIC-5000NEX | Owner's Manual - Page 18
Chapter 02 Basic operation How to use the screens Switching screens using the touch panel keys b 2 a 3 1 9 4 6 8 7 5 18 En - Pioneer AVIC-5000NEX | Owner's Manual - Page 19
p If you press the HOME button, the Top menu screen is displayed. 2 Time and date setting screen You can set the time and date settings. 3 Setting menu screen the destination. ! You can customize navigation settings. p If you press the MAP button, the Map screen is displayed. a Application operation - Pioneer AVIC-5000NEX | Owner's Manual - Page 20
SiriusXM™ tuner ! AV input (AV) ! AUX ! HDMI (*2) p (*1) Available for AVIC-5000NEX and AVIC- X8610BS only. p (*2) Available for AVIC-8000NEX, AVIC- 7000NEX and AVIC-6000NEX only. Displaying the AV operation screen 1 Press the HOME button to display the Top menu screen. 1 1 AV operation key The AV - Pioneer AVIC-5000NEX | Owner's Manual - Page 21
refer to Navigation info window on page 149. Selecting a front source on the AV source selection screen 1 Press the HOME button to display the video for the rear display on page 192. Turning off the AV source Turn off the AV source to stop playing or receiving the AV source. 1 Press the HOME button - Pioneer AVIC-5000NEX | Owner's Manual - Page 22
also changed. Changing the display order of source keys You can change the display order of source keys on the source list. 1 Press the HOME button to display the Top menu screen. 2 Touch the AV operation key. 1 p If the source key is moved, the source icons displayed on the Top menu - Pioneer AVIC-5000NEX | Owner's Manual - Page 23
the navigation system. 3 8 4 7 5 6 1 Displays the characters that are entered. If there is no text in the box, an informative guide with deletes all of the text. p The first time that the MAP button is pressed, the navigation system begins its initial startup. After a short pause, the - Pioneer AVIC-5000NEX | Owner's Manual - Page 24
For details, refer to Customizing the navigation settings on page 47. 10 Touch [Activate], then [Next]. A message saying that the connected online features are activated appears if you activate these services right away. p You will need to install the AVICSYNC App on your iPhone or smartphone first - Pioneer AVIC-5000NEX | Owner's Manual - Page 25
Navigation menu screen Operating the Navigation menu screen 1 Press the MAP button. The Map screen appears. 2 Touch the following key. Displays the navigation menu on the Map "Route Planner" on page 41. 4 Displays useful information to support your driving. = For details, refer to Chapter 9. 5 - Pioneer AVIC-5000NEX | Owner's Manual - Page 26
your vehicle is traveling on (or in). 8 Indicates the current route.* The route currently set is highlighted in color on the map. 9 Displays the Navigation menu screen. a Indicates the progress to the final destination.* Frequently shown route events Icon Meaning Turn left. Turn right. Turn - Pioneer AVIC-5000NEX | Owner's Manual - Page 27
shows the current position, recommended route and surrounding map area. When there is no GPS position, the arrow mark is transparent. It shows your last known position. Browsing the data field The data fields are different when you are navigating the current route and when you have no specified - Pioneer AVIC-5000NEX | Owner's Manual - Page 28
you want to display other types of POIs for the exits, you can change the icons in "Navigation Map". = For details, refer to "Navigation Map" settings on page 51. Signs display at the top of the map. Sign colors and design styles are similar to those of the actual signs in place above or along - Pioneer AVIC-5000NEX | Owner's Manual - Page 29
is displayed on the screen with street names and other text displayed in the same font size. 1 Press the MAP button. The Map screen appears. 2 Touch anywhere on the map during navigation. The map stops following the current position and control keys appear. 3 Touch the following key to change the - Pioneer AVIC-5000NEX | Owner's Manual - Page 30
For details, refer to Switching between 2D, 3D, and 2D North up views on page 29. 1 Press the MAP button. The Map screen appears. 2 Touch anywhere on the map during navigation. The map stops following the current position and control keys appear. 3 Touch the following key to change the view angle of - Pioneer AVIC-5000NEX | Owner's Manual - Page 31
you must stop in a safe place and put on the parking brake before setting your route. p Some information regarding traffic regulations depends may be skipped. 1 Press the MAP button. The Map screen appears. 2 Touch the following key. Displays the navigation menu on the Map screen. 3 Touch [New Route - Pioneer AVIC-5000NEX | Owner's Manual - Page 32
search allows you to quickly find the most frequently selected types of POIs. 1 Press the MAP button. The Map screen appears. 2 Touch the following key. Displays the navigation menu on the Map screen. 3 Touch [New Route]. The "New Route to..." screen appears. 4 Touch [Places]. The "Places" screen - Pioneer AVIC-5000NEX | Owner's Manual - Page 33
You can also search for POIs by their names in each of their categories. 1 Press the MAP button. The Map screen appears. 2 Touch the following key. Displays the navigation menu on the Map screen. 3 Touch [New Route]. The "New Route to..." screen appears. 4 Touch [Places]. The "Places" screen appears - Pioneer AVIC-5000NEX | Owner's Manual - Page 34
for locations that provide emergency or roadside assistance in surrounding areas. 1 Press the MAP button. The Map screen appears. 2 Touch the following key. Displays the navigation menu on the Map screen. 3 Touch [Useful Information]. The "Useful Information" screen appears. 4 Touch [Help Nearby - Pioneer AVIC-5000NEX | Owner's Manual - Page 35
Saved Routes". = For details, refer to Storing a route in "Saved Routes" on page 43. 1 Press the MAP button. The Map screen appears. 2 Touch the following key. Displays the navigation menu on the Map screen. 3 Touch [New Route]. The "New Route to..." screen appears. # This screen has several options - Pioneer AVIC-5000NEX | Owner's Manual - Page 36
The "Combined Search" feature lets you quickly find a place by its name and search area. 1 Press the MAP button. The Map screen appears. 2 Touch the following key. Displays the navigation menu on the Map screen. 3 Touch [New Route]. The "New Route to..." screen appears. 4 Touch [Search in All]. The - Pioneer AVIC-5000NEX | Owner's Manual - Page 37
. Searching for a location by coordinates Entering a latitude and longitude pinpoints the location. 1 Press the MAP button. The Map screen appears. 2 Touch the following key. Displays the navigation menu on the Map screen. 3 Touch [New Route]. The "New Route to..." screen appears. # This screen has - Pioneer AVIC-5000NEX | Owner's Manual - Page 38
starting navigation. = For details, refer to Checking route alternatives when planning the route on page 39. Searching for a location by scrolling the map Specifying a location after scrolling the map enables you to set the position as destination, waypoint. 1 Press the MAP button. The Map screen - Pioneer AVIC-5000NEX | Owner's Manual - Page 39
, you can turn off the GPS receiver. Then you can set the starting point of the route to a different location than the current GPS position. 1 Press the MAP button. The Map screen appears. 2 Touch the following key. Displays the navigation menu on the Map screen. 3 Touch [Route Planner]. The "Route - Pioneer AVIC-5000NEX | Owner's Manual - Page 40
the list of destinations (adding a waypoint, or changing a final destination, for example). 1 Press the MAP button. The Map screen appears. 2 Touch the following key. Displays the navigation menu on the Map screen. 3 Touch [My Route]. The "My Route" screen appears. 4 Edit the route by modifying - Pioneer AVIC-5000NEX | Owner's Manual - Page 41
route and check the different parameters of the planned route in "Route Summary". 1 Press the MAP button. The Map screen appears. 2 Touch the following key. Displays the navigation menu on the Map screen. 3 Touch [Route Summary]. The "Route Summary" screen appears. The current route is displayed in - Pioneer AVIC-5000NEX | Owner's Manual - Page 42
to your destination. = For details, refer to Chapter 5. 2 Press the MAP button. The Map screen appears. 3 Touch the following key. Displays the navigation menu on the Map screen. seconds but you can open them again by touching the map). Jumps to the previous guidance point (maneuver). Pauses the - Pioneer AVIC-5000NEX | Owner's Manual - Page 43
. 1 Search for a location. The cursor appears at the selected point. 2 Press the MAP button. The Map screen appears. 3 Touch the following key. Displays the navigation menu on the Map screen. 4 Touch [Route Summary]. The "Route Summary" screen appears. 5 Touch the following key. Displays the list - Pioneer AVIC-5000NEX | Owner's Manual - Page 44
07 Registering and editing locations and routes 2 Scroll the map and select a location. The cursor appears at the page 50. p The warning for road safety cameras (like speed cameras) is disabled when you are in certain countries where road safety camera warning is prohibited. However, you are fully - Pioneer AVIC-5000NEX | Owner's Manual - Page 45
is equipped with the required TMC receiver needed for receiving reports on traffic incidents. To enable the TMC receiver, complete the below steps. 1 Press the MAP button. The Map screen appears. 2 Touch the following key. Displays the navigation menu on the Map screen. # This screen has several - Pioneer AVIC-5000NEX | Owner's Manual - Page 46
information to support your driving. 1 Press the MAP button. The Map screen appears. 2 Touch the following key. Displays the navigation menu on the Map screen. 3 Touch [Useful Information]. The "Useful Information" screen appears. 4 Touch the desired menu item. ! Parking: Checks parking lots near - Pioneer AVIC-5000NEX | Owner's Manual - Page 47
MAP button. The Map screen appears. 2 Touch the following key. Displays the navigation menu on the Map 7000NEX 6000NEX Enables or disables the TMC receiver the online gas price service, and selects the Services: Enables or disables the connected services. p You will need to install the AVICSYNC App - Pioneer AVIC-5000NEX | Owner's Manual - Page 48
the default settings You can restore settings or recorded content to the default settings. 1 Press the MAP button. The Map screen appears. 2 Touch the following key. Displays the navigation menu on the Map screen. # This screen has several options. Touch to see the full list. 3 Touch [Settings]. The - Pioneer AVIC-5000NEX | Owner's Manual - Page 49
preferences of the navigation - U-turns are not used in routes (turning around on a divided road is not considered a U-turn for the purpose of this system). - Route planning can also be configured to incorporate dimension, weight, and freight hazard restrictions for maps that contain such - Pioneer AVIC-5000NEX | Owner's Manual - Page 50
You can turn off the attention tone that precedes the verbal instructions or adjust its volume. Voice Guidance You can enable or disable navigation system can read out the quick summary of the route. Announce Traffic Info 8000NEX 7000NEX 6000NEX When a traffic message is received, this navigation - Pioneer AVIC-5000NEX | Owner's Manual - Page 51
key to turn on or off these warnings and to set the distance from the hazard to receive the warning at. These can be set individually for the different warning types. "Navigation Map" settings Map Display You can see the effect when you change a setting. ! Viewpoint You can adjust the basic zoom - Pioneer AVIC-5000NEX | Owner's Manual - Page 52
data fields in the corner of the Map screen. You can choose to have different values displayed for when navigating a route to a select destination and the decision. You can accept the detour as offered or increase the bypassed freeway segment before accepting. ! Turn to the suggested new direction - Pioneer AVIC-5000NEX | Owner's Manual - Page 53
navigation system can offer parking category places near your destination. Touch to open a top-down map with the destination and the offered parking bypass them with the help of this navigation not support all 7000NEX 6000NEX Traffic You can set to enable or disable the TMC receiver that can receive - Pioneer AVIC-5000NEX | Owner's Manual - Page 54
parameters that are to be used during the inital setup proccess. "Connected Services" settings You can use the "Connected Services" settings to enable or disable connected online features. p You will need to install the AVICSYNC App on your iPhone or smartphone first in order to be able to use - Pioneer AVIC-5000NEX | Owner's Manual - Page 55
some Bluetooth devices, no specific action is necessary to activate Bluetooth wireless technology. For details, refer to the instruction manual of your devices. 2 Press the HOME button to display the Top menu screen. 3 Touch the following keys in the following order. The "Bluetooth" screen appears - Pioneer AVIC-5000NEX | Owner's Manual - Page 56
If the connection is established, "Paired." is displayed. p If your device supports SSP (Secure Simple Pairing), a six-digit number appears on the display of A2DP (Advanced Audio Distribution Profile)/AVRCP (Audio/ Video Remote Control Profile). Illuminates when the Bluetooth connection is - Pioneer AVIC-5000NEX | Owner's Manual - Page 57
is necessary to activate Bluetooth wireless technology. For details, refer to the instruction manual of your devices. 2 Use the Bluetooth setting in the device to automatically when the ignition switch is turned on. 1 Press the HOME button to display the Top menu screen. 2 Touch the following keys in - Pioneer AVIC-5000NEX | Owner's Manual - Page 58
For some Bluetooth devices, no specific action is necessary to activate Bluetooth wireless technology. For details, refer to the instruction manual of your devices. 2 Press the HOME button to display the Top menu screen. 5 Touch the name of the device that you want to connect. Switching visibility - Pioneer AVIC-5000NEX | Owner's Manual - Page 59
setting is available only when you stop your vehicle in a safe place and apply the parking brake. CAUTION Never turn this product off while the Bluetooth memory is being cleared. 1 Press the HOME button to display the Top menu screen. 2 Touch the following keys in the following order. Displaying - Pioneer AVIC-5000NEX | Owner's Manual - Page 60
the HOME button to display the Top menu screen. 2 Touch the following keys in the following order. The "Bluetooth" screen appears. 3 Touch [BT Software Update]. 4 Touch [Start]. The data transfer screen is displayed. p Follow the on-screen instructions to finish updating the Bluetooth software - Pioneer AVIC-5000NEX | Owner's Manual - Page 61
handsfree function, you can operate this product to make or receive phone calls. This section describes how to set up a on the follow- ing screens. - Top menu screen - AV operation screen - On the App control side bar on the AppRadio Mode and MirrorLink screens % Touch the following key. Touch - Pioneer AVIC-5000NEX | Owner's Manual - Page 62
visibility of this product should be on when you use the "Bluetooth" menu. = For details, refer to Switching visibility on page 58. 1 Press the HOME button to display the Top menu screen. 2 Touch the following keys in the following order. 1 Dial pad 2 Deletes one digit. Touch and hold to delete all - Pioneer AVIC-5000NEX | Owner's Manual - Page 63
following order. Dialing from the history The most recent calls made (dialed, received and missed) are stored in the call history list. You can browse the call history list and call numbers from it. 1 Press the HOME button to display the Top menu screen. 2 Touch the following keys in the following - Pioneer AVIC-5000NEX | Owner's Manual - Page 64
the following key. Deletes the phone number. Dialling from the preset dial list 1 Press the HOME button to display the Top menu screen. 2 Touch the following keys in the following order. Receiving a phone call You can perform hands-free answering by using this product. The "Preset Dial" screen - Pioneer AVIC-5000NEX | Owner's Manual - Page 65
set to automatically answer incoming calls, you will have to answer the calls manually. = For details, refer to Answering a call automatically on page 66. p The registered name appears if the phone number of the received call is already registered in "Phone Book". 1 Touch the following key. Answers - Pioneer AVIC-5000NEX | Owner's Manual - Page 66
not to use this product's ring tone. If this function is set to on, the ring tone for this product will sound. 1 Press the HOME button to display the Top menu screen. 2 Touch the following keys in the following order. The "Bluetooth" screen appears. 3 Touch [Ring Tone] repeatedly until the desired - Pioneer AVIC-5000NEX | Owner's Manual - Page 67
can also launch the voice recognition function by pressing and holding the HOME button. Indicates that this product is on standby for your voice commands. Cancels phone must be 10 meters or less when sending and receiving voice and data via Bluetooth technology. However, the actual transmission - Pioneer AVIC-5000NEX | Owner's Manual - Page 68
manual that came with your cellular phone for detailed instructions. ! With cellular phones, phone book transfer may not work even though your phone is paired with this product. In that case, disconnect your phone, and then perform pairing again from your phone to this product. Making and receiving - Pioneer AVIC-5000NEX | Owner's Manual - Page 69
details of the connections, refer to the Installation Manual. 3 If necessary, connect your device to the connected device. 1 Press the HOME button to display the Top menu screen. 2 Touch Input/Output settings]. iPod compatibility This product supports only the following iPod models and iPod software - Pioneer AVIC-5000NEX | Owner's Manual - Page 70
compatibility with this product, refer to the information on our website. This manual applies to the following iPod models. iPod with 30-pin connector ! iPhone 7th generation p Compatibility with all Android devices is not guaranteed. For details about Android device compatibility with this product, - Pioneer AVIC-5000NEX | Owner's Manual - Page 71
connector Required cable (sold separately) Smartphone Setup Device Connection Bluetooth connection Connection requirement Available source iPod (audio) iPod (video) aha Pandora AppRadio Mode Cable connection is not required. iPhone/iPod Wireless via BT Bluetooth connection is required for - Pioneer AVIC-5000NEX | Owner's Manual - Page 72
on available on AVIC- AVIC- 8000NEX, 5000NEX AVIC- and AVIC- 7000NEX X8610BS. and AVIC- 6000NEX. (*1) Install the CarMediaPlayer app on your iPod or iPhone. = For details about the CarMediaPlayer, refer to the information on our website. = Refer to the CarMediaPlayer manual for more - Pioneer AVIC-5000NEX | Owner's Manual - Page 73
operation Chapter 13 iPod / iPhone or smartphone setup operation Android, MirrorLink device Required cable (sold separately) Smartphone Setup connection is required. Connect to USB port 2. 1 1 1 - This connection and settings are available on AVIC8000NEX, AVIC7000NEX and AVIC6000NEX. En 73 - Pioneer AVIC-5000NEX | Owner's Manual - Page 74
or seek tuning. = For details, refer to Manual tuning on page 75. = For details, refer to Seek tuning on page 75. 9 Displays the preset channels. 3 8 4 5 76 1 Band indicator Shows the tuned band: FM1, FM2, FM3 or AM. 2 Current time and date 3 Program service name indicator Shows the program - Pioneer AVIC-5000NEX | Owner's Manual - Page 75
Appears when this product receives an iTunes song tag manually. Moves down one step at a time. Moves up one step at a time. p This function is convenient for preparing different preset lists for each band. Seek tuning % Touch and hold one of the following keys for about one second and then release - Pioneer AVIC-5000NEX | Owner's Manual - Page 76
radio station is stored in memory. The next time you touch the same preset tuning key "1" to "6", the service component is recalled from memory. p Up to 18 FM stations, six for each of the three FM bands, signals for good reception. 1 Press the HOME button to display the Top menu screen. 76 En - Pioneer AVIC-5000NEX | Owner's Manual - Page 77
Tagging) on page 189. 4 Touch [Radio settings]. The following screen appears. Operating with the hardware buttons Press the TRK button You can move the preset channels up or down. Press and hold the TRK button You can perform seek tuning. 5 Touch [Local]. The pop-up menu appears. 6 Touch the item - Pioneer AVIC-5000NEX | Owner's Manual - Page 78
service AM band Analog AM Analog AM Digital AM iTunes® Tagging provides you the opportunity to discover a wide range of content and the means to "tag" that content for later review and purchase from the iTunes® Store. Visual information related to content being played on your HD Radio receiver - Pioneer AVIC-5000NEX | Owner's Manual - Page 79
page 189. 9 Performs manual tuning or seek tuning. = For details, refer to Manual tuning on page 80 the list. 3 Current time and date 4 Album artwork Shows the artwork for service or frequency Shows the call sign, the program service or the frequency of the broadcast station currently being received - Pioneer AVIC-5000NEX | Owner's Manual - Page 80
for preparing different preset lists for each band. Manual tuning % Touch the following keys to tune manually. Moves down one step at a time. Moves frequencies. Seek tuning will start when you release the key. p When an analog station is being received, only analog broadcasts can be tuned up - Pioneer AVIC-5000NEX | Owner's Manual - Page 81
radio station is stored in memory. The next time you touch the same preset tuning key "1" to "6", the service component is recalled from memory. p Up to 18 FM stations, six for each of the three FM bands, signals for good reception. 1 Press the HOME button to display the Top menu screen. En 81 - Pioneer AVIC-5000NEX | Owner's Manual - Page 82
lower settings allow reception of those with weaker signals. Switching the seek mode You can select the method of seek tuning. 1 Press the HOME button to display the Top menu screen. 2 Touch the following keys in the following order. The "System" screen appears. 3 Touch [AV Source Settings]. The - Pioneer AVIC-5000NEX | Owner's Manual - Page 83
of the same frequency level by default. If you want to avoid frequent automatic switching, change this setting to "Off". 1 Press the HOME button to display the Top menu screen. 2 Touch the following keys in the following order. 5 Touch [Blending] repeatedly until the desired setting appears. ! On - Pioneer AVIC-5000NEX | Owner's Manual - Page 84
video images cannot be viewed while your vehicle is in motion. To view video images, you must stop in a safe place and apply the parking brake on page 21. 2 Displays the Time and date setting screen. = For details, refer to Setting the time and date on page 189. 3 Displays the Setting menu screen - Pioneer AVIC-5000NEX | Owner's Manual - Page 85
Playing a disc Chapter 16 Playing a disc 9 Changes the playback point by dragging the key. = For details, refer to Operating the time bar on page 23. a Switches the media file type. = For details, refer to Switching the media file type on page 88. b Switches between playback and pause. c Uses " - Pioneer AVIC-5000NEX | Owner's Manual - Page 86
Playing a disc Reading the screen (for audio) Example: CD 1 4 2 3 Reading the screen (for video) Example: DVD 1 9 5 6 8 7 3 Example: Video CD 1 4 a 3 1 Current time and date 2 Playback condition indicator Indicates the current playback condition. Playing tracks in random order Indicator - Pioneer AVIC-5000NEX | Owner's Manual - Page 87
disc. = For details, refer to Using the touch panel keys (for audio) on page 84. = For details, refer to Using the touch panel keys (for video) on page 84. ! (default): Does not play tracks in random order. !: Plays all tracks in the current repeat play range in random order. p If you - Pioneer AVIC-5000NEX | Owner's Manual - Page 88
to play on the disc. 2 Touch the item you want to set. ! Music: Switches the media file type to music (compressed audio). ! Video: Switches the media file type to video. ! CD-DA: Switches the media file type to CD (audio data (CD-DA)). Searching for the part you want to play You - Pioneer AVIC-5000NEX | Owner's Manual - Page 89
there. This function cannot be used if a specified scene has not been preprogramed on the disc. p This function is available for DVD-Video and Video-CDs featuring PBC (playback control) only. % Touch the following key. Returns to the specified point and begins playback from there. p The specified - Pioneer AVIC-5000NEX | Owner's Manual - Page 90
Chapter 16 Playing a disc Resuming playback (Bookmark) The Bookmark function lets you resume playback from a selected scene the next time the disc is loaded. % Touch the following key. Bookmarks one point for each of up to five discs. 2 Touch the following key. Starts playback from the selected - Pioneer AVIC-5000NEX | Owner's Manual - Page 91
. p The appearance of this key changes accord- ing to the current setting. Operating with the hardware buttons Press the TRK button You can skip tracks or chapters forward or backward. Press and hold the TRK button You can perform fast reverse or fast forward. Playing a disc Chapter 16 En 91 - Pioneer AVIC-5000NEX | Owner's Manual - Page 92
list on page 21. 2 Displays the MIXTRAX screen. = For details, refer to Chapter 30. 3 Displays the Time and date setting screen. = For details, refer to Setting the time and date on page 189. 4 Displays the Setting menu screen. 5 Recalls equalizer curves. = For details, refer to Using the equalizer - Pioneer AVIC-5000NEX | Owner's Manual - Page 93
Nothing is displayed if the song currently playing is in a format which does not support these functions. Folder Browse mode ! : File name Shows the name of the of the folder containing the file currently playing. 2 Current time and date 3 Album artwork Album art of the current song is displayed if - Pioneer AVIC-5000NEX | Owner's Manual - Page 94
playable files. If there are no playable files in folder 01 (root folder), playback starts from folder 02. Switching the browse mode This product supports two types of browse modes: Folder Browse mode and Music Browse mode. p The browse modes are available only for the external storage device (USB - Pioneer AVIC-5000NEX | Owner's Manual - Page 95
Playing compressed audio files Chapter 17 Playing compressed audio files Selecting files from the file name list You can find files or folders to play back using the file name or folder name list which is a list of the files or folders stored on a disc or in the external storage device (USB, SD). - Pioneer AVIC-5000NEX | Owner's Manual - Page 96
type to music (compressed audio). ! Video: Switches the media file type to video. ! CD-DA: Switches the media file type to CD (audio data (CD-DA)). ! Photo: Switches the media file type to still image (JPEG data). Operating with the hardware buttons Press the TRK button You can skip files forward - Pioneer AVIC-5000NEX | Owner's Manual - Page 97
video images, you must stop in a safe place and apply the parking brake. Using the touch panel keys Example: Disc 1 23 4 5 6 h 7 g 8 f 9 ea dc b a 1 Displays the source list. = For details, refer to Selecting a front source on the source list on page 21. 2 Displays the Time and date - Pioneer AVIC-5000NEX | Owner's Manual - Page 98
Chapter 18 Playing compressed video files Reading the screen Example: Disc 1 3 Use the touch panel keys on the screen to control the disc. = For details, refer to Using the touch panel keys on page 97. 3 2 1 Current time and date 2 Play time indicator Shows the elapsed playing time within the - Pioneer AVIC-5000NEX | Owner's Manual - Page 99
type to music (compressed audio). ! Video: Switches the media file type to video. ! Photo: Switches the media file type to still image (JPEG data). ! CD-DA: Switches the media file type to CD (audio data (CD-DA)). Operating with the hardware buttons Press the TRK button You can skip files forward or - Pioneer AVIC-5000NEX | Owner's Manual - Page 100
. f Changes the wide screen mode. = For details, refer to Changing the wide screen mode on page 191. Reading the screen 1 2 1 Current time and date 2 Current file information ! : File name Shows the name of the file currently playing. ! : Folder name Shows the name of the folder containing the file - Pioneer AVIC-5000NEX | Owner's Manual - Page 101
play in the external storage device (USB, SD). 2 Touch the item you want to set. ! Music: Switches the media file type to music (compressed audio). ! Video: Switches the media file type to video. ! Photo: Switches the media file type to still image (JPEG data). En 101 - Pioneer AVIC-5000NEX | Owner's Manual - Page 102
the HOME button to display the Top menu screen. 2 Touch the following keys in the following order. The "Video Setup" screen Manual: JPEG images can be switched manually. Operating with the hardware buttons Press the TRK button You can skip files forward or backward. Press and hold the TRK button - Pioneer AVIC-5000NEX | Owner's Manual - Page 103
the Installation Manual. When you want to play audio and/or video files on your iPod with a Lightning connector, first install CarMediaPlayer reasons, video images cannot be viewed while your vehicle is in motion. To view video images, you must stop in a safe place and apply the parking brake. - Pioneer AVIC-5000NEX | Owner's Manual - Page 104
the equalizer on page 170. 5 Selects a track from the list. = For details, refer to Selecting song or video sources from the playlist screen on page 106. 6 Switches the control mode to "App Mode". = For details, refer to Using this product's iPod function from your iPod on page 106. 7 Displays the - Pioneer AVIC-5000NEX | Owner's Manual - Page 105
Using an iPod 2 Current time and date 3 Album artwork Album art of the current song is displayed if it is available. 4 Playback condition indicator Indicates the current playback condition. Setting the shuffle play Indicator Meaning Plays back songs or videos in random order within the selected - Pioneer AVIC-5000NEX | Owner's Manual - Page 106
the list that you want to play. Repeat this operation until you find the desired song or video. 7 Start playback of the selected list. p Depending on the generation or version of the if the control mode is set to "App Mode". The application screen of the iPod can be displayed on this product, and - Pioneer AVIC-5000NEX | Owner's Manual - Page 107
or backward. When a song or video with chapters is played, you can skip a chapter forward or backward. Press and hold the TRK button You can perform fast reverse or fast forward. Playing back music from a music app other than iPod music, as the iPod source The app name and the song information are - Pioneer AVIC-5000NEX | Owner's Manual - Page 108
page 21. 2 Displays the Time and date setting screen. = For details, refer to Setting the time and date on page 189. 3 Displays the Setting For details, refer to Selecting song or video sources from the playlist screen on page 106. 6 Switches the control mode to "App Mode". = For details, refer to - Pioneer AVIC-5000NEX | Owner's Manual - Page 109
the car is parked. No feature p For AVIC-5000NEX and AVIC-X8610BS, install the AppRadio app on the Pioneer is not liable for any issues that may arise from incorrect or flawed app-based content. ! The content and functionality of the supported applications are the responsibility of the App - Pioneer AVIC-5000NEX | Owner's Manual - Page 110
with a 30-pin connector users 1 Connect your iPhone. = For details of the connections, refer to the Installation Manual. 2 Press the HOME button to display the Top menu screen. 3 Touch [APPS]. A message, which notifies you that your iPhone can launch the application, appears on the screen. A message - Pioneer AVIC-5000NEX | Owner's Manual - Page 111
the HOME button to display the Top menu screen. 5 Touch [APPS]. The AppRadio app is launched, and the AppRadio Mode screen (Application menu screen) appears. Using the keyboard CAUTION For your safety, the keyboard functionality is only available when the vehicle is stopped and the parking brake is - Pioneer AVIC-5000NEX | Owner's Manual - Page 112
parking brake. p This function can be set under the following conditions: - When an Android 1 Press the HOME button to display the Top menu settings]. 4 Touch [AppRadio Video Adjustment]. The confirmation screen setting again from the beginning, touch [Reset]. Displaying the image of your application - Pioneer AVIC-5000NEX | Owner's Manual - Page 113
p The cable connection method varies depending on your device. = For details of the connections, refer to the Installation Manual. 2 Press the HOME button to display the Top menu screen. 3 Touch [APPS]. The image in your iPhone appears on the screen. 4 Launch an application on your iPhone. An image - Pioneer AVIC-5000NEX | Owner's Manual - Page 114
depending on your device. = For details of the connections, refer to the Installation Manual. 3 Press the HOME button to display the Top menu screen. 4 Touch [APPS]. If the launcher application is installed in the MirrorLink device, the application launches. If not, the Application menu screen - Pioneer AVIC-5000NEX | Owner's Manual - Page 115
unavailable with the current app & source selections. To hear the navigation sounds, please adjust the Audio Mix settings." is displayed. To output voice guidance for the navigation system, touch "Yes". 1 Start up the AppRadio Mode or MirrorLink mode. 2 Press the VOL (+/-) button. The audio mix menu - Pioneer AVIC-5000NEX | Owner's Manual - Page 116
by connecting an iPhone or a smartphone that has the Pandora application installed. Important ! Requirements to access Pandora using Pioneer car audio/video products: = For details, refer to Chapter 13. ! Please update the firmware of the Pandora application to the latest version before use. ! The - Pioneer AVIC-5000NEX | Owner's Manual - Page 117
Streaming Pandora® Chapter 22 Streaming Pandora® 2 Displays the Time and date setting screen. = For details, refer to Setting the time and date on page 189. 3 Displays the Setting menu screen. 4 Recalls equalizer curves. = For details, refer to Using the equalizer on page 170. 5 Touching the key - Pioneer AVIC-5000NEX | Owner's Manual - Page 118
7000NEX 6000NEX p Connect via USB, Bluetooth, or HDMI and Bluetooth. = For details of the Bluetooth connection, refer to Registering your Bluetooth devices on page 55. p The cable connection method varies depending on your device. = For details of the connections, refer to the Installation Manual - Pioneer AVIC-5000NEX | Owner's Manual - Page 119
can sort the items in the list alphabetically. Date: You can sort the items in the list in the order of the dates the items were created. p If you touch station, touch [Cancel]. Operating with the hardware buttons Press the TRK button You can skip songs forward. Chapter 22 En 119 Streaming Pandora® - Pioneer AVIC-5000NEX | Owner's Manual - Page 120
App settings, logging into Facebook, creating a Facebook account, logging into Twitter, or creating a Twitter account. ! Aha Radio is a service not affiliated with Pioneer. More information is available at http://www.aharadio.com/. ! A specific version of the Aha Radio application must be installed - Pioneer AVIC-5000NEX | Owner's Manual - Page 121
Using Aha Radio Chapter 23 Using Aha Radio p The icons displayed vary depending on each station or content. Indicator Meaning Touching the key discloses the current car location through Aha Radio. Touching the key retweets the selected tweets with your Twitter account. Touching the key - Pioneer AVIC-5000NEX | Owner's Manual - Page 122
7000NEX 6000NEX p Connect via USB, Bluetooth, or HDMI and Bluetooth. = For details of the Bluetooth connection, refer to Registering your Bluetooth devices on page 55. p The cable connection method varies depending on your device. = For details of the connections, refer to the Installation Manual - Pioneer AVIC-5000NEX | Owner's Manual - Page 123
. Updating the iDatalink Maestro module 1 Access the Automotive Data Solutions Inc. website (www.idatalinkmaestro.com/) and follow the on-screen directions to configure the desired firmware. p When the serial number input is required, please input the device number of this Pioneer product. 2 Install - Pioneer AVIC-5000NEX | Owner's Manual - Page 124
Chapter 24 Using iDatalink Starting procedure 1 Display the AV source selection screen. = For details of the operations, refer to Displaying the AV operation screen on page 20. 2 Touch [iDatalink] on the AV source selection screen. The following screen appears. 7 Switches to the next or previous - Pioneer AVIC-5000NEX | Owner's Manual - Page 125
hands-free phone for the vehicle. Setting Bluetooth 1 Press the HOME button to display the Top menu screen. 1 2 3 8 4 5 1 Switches to the voice recognition function. 2 Switches to the phone book list. 3 Switches to the missed, received and dia- led call lists. 4 Switches the mode to enter the - Pioneer AVIC-5000NEX | Owner's Manual - Page 126
Chapter 24 Using iDatalink History list screen 1 Dial confirmation screen 12 3 1 Switches to call history. Dial screen 1 23 4 5 1 Switches the mode to enter the phone number directly. 2 Turns private mode on or off. 3 Minimizes the dial confirmation screen. 4 Making a phone call. 5 Ends a - Pioneer AVIC-5000NEX | Owner's Manual - Page 127
(Audio/Video Remote Control Profile): Playing back, pausing, selecting songs, etc., are possible. p Since a number of Bluetooth audio players are available on the market, operations with your Bluetooth audio player using this product vary considerably in range. Please refer to the instruction manual - Pioneer AVIC-5000NEX | Owner's Manual - Page 128
when the connecting cable for using AppRadio Mode is connected. 2 Press the HOME button to display the Top menu screen. 3 Touch the following keys in the following order. 3 2 1 Current time and date 2 File number indicator Shows the file number currently playing (when available). 3 Play time - Pioneer AVIC-5000NEX | Owner's Manual - Page 129
hold the TRK button You can perform fast reverse or fast forward. Playing files in random order All of the files within the repeat play range can be played at random by only touching a single key. p This function is only available when the connected Bluetooth audio player supports AVRCP 1.3. En - Pioneer AVIC-5000NEX | Owner's Manual - Page 130
to the SiriusXM Satellite Radio service 1 Select SiriusXM as the source. You should be able to tune in to Channel 1. If you cannot get Channel 1, ensure that your SiriusXM Connect Vehicle Tuner is installed correctly as described in the tuner installation guide. 2 Switch to Channel 0 and check - Pioneer AVIC-5000NEX | Owner's Manual - Page 131
a SiriusXM channel directly on page 133. b Performs manual tuning. = For details, refer to Manual tuning on page 133. c Switches the bar displays the name logo of the station currently being tuned into. 3 Current time and date 4 Album artwork Shows the artwork for the current song (when available). p - Pioneer AVIC-5000NEX | Owner's Manual - Page 132
songs that are capable of iTunes tagging. p The icon is displayed on all operation screens of AV sources. Indicator Meaning Appears when this product receives an iTunes song tag that can be stored and then downloaded to an iPod for later purchase. Flashes when this product is storing song tag - Pioneer AVIC-5000NEX | Owner's Manual - Page 133
Using the SiriusXM® tuner Chapter 26 Using the SiriusXM® tuner Manual tuning % Touch the following keys to tune manually. Moves down one channel at a time. Moves up one channel at a time. p If you keep holding or , you can skip broadcasting channels. Selecting a preset channel - Pioneer AVIC-5000NEX | Owner's Manual - Page 134
Chapter 26 Using the SiriusXM® tuner 3 Touch the following key. Selects the SiriusXM channel of the entered number. 4 Touch the following key. Returns to the previous screen. Selecting a channel from a list of all channels You can select a channel from any of the available channels. p It may take - Pioneer AVIC-5000NEX | Owner's Manual - Page 135
the beginning when you tune to one of your preset channels in the current preset band when Tune Start is turned on. 1 Press the HOME button to display the Top menu screen. 2 Touch the following keys in the following order. Using TuneScan™ When you activate the TuneScan™ feature, you will hear - Pioneer AVIC-5000NEX | Owner's Manual - Page 136
When enabled, the Parental Control feature requires you to enter a passcode to tune into the locked channels. Setting the passcode 1 Press the HOME button to display the Top menu screen. 2 Touch the following keys in the following order. The "System" screen appears. 3 Touch [AV Source Settings]. The - Pioneer AVIC-5000NEX | Owner's Manual - Page 137
entered numbers one by one, touch [C]. 10 Touch the following key. Displays the "Locked Channel" screen. Locking the channel 1 Press the HOME button to display the Top menu screen. 2 Touch the following keys in the following order. 5 Touch [Parental control]. The "Parental Control" screen appears - Pioneer AVIC-5000NEX | Owner's Manual - Page 138
on setting up the Artist, Song and Game Alerts is described below. Setting the program you want to be alerted for 1 Press the HOME button to display the Top menu screen. 2 Touch the following keys in the following order. The "System" screen appears. 3 Touch [AV Source Settings]. The following - Pioneer AVIC-5000NEX | Owner's Manual - Page 139
only when you stop your vehicle in a safe place and apply the parking brake. The "System" screen appears. 3 Touch [AV Source Settings]. The following screen appears. CAUTION Do not turn off the engine while restoring the settings. 1 Press the HOME button to display the Top menu screen. En 139 - Pioneer AVIC-5000NEX | Owner's Manual - Page 140
. You can perform fast reverse or fast forward by holding down the button when the play time indicator is displayed. 4 Touch [SiriusXM settings]. The following screen appears. 5 Touch [SiriusXM Reset]. The "SiriusXM Reset" screen appears. 6 Touch [Restore]. The settings are restored to the default - Pioneer AVIC-5000NEX | Owner's Manual - Page 141
Installation Manual. CAUTION For safety reasons, video images cannot be viewed while your vehicle is in motion. To view video images, you must stop in a safe place and apply the parking brake the Phone menu screen. 1 Current time and date Starting procedure 1 Display the AV source selection screen - Pioneer AVIC-5000NEX | Owner's Manual - Page 142
details of the connection method, refer to the Installation Manual. CAUTION For safety reasons, video images cannot be viewed while your vehicle is in motion. To view video images, you must stop in a safe place and apply the parking brake. 7 Switches the operation screen. = For details, refer to - Pioneer AVIC-5000NEX | Owner's Manual - Page 143
touch panel keys on page 142. Setting the video signal When you connect this product to an AUX equipment, select the suitable video signal setting. p You can operate this function only for the video signal input into the AUX input. 1 Press the HOME button to display the Top menu screen. 2 Touch the - Pioneer AVIC-5000NEX | Owner's Manual - Page 144
details of the connection method, refer to the Installation Manual. Reading the screen 1 CAUTION For safety reasons, video images cannot be viewed while your vehicle is in motion. To view video images, you must stop in a safe place and apply the parking brake. Using the touch panel keys 1 23 - Pioneer AVIC-5000NEX | Owner's Manual - Page 145
details, refer to Using the touch panel keys on page 144. Using AV input Starting procedure (for camera) You can display the image output by the camera connected to video input. 1 Press the HOME button to display the Top menu screen. 2 Touch the following keys in the following order. Setting the - Pioneer AVIC-5000NEX | Owner's Manual - Page 146
Chapter 29 Using AV input Adjusts the video signal setting automatically. ! PAL: Sets the video signal to PAL. ! NTSC: Sets the video signal to NTSC. ! PAL-M: Sets the video signal to PAL-M. ! PAL-N: Sets the video signal to PAL-N. ! SECAM: Sets the video signal to SECAM. 146 En - Pioneer AVIC-5000NEX | Owner's Manual - Page 147
you playing the music. MIXTRAX operation You can enjoy your music files by installing the MIXTRAX software to your computer and using the software to transfer the .com For details on how to use the MIXTRAX software, refer to the online manual. Touch panel keys 1 2 b 3 4 5 6 a 98 87 1 - Pioneer AVIC-5000NEX | Owner's Manual - Page 148
the playback list screen. Setting the flash pattern The flashing color changes with the changes in the sound and bass levels. 1 Press the HOME button to display the Top menu screen. 2 Touch the following keys in the following order. 2 Touch the following key. Displays the "Playback not allowed - Pioneer AVIC-5000NEX | Owner's Manual - Page 149
can set whether to automatically switch to the navigation screen from the AV screen or AppRadio Mode screen when your vehicle approaches a guidance point such as an intersection. 1 Press the HOME button to display the Top menu screen. 4 Touch [AV/App Guide Mode] repeatedly until the desired setting - Pioneer AVIC-5000NEX | Owner's Manual - Page 150
1 Press the HOME button to display the Top input You can use external video equipment such as portable players camera function. (For details, consult your dealer.) Rear view camera This product features a function that automatically switches to the full-screen image of the rear view camera installed - Pioneer AVIC-5000NEX | Owner's Manual - Page 151
of this product is started up, only the camera image will be displayed and the parking assist guidelines and the message, "The video may appear reversed" will not be displayed. The parking assist guidelines and the message will be displayed on the camera image after a little while. Be sure to check - Pioneer AVIC-5000NEX | Owner's Manual - Page 152
key to switch the display appears. 1 1 Switches the display between rear view image and 2nd camera image. The "System" screen appears. 3 Touch [Camera settings]. The following screen appears. Displaying the parking assist guidelines 1 Press the HOME button to display the Top menu screen. 152 En - Pioneer AVIC-5000NEX | Owner's Manual - Page 153
the rear view camera, the rear view image appears. p If you press and hold the MAP button, the rear view image disappears. Setting guidelines on the rear view image CAUTION ! When adjusting the guidelines, be sure to park the vehicle in a safe place and apply the parking brake. ! Before getting out - Pioneer AVIC-5000NEX | Owner's Manual - Page 154
on the lateral coordinates at both ends will also move. Resets the settings of the distance and vehicle width guidelines and - The "Audio" screen - The "System" screen - The "Video Setup" screen - The "Bluetooth" screen - Language for messages Some button to display the Top menu screen. 154 En - Pioneer AVIC-5000NEX | Owner's Manual - Page 155
Mode by setting the language of the keyboard for iPhone. p This function is only available in AppRadio Mode on the iPhone. 1 Press the HOME button to display the Top menu screen. 2 Touch the following keys in the following order. The "System" screen appears. 3 Touch [Keyboard]. The pop-up menu - Pioneer AVIC-5000NEX | Owner's Manual - Page 156
positions of the touch panel (touch panel calibration) 7000NEX 6000NEX 5000NEX X8610BS If you feel that the touch place and apply the parking brake. Refer to Important Information for the User (a separate manual). 1 Display the screen you wish to adjust. 2 Press the HOME button to display the Top - Pioneer AVIC-5000NEX | Owner's Manual - Page 157
Camera], the mode changes to the selected camera mode. By touching [Source], [Navi] or [Apps], cameras. p The setting contents can be memorized separately for the following screens and video images. - DVD, Video CD and Disc - AV and external camera - USB (Video), USB (JPEG) and MirrorLink - SD (Video - Pioneer AVIC-5000NEX | Owner's Manual - Page 158
the parking brake is engaged. 7 Touch [Firmware Update]. The "Firmware Update" screen appears. 8 Touch [Continue] to display the data transfer mode. p Follow the on-screen instructions to finish updating the firmware. p This product will reset automatically after the firmware update is completed - Pioneer AVIC-5000NEX | Owner's Manual - Page 159
sensor memory based on the outer dimensions of the tires. 1 Press the HOME button to display the Top menu screen. 2 Touch the following keys in the following [Learning]. The pop-up menu appears. 4 Touch [Reset All]. All learned results are cleared. p Touch [Reset All] for the following cases: En 159 - Pioneer AVIC-5000NEX | Owner's Manual - Page 160
installation position of the navigation system ! After changing the installation angle of 1 the navigation system 2 ! After moving the navigation system to another vehicle 3 # If you touch [Reset from how many satellites the signal is received. Color Orange Yellow Signal communication Yes - Pioneer AVIC-5000NEX | Owner's Manual - Page 161
position of this product is correct or not. When this product is installed at an extreme angle exceeding the limitation of the installing angle, "NOK(Installation Angle)" will be displayed. When the angle of this product has been changed, "NOK(Vibration)" will be displayed. 4 Speed Pulse - Pioneer AVIC-5000NEX | Owner's Manual - Page 162
provides an ideal listening environment in all occupied seats. p This function is available when "Rear Speaker" is set to "On". 1 Press the HOME button to display the Top menu screen. 2 Touch the following keys in the following order. The "Audio" screen appears. 3 Touch [Fader/Balance]. The "Fader - Pioneer AVIC-5000NEX | Owner's Manual - Page 163
muting/ attenuation You can automatically mute or attenuate the AV source volume and the iPhone application volume when the navigation outputs the guidance voice. 1 Press the HOME button to display the Top menu screen. 2 Touch the following keys in the following order. p Settings are based on the - Pioneer AVIC-5000NEX | Owner's Manual - Page 164
set to the same source level adjustment volume automatically. 8000NEX 7000NEX 6000NEX Required cable (sold separately) Smartphone Setup Device Connection CD-IH202 ! CD-IU52 ! Lightning Digital AV Adapter iPhone/iPod Android device CD-AH200 Others Digital AV adapter aha AppRadio Mode HDMI - Pioneer AVIC-5000NEX | Owner's Manual - Page 165
Audio adjustments p When an iPod / iPhone with a Lightning connector is connected to USB port 1 or USB port 2 using a USB interface cable for iPod / iPhone (CD-IU52) (sold separately), the source level adjustment volume is automatically set to the same level as the USB port to which the iPod / - Pioneer AVIC-5000NEX | Owner's Manual - Page 166
the front and rear speaker output You can set the frequency range for the sound output from the front and rear speakers. 1 Press the HOME button to display the Top menu screen. 2 Touch the following keys in the following order. 5 Touch the following keys to select "Front" or "Rear". Selects the - Pioneer AVIC-5000NEX | Owner's Manual - Page 167
p This function is available when "Subwoo- fer" is set to "On". = For details, refer to Using the subwoofer output on page 166. 1 Press the HOME button to display the Top menu screen. 2 Touch the following keys in the following order. The "Audio" screen appears. The "Audio" screen appears. 3 Touch - Pioneer AVIC-5000NEX | Owner's Manual - Page 168
to Selecting the listen- ing position on page 167. 1 Measure the distance between the head of the listener and each speaker unit. 2 Press the HOME button to display the Top menu screen. 168 En - Pioneer AVIC-5000NEX | Owner's Manual - Page 169
Audio adjustments Chapter 32 Audio adjustments 3 Touch the following keys in the following order. The "Audio" screen appears. 4 Touch [Time Alignment]. The "Time Alignment" screen appears. 5 Touch the following keys to select the listening position if necessary. Selects the listening position. ! - Pioneer AVIC-5000NEX | Owner's Manual - Page 170
noise becomes greater. The sensitivity (variation of volume level to noise level) of ASL can be set to one of five levels. 1 Press the HOME button to display the Top menu screen. 2 Touch the following keys in the following order. The "Audio" screen appears. 3 Touch [ASL]. The "ASL" screen appears - Pioneer AVIC-5000NEX | Owner's Manual - Page 171
the "Custom2" curve will be updated. p "Custom1" and "Custom2" curves can be created common to all sources. 1 Press the HOME button to display the Top menu EQ) on page 171. p To manually adjust the equalizer curve, set "Auto EQ&TA" to "Off". 1 Press the HOME button to display the Top menu screen. 2 - Pioneer AVIC-5000NEX | Owner's Manual - Page 172
rear speakers will automatically be adjusted to a high pass filter setting. p Previous settings for Auto EQ will be overwritten. p For AVIC-8000NEX and AVIC-7000NEX users Do not press the h button to open or close the panel when you are using the microphone. CAUTION Do not turn off the engine while - Pioneer AVIC-5000NEX | Owner's Manual - Page 173
acoustical measurement (sold separately) with this product. 8000NEX 7000NEX Plug the microphone into the microphone input jack on refer to Displaying the AV operation screen on page 20. 6 Press the HOME button to display the Top menu screen. 6000NEX 5000NEX X8610BS Connect the microphone with the - Pioneer AVIC-5000NEX | Owner's Manual - Page 174
Chapter 32 Audio adjustments 1 2 1 Mini-jack extension cable 2 Microphone for acoustical measurement (sold separately) 10 Touch [Front Left] or [Front Right] to select the current listening position. 11 Touch [Start]. A 10-second countdown starts. p The Bluetooth connection is disconnected - Pioneer AVIC-5000NEX | Owner's Manual - Page 175
× 4 000 pixel or smaller CAUTION Do not turn off the engine while importing an image from the external device (USB/SD). 1 Press the HOME button to display the Top menu screen. 2 Touch the following keys in the following order. p You can also change the screen for settings by touching [Illumination - Pioneer AVIC-5000NEX | Owner's Manual - Page 176
these 5 colors in order. Selecting the color from the preset colors You can select an illumination color from the color list. 1 Press the HOME button to display the Top menu screen. p You can also change the screen for settings by touching [Theme], [Background] or [Clock] on this screen. 4 Touch - Pioneer AVIC-5000NEX | Owner's Manual - Page 177
. 3 Touch [Illumination]. The following screen appears. Selecting the theme color A theme color can be selected from 5 different colors. 1 Press the HOME button to display the Top menu screen. 2 Touch the following keys in the following order. Theme menu The "Theme" screen appears. 3 Touch [Theme - Pioneer AVIC-5000NEX | Owner's Manual - Page 178
or [AV] respectively. Changing the preinstalled splash screen You can change the splash screen to other images preinstalled in this product. 1 Press the HOME button to display the Top menu screen. 2 Touch the following keys in the following order. 4 Touch the item you want to set. ! Preset images - Pioneer AVIC-5000NEX | Owner's Manual - Page 179
to Inserting and ejecting an SD memory card on page 15. 2 Press the HOME button to display the Top menu screen. 3 Touch the following keys in the following order only when you stop your vehicle in a safe place and apply the parking brake. The "Theme" screen appears. 4 Touch [Export]. The "Settings - Pioneer AVIC-5000NEX | Owner's Manual - Page 180
Chapter 33 Theme menu CAUTION ! Do not turn off the engine while importing the settings. ! To prevent data loss and damage to the SD memory card, never edit the data exported to the SD memory card. 1 Insert the SD memory card into the SD card slot. = For details, refer to Inserting and ejecting an - Pioneer AVIC-5000NEX | Owner's Manual - Page 181
subtitle languages key. Setting the audio language You can set the preferred audio language. 1 Press the HOME button to display the Top menu screen. 2 Touch the following keys in the following order. The "Video Setup" screen appears. 3 Touch [DVD/DivX Setup]. The following screen appears. The - Pioneer AVIC-5000NEX | Owner's Manual - Page 182
the preferred language in which the menus recorded on a disc are displayed. 1 Press the HOME button to display the Top menu screen. 2 Touch the following keys in the following order. The "Video Setup" screen appears. 3 Touch [DVD/DivX Setup]. The following screen appears. p If the selected language - Pioneer AVIC-5000NEX | Owner's Manual - Page 183
the selected source is "Disc", "CD", "Video CD" or "DVD". 1 Press the HOME button to display the Top menu screen. 2 Touch the following keys in some discs. For details, refer to the disc's instructions. Setting parental lock Some DVD-Video discs let you use parental lock to set restrictions so - Pioneer AVIC-5000NEX | Owner's Manual - Page 184
, refer to the disc's instructions. Displaying your DivX VOD registration code If you want to play DivX VOD (video on demand) content on this available when the selected source is "Disc", "CD", "Video CD" or "DVD". 1 Press the HOME button to display the Top menu screen. 2 Touch the following keys in - Pioneer AVIC-5000NEX | Owner's Manual - Page 185
code registered with a deregistration code can be deleted. p This setting is available when the selected source is "Disc", "CD", "Video CD" or "DVD". 1 Press the HOME button to display the Top menu screen. 2 Touch the following keys in the following order. 4 Touch [DivX® VOD]. The "DivX - Pioneer AVIC-5000NEX | Owner's Manual - Page 186
Play setting on. Setting the video signal for the rear view camera When you connect a rear view camera to this product, select the suitable video signal setting. p You can operate this function only for the video signal input into the AV input. 1 Press the HOME button to display the Top menu screen - Pioneer AVIC-5000NEX | Owner's Manual - Page 187
Chapter 34 Setting up the video player Language code chart for DVDs Two-letter code, input code aa, 0101 ab, 0102 af, 0106 am, 0113 ar, 0118 as, 0119 ay, 0125 - Pioneer AVIC-5000NEX | Owner's Manual - Page 188
by a simple touch on the "Favorites" screen. p Up to 12 menu items can be registered in the favorite menu. Selecting a shortcut 1 Press the HOME button to display the Top menu screen. 2 Touch the following keys in the following order. The "Favorites" screen appears. 3 Touch the star icon that you - Pioneer AVIC-5000NEX | Owner's Manual - Page 189
date. ! d/m: Changes the date display format to date/ month. Time Format ! 12hour (default): Changes the display to 12-hour format with am/pm. ! 24hour: Changes the display to 24-hour format. p The iTunes Tagging function is available while digital broadcasts are being received the HOME button to - Pioneer AVIC-5000NEX | Owner's Manual - Page 190
received, is displayed while the desired song is being broadcast, and the touch panel key becomes active. Radio (for AVIC-5000NEX and AVIC- Using the touch panel keys on page 74. HD Radio (for AVIC-8000NEX, AVIC-7000NEX and AVIC-6000NEX) = For details, refer to iTunes® tagging indicator on page - Pioneer AVIC-5000NEX | Owner's Manual - Page 191
is displayed normally, giving you no sense of disparity since its proportions are the same as those of the normal picture. p This setting is for video and JPEG images. ! Trimming An image is displayed across the entire screen with the horizontal-to-vertical ratio left as is. If the horizontal-to - Pioneer AVIC-5000NEX | Owner's Manual - Page 192
and MPEG-4 only. ! USB/iPod The video and sound of the USB storage device or iPod are output to the rear display. - The port that supports the rear display will only be USB boot up. Setting the password 1 Press the HOME button to display the Top menu screen. 2 Touch the following keys in the following - Pioneer AVIC-5000NEX | Owner's Manual - Page 193
password is entered, this product will be unlocked. Deleting the password The current password and password hint can be deleted. 1 Press the HOME button to display the Top menu screen. 2 Touch the following keys in the following order. The "System" screen appears. 3 Touch Area1, followed by Area2 - Pioneer AVIC-5000NEX | Owner's Manual - Page 194
authorized Pioneer Service Resets various settings registered to this product to the default settings. p This setting is available only when you stop your vehicle in a safe place and apply the parking brake. CAUTION Do not turn off the engine while restoring the settings. 1 Press the HOME button - Pioneer AVIC-5000NEX | Owner's Manual - Page 195
Appendix Troubleshooting If you have problems operating your navigation system, refer to this section. The most common problems are listed below, along with likely causes and solutions. If a solution to your problem cannot be found here, contact your dealer or the nearest authorized Pioneer service - Pioneer AVIC-5000NEX | Owner's Manual - Page 196
! Park your Update service. vice. The connection between the cellular Perform the connection process. phone and this product cannot be established now. Problems with the Application screen Symptom Cause Action A black screen is displayed. While operating an application, the Press the HOME button - Pioneer AVIC-5000NEX | Owner's Manual - Page 197
. If this message keeps showing up, it is possible that some problem occured in the product. Follow the instructions displayed on the screen. If this does not solve the problem, contact your dealer or an authorized Pioneer Station for assistance. Pandora Message Error-19 Skip limit reached. Check - Pioneer AVIC-5000NEX | Owner's Manual - Page 198
is switched off/on, contact your dealer or the nearest authorized Pioneer service center for assistance. The SiriusXM Connect Vehicle Tuner ! Verify that your vehicle is outdoors with a is having difficulty receiving the clear view of the southern sky. SiriusXM satellite signal. ! Verify - Pioneer AVIC-5000NEX | Owner's Manual - Page 199
the disc is loaded correctly. There is an electrical or mechanical Press the RESET button. (Page 11) error. Different Region Disc The disc does not have Select a file that can be played. DivX VOD content. Video resolution not supported Files that cannot be played on this Select a file that - Pioneer AVIC-5000NEX | Owner's Manual - Page 200
storage device (USB, SD) is en- instructions to disable security. abled. Skipped The connected ON and then connect a compliant USB storage device. Video resolution not supported Files that cannot be played on this Select a USB memory into the unit. Press reset to restart USB memory. The USB - Pioneer AVIC-5000NEX | Owner's Manual - Page 201
Cause iPod failure. The iPod firmware version is old. Action Disconnect the cable from the iPod. Once the iPod's main menu is displayed, reconnect the iPod and reset it. Update the iPod version. iTunes above action, please contact your dealer or an authorized Pioneer Service Station. En 201 - Pioneer AVIC-5000NEX | Owner's Manual - Page 202
application list. be read out. There is no supported applica- No supported applications can be tion on your MirrorLink de- reset the smartphone. If the error message is still displayed after performing the above action, please contact your dealer or an authorized Pioneer Service Station. Install - Pioneer AVIC-5000NEX | Owner's Manual - Page 203
on the vehicle model. For details, consult your authorized Pioneer dealer or an installation professional. p Some types of vehicles may not output a congestion or in a parking lot. How do GPS and dead reckoning work together? For maximum accuracy, your navigation system continually compares - Pioneer AVIC-5000NEX | Owner's Manual - Page 204
. With map matching In tunnels or enclosed parking garages Under elevated roads or similar structures Without map matching Handling not been received for a long time, your vehicle's actual position and the current position mark on the map may diverge considerably or may not be updated. In - Pioneer AVIC-5000NEX | Owner's Manual - Page 205
are traveling on and the reception status of the GPS signal, the actual position of your vehicle may differ from the position displayed on the map screen. ! If you make a slight turn. ! If you drive in zigzags. ! If the road has a series of hairpin bends. ! If there is a parallel road. ! If - Pioneer AVIC-5000NEX | Owner's Manual - Page 206
manner, as in a traffic congestion. ! If your vehicle is turned on a turntable or similar structure. ! If you join the road after driving around a large parking lot. ! If your vehicle's wheels spin, such as on a gravel road or in snow. ! When you drive around a traffic circle. ! If you put on - Pioneer AVIC-5000NEX | Owner's Manual - Page 207
specifications Your navigation system sets a route to your destination by applying certain built-in rules to the map data. travel in the opposite direction to your current heading. In such cases, you are instructed to turn around, so please turn around safely by following the actual traffic rules. - Pioneer AVIC-5000NEX | Owner's Manual - Page 208
discs. ! When using discs that can be printed on label surfaces, check the instructions and the warnings of the discs. Depending on the discs, inserting and ejecting Consider it to be normal wear and tear. Playable discs DVD-Video and CD DVD and CD discs that display the logos shown below generally can - Pioneer AVIC-5000NEX | Owner's Manual - Page 209
have a recordable CD for audio on one side and a recordable DVD for video on the other. ! Playback of the DVD side is possible with this product may result in scratches to the disc. ! Serious scratches can lead to playback problems on this product. In some cases, a DualDisc may become stuck in the - Pioneer AVIC-5000NEX | Owner's Manual - Page 210
you use a dedicated formatter to avoid such problems. All of the data stored on an properly. ! The text information of some audio and video files may not be correctly displayed. ! File extensions must onto the floor, where it may become jammed under the brake or gas pedal. ! There may be a slight - Pioneer AVIC-5000NEX | Owner's Manual - Page 211
your DivX VOD registration code on page 184. ! Plays all versions of DivX video, except for DivX 7 with standard playback of DivX media files. ! For more For materials that use a high transfer rate, the subtitles and video may not be completely synchronized. ! If multiple subtitles are programed to - Pioneer AVIC-5000NEX | Owner's Manual - Page 212
Appendix Appendix Media compatibility chart General Media CD-R/-RW DVD-R/-R SL/-R DL/DVD-RW USB storage device SD memory card File system ! ISO9660 level 1 ! ISO9660 level 2 ! Romeo, Joliet ! UDF 1.02 / 1.50 / 2.00 / 2.01 / 2.50 ! ISO9660 level 1 ! ISO9660 level 2 ! Romeo, Joliet ! UDF 1.02 - Pioneer AVIC-5000NEX | Owner's Manual - Page 213
Appendix Appendix Appendix WMA compatibility Media CD-R/-RW DVD-R/-R SL/-R DL/DVD-RW File extension .wma Bit rate 5 kbps to 320 kbps (CBR), VBR Sampling frequency 8 kHz to 48 kHz Note: This product is not compatible with the following: Windows Media™ Audio 9 Professional, Lossless, - Pioneer AVIC-5000NEX | Owner's Manual - Page 214
720 pixels × 576 pixels Maximum file size 4 GB Notes: ! This product is not compatible with the following: DivX Ultra format, DivX files without video data, DivX files encoded with LPCM (Linear PCM) audio codec ! Depending on the file information composition, such as the number of audio streams - Pioneer AVIC-5000NEX | Owner's Manual - Page 215
files compatibility (USB, SD) File extension Format Compatible video codec Compatible audio codec Maximum resolution Maximum bit rate: Maximum file size Maximum playback time .avi MPEG-4 .mp4 MPEG-4 MPEG-4 MPEG-4 Linear PCM (LPCM) AAC - Pioneer AVIC-5000NEX | Owner's Manual - Page 216
All rights reserved. HD Radio™ Technology ! AVIC-8000NEX, AVIC-7000NEX, AVIC-6000NEX HD Radio Technology manufactured under license from use of such marks by PIONEER CORPORATION is under license. Other trademarks and trade names are those of their respective owners. microSDHC Logo is a trademark - Pioneer AVIC-5000NEX | Owner's Manual - Page 217
iTunes. Android™ Android is a trademark of Google Inc. DivX is a compressed digital video format created by the DivX video codec information regarding connected iPod devices CAUTION ! Pioneer accepts no responsibility for data lost brake or gas pedal. For details, refer to the iPod manuals. En 217 - Pioneer AVIC-5000NEX | Owner's Manual - Page 218
of Apple Inc., registered in the U.S. and other countries. Using app-based connected content IMPORTANT Requirements to access app-based connected content services using this product: ! Latest version of the Pioneer compatible con- nected content application(s) for the smartphone, available from - Pioneer AVIC-5000NEX | Owner's Manual - Page 219
Aha and Aha Radio logos are either the trademarks or the registered trademarks of Harman International Industries, Incorporated. HDMI Notice regarding video viewing Remember that use of this system for commercial or public viewing purposes may constitute an infringement on the author's rights as - Pioneer AVIC-5000NEX | Owner's Manual - Page 220
phone, keep the antenna of the cellular phone away from the LCD screen to prevent disruption of the video in the form of disturbances such as spots or colored stripes. Maintaining the LCD screen ! When case, please consult your dealer or the nearest authorized Pioneer Service Station. 220 En - Pioneer AVIC-5000NEX | Owner's Manual - Page 221
64 62 63 62 67 Page Navigation Related Settings Navigation info window 149 AV/App Guide Mode 149 AV Source Settings MIXTRAX AppRadio Video Adjustment 112 Camera settings Camera View 152 Back Camera Input 151 Camera Polarity 151 Parking assist guide 152 Parking assist guide adjust - Pioneer AVIC-5000NEX | Owner's Manual - Page 222
Appendix Appendix System Language Restore Settings Keyboard Beep Tone Picture Adjustment Touch panel calibration System Information Firmware Information Firmware Update 3D Calibration Status Connection Status OEM Settings Page 154 194 155 155 156 156 Theme menu 158 Background 158 Illumination 159 - Pioneer AVIC-5000NEX | Owner's Manual - Page 223
Appendix Audio menu Video Setup menu Appendix Appendix Graphic EQ Fader/Balance Balance Mute Level Source Level Adjuster Multi Angle TV Aspect Parental DivX® VOD DVD Auto Play Time Per Photo Slide Video Signal Setting AV AUX Camera Page 181 181 182 182 183 183 184 185 102 145 143 186 En 223 - Pioneer AVIC-5000NEX | Owner's Manual - Page 224
Appendix Appendix Bluetooth menu Connection Auto Connect Visibility PIN Code Input Device Information Auto Answer Ring Tone Invert Name Bluetooth Memory Clear BT Software Update Bluetooth Version Information Page 55 57 58 59 59 66 66 66 59 60 60 224 En - Pioneer AVIC-5000NEX | Owner's Manual - Page 225
1.8 kg (4.0 lbs) AVIC-5000NEX 1.8 kg (4.0 lbs) AVIC-X8610BS 1.8 kg (4.0 lbs) NAND flash memory: AVIC-8000NEX 16 GB AVIC-7000NEX 8 GB AVIC-6000NEX 8 GB AVIC-5000NEX 8 GB AVIC-X8610BS 8 GB Navigation GPS receiver: System L1, C/Acode GPS SPS (Standard Positioning Service) Reception system - Pioneer AVIC-5000NEX | Owner's Manual - Page 226
(Visual), MS MPEG-4 Ver.3: avi USB USB standard spec USB1.1, USB2.0 High Speed Max current supply 1.6 A video decoding format VC-1 SP/MP/AP, WMV 7/8 MPEG4 video decoding format SimpleProfile, AdvancedSimpleProfile (except GMC) JPEG decoding format .......... JPEG SD (AVIC-8000NEX and AVIC-7000NEX - Pioneer AVIC-5000NEX | Owner's Manual - Page 227
VC-1 SP/MP/AP, WMV 7/8 MPEG4 video decoding format SimpleProfile, AdvancedSimpleProfile (except GMC) JPEG decoding format JPEG Bluetooth Version Bluetooth 3.0+EDR certified Output power 4 dBm Max. (Power class 2) FM tuner AVIC-8000NEX, AVIC-7000NEX and AVIC-6000NEX Frequency range 87.9 MHz to - Pioneer AVIC-5000NEX | Owner's Manual - Page 228
To keep up to date with the latest navigational data, you can periodically update your navigation system. For further details, please visit: http://pioneer.naviextras.com PIONEER CORPORATION 1-1, Shin-ogura, Saiwai-ku, Kawasaki-shi, Kanagawa 212-0031, JAPAN PIONEER ELECTRONICS (USA) INC. P.O. Box
-
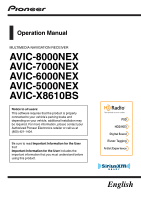 1
1 -
 2
2 -
 3
3 -
 4
4 -
 5
5 -
 6
6 -
 7
7 -
8
-
9
-
10
-
11
-
12
-
13
-
14
-
15
-
16
-
17
-
18
-
19
-
20
-
21
-
22
-
23
-
24
-
25
-
26
-
27
-
28
-
29
-
30
-
31
-
32
-
33
-
34
-
35
-
36
-
37
-
38
-
39
-
40
-
41
-
42
-
43
-
44
-
45
-
46
-
47
-
48
-
49
-
50
-
51
-
52
-
53
-
54
-
55
-
56
-
57
-
58
-
59
-
60
-
61
-
62
-
63
-
64
-
65
-
66
-
67
-
68
-
69
-
70
-
71
-
72
-
73
-
74
-
75
-
76
-
77
-
78
-
79
-
80
-
81
-
82
-
83
-
84
-
85
-
86
-
87
-
88
-
89
-
90
-
91
-
92
-
93
-
94
-
95
-
96
-
97
-
98
-
99
-
100
-
101
-
102
-
103
-
104
-
105
-
106
-
107
-
108
-
109
-
110
-
111
-
112
-
113
-
114
-
115
-
116
-
117
-
118
-
119
-
120
-
121
-
122
-
123
-
124
-
125
-
126
-
127
-
128
-
129
-
130
-
131
-
132
-
133
-
134
-
135
-
136
-
137
-
138
-
139
-
140
-
141
-
142
-
143
-
144
-
145
-
146
-
147
-
148
-
149
-
150
-
151
-
152
-
153
-
154
-
155
-
156
-
157
-
158
-
159
-
160
-
161
-
162
-
163
-
164
-
165
-
166
-
167
-
168
-
169
-
170
-
171
-
172
-
173
-
174
-
175
-
176
-
177
-
178
-
179
-
180
-
181
-
182
-
183
-
184
-
185
-
186
-
187
-
188
-
189
-
190
-
191
-
192
-
193
-
194
-
195
-
196
-
197
-
198
-
199
-
200
-
201
-
202
-
203
-
204
-
205
-
206
-
207
-
208
-
209
-
210
-
211
-
212
-
213
-
214
-
215
-
216
-
217
-
218
-
219
-
220
-
221
-
222
-
223
-
224
-
225
-
226
-
227
-
228
 |
 |

Operation Manual
MULTIMEDIA NAVIGATION RECEIVER
AVIC-8000NEX
AVIC-7000NEX
AVIC-6000NEX
AVIC-5000NEX
AVIC-X8610BS
Notice to all users:
This software requires that the product is properly
connected to your vehicle
’
s parking brake and
depending on your vehicle, additional installation may
be required. For more information, please contact your
Authorized Pioneer Electronics retailer or call us at
(800) 421-1404.
Be sure to read
Important Information for the User
first!
Important Information for the User
includes the
important information that you must understand before
using this product.
English