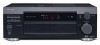
Pioneer D812K Owner's Manual
Pioneer D812K - AV Receiver - 5.1 Channel Manual
 |
UPC - 012562631134
View all Pioneer D812K manuals
Add to My Manuals
Save this manual to your list of manuals |
Pioneer D812K manual content summary:
- Pioneer D812K | Owner's Manual - Page 1
AUDIO/VIDEO MULTI-CHANNEL RECEIVER VSX-D712 VSX-D812 Operating Instructions - Pioneer D812K | Owner's Manual - Page 2
Thank you for buying this Pioneer product. Please read through these operating instructions so you will know how to operate your model properly. After you have finished reading the instructions, put them away in a safe place for future reference. IMPORTANT NOTICE H006AEn The serial number for - Pioneer D812K | Owner's Manual - Page 3
Manufactured under license from Dolby Laboratories. "Dolby", "Pro Logic", "Surround EX", and the double-D symbol are trademarks of Dolby Laboratories. "DTS" ,"DTS-ES Extended Surround" and "Neo:6" are trademarks of Digital Theater Systems, Inc. - Pioneer D812K | Owner's Manual - Page 4
20 Connecting the speakers (VSX-D712) . . . . 21 Connecting the speakers (VSX-D812) . . . . 22 Speaker terminals 23 A and B speaker systems 23 Hints on speaker placement 23 Connecting additional amplifiers 26 AC outlet 27 Power cord caution 27 Operating other Pioneer components . . . . 28 04 - Pioneer D812K | Owner's Manual - Page 5
input settings 49 Surround back channel input setting (VSX-D812 only 50 Digital input settings 50 Manually calibrating your listening area (MCACC 51 Setting Preset Code List 63 10 Additional information Troubleshooting 65 Resetting the main unit 67 Specifications 68 Cleaning the unit 69 - Pioneer D812K | Owner's Manual - Page 6
Before you start Checking what's in the box Please check that you've received the following supplied accessories: • AM loop antenna • FM wire antenna • AA/R6 dry cell batteries x2 • Remote control • These operating instructions Making cable connections Make sure not to bend the cables over the top - Pioneer D812K | Owner's Manual - Page 7
of used batteries, please comply with governmental regulations or environmental public instruction's rules that apply in your country or area. Operating range of obstacles between the remote control and the receiver's remote sensor. • Direct sunlight or fluorescent light is shining onto the remote sensor - Pioneer D812K | Owner's Manual - Page 8
02 5 minute guide Chapter 2: 5 minute guide Introduction to home theater You are probably used to gives you the feeling of 'being there'. This receiver will automatically decode Dolby Digital, DTS, or Dolby Surround DVD-Video discs, according to your speaker setup. In most cases, you won't have to - Pioneer D812K | Owner's Manual - Page 9
E IN IN R OUT SINGLE SEE INSTRUCTION MANUAL MONITOR IN PLAY R AUDIO L S-VIDEO S OUT R FRONT L B DVD IN / LD FRONT D V D 7.1CH REC INPUT CD-R IN / TAPE / MD SUB WOOFER PREOUT * The illustration shows the VSXD812, but DVD connections for the VSX-D712 are the same. Video cord 3 Connect - Pioneer D812K | Owner's Manual - Page 10
guide Make sure you connect the speaker on the right to the right terminal and the speaker on the left to the left terminal. Also make sure the positive and negative (+/-) terminals on the receiver DVD/ LD IN S-VIDEO E A K A E R S R FRONT L B AC OUTLET Powered subwoofer SW VSX-D712 10 En - Pioneer D812K | Owner's Manual - Page 11
5 minute guide 02 Front speakers L R Center speaker C Surround speakers BACK L R SURROUND L SINGLE SEE INSTRUCTION MANUAL R FRONT L B AC OUTLET VSX-D812 Passive Powered subwoofer subwoofer SW or single surround TV INPUT back speaker VSX-D812 only • When using the speaker - Pioneer D812K | Owner's Manual - Page 12
manual that came with the TV if you don't know how to do this. Also make sure that DVD/LD is showing in the receiver's display, indicating that the DVD input is selected. If it isn't, press DVD/LD on the remote control to set the receiver to the DVD input. 5 Press QUICK SETUP - Pioneer D812K | Owner's Manual - Page 13
guide 02 Using the Quick Setup You can use the Quick Setup to get your system up and running with just a few button presses. The receiver automatically makes the necessary settings after you have selected your speaker setup, room size and listening position. If you want to make more specific - Pioneer D812K | Owner's Manual - Page 14
02 5 minute guide 7 Use the MULTI JOG dial to choose your listening position. Cycle between the following nearer to the surround speakers than the front speakers 8 Press ENTER to confirm your setup. The display shows the speaker setup, room size and listening position that you've selected. 14 En - Pioneer D812K | Owner's Manual - Page 15
Use S-video cables (not supplied) to get clearer picture reproduction than regular video cords. Connect from an S-video jack on the rear of the receiver to an S-video jack on the video component you are hooking up. Be sure to insert completely. S VIDEO Digital audio coaxial cords/ Optical cables - Pioneer D812K | Owner's Manual - Page 16
with like (for example, the coaxial output from the component to coaxial input on the receiver). The VSX-D712 has three digital inputs on the rear panel (two coaxial inputs and an optical input) and the VSX-D812 has four (two coaxial inputs and two optical inputs). Connect your digital components to - Pioneer D812K | Owner's Manual - Page 17
CD player OUTPUT L R CD-R/Tape/MD deck REC PLAY This receiver* IN DIGITAL OUT OPT IN AUX AM FM UNBAL LOOP 75 Ω (T V / SAT)IN ø R FRONT SU R SURROUND BACK L RS SINGLE SEE INSTRUCTION MANUAL * The illustration shows the VSX-D812, but connections for the VSX-D712 are the same. 17 En - Pioneer D812K | Owner's Manual - Page 18
signal. This receiver* IN DIGITAL INSTRUCTION MANUAL R R L SURROUND BACK OUTPUT L LAC OUTLET AC OUTLET B BR SUB WOOFER OUTPUT CENTER OUTPUT DVD/multi-channel decoder with multi-channel analog output jacks VIDEO OUTPUT * The illustration shows the VSX-D812, but connections for the VSX-D712 - Pioneer D812K | Owner's Manual - Page 19
in this order) on the rear of the receiver instead of the regular video jacks. Make sure INSTRUCTION MANUAL IN PLAY R AUDIO L S-VIDEO S VIDEO TV (monitor) * The illustration shows the VSX-D812, but connections for the VSX-D712 QUICK SETUP MULTI JOG VIDEO INPUT S-VIDEO VIDEO L AUDIO R - Pioneer D812K | Owner's Manual - Page 20
fully extend vertically along a window frame or another suitable place that gives good reception. AM loop antenna Assemble the antenna and connect to the receiver. Attach (if necessary) and face in the direction that gives the best reception. 75Ω coaxial cable AM FM UNBAL LOOP 75 Ω ANTENNA To - Pioneer D812K | Owner's Manual - Page 21
Connecting up 03 Connecting the speakers (VSX-D712) A complete setup of six speakers (including the subwoofer) is shown below, but everyone's home setup will vary. Simply connect the speakers you have in the manner shown below. The receiver will work with just two stereo speakers (the front - Pioneer D812K | Owner's Manual - Page 22
receiver will work with just two stereo speakers (the front speakers in the diagram) but using at least three speakers is recommended, and a complete setup SURROUND BACK L R SURROUND L SINGLE SEE INSTRUCTION MANUAL R FRONT L B AC OUTLET VSX-D812 Passive Powered subwoofer subwoofer SW or - Pioneer D812K | Owner's Manual - Page 23
terminal. • The speaker terminals also accept single banana plugs. (Refer to speaker manual for details.) A and B speaker systems The receiver has two speaker systems: A and B. A is the main system supporting the full speaker setup. If you switch on both A and B speaker systems, only the front - Pioneer D812K | Owner's Manual - Page 24
and improve sound quality. Overhead view of 5.1 channel speaker setup Front Left Center Front Right Surround Left Subwoofer Surround Right Listening as earthquakes. Overhead view of 6.1 channel speaker setup Front Left Center Front Right Surround Left Subwoofer Surround Right Listening Position - Pioneer D812K | Owner's Manual - Page 25
Connecting up 03 3-D view of 6.1 channel speaker setup Overhead view of 7.1 channel speaker setup Front Left Center Front Right Surround Left Subwoofer Surround Right Listening Position Surround Back Left Surround Back Right 3-D view of 7.1 channel speaker setup 25 En - Pioneer D812K | Owner's Manual - Page 26
receiver is switched off and unplugged from the wall outlet before making or changing any connections. • The arrows indicate the direction of the audio signal. VSX-D712 MONITOR OUT SUB W. PREOUT TV/ SAT SINI N G L E SEE INSTRUCTION MANUAL DVD/ LD IN S-VIDEO R FRONT L B AC OUTLET ANALOG IN L - Pioneer D812K | Owner's Manual - Page 27
setting on page 45) to large. • VSX-D712 only - If you connect to a surround is touching the rear panel, this may cause the receiver to turn off automatically. • This unit should be . When you find it damaged, ask your nearest Pioneer authorized service center or your dealer for a replacement. • Do - Pioneer D812K | Owner's Manual - Page 28
's remote sensor. The remote control signals are received by the remote sensor of this unit, and sent to the other devices via the CONTROL OUT terminals on the receiver. OUT IN CONTROL Receiver CONTROL IN OUT Remote control unit Other Pioneer products with CONTROL terminals Connect to CONTROL - Pioneer D812K | Owner's Manual - Page 29
MIDNIGHT/ SELECT LOUDNESS SPEAKERS SB CH MODE TONE QUICK SETUP BAND MPX PHONES SURR. LISTENING MODE INPUT ATT FL Receives the signals from the remote control. 5 ENTER 6 MULTI JOG dial The MULTI JOG dial performs a number of tasks. Use it to select options after pressing TONE, QUICK SETUP - Pioneer D812K | Owner's Manual - Page 30
Use to attenuate (lower) the level of an analog input signal to prevent distortion. 21 MPX Press to receive a radio broadcast in mono (page 54). 22 BAND Switches between AM and FM radio bands (page 54). with the MULTI JOG dial (page 42). 17 QUICK SETUP See Using the Quick Setup on page 13. 30 En - Pioneer D812K | Owner's Manual - Page 31
4 2 PRO LOGIC II When the (STANDARD) Pro Logic II mode of the receiver is on, this lights to indicate Pro Logic II decoding. 5 VIR.SB Lights . 8 MIDNIGHT Lights during Midnight listening. 9 SLEEP Lights when the receiver is in sleep mode. 10 Speaker indicator Shows the speaker system currently - Pioneer D812K | Owner's Manual - Page 32
Advanced Surround modes has been selected. 14 LOUDNESS Lights when LOUDNESS has been selected. 15 TUNER indicators STEREO Lights when a stereo FM broadcast is being received in auto stereo mode. MONO Lights when the mono mode is set using the MPX button. TUNED Lights when a broadcast is being - Pioneer D812K | Owner's Manual - Page 33
/ STANDARD SURROUND DIRECT LOUDNESS CH TEST SELECT LEVEL TONE MUTE TOP MENU EFFECT RECEIVER CONTROL MASTER VOLUME SETUP FL DIMMER MENU DTV MENU ST TUNE ENTER INPUT ATT T.EDIT ST AUDIO MCACC SETUP TUNE GUIDE SUBTITLE SLEEP RETURN BAND DTV ON/OFF DTV INFO 7 DISPLAY CLASS MPX D.ACCESS - Pioneer D812K | Owner's Manual - Page 34
the audio language or channel with DVD discs. MCACC SETUP Use to setup your speaker system using the multi-channel acoustic calibration system GUIDE Displays the guides on a digital TV. SUBTITLE Displays/changes the subtitles included in multilingual DVD-Video discs. SLEEP Use to put the receiver - Pioneer D812K | Owner's Manual - Page 35
source. 11 LED This lights when a command is sent from the remote control. 12 SOURCE Press to turn on/off other components connected to the receiver. 13 DISC (ENTER) The button's use depends on the component selected. It can be used to enter commands for TV or DTV, and can also - Pioneer D812K | Owner's Manual - Page 36
listening, Loudness, or the Tone controls when DIRECT is selected, the receiver automatically switches to STEREO. Standard mode The Standard mode can be selected, you may not get sound from the surround back speakers in your setup. For more on this, refer to Using the Virtual Surround Back mode - Pioneer D812K | Owner's Manual - Page 37
selected, you may not get sound from the surround back speakers in your setup. For more on this, refer to Using the Virtual Surround Back mode ( up a component to both analog and digital inputs on the rear of the receiver to select between input signals. TV Surround (TV. SURR.) This mode produces - Pioneer D812K | Owner's Manual - Page 38
signal input to DIGITAL. • Some DVD players don't output DTS signals. For more details, refer to the instruction manual supplied with your DVD player. Listening to multi-channel playback RECEIVER INPUT SELECT MULTI CONTROL DVD/LD TV / SAT VCR/DVR TV CONT CD CD-R/TAPE STANDARD TUNER 1 Switch - Pioneer D812K | Owner's Manual - Page 39
Standard (STANDARD) mode cannot be changed. • If you switch on Midnight listening, Loudness, or the Tone controls when DIRECT is selected, the receiver automatically switches to STEREO. Using Advanced Surround When you select one of the Advanced Surround options, Dolby Pro Logic, Dolby Digital and - Pioneer D812K | Owner's Manual - Page 40
05 Playing sources Using the Surround Back Channel (SB CH) • Default setting: SB ON (VSX-D812), SB OFF (VSX-D712) You can have the receiver automatically switch to Dolby Digital EX or DTS-ES decoding for 6.1 encoded sources (SB AUTO), or you can choose to listen to other kinds of - Pioneer D812K | Owner's Manual - Page 41
format for which it was originally encoded. In this case you can have the receiver only apply this effect to 6.1 encoded sources like Dolby Digital EX or DTSES ( Surround back speaker setting on page 46 is set to SB or SB SW (VSX-D812 only). • You can't adjust the surround back channel level when you - Pioneer D812K | Owner's Manual - Page 42
or treble using the front panel tone control. Playing other sources RECEIVER INPUT SELECT MULTI CONTROL DVD/LD TV / SAT VCR/DVR TV CD-R/TAPE TUNER SIGNAL MIDNIGHT/ SELECT LOUDNESS SPEAKERS SB CH MODE TONE QUICK SETUP MULTI JOG VIDEO INPUT S-VIDEO VIDEO L AUDIO R ENTER MULTI JOG MASTER - Pioneer D812K | Owner's Manual - Page 43
a decoder or a DVD player with multi-channel analog outputs to this receiver (page 18), you must select the analog multi-channel inputs for surround DIRECT SIGNAL MIDNIGHT/ SELECT LOUDNESS SPEAKERS SB CH MODE TONE QUICK SETUP PHONES SURR. LISTENING MODE INPUT ATT FL DIMMER MULTI JOG VIDEO - Pioneer D812K | Owner's Manual - Page 44
06 Setting up the receiver Chapter 6: Setting up the receiver Choosing your receiver setup To ensure the best possible the following pages for details on each of the settings. • If you are using the Pioneer S-FCRW230/ 730 speaker system, make sure the Subwoofer setting is set to YES and the - Pioneer D812K | Owner's Manual - Page 45
5 Repeat steps 3 and 4 to adjust other setup options. 6 When you're done, press ENTER large or small) determines how much bass is sent from the receiver to the speakers. In the display, F, C, and S speaker is connected. Surround back channel input setting (VSX-D812 only) (page 49) Specify the number - Pioneer D812K | Owner's Manual - Page 46
YES PLUS NO Surround back speaker setting • Default setting: S (VSX-D812), (VSXD712) You must let the receiver know if surround back speaker(s) have been connected, and how big the speakers set to small (S) in your setup. Choose the point at which you want the frequency routed to the subwoofer (or L - Pioneer D812K | Owner's Manual - Page 47
Setting up the receiver 06 We recommend setting this to 200Hz if your S speakers are smaller bookshelf-type speakers. • Use or to specify the crossover frequency for your small - Pioneer D812K | Owner's Manual - Page 48
06 Setting up the receiver • Use or to set the distance of the center speaker from the main from the main listening position (within the range of 0.5 ft. to 45 ft.). • When SB SW (VSX-D812 only) or SB is selected in the surround back speaker setting, the surround back speaker distance can't be - Pioneer D812K | Owner's Manual - Page 49
is being played back. L ch 1.R ch2 ch2 ch1 Component video input settings Here you tell the receiver what components you have hooked up to the component video jacks on the back of the receiver. Component video 1: • Default settings: DVD • Use or to assign the component video 1 input (DVD, TV - Pioneer D812K | Owner's Manual - Page 50
06 Setting up the receiver Surround back channel input setting (VSX-D812 only) • Default setting: SB 2ch Use or to assign the optical digital 1 input (DVD, TV, CD, CDR, VCR or OFF). Optical digital 2 (VSX-D812 only) • Default setting: CDR • Use or to assign the optical digital 2 input (DVD, TV, CD, - Pioneer D812K | Owner's Manual - Page 51
Setting up the receiver 06 Manually calibrating your listening area (MCACC) You can use the Multi- setting): • You must complete the Speaker setting on page 45 before using the MCACC setup. RECEIVER ENTER MCACC SETUP R C LS SW SB RS 4 Specify the distance from the front left speaker to - Pioneer D812K | Owner's Manual - Page 52
06 Setting up the receiver The test tone for channel delay is output in the same order as step 5: R C LS SW SB RS After you have completed all the channels in your speaker setup, the volume level returns to normal and COMPLETE, then RESUME shows in the display. Setting separate channel - Pioneer D812K | Owner's Manual - Page 53
the main listening position. The channel level range is ± 10 dB. 5 When you're done, press TEST TONE to turn off the test tone. The receiver returns to the Standard mode. • The speaker volume can be adjusted without outputting the test tone by pressing CH SELECT and then using LEVEL +/-. However - Pioneer D812K | Owner's Manual - Page 54
in the currently selected band, press and hold TUNE +/- for about a second. The receiver will start searching for the next station, stopping when it has found one. Repeat to search for other stations. Manual tuning To change the frequency one step at a time, press TUNE +/-. High speed tuning - Pioneer D812K | Owner's Manual - Page 55
to have the receiver store the frequency for easy recall whenever you want to listen to that station. This saves the effort of manually tuning in each . / SIGNAL MIDNIGHT/ SB CH SELECT LOUDNESS SPEAKERS MODE TONE QUICK SETUP MULTI JOG VIDEO INPUT S-VIDEO VIDEO L AUDIO R ENTER MULTI JOG - Pioneer D812K | Owner's Manual - Page 56
the station is stored. Press repeatedly to cycle through classes A, B and C. 3 Press ST +/- (STATION +/-) to select the station preset you want. • If the receiver is left disconnected from the AC power outlet for an extended period, the station memories will be lost and will have to be reprogrammed - Pioneer D812K | Owner's Manual - Page 57
do this. Most video recorders set the audio recording level automatically-check the component's instruction manual if you're unsure. 5 Start recording, then start playback of the source component. • The receiver's volume, balance, tone (bass, treble, loudness), and surround effects have no effect on - Pioneer D812K | Owner's Manual - Page 58
be set to control the following components: Selecting preset codes directly MULTI CONTROL DVD/LD TV / SAT VCR/DVR TV CONT CD CD-R/TAPE TUNER RECEIVER Button Controllable Components DVD/LD: DVD or LD player TV/SAT: TV or Satellite tuner VCR/DVR: VCR or Digital Video Recorder CD: CD player - Pioneer D812K | Owner's Manual - Page 59
input a code for the component type written on each MULTI CONTROL button (except RECEIVER and TUNER). • Even if you don't input a preset code for the TV using the remote control while at the same time, using your receiver to playback a different component. This could let you, for example, use - Pioneer D812K | Owner's Manual - Page 60
can control components after entering the proper codes or teaching the receiver the commands (see Setting the remote to control other components on TV/Satellite TV/TV AUDIO Use to switch DTV audio tracks DTV GUIDE Use as the GUIDE button for navigating DTV Use to choose the BLUE commands on - Pioneer D812K | Owner's Manual - Page 61
TV to the TV CONT button. Controls for other components This remote control can control these components after entering the proper codes or teaching the receiver the commands (see Setting the remote to control other components on page 58 for more on this). Use the MULTI CONTROL buttons to select - Pioneer D812K | Owner's Manual - Page 62
DVD Chooses the disc. Multiple CD player Use as the ENTER button. VCR Displays the setup screen for DVR players. DVR player Changes sides of the LD. LD player MENU language or channel. DVD/DVR Player GUIDE Displays/changes the subtitles on multilingual DVDs. DVD/DVR Player 62 En - Pioneer D812K | Owner's Manual - Page 63
09 Preset Code List You should have no problem controlling a component if you find the manufacturer in 441 LOEWE 414, 432 KENWOOD 456 PIONEER 400 DVD Recorder Manufacturer Code PIONEER 456 TAPE Manufacturer Code DENON 810 FISHER 813 JVC 802 KENWOOD 804, 807 MARANTZ 821 ONKYO 808, 809 OPTIMUS 800 - Pioneer D812K | Owner's Manual - Page 64
09 Controlling the rest of your system SONY 301, 316, 317, 318 TEAC 305, 306, 327, 324, 325 TECHNICS 304, 326 YAMAHA 315 , 314 , 328, 347 PIONEER 300, 345 MD Manufacturer Code SONY 901 KENWOOD 903 SHARP 902 TEAC 904 ONKYO 905 DENON 906 PIONEER 900, 902, 907 64 En - Pioneer D812K | Owner's Manual - Page 65
the other components and electrical appliances being used. If the trouble cannot be rectified even after exercising the checks listed below, ask your nearest Pioneer authorized service center or your dealer to carry out repair work. Problem The power does not turn on. Remedy • Connect the power - Pioneer D812K | Owner's Manual - Page 66
Problem Remedy Broadcast stations cannot be • Connect an outdoor antenna (refer to page 20). selected automatically. No sound from surround or center speakers. • Refer to Speaker setting on page 45 to check the speaker settings. • Refer to Manually receiver to the instruction manual supplied with - Pioneer D812K | Owner's Manual - Page 67
to return to normal operating conditions. Resetting the main unit Use this procedure to reset all the receiver's settings to the factory default. Use the front panel controls to do this. 1 Switch the receiver on. 2 While holding down the TONE button, press and hold the STANDBY/ON button for about - Pioneer D812K | Owner's Manual - Page 68
10 Additional information Specifications Amplifier section Continuous average power output of W (1kHz, 1.0 %, 8 Ω) Surround 100 W per channel (1kHz, 1.0 %, 8 Ω) Surround Back 100 W per channel (VSX-D812 only) (1kHz, 1.0 %, 8 Ω) Signal-to Noise Ratio EIA, at 1 W (1 kHz) CD, VCR/DVR, CD-R/ - Pioneer D812K | Owner's Manual - Page 69
(16-9/16 (W) x 6-4/16 (H) x 15-6/16 (D) in.) Weight (without package) VSX-D812 10.5 kg (23.1 lb) VSX-D712 9.0 kg (19.8 lb) Cleaning the unit • Use a polishing cloth or dry cloth batteries 2 Remote control 1 These operating instructions 1 • Specifications and the design are subject to possible - Pioneer D812K | Owner's Manual - Page 70
10 Additional information 70 En - Pioneer D812K | Owner's Manual - Page 71
Additional information 10 71 En - Pioneer D812K | Owner's Manual - Page 72
ELECTRONICS OF CANADA, INC. 300 Allstate Parkway, Markham, Ontario L3R OP2, Canada TEL: (905) 479-4411 PIONEER EUROPE NV Haven 1087, Keetberglaan 1, B-9120 Melsele, Belgium TEL: 03/570.05.11 PIONEER ELECTRONICS ASIACENTRE PTE. LTD. 253 Alexandra Road, #04-01, Singapore 159936 TEL: 656-472-1111
-
 1
1 -
 2
2 -
 3
3 -
 4
4 -
 5
5 -
 6
6 -
 7
7 -
8
-
9
-
10
-
11
-
12
-
13
-
14
-
15
-
16
-
17
-
18
-
19
-
20
-
21
-
22
-
23
-
24
-
25
-
26
-
27
-
28
-
29
-
30
-
31
-
32
-
33
-
34
-
35
-
36
-
37
-
38
-
39
-
40
-
41
-
42
-
43
-
44
-
45
-
46
-
47
-
48
-
49
-
50
-
51
-
52
-
53
-
54
-
55
-
56
-
57
-
58
-
59
-
60
-
61
-
62
-
63
-
64
-
65
-
66
-
67
-
68
-
69
-
70
-
71
-
72
 |
 |

AUDIO/VIDEO MULTI-CHANNEL
RECEIVER
VSX-D712
VSX-D812
Operating Instructions