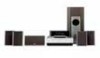
Pioneer HTZ-55DV Owner's Manual
Pioneer HTZ-55DV Manual
 |
View all Pioneer HTZ-55DV manuals
Add to My Manuals
Save this manual to your list of manuals |
Pioneer HTZ-55DV manual content summary:
- Pioneer HTZ-55DV | Owner's Manual - Page 1
DVD SURROUND SYSTEM HTZ-55DV Operating Instructions - Pioneer HTZ-55DV | Owner's Manual - Page 2
PARTS INSIDE. REFER SERVICING TO QUALIFIED SERVICE PERSONNEL. The exclamation point within an equilateral triangle is intended to alert the user to the presence of important operating and maintenance (servicing) instructions shielded cables and connectors for connections. CAUTION • Use of controls - Pioneer HTZ-55DV | Owner's Manual - Page 3
Pioneer product. Please read through these operating instructions so you will know how to operate your model properly. After you have finished reading the instructions . Installation Precautions • Install components Powered subwoofer unit (S-DV55SW) 25 cm (10 in.) or more DVD Tuner system (XV - Pioneer HTZ-55DV | Owner's Manual - Page 4
You Start Features 5 Using this manual 5 Hints on installation 6 Avoiding problems with condensation 6 Moving the system 6 Discs compatible with this system 6 DVD Video regions 6 2 Controls and Displays Front panel 7 Display 7 Remote control 8 3 Getting Started Introduction 10 Switching - Pioneer HTZ-55DV | Owner's Manual - Page 5
Code List 60 Troubleshooting 64 Resetting the player 66 Screen sizes and disc formats 66 Component features & functions 67 DVD tuner system 67 Powered subwoofer unit 67 Display unit 67 Specifications 68 ÷ Superlative audio performance with Dolby Digital* and DTS** software The HTZ-55DV - Pioneer HTZ-55DV | Owner's Manual - Page 6
installation support all four of the unit's feet. Avoiding problems with condensation Condensation may form inside the system system. Other formats, including DVD-RAM, DVDROM, DVD-Audio, CD-ROM, SACD and Photo CD will not play. Single or double sided / Single or double layer. Dolby instruction manual - Pioneer HTZ-55DV | Owner's Manual - Page 7
to pause a disc that's playing, or restart a paused disc. 9 7 - Press to stop the disc. 10 VOLUME controls - Use to adjust the overall system volume. 11 FUNCTION - Press to select the input source (DVD, tuner, etc.) 8 9 10 11 12 13 20 19 18 17 16 15 14 1 CONDITION - Indicates playback settings - Pioneer HTZ-55DV | Owner's Manual - Page 8
between AM and FM bands when listening to the radio. C C - Press to clear settings or entries. CH+ / CH- - Press to change channels on a satellite tuner, cable box, VCR, etc. CH SELECT - Press to select the speaker channel when setting up your system for surround sound. 8 En - Pioneer HTZ-55DV | Owner's Manual - Page 9
for listening to the radio. PAGE +/- - Press to display the next/previous page of a cable TV guide. TV - Press to switch the remote from system, DVD, tuner, etc. control to TV control. PGM - Use to program a playlist for a DVD, Video CD or CD. R RDM - Use to set the random play mode when playing - Pioneer HTZ-55DV | Owner's Manual - Page 10
on and setting the clock, using the Setup Navigator to set some basic preferences, using all the basic controls for playing discs, and using the tuner. Switching on and setting the clock This system has a built in clock, which needs to be set to be able to use the timer features. 1 Press - Pioneer HTZ-55DV | Owner's Manual - Page 11
puts the remote into surround setup mode. operation is performed within 20 seconds. • There are several other settings that you can make from the System Setup menu to further tailor your surround sound. See chapter 10 for more on this. • The speaker distance settings have no effect when the Dolby - Pioneer HTZ-55DV | Owner's Manual - Page 12
DSP mode. Note: it may not be possible to accurately adjust the subwoofer level using this method. You may prefer to leave it on its default setting and adjust it to your liking later when playing surround-sound sources. 1 Press SYS then 2/DTS. The Dolby/DTS mode can be set to any-thing except - Pioneer HTZ-55DV | Owner's Manual - Page 13
DVD then SETUP. The Setup Navigator on-screen display (OSD) appears: Audio Video Language General Setup Navigator Setup Navigator Start Auto Start Off Move ENTER Select SETUP Exit Navigate all of the following OSDs using these controls , you've set up your system! If you want to use the - Pioneer HTZ-55DV | Owner's Manual - Page 14
in the disc guide. • Press 0 OPEN/CLOSE to close the disc tray. Many DVD-Video discs start playing automatically. 3 Basic playback controls* Button 3 using the DVD, you may see the or mark displayed on-screen. means that the operation is not allowed by the system. means that the operation is not - Pioneer HTZ-55DV | Owner's Manual - Page 15
or TOP MENU. Control What it does TOP MENU Displays the 'top menu' of a DVD disc - this varies with the disc. MENU Displays a DVD disc menu - Cursor buttons Returns to the previously displayed menu screen. On some DVD-Audio discs featuring browsable pictures, press to display the browser screen - Pioneer HTZ-55DV | Owner's Manual - Page 16
on the front panel to select DVD. 2 Load a CD. • Press 0 OPEN/CLOSE to eject the disc tray. • Place a disc in the tray, label side face up, making sure it is seated properly in the disc guide. • Press 0 OPEN/CLOSE to close the disc tray. 3 Basic playback controls: Button What it does 3 Starts - Pioneer HTZ-55DV | Owner's Manual - Page 17
on the front panel to select DVD. 2 Load a Video CD. • Press 0 OPEN/CLOSE to eject the disc tray. • Place a disc in the tray, label side face up, making sure it is seated properly in the disc guide. • Press 0 OPEN/CLOSE to close the disc tray. 3 Basic playback controls Many Video CDs contain menus - Pioneer HTZ-55DV | Owner's Manual - Page 18
band, press and hold either the FQ + or FQ - button for about a second. The system will start searching for the next station, stopping when it has found one. Repeat this step to search for other stations. • Manual tuning To change the frequency one step at a time, press the FQ + / FQ - buttons - Pioneer HTZ-55DV | Owner's Manual - Page 19
components to. Select them using the multi-control buttons: • V-1 (Video 1) • press SYS then FUNCTION on the remote. 2 Start playing the source this system. Note: This system can only play Dolby Digital, to select the input to use. • INPUT OPTICAL - the optical digital input is used as the source • - Pioneer HTZ-55DV | Owner's Manual - Page 20
adjusting the amount of bass and treble. Note: The bass and treble controls have no effect when using the DSP modes, or when the Dolby/DTS mode is set to anything other than AUTO, STANDARD or SURROUND OFF. 1 Press SYS then SOUND CONTROL. 2 Use the @ or # buttons to select BASS or TREBLE. 3 Use the - Pioneer HTZ-55DV | Owner's Manual - Page 21
processed using Dolby Pro Logic for surround-sound effects. • Musical - Concert hall sound. • Drama - Classic, mid-size movie theater sound. • Action - Large, modern movie theater sound. • Virtual Surround 1 - Virtual surround sound from just the main front stereo speakers and a subwoofer. Use this - Pioneer HTZ-55DV | Owner's Manual - Page 22
with the Dolby/DTS mode. • When playing stereo sources with DSP effects switched off, there is no sound from the surround and center speakers. 1 Press SYS then DSP to select a sound mode. Each press changes the mode as follows: • HALL 1 • HALL 2 • JAZZ • DANCE • THEATER 1 • THEATER 2 • SIMULATED - Pioneer HTZ-55DV | Owner's Manual - Page 23
apply to DVD discs, Video CDs and CDs, although the exact operation of some varies slightly with the kind of disc loaded. • When playing DVD discs, , stop the disc first and restart by inputting a track number on the remote control. Finding what you want on a disc You can directly access any point - Pioneer HTZ-55DV | Owner's Manual - Page 24
TV angle indicator, choose Angle Indicator > Off from the Video menu (see page 35). Switching subtitles (DVD only) Many DVD discs have subtitles in one or more languages - the box will usually tell you which subtitle languages are available. You can switch subtitle language anytime during playback - Pioneer HTZ-55DV | Owner's Manual - Page 25
to memorize the playlist, move the cursor down to Program Memory and set it to ON. The player can memorize playlists for up to 24 DVD discs. Program Chapter Program Title Current: Title Title 7 Chapter 1 1 (Chapter 1 ~ 49) 09 07 18 Program Memory On Off Move PROGRAM Exit 5 Press ENTER to - Pioneer HTZ-55DV | Owner's Manual - Page 26
chapter/track to the playlist, press SHIFT then hold PGM for about 2 seconds. • If there is no current playlist, a new one is created. (For DVD: if the last playlist programmed was for titles, then a title playlist is created; otherwise a chapter playlist is created.) • To delete the playlist, press - Pioneer HTZ-55DV | Owner's Manual - Page 27
and loop. Button REPEAT A-B C 7 What it does Sets the repeat mode. For DVD the repeat modes are title or chapter; for CDs or Video CDs, track or . Note: you can't use random play together with program or repeat play. DVD • To start playing chapters at random, press SHIFT then RDM, then ENTER. - Pioneer HTZ-55DV | Owner's Manual - Page 28
DVD/Video CD) If you watch only part of a DVD disc with the intention of picking up later where you left off, you can bookmark the place then resume playback at a later date without having to manually automatically whenever you load that disc. The system can store settings for 15 discs; after this - Pioneer HTZ-55DV | Owner's Manual - Page 29
DISP to change the displayed information. Play 3 Tr. Rate : 9.2 DVD display showing the video transmission rate • When a disc is stopped, all 1/1 CD/Video CD DISPLAY Exit • To display the time remaining on the DVD disc playing, press and hold DISP. The time remaining is displayed for as - Pioneer HTZ-55DV | Owner's Manual - Page 30
to have the receiver store the frequency for easy recall whenever you want to listen to that station. This saves the effort of manually tuning in each time. This system can save up to 30 station presets. When saving FM frequencies, the receiver also saves the mono setting (see page 18). 1 Tune - Pioneer HTZ-55DV | Owner's Manual - Page 31
an alarm clock to wake up to the sound of a disc loaded or the radio. If you have an external component operated by a separate timer, you can also need to set a system switch off time as well as a switch on time. 1 Select the source that you'd like to wake up to. For a disc, press DVD; for the radio - Pioneer HTZ-55DV | Owner's Manual - Page 32
TIMER CHECK in the display. 3 Press ENTER. The display shows the timer settings: • On time • Off time • Function (DVD, etc.) • Volume Using the sleep timer The sleep timer switches the system into standby after a specified amount of time so that you can fall asleep without worrying about the stereo - Pioneer HTZ-55DV | Owner's Manual - Page 33
the audio recording level automatically - check your video's instruction manual if you are unsure whether yours has manual controls. 4 Start recording, then start playback of the source component. Making a digital recording The system has one optical digital audio output (for AUDIO 1). If you want - Pioneer HTZ-55DV | Owner's Manual - Page 34
DVD system settings. When in DVD mode, press SETUP to display/leave the menu and the cursor buttons and ENTER to navigate and select options. The controls box. The color of the box indicates what kind of disc the setting is applicable to: blue for DVD only; yellow for DVD have the operation displays ( - Pioneer HTZ-55DV | Owner's Manual - Page 35
is presented-see the manual that came with your TV for General TV Screen 4:3(Letter Box) Picture Quality - 4:3( DVD Settings Still Picture (Expert) • Default setting: Auto This system uses one of two processes when displaying a still frame from a DVD disc. The default Auto setting lets the system - Pioneer HTZ-55DV | Owner's Manual - Page 36
9 DVD Settings Audio settings Dolby Digital Out • Set in Setup Navigator (Default: Dolby Digital) You only need to make this setting if you connected this system to another component (MD recorder, etc.) using one of the digital outs. When recording a Dolby Digital disc to an MD or CD recorder, set - Pioneer HTZ-55DV | Owner's Manual - Page 37
to refer to the DVD language code list on page 59. Audio Video Language General Subtitle Language List of Languages Code (0~2) ja: Japanese 1 setting.) 9 DVD Settings Auto Language • Default Setting: On When set to On, the system always selects the default audio language on a DVD disc (French - Pioneer HTZ-55DV | Owner's Manual - Page 38
may also want to refer to the DVD language code list on page 59. Audio Video Language General DVD Language List of Languages Code (0~2) ja: Japanese 1 00 1 Move (Expert) • Default Setting: On Set to On, the system displays subtitles according to the Subtitle Language and Auto Language settings - Pioneer HTZ-55DV | Owner's Manual - Page 39
restricted disc is loaded, giving you a degree of control over what your children watch. Enter 4-Digit Code Move RETURN Return SETUP Exit You can set the restriction , it is not possible to give a definitive guide to each level-check the disc box for parental lock details. Be careful: not all - Pioneer HTZ-55DV | Owner's Manual - Page 40
the General menu display. Audio Video Language General Parental Lock: Password Change 6 2 7 1 ENTER Enter 4-Digit Code Move +/- RETURN Return SETUP Exit If you forget your password, resetting the system will clear the password. See page 66 for more on this. Background Color (Expert) • Default - Pioneer HTZ-55DV | Owner's Manual - Page 41
your system. LFE attenuator The LFE (low frequency effects) channel carries ultra low bass sound to add weight to effects in Dolby Digital and DTS soundtracks. This channel can overload the sub-woofer resulting in distortion. Use the LFE attenuator setting to reduce the signal fed to the subwoofer - Pioneer HTZ-55DV | Owner's Manual - Page 42
Sound Setup Dual-mono setting The dual-mono setting applies only to Dolby Digital discs that feature dual-mono material-see the disc box dual-mono setting to play just the guitar part on its own; just the backing, or through the left and right speakers if Surround Off is selected); Ch2 is muted. • - Pioneer HTZ-55DV | Owner's Manual - Page 43
set up the remote to control your TV, press TV. The MULTI CONTROL buttons have different types of components assigned to them by default: • V-1 - analog or digital VCR, DVD, DVD-R, LD, DVD/LD player (default: Pioneer VCR, 0058). • V-2 - Satellite, cable or DTV tuner (default: Pioneer cable TV tuner - Pioneer HTZ-55DV | Owner's Manual - Page 44
Point the remote at the component to control and enter the 4-digit code. If there's more than one code, enter the first one. The LED blinks after each button press, and twice to confirm a valid code has been input. If it doesn't blink twice, you have entered an invalid code: check the code and input - Pioneer HTZ-55DV | Owner's Manual - Page 45
Other Equipment Learning directly from other remote controls If preset codes are not available for your component(s), or the available preset codes do not work, you can use this method to teach the remote each command separately. You can also use this operation to program additional commands for - Pioneer HTZ-55DV | Owner's Manual - Page 46
to the original function, press the MULTI CONTROL for the current system function. It's also possible to set up the remote so that a particular multi control button always only switches the remote control mode and not the system function. 1 Press and hold REMOTE SETUP for three seconds. The LED at - Pioneer HTZ-55DV | Owner's Manual - Page 47
times to indicate the button has been cleared. Checking preset codes To check which preset code is associated with a MULTI CONTROL button: 1 Press and hold REMOTE SETUP for three seconds. The LED at top of the remote will blink twice. 2 Press the MULTI CONTROL button you want to check the preset - Pioneer HTZ-55DV | Owner's Manual - Page 48
12 14 10 11 8 7 13 4 92 3 23 6 22 18 5 19 20 21 CD/MD/CD-R/VCR/LD player controls These controls are available after you set up the remote to control. See Setting up the remote control on page 43 for how to do this. 1 SOURCE Press to switch between standby and on. 24 Press to - Pioneer HTZ-55DV | Owner's Manual - Page 49
13 4 9 2 6 3 5 11 Controlling Other Equipment Cassette deck controls These controls are available after you set up the remote to control. See Setting up the remote control on page 43 for how to do this. 1 SOURCE Press to switch between standby and on (not possible on all models). 24 Use to play - Pioneer HTZ-55DV | Owner's Manual - Page 50
DVD/DVR player controls These controls are available after you set up the remote to control. See Setting up the remote control on page 43 for how to do this. 1 SOURCE Press to switch the DVD skip to the start of following tracks. 11 RETURN / ¶ DVD : Use to go back one menu. DVR : Press twice - Pioneer HTZ-55DV | Owner's Manual - Page 51
Controlling Other Equipment DTV controls These controls are available after you set up the remote to control. See Setting up the remote control on page 43 for how to do this. 1 SOURCE Press to switch the TV on or off. 2 Number buttons Use to select a specific ¡ (GUIDE) Use as the Guide button for - Pioneer HTZ-55DV | Owner's Manual - Page 52
11 Controlling Other Equipment Cable TV/satellite TV/TV controls These controls are available after you set up the remote to control. See Setting up the remote control on page 43 for how to do this. 9 8 3 4 2 1 7 12 10 11 56 13 The first four buttons are dedicated TV control buttons. 1 - Pioneer HTZ-55DV | Owner's Manual - Page 53
get a better picture. Refer to the TV's instruction manual for more detailed connection instructions. 12 Connecting Up Playing your TV through this system When watching cable or satellite TV, it's best to connect the cable/satellite box directly to this system, rather than going via the TV. However - Pioneer HTZ-55DV | Owner's Manual - Page 54
the player has a digital audio output, connect to the VIDEO 2 DIGITAL IN or OPTICAL IN jacks. See Switching between digital and analog sources on page 19 for more on a standard video cord, your TV must also be connected to this system with a standard video cord. To the TV's video input From an - Pioneer HTZ-55DV | Owner's Manual - Page 55
terminal AM loop antenna Connecting an outdoor FM Antenna Connect as shown in the figure below. 75Ω coaxial cable (3C-2V) Unit: mm FM antenna Tooled(-) Insulated(+) The system's antenna terminal Note: The ground mark ( ) on the antenna terminal refers to measures to reduce reception noise when - Pioneer HTZ-55DV | Owner's Manual - Page 56
with low lighting. • Press SYS then FL DIMMER. Press FL DIMMER repeatedly to set the display brightness. There are five levels. Switching the TV system output DVD and Video CD discs are recorded in either PAL or NTSC format. This setting determines which TV signal format is output to your TV. 1 With - Pioneer HTZ-55DV | Owner's Manual - Page 57
system To clean this unit, wipe with a soft, dry cloth. For stubborn dirt, wet a soft cloth with a mild detergent solution made by • Wipe lightly from the center of the disc using straight strokes. diluting one part detergent to 5 or 6 parts Pioneer authorized service CDs and DVDs are more - Pioneer HTZ-55DV | Owner's Manual - Page 58
up to six channels of digital audio (front left and right, surround left and right, center and low-frequency channels). See also DTS. DTS A surround sound system developed by Digital Theater Systems as an alternative to Dolby Digital. DTS discs contain up to eight channels of digital audio - Pioneer HTZ-55DV | Owner's Manual - Page 59
The table below lists all the languages and codes that are recognized by the DVD standard. Language Japanese/japonais ( ja ) English/ ( vo ) Wolof ( wo ) Xhosa ( xh ) Yoruba ( yo ) Zulu ( zu ) Code 1721 1813 1814 1815 1823 1901 1904 1907 1908 1909 1911 1912 1913 1914 1915 1917 1918 1919 1920 - Pioneer HTZ-55DV | Owner's Manual - Page 60
13 Additional Information Preset Code List DVD PLAYER/RECORDER Manufacturer Denon GE Harman/Kardon JVC Kenwood Magnavox Marantz Mitsubishi Onkyo Optimus Panasonic Philips Pioneer Proscan RCA Samsung Sharp Sherwood Sony Technics Theta Digital Toshiba Yamaha Zenith Code 0490, 0634 0522 0582 0558, - Pioneer HTZ-55DV | Owner's Manual - Page 61
0019, 0030 Zenith 0016, 0017, 0092, 0463 Zonda 0003 CABLE TV/DTV Manufacturer Code ABC 0003, 0007, 0008, 0011, 0014, 0017 Americast 0899 0007, 0019 Pacific 0678 Panasonic 0000, 0107, 1003 Paragon 0000, 1003 Pioneer 0144, 0260, 0533, 0877, 1010(DTV), 1021 Pulsar 0000 Quasar - Pioneer HTZ-55DV | Owner's Manual - Page 62
Inkel JVC Kenwood Kyocera Lotte Luxman Magnavox Marantz Nakamichi Nikko Olympus Onkyo Optimus Panasonic Philips Pioneer RCA Renaissance Samsung Sansui Sanyo Sherwood Sonic Sony Teac Technics Victor Wards Yamaha Code 1171 1029, 1197, 1223 1189 1364 1029, 1261 1076 1383 1261 1418 1261 1375 1375 - Pioneer HTZ-55DV | Owner's Manual - Page 63
Harwood 0072 Headquarter 0046 Hitachi 0000, 0041, 0042, 0235 Hughes Network Systems 0042 JVC 0008, 0041, 0067 Jensen 0041 KEC 0037, 0278 KLH CD RECORDER Manufacturer Denon Kenwood Onkyo Optimus Philips Pioneer Sharp Sony Code 0873 0626, 0681, 0826 0868 1063 0626 1062, 1063, 1087(CD - Pioneer HTZ-55DV | Owner's Manual - Page 64
the other components and electrical appliances being used. If the trouble cannot be rectified after checking the items below, ask your nearest Pioneer authorized service center or your dealer to carry out repair work. DVD/CD/Video CD DVD/CD/Video CD The disc is ejected automatically after loading - Pioneer HTZ-55DV | Owner's Manual - Page 65
or cause picture problems. This is not a malfunction. The remote control doesn't seem to work. • The remote control is too far from the system, or the angle with the remote sensor is too wide. Use the remote within its operating range (See the separate Setting Up guide). • The batteries are - Pioneer HTZ-55DV | Owner's Manual - Page 66
guide -check the manual that came operation. If this does not correct the problem, please consult your nearest Pioneer service system into standby using the front panel STANDBY/ON switch. Next, hold down the front panel 7 button and switch back on. All settings will have been cleared. 4:3 (Letter Box - Pioneer HTZ-55DV | Owner's Manual - Page 67
DVD Tuner System 13 Additional Information Powered Subwoofer Unit STANDBY/ON button STANDBY indicator OPEN/CLOSE DVD indicator button Disc table Power cord connector FUNCTION VOLUME button up button Pause PHONES button jack VOLUME Stop button Play button down button Control cable - Pioneer HTZ-55DV | Owner's Manual - Page 68
cord 1 Display cable 1 Control cable A (Blue 1 Control cable B (Black 1 Speaker cords (5 m/16 ft. 3 in 3 Speaker cords (10 m/32 ft. 6 in 2 Cord labels 1 Non-skid pads 1 Operating instructions (Setting up 1 Operating instructions (Basic/Detailed 1 Warranty 1 Note: Specifications and design
-
 1
1 -
 2
2 -
 3
3 -
 4
4 -
 5
5 -
 6
6 -
 7
7 -
8
-
9
-
10
-
11
-
12
-
13
-
14
-
15
-
16
-
17
-
18
-
19
-
20
-
21
-
22
-
23
-
24
-
25
-
26
-
27
-
28
-
29
-
30
-
31
-
32
-
33
-
34
-
35
-
36
-
37
-
38
-
39
-
40
-
41
-
42
-
43
-
44
-
45
-
46
-
47
-
48
-
49
-
50
-
51
-
52
-
53
-
54
-
55
-
56
-
57
-
58
-
59
-
60
-
61
-
62
-
63
-
64
-
65
-
66
-
67
-
68
 |
 |

HTZ-55DV
DVD SURROUND SYSTEM
Operating Instructions