Pioneer VSX80TXV Owner's Manual
Pioneer VSX80TXV - Elite AV Receiver Manual
 |
UPC - 012562811024
View all Pioneer VSX80TXV manuals
Add to My Manuals
Save this manual to your list of manuals |
Pioneer VSX80TXV manual content summary:
- Pioneer VSX80TXV | Owner's Manual - Page 1
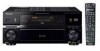
MULTI-CHANNEL RECEIVER VSX-80TXV VSX-80TXV-S Register your product at www.pioneerelectronics.com (US) www.pioneerelectronics.ca (Canada) • Protect your new investment The details of your purchase will be on file for reference in the event of an insurance claim such as loss or theft. • Receive free - Pioneer VSX80TXV | Owner's Manual - Page 2
Name: AUDIO/VIDEO MULTI-CHANNEL RECEIVER Model Number: VSX-80TXV, VSX-80TXV-S Responsible Party Name: PIONEER ELECTRONICS SERVICE INC. Address: 1925 E. and, if not installed and used in accordance with the instructions, may cause harmful interference to radio communications. However, there - Pioneer VSX80TXV | Owner's Manual - Page 3
servicing) instructions in the literature accompanying the appliance. D1-4-2-3_En IMPORTANT SAFETY INSTRUCTIONS READ INSTRUCTIONS - All the safety and operating instructions information with regard to proper grounding of the mast and supporting structure, grounding of the lead-in wire to an antenna - Pioneer VSX80TXV | Owner's Manual - Page 4
Thank you for buying this Pioneer product. Please read through these operating instructions so you will know how to operate your model properly. After you have finished reading the instructions, put them away in a safe place for future reference. Contents 01 Before you start Features 6 Checking - Pioneer VSX80TXV | Owner's Manual - Page 5
your XM Radio receiver 41 Listening to XM Radio 41 Using XM HD Surround 42 Saving channel presets 42 Connecting Pioneer components with this unit's sensor 61 12 Additional information Troubleshooting 62 Power 62 No sound 62 Other audio problems 63 Video 64 Settings 64 Display 65 Remote - Pioneer VSX80TXV | Owner's Manual - Page 6
design This receiver bears the THX channel surround sound. • Phase correction Based on Pioneer's unique Phase Control Technology, the Basic Phase Control feature incorporated into this receiver remote control The remote control gives you not only complete control over every function of this receiver - Pioneer VSX80TXV | Owner's Manual - Page 7
batteries, please comply with governmental regulations or environmental public instruction's rules that apply in your country or area. • catch fire. It can also reduce the life or performance of batteries. Installing the receiver • When installing this unit, make sure to put it on a level and stable - Pioneer VSX80TXV | Owner's Manual - Page 8
for the best surround sound this receiver. Check the manual that receiver's display, indicating that the DVD input is selected. If it isn't, press DVD on the remote control to set the receiver channel delay and channel level. After you have set up the microphone provided with your system, the receiver - Pioneer VSX80TXV | Owner's Manual - Page 9
SOURCE AV PRE-PROGRAMMED AND LEARNING REMOTE CONTROL UNIT DVD CD TV CD-R DVR 2 DVR1 TV CTRL XM RADIO ROOM 2 TUNER RECEIVER DIALOG E PHASE S.RETRIEVER D.ACCESS +10 CLASS DISC ENTER TOP MENU TUNE DTVMENU ST SETUP ENTER MENU ST T.EDIT RETURN TUNE GUIDE CATEGORY TV CONTROL BAND TV VOL - Pioneer VSX80TXV | Owner's Manual - Page 10
the Auto MCACC Setup. Playing a source Here are the basic instructions for playing a source (such as a DVD disc) with your home theater system. RECEIVER INPUT SELECT SYSTEM OFF SOURCE AV PRE-PROGRAMMED AND LEARNING REMOTE CONTROL UNIT GUIDE TV CONTROL TV VOL INPUT SELECT TV CH VOL DTV ON - Pioneer VSX80TXV | Owner's Manual - Page 11
Use for digital audio sources, including DVD players/ recorders, digital satellite receivers, CD players, etc. See also The Input Assign menu on page connect other Pioneer components so that you can control all your equipment from a single IR remote sensor. Operating other Pioneer components with - Pioneer VSX80TXV | Owner's Manual - Page 12
DVD player on page 13. 13 Multichannel analog audio inputs 7.1 channel inputs for connection to a DVD player with multichannel analog outputs. components in your system on and off according to the input function of the receiver. Switching components on and off using the 12 volt trigger on page 48. - Pioneer VSX80TXV | Owner's Manual - Page 13
IN IN OUT IN CD-R/TAPE/MD DVD/LD TV/SAT DVR/VCR1 VSX-80TXV AM LOOP L OUT P CENTER L IN 3 R SUB R FRONT WOOFER OUT IN MONITOR OUT OUT IN L DVR/VCR2 R FRONT MULTI C The diagram shows a basic setup of this receiver together with a TV and DVD player, with S-video or composite video - Pioneer VSX80TXV | Owner's Manual - Page 14
receiver has two sets of audio/video inputs and outputs suitable for connecting analog or digital video devices, including DVD/HDD recorders and VCRs. VSX-80TXV ), which delivers a very stable, flicker-free picture. See the manuals that came with your TV and source component to check whether they - Pioneer VSX80TXV | Owner's Manual - Page 15
receiver has both digital inputs and outputs, allowing you to connect digital audio components for playback and for making digital recordings. Most digital components also have analog connections. See Connecting analog audio sources on the following page if you want to connect these too. VSX-80TXV - Pioneer VSX80TXV | Owner's Manual - Page 16
digital output. Connecting analog audio sources This receiver features two stereo audio-only inputs. One DVR/VCR2 R FRONT SUB WOOFER MULTI CH IN VSX-80TXV PHONES SYSTEM SETUP RETURN TONE TUNING/ STATION TUNER . • With WMA9 Pro, sound problems may occur depending on your computer system. Note - Pioneer VSX80TXV | Owner's Manual - Page 17
IN CENTER VSX-80TXV AC OUTLET SWITCHED 100 W(0.8 A) MAX R SURROUND L SURROUND BACK / B R L (Single) SEE INSTRUCTION MANUAL SELECTABLE Surround left Surround right Surround back left Surround back right Connecting the speakers Each speaker connection on the receiver comprises a positive - Pioneer VSX80TXV | Owner's Manual - Page 18
speaker terminal. Important • Please refer to the manual that came with your speakers for details on how the TV so that the sound of the center channel is localized at the TV screen. Also, make sure The following guidelines should help you to get the best sound from your system. • The subwoofer can - Pioneer VSX80TXV | Owner's Manual - Page 19
sure the reception is clear. 4 Place the AM antenna on a flat surface and in a direction giving the best reception. 5 Connect the FM wire antenna in the same way as the AM loop antenna. For best results, extend the FM antenna fully and fix to a wall or door frame. Don't drape loosely or - Pioneer VSX80TXV | Owner's Manual - Page 20
or give you an electric shock. Check the power cord once in a while. If you find it damaged, ask your nearest Pioneer authorized independent service company for a replacement. • The receiver should be disconnected by removing the mains plug from the wall socket when not in regular use, e.g., when on - Pioneer VSX80TXV | Owner's Manual - Page 21
45 STANDBY/ON PHASE CONTROL 6 78 9 10 AUDIO/VIDEO MULTI-CHANNEL RECEIVER VSX-80TXV MULTI ROOM LISTENING ON/OFF CONTROL MODE MULTI JOG DVD / LD TV Display on page 23. 7 Remote sensor Receives the signals from the remote control (see Operating range of remote control unit on page 22). - Pioneer VSX80TXV | Owner's Manual - Page 22
recall (page 31). 21 SPEAKERS Use to change the speaker system (page 44). Operating range of remote control unit The remote control may not work properly if: • There are obstacles between the remote control and the receiver's remote sensor. • Direct sunlight or fluorescent light is shining onto the - Pioneer VSX80TXV | Owner's Manual - Page 23
when the receiver is set to select the input signal automatically (page 29). 2 Program format indicators These change according to which channels are active in digital sources. L - Left front channel C - Center channel R - Right front channel SL - Left surround channel S - Surround channel (mono) SR - Pioneer VSX80TXV | Owner's Manual - Page 24
GUIDE CATEGORY TV CONTROL BAND 7 TV VOL INPUT SELECT TV CH VOL 15 8 9 10 11 DTV ON/OFF MPX REC DTV INFO MUTE REC STOP JUKEBOX AUDIO SUBTITLE HDD DVD DISP CH CH THX STANDARD ADV.SURR STEREO MULTI OPE AUTOSURR ACOUSTIC EQ SIGNAL SEL SHIFT EFFECT/CHSEL 16 17 RECEIVER The remote - Pioneer VSX80TXV | Owner's Manual - Page 25
- See Confirming preset codes on page 57. 14 RECEIVER Switches the remote to control the receiver (used to select the green commands above the number volume also restores the sound). 17 EFFECT/CH SEL Press repeatedly to select a channel, then use +/- to adjust the level (see Tip on page 39). - Pioneer VSX80TXV | Owner's Manual - Page 26
DTS 96 kHz (24 bit) or WMA9 Pro), settings and status of the receiver. See Listening modes with different input signal formats on page 69 for more on this If you connected surround back speakers, see also Using surround back channel processing on page 29. Standard surround sound The following modes - Pioneer VSX80TXV | Owner's Manual - Page 27
more on this). THX STANDARD ADV.SURR STEREO MULTI OPE AUTOSURR ACOUSTIC EQ SIGNAL SEL SHIFT EFFECT/CHSEL RECEIVER • Press THX (HOME THX) to select a listening mode.1 With two channel sources, press THX repeatedly to select a matrix-decoding process for the THX CINEMA mode (see Listening in surround - Pioneer VSX80TXV | Owner's Manual - Page 28
setting you want to adjust. Depending on the current status / mode of the receiver, certain options may not appear. Check the table below for notes on this. : • ALL CH ADJUST - No special weighting is given to any one channel. • FRONT ALIGN - All speakers are heard in accordance with the front - Pioneer VSX80TXV | Owner's Manual - Page 29
WMA9 Pro signal. Using surround back channel processing • Default setting: SBch ON You can have the receiver automatically use 6.1 or 7.1 decoding for DVD players don't output DTS signals. For more details, refer to the instruction manual supplied with your DVD player. 2 • You can't use the Virtual - Pioneer VSX80TXV | Owner's Manual - Page 30
Enhancing dialog • Default setting: OFF The Dialog Enhancement feature localizes dialog in the center channel to make it stand out from other background sounds in a TV or movie soundtrack. • Press RECEIVER then press DIALOG E to switch dialog enhancement on or off. Using the tone controls Depending - Pioneer VSX80TXV | Owner's Manual - Page 31
using the automatic (search) and manual (step) tuning functions. If you REMOTE CONTROL UNIT DVD CD DVR 2 TV DVR1 TVCTRL CD-R XM RADIO ROOM 2 TUNER RECEIVER DIALOG E PHASE S.RETRIEVER D.ACCESS +10 CLASS DISC ENTER TOP MENU TUNE DTVMENU ST SETUP ENTER MENU ST T.EDIT RETURN TUNE GUIDE - Pioneer VSX80TXV | Owner's Manual - Page 32
Choose from the following characters for a name up to four characters long. ABCDEFGHIJKLMNOPQRSTUVWXYZ abcdefghijklmnopqrstuvwxyz 0123456789 space] • Use the ST / buttons (remote) to select characters. • Press ENTER to confirm a character. If no character is input, a space is input. • The name is - Pioneer VSX80TXV | Owner's Manual - Page 33
GUIDE CATEGORY TV CONTROL BAND TV VOL INPUT SELECT TV CH VOL 1 Switch on the receiver and your TV. Use the RECEIVER button to switch on.1 • If headphones are connected to the receiver, disconnect them. 2 Press RECEIVER on the remote 3.Manual MCACC 4.Manual SP back speaker channels with this - Pioneer VSX80TXV | Owner's Manual - Page 34
re unsure how to do this. Also see Problems when using the Auto MCACC Setup on page volume. 1 Select 'Manual MCACC' from the System Setup menu. See Making receiver settings from the System Setup the reference speaker. • The level of the left channel (the primary reference speaker) is fixed at 0.0dB - Pioneer VSX80TXV | Owner's Manual - Page 35
change depending on which speaker you select. • If you want to go back and adjust a channel, simply use / to select it. 4 When you're finished, press RETURN. You return to the Manual MCACC setup menu. Acoustic Calibration EQ Acoustic Calibration Equalization is a kind of room equalizer for your - Pioneer VSX80TXV | Owner's Manual - Page 36
Problems Channel Level [ ] Acoustic Cal EQ [ ] :Cancel As the receiver outputs to adjust the overall frequency balance. It is best to choose whichever one you copied to the custom target speaker. 3 Select the channel(s) you want and adjust to your liking. 3.Manual MCACC a.Fine Ch Level b. - Pioneer VSX80TXV | Owner's Manual - Page 37
so you can compare the different settings. 3 Select the channels you want, pressing ENTER when you're finished checking each one. 4 When you're finished, press RETURN. You return to the Manual MCACC setup menu. Manual speaker setup This receiver allows you to make detailed settings to optimize the - Pioneer VSX80TXV | Owner's Manual - Page 38
and SMALL alternatively and let your ears judge which sounds best. If you're having problems, the easiest option is to route all the bass sounds 're finished, press RETURN. You return to the Manual SP Setup menu. Channel Level Using the channel level settings, you can adjust the overall balance of - Pioneer VSX80TXV | Owner's Manual - Page 39
Manual SP Setup menu. Tip • You can change the channel levels at any time by using EFFECT/CH SEL and +/- on the remote control. You can set two channel the distance of each speaker in 0.5 foot increments. Tip • For best surround sound, make sure the surround back speakers are the same distance - Pioneer VSX80TXV | Owner's Manual - Page 40
setup on page 19 for more on using a THX speaker system. 1 Select 'THX Speaker Setup' from the Manual SP Setup menu. 4.Manual SP Setup a.Speaker Setting b.Crossover Network c.Channel Level d.Speaker Distance e.THX Audio Setting f.THX Speaker Setup :Return 2 Specify whether or not you are using - Pioneer VSX80TXV | Owner's Manual - Page 41
IN CD-R/TAPE/MD DVD/LD TV/SAT DVR/VCR1 VSX-80TXV AM LOOP L OUT PRE OUT CENTER L L ( receiver. You will also need to activate the XM Radio service. 2 Press XM RADIO (SHIFT+TUNER) to switch to the XM RADIO input. For best the XM Channel Guide then / / / and ENTER to select the channel of the - Pioneer VSX80TXV | Owner's Manual - Page 42
/ to select the channel preset you want. • You can also use the number buttons on the remote control to recall the channel preset. Connect & OUT DVR/ VSX-80TXV HDMI IN HDMI/DVI-compatible monitor or plasma display 1 Use an HDMI cable to connect the HDMI IN 1/2 interconnect on this receiver to an - Pioneer VSX80TXV | Owner's Manual - Page 43
one specification. HDCP is used to protect digital content transmitted and received by DVI-compliant displays. HDMI has the capability to support standard, enhanced, or high-definition video plus standard to multi-channel surround-sound audio. HDMI features include uncom- pressed digital video - Pioneer VSX80TXV | Owner's Manual - Page 44
speaker system on page 17. Make sure to review Placing the speakers on page 18 when placing system A (multichannel sources will be downmixed to 2 channels). • SP (off) - No sound is output L (Single) Front left speaker SEE INSTRUCTION MANUAL SELECTABLE High Low Since both front and surround - Pioneer VSX80TXV | Owner's Manual - Page 45
See your speaker manual for more information. speaker terminal on the receiver. Using a banana VSX-80TXV ANALOG INPUT L R ANALOG INPUT ANALOG INPUT L R ANALOG INPUT L R ANALOG INPUT Front channel amplifier Center channel amplifier (mono) Surround channel amplifier Surround back channel - Pioneer VSX80TXV | Owner's Manual - Page 46
INSTRUCTION MANUAL SELECTABLE Using the multi-room controls The following steps use the front panel controls to adjust the sub room volume and select sources. See Multi-room remote controls below when using the remote control. STANDBY/ON PHASE CONTROL AUDIO/VIDEO MULTI-CHANNEL RECEIVER VSX-80TXV - Pioneer VSX80TXV | Owner's Manual - Page 47
window. • Note that other manufacturers may not use the IR terminology. Refer to the manual that came with your component to check for IR compatibility. • If using two remote controls (at the same time), the IR receiver's remote sensor takes priority over the remote sensor on the front panel. 47 En - Pioneer VSX80TXV | Owner's Manual - Page 48
this receiver with a Pioneer plasma display If you have a Pioneer plasma display, you can use an SR+ cable1 to connect it to this unit and take advantage of various convenient features, such as automatic video input switching of the plasma display when the input is changed.2 CONTROL OUT VSX-80TXV - Pioneer VSX80TXV | Owner's Manual - Page 49
CONTROL OUT jack of your plasma display. VIDEO INPUT 1 Pioneer plasma display VIDEO INPUT 2 DVD player Satellite receiver, etc DVD/LD AUDIO IN STANDBY/ON PHASE CONTROL TV/SAT AUDIO IN AUDIO/VIDEO MULTI-CHANNEL RECEIVER VSX-80TXV MULTI ROOM LISTENING ON/OFF CONTROL MODE MULTI JOG DVD - Pioneer VSX80TXV | Owner's Manual - Page 50
if you have connected equipment using component video cables. 1 Press RECEIVER on the remote control, then press the SETUP button. An on-screen display ( Setup menu. System Setup 1.Surr Back System 2.Auto MCACC 3.Manual MCACC 4.Manual SP Setup 5.Input Assign 6.Other Setup 5.Input Assign a.Digital - Pioneer VSX80TXV | Owner's Manual - Page 51
you are using the receiver. 1 Press RECEIVER on the remote control, then press the Back System 2.Auto MCACC 3.Manual MCACC 4.Manual SP Setup 5.Input Assign 6. channel (LFE Attenuator Setup on page 52). • SR+ Setup - Specify how you want to control your Pioneer plasma display (SR+ Setup for Pioneer - Pioneer VSX80TXV | Owner's Manual - Page 52
OFF - No sound from LFE channel 3 When you're finished, press RETURN. You return to the Other Setup menu. SR+ Setup for Pioneer plasma displays • Default setting: OFF (all settings) Make the following settings if you have connected a Pioneer plasma display to this receiver using an SR+ cable. Note - Pioneer VSX80TXV | Owner's Manual - Page 53
- Use this setting if you've connected a fully integrated amplifier (such as another Pioneer VSX receiver) in the sub room and want to use that receiver's volume controls. With the Fixed setting, the source is sent from this receiver at maximum volume, so make sure the volume is quite low in the sub - Pioneer VSX80TXV | Owner's Manual - Page 54
RECEIVER INPUT SELECT SYSTEM OFF SOURCE AV PRE-PROGRAMMED AND LEARNING REMOTE CONTROL UNIT DVD CD DVR 2 TV DVR1 TVCTRL CD-R XM RADIO ROOM 2 TUNER RECEIVER set the audio recording level automatically-check the component's instruction manual if you're unsure. 4 Start recording, then start - Pioneer VSX80TXV | Owner's Manual - Page 55
Using other functions 10 Using the sleep timer The sleep timer switches the receiver into standby after a specified amount of time so you can fall asleep without worrying about the receiver being left on all night. Use the remote control to set the sleep timer. DVD CD TV CD-R DVR 2 DVR1 TV - Pioneer VSX80TXV | Owner's Manual - Page 56
in the remote control will not work for the model that you receiver's remote control. PRES KEY starts flashing to indicate the remote is ready to accept a signal. Note 1 You can't assign the RECEIVER, XM RADIO or TUNER buttons. 2 • When using a Pioneer HDD recorder, please select PIONEER - Pioneer VSX80TXV | Owner's Manual - Page 57
SELECT CATEGORY TUNE GUIDE TV CONTROL XM RADIO TUNER VIDEO 2 VIDEO 1 ENTER DISP MPX TV VOL DTVMENU ST SETUP AV PARAMETER TOP MENU ì TUNE TV SAT CD-R i Pod D.ACCESS +10 SLEEP SR+ RECEIVER INPUT SELECT CD DVD DVR2 DVR1 5 Press the corresponding button on the other remote control that is - Pioneer VSX80TXV | Owner's Manual - Page 58
SLEEP SB ch ANALOG ATT TOP MENU TUNE DTVMENU ST SETUP ENTER MENU ST T.EDIT RETURN TUNE GUIDE CATEGORY TV CONTROL BAND 1 While pressing the RECEIVER button, press SETUP. The remote LCD display shows SETUP. 2 Use / to select MULTI OP or SYS OFF from the menu and press ENTER. If you selected - Pioneer VSX80TXV | Owner's Manual - Page 59
DTVMENU ST SETUP ENTER TUNE GUIDE CATEGORY CLASS DISC ENTER MENU ST T.EDIT RETURN BAND MULTI OPE AUTOSURR ACOUSTIC EQ SIGNAL SEL SHIFT EFFECT/CHSEL RECEIVER • You don't need to program the receiver to switch on or off. This is done automatically. With Pioneer components, you don't need to - Pioneer VSX80TXV | Owner's Manual - Page 60
Switches the TV input. (Not possible with all models.) Cable TV/Satellite TV/TV/DTV TV CH +/- Selects channels. TV VOL +/- Adjust the TV volume. Cable This remote control can control these components after entering the proper codes or teaching the receiver the commands (see Setting the remote to - Pioneer VSX80TXV | Owner's Manual - Page 61
this receiver's remote control, refer to Setting the remote to control other components on page 56. If you have connected a remote control to the CONTROL IN jack (using a mini-plug cable), you won't be able to control this unit using the remote sensor. • See Using this receiver with a Pioneer plasma - Pioneer VSX80TXV | Owner's Manual - Page 62
the power automatically switches off. The MCACC blinks and the power does not turn on. • The receiver may have a serious problem. Do not try switching the receiver on. Contact a Pioneer authorized independent service company for help. OVERHEAT blinks in the display • Allow the unit to cool down in - Pioneer VSX80TXV | Owner's Manual - Page 63
to SBch ON (see Using surround back channel processing on page 29). • If the source or Status menu. Other audio problems Symptom Remedy Broadcast stations cannot be antenna, adjust the position for best reception and secure to a is not a malfunction of the receiver. The scan function of your - Pioneer VSX80TXV | Owner's Manual - Page 64
setting where you think it has the best overall effect on the sound). • Make malfunction. If the levels in Channel Level on page 38 have been you want to record) to this receiver. Noisy, intermittant, or distorted picture. manually in Speaker Setting on page 37 if this is a recurring problem. 64 En - Pioneer VSX80TXV | Owner's Manual - Page 65
. Set to SBch ON (see Using surround back channel processing on page 29) then switch to the AUTO receiver and the remote control. • Make sure that there is no fluorescent or other strong light shining on to the remote sensor. • Check the connections of the CONTROL IN jack (see Operating other Pioneer - Pioneer VSX80TXV | Owner's Manual - Page 66
Using this receiver with a Pioneer the connected components can't plasma display on page 48). be operated with the remote. • Make problem still persists when connecting your HDMI component directly to your monitor, please consult the component or monitor manual or contact the manufacturer for support - Pioneer VSX80TXV | Owner's Manual - Page 67
the source, as well as its own processing to determine channel localization (with two channel sources, the ".1" subwoofer channel is generated by bass management in the receiver). Two modes (Cinema and Music) are available using DTS Neo:6 with two channel sources. DTS 96/24 DTS 96/24 is an extension - Pioneer VSX80TXV | Owner's Manual - Page 68
can support up to 5.1/7.1 channel playback found on the Dolby web site at www.dolby.com. Only receiver and controller products bearing the THX Surround EX logo, when in the plays 5.1 movies using all 8 speakers giving you the best possible movie watching experience. In this mode, ASA processing - Pioneer VSX80TXV | Owner's Manual - Page 69
12 you are watching is encoded in Surround EX, you can manually select the THX Surround EX playback mode, otherwise THX Select2 Cinema mode will apply ASA processing to provide optimum replay. • THX MusicMode For the replay of multi-channel music the THX MusicMode should be selected. In this mode - Pioneer VSX80TXV | Owner's Manual - Page 70
DTS-ES+THX (Matrix/Discrete) DTS+2 Pro Logic IIx MOVIE+THXa THX Select2 CINEMAa THX MUSICMODEa THX GAMES MODEa DTS-ES (Matrix/Discrete) DTS (5.1 channel encoding) DTS+Neo:6 DTS+2 Pro Logic IIx MOVIEa DTS+2 Pro Logic IIx MUSIC DTS+Neo:6+THX DTS+2 Pro Logic IIx MOVIE+THXa THX Select2 CINEMAa - Pioneer VSX80TXV | Owner's Manual - Page 71
dBf) Stereo: 70 dB (at 85 dBf) Distortion Stereo: 0.5 % (1 kHz) Alternate Channel Selectivity 60 dB (400 kHz) Stereo Separation 40 dB (1 kHz) Frequency Response 30 Hz batteries 2 Remote control unit 1 AM loop antenna 1 FM wire antenna 1 Warranty card 1 These operating instructions Note • - Pioneer VSX80TXV | Owner's Manual - Page 72
and excitement your equipment offers. This manufacturer and the Electronic Industries Association's Consumer Electronics Group want you to get the most out of your feet, sewing machine 70 Vacuum cleaner, hair dryer, noisy restaurant 80 Average city traffic, garbage disposals, alarm clock at two feet - Pioneer VSX80TXV | Owner's Manual - Page 73
instructions, service manuals, or accessories, please call the number shown below. 8 0 0 - 4 2 1 - 1 4 0 4 Please do not ship your product to Pioneer without first calling the Customer Support Division at the above listed number for assistance. Pioneer Electronics (USA) Inc. Customer Support
-
 1
1 -
 2
2 -
 3
3 -
 4
4 -
 5
5 -
 6
6 -
 7
7 -
8
-
9
-
10
-
11
-
12
-
13
-
14
-
15
-
16
-
17
-
18
-
19
-
20
-
21
-
22
-
23
-
24
-
25
-
26
-
27
-
28
-
29
-
30
-
31
-
32
-
33
-
34
-
35
-
36
-
37
-
38
-
39
-
40
-
41
-
42
-
43
-
44
-
45
-
46
-
47
-
48
-
49
-
50
-
51
-
52
-
53
-
54
-
55
-
56
-
57
-
58
-
59
-
60
-
61
-
62
-
63
-
64
-
65
-
66
-
67
-
68
-
69
-
70
-
71
-
72
-
73
 |
 |

AUDIO/VIDEO MULTI-CHANNEL
RECEIVER
VSX-80TXV
VSX-80TXV
-S
Operating Instructions
• Protect your new investment
The details of your purchase will be on file for reference in the event of an
insurance claim such as loss or theft.
• Improve product development
Your input helps us continue to design products that meet your needs.
• Receive a free Pioneer newsletter
Registered customers can opt in to receive a monthly newsletter.
• Receive free tips, updates and service bulletins on
your new product
Register your product at
www.pioneerelectronics.com (US)
www.pioneerelectronics.ca (Canada)