Plantronics Voyager Legend CS Voyager Legend CS Quick Start Guide
Plantronics Voyager Legend CS Manual
 |
View all Plantronics Voyager Legend CS manuals
Add to My Manuals
Save this manual to your list of manuals |
Plantronics Voyager Legend CS manual content summary:
- Plantronics Voyager Legend CS | Voyager Legend CS Quick Start Guide - Page 1
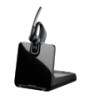
instructions for important product safety information prior to installation or use. The Voyager Legend CS Headset System consists of a CSEB-01 headset base and a Voyager Legend Bluetooth headset. NEED MORE HELP? Technical support plantronics.com/support Online user guide http://docs.plantronics - Plantronics Voyager Legend CS | Voyager Legend CS Quick Start Guide - Page 2
-casque CS Voyager Legend comprend une base de micro-casque CSEB-01 et un micro-casque Bluetooth Voyager Legend. BESOIN D'AIDE? Soutien technique plantronics.com/support Guide de l'utilisateur en ligne http://docs.plantronics.com/VoyagerLegendCS Exposure to RF Radiation The internal wireless radio
-
 1
1 -
 2
2
 |
 |

Ajuste del auricular y carga
con el cable USB
Ajuste el auricular
Reemplace el tapón para un mejor ajuste.
1
Presione la almohadilla hacia adentro y gírela hacia la izquierda para
desbloquearla.
2
Alinee una nueva almohadilla en la ranura.
3
Presione la almohadita hacia adentro y gírela hacia la derecha para
hasta que encaje en su lugar.
Para llevar el auricular en el otro oído, rote el brazo hacia arriba y luego
gírelo alrededor, así la almohadita estará en el otro lado antes de bajar
el brazo.
2
1
3
Carga del auricular con cable USB
1
Alinee las zonas magnéticas de ajuste del auricular y del dispositivo de
carga.
2
Conecte el dispositivo de carga al cargador de pared USB o a la
computadora portátil por 90 minutos. Las luces LED se apagan una vez
completada la carga
Accesorios de carga opcionales
Para obtener información sobre otras opciones de carga, visite
plantronics.com/accessories y busque:
• Estuche para carga Voyager Legend
• Soporte de carga Voyager Legend
• Cargador para automóviles Voyager Legend
Emparejar teléfono celular
y llamada
Empareje su teléfono celular
1
Encienda su auricular y luego seleccione:
• Toque el botón Voz
y diga “modo de emparejamiento”, o bien,
• Mantenga presionado el botón de llamada
hasta que escuche
"emparejamiento.”
2
Mientras las luces LED del auricular parpadean en rojo y azul, active
Bluetooth® en su teléfono y configúrelo para buscar nuevos dispositivos.
3
Seleccione “PLT_Legend.”
PLT_Legend
4
Si su teléfono celular le solicita ingresar una contraseña, ingrese 0000.
Una vez que se hayan emparejado correctamente, las luces LED dejan
de parpadear en rojo y azul y se escucha "emparejado exitoso.” Algunos
teléfonos pueden solicitarle permitir el acceso a los contactos para
habilitar anuncios con el nombre del interlocutor.
PLT_Legend
5
Haga una llamada de prueba desde su teléfono celular.
6
Finalice la llamada presionando el botón de llamada
. La llamada no
finaliza cuando se quita el auricular.
Empareje otro teléfono
Luego de emparejar su auricular con su teléfono, usted podría querer
emparejar otro teléfono.
1
Encienda su auricular y luego seleccione:
• Toque el botón Voz
y diga “modo de emparejamiento”, o bien,
• Mantenga presionado el botón de llamada
hasta escuchar
“emparejamiento.”
2
Mientras las luces LED del auricular parpadean en rojo y azul, active
Bluetooth® en su teléfono y configúrelo para buscar nuevos dispositivos.
3
Seleccione “PLT_Legend.”
4
Una vez que se hayan emparejado correctamente, las luces LED dejan de
parpadear en rojo y azul y se escucha "Emparejamiento correcto.”
NOTA
Algunos teléfonos pueden solicitarle permitir el acceso a los
contactos para habilitar anuncios con el nombre del interlocutor.
Responder una llamada del teléfono de escritorio mientras está
en una llamada móvil
Presione el botón de llamada una vez para finalizar la llamada en el
teléfono móvil y luego presiónelo nuevamente para responder la llamada
del teléfono de escritorio.
NOTA
Siga el mismo procedimiento cuando responde una llamada móvil
mientras está en una llamada del teléfono de escritorio.
GUÍA DE INICIO RÁPIDO
Sistema del auricular Voyager
Legend
®
CS Bluetooth
®
Diseñado en Santa Cruz, California
Utilice y reinicie
Smart Sensors
Uso de los sensores
Smart Sensors reaccionan cuando se pone o se quita los auriculares.
Al colocarse el auricular podrá:
• Contestar una llamada entrante
• Transferir una llamada activa desde su teléfono (Disponible sólo con su
teléfono móvil)
• Reanudar la transmisión de audio
Al sacarse el auricular podrá:
• Transferir una llamada activa hacia su auricular (Disponible sólo con su
teléfono móvil)
• Pausar la transmisión de audio
• Bloquear el botón de Llamada para prevenir llamadas accidentales
Probar comandos de voz
Presione el botón Voz
espere que le solicite un comando, luego
diga el comando. Por ejemplo, “¿Qué puedo decir?” le indicará toda la
lista de comandos disponibles.
Reinicio de sensores
Podría tener que reiniciar los sensores si estos no están funcionando
correctamente.
Con el auricular puesto, presione el botón de Llamada para probar los
sensores:
• La alerta de voz del tiempo de conversación le indica que los sensores
funcionan
• El sonido de tono significa que debe reiniciar los sensores
Para restablecer los sensores, cargue el auricular y colóquelo en una
superficie lisa no-metálica durante más de 10 segundos.
3
voice
2
Contestar una llamada,
seleccione:
•
Póngase el auricular para contestar la
llamada, o
•
Presione el botón de llamadas
, o bien
•
Diga “contestar” luego de que se anuncia la
llamada. (Disponible solo con su teléfono
celular)
Terminar una llamada
Presione el botón Llamada
para finali-
zar la llamada actual.
Discado por voz (función del teléfono móvil)
Presione el botón de llamada
durante 2
segundos, espere la indicación del teléfono,
y luego indíquele al teléfono que marque el
nombre de un contacto almacenado.
Silenciar el micrófono durante una llamada
Presione el botón de Silencio
. Escuchará
la confirmación “mute on” (activación del
silencio). Una alerta se repite cada 15 minu-
tos a modo de recordatorio. Vuelva a tocar
el botón de silencio para abrir el micrófono
y escuchar la confirmación “mute off”
(silencio desactivado).
Ajustar el volumen
Alterne el botón de volumen
hacia arri-
ba (+) o hacia abajo (-) durante una llamada
o mientras se realiza una transferencia de
audio.
4
¿NECESITA MÁS AYUDA?
Soporte técnico
plantronics.com/support
Guía del usuario en línea
1
Cargar, conectar y realizar una
llamada desde el teléfono de
escritorio
Carga del auricular
1
Enchufe un extremo del suministro eléctrico en el conector hembra en la
parte trasera de la base y el otro extremo en la salida del tomacorriente
que está funcionando.
2
Para cargar, coloque el auricular en la base durante 20 minutos como
mínimo.
Cómo conectar el teléfono de escritorio
Conecte los cables del teléfono de escritorio a la base.
Hacer una llamada con el teléfono de escritorio
1
Con el auricular puesto, presione el botón de control de llamadas.
2
Levante el tubo del teléfono de escritorio.
NOTA
Para la función de control de llamadas remotas (dispositivo para
descolgar el teléfono HL10 o cable EHS), consulte
www.plantronics.com/
accessories
.
3
Marque llamada de prueba desde el teléfono de escritorio.
4
Para finalizar la llamada, presione el botón de control de llamadas de los
auriculares y cuelgue el tubo.
Consejo para la resolución de problemas: Si no escucha un tono de
marcar, ajuste el conmutador deslizante (A–G) hasta que lo haga. El
ajuste preconfigurado A funciona para la mayoría de los teléfonos de
escritorio.
=
20
Consulte las instrucciones de seguridad por separado para obtener
información importante sobre la seguridad del producto antes de
instalarlo o utilizarlo.
El sistema de auricular Voyager Legend CS consiste en una base del
auricular CSEB-01 y un auricular Voyager Legend Bluetooth.
1
Estado de la llamada
•
Inactivo = sin luz
•
Llamada entrante = parpadea rápidamente
una luz azul
•
En llamada = luz azul fija
•
Llamada en silencio (mic del auricular) =
parpadea lentamente una luz azul
2
LED de encendido
•
Apagado = sin luz
•
Encendido = luz azul fija
•
En modo de emparejamiento = parpadea
luz roja/azul
•
Emparejamiento exitoso = luz azul fija
3
LED de batería del auricular (cuando está
en la base)
•
Batería completa, se detuvo la carga = luz
azul fija
•
Alta, Cargando = 3 luces azules que par-
padean cada 10 segundos
•
Media, Cargando = 2 luces azules que
parpadean cada 10 segundos
•
Baja, Cargando = 2 luces rojas que par-
padean cada 10 segundos
•
Muy baja, Cargando = 3 luces rojas que
parpadean cada 10 segundos
1
2
3
Fit Headset and Charge with
USB Cable
Fit your headset
Replace the eartip for a better fit.
1
Push in eartip and rotate to the left to unlock it.
2
Align new eartip into slot.
3
Push in eartip and rotate to the right to lock it into place.
To wear the headset on your other ear, rotate the boom upwards then
twist it around so eartip is on other side before lowering boom.
2
1
3
Charge headset with USB cable
1
Align snap-fit magnetic areas of headset and charging device.
2
Attach charging device to USB wall charger or laptop for 90 minutes.
LEDs turn off once fully charged.
Optional charging accessories
For more charging options go to plantronics.com/accessories and look
for:
• Voyager Legend Charge Case
• Voyager Legend Desktop Charge Stand
• Voyager Legend USB Car Charger
Pair Mobile Phone and Call
Pair your mobile phone
1
Power on your headset then choose:
• Tap the Voice button
and say “Pair mode,” or
• Press and hold the Call button
until you hear “Pairing.”
2
While the headset LEDs are flashing red and blue, activate Bluetooth® on
your phone and set it to search for new devices.
3
Select “PLT_Legend.”
PLT_Legend
4
If prompted by your mobile phone for a passcode enter 0000. Once
successfully paired, LEDs stop flashing red and blue and you hear
“pairing successful.” Some phones may prompt you to allow access to
contacts to enable caller name announcement.
PLT_Legend
5
Make a test call from your mobile phone.
6
End the call by pressing the Call button
. The call does not end when
you remove your headset.
Pair another phone
After pairing your headset to your phone you may want to pair another
or new phone.
1
Power on your headset then choose:
• Tap the Voice button
and say “Pair mode,” or
• Press and hold the Call button
until you hear “Pairing”
2
While the headset LEDs are flashing red and blue, activate Bluetooth® on
your phone and set it to search for new devices.
3
Select “PLT_Legend.”
4
Once successfully paired, LEDs stop flashing red and blue and you hear
“pairing successful.”
NOTE
Some phones may prompt you to allow access to contacts to enable
caller name announcement.
Answering a desk phone call while on a mobile call
Tap the Call button once to end the mobile phone call then press again
to answer your desk phone call.
NOTE
Use the same procedure when answering a mobile call while on a
desk phone call.
QUICK START GUIDE
Voyager Legend
®
CS
Bluetooth
®
Headset System
Designed in Santa Cruz, California
Use and Reset Smart Sensors
Use sensors
Smart sensors react when you put on or take off your headset.
Putting on your headset will:
• Answer an incoming call
• Transfer an active call from your phone (Available only with your mobile
phone)
• Resume streaming audio
Taking off your headset will:
• Transfer an active call to your phone handset (Available only with your
mobile phone)
• Pause streaming audio
• Lock the Call button to prevent accidental calls
Try voice commands
Tap the Voice button
wait for command request, then say a
command. For example, “What can I say?” tells you the full list of
available commands.
Reset sensors
You may need to reset the sensors if they are not working as expected.
Wearing the headset, tap the Call button to test sensors:
• Talk time voice alert means sensors are working
• A tone means sensors need to be reset
To reset the sensors, charge your headset and place on a flat non-
metallic surface for more than 10 seconds.
3
voice
2
Answer a call,
choose:
• Put on the headset to answer call, or
• Tap the Call button
or
• Say “answer” after call is announced.
(Available only with your mobile
phone)
End a call
Tap the Call button
to end current
call.
Voice dial (mobile phone feature)
Press the Call button
for 2
seconds, wait for phone prompt and
then tell the phone to dial the name
of a stored contact.
Mute the microphone during a call
Tap the Mute button
. You will hear
“mute on” confirmation. An alert re-
peats every 15 minutes as a reminder.
Tap the Mute button again to open
the microphone and hear “mute off”
confirmation.
Adjust the volume
Toggle the Volume button
up (+)
or down (–) during a call or while
streaming audio.
4
© 2013 Plantronics, Inc. All rights reserved. Plantronics and Voyager Legend are trademarks or
registered trademarks of Plantronics, Inc. The Bluetooth® word mark and logos are owned by
the Bluetooth SIG, Inc. and any use of such marks by Plantronics, Inc. is under license. All other
trademarks are the property of their respective owners.
Patents: US 8,208,673; D617,316; D681,003; 681,014; D681,002; D662,089; BR 3020120011493;
CN ZL201230489876.9; ZL201230059196.3; EM 002109637-0001; 002109637-0002;
002109637-0003; 001315261-0001; IN 243252; TW D151481; Patents Pending.
1
Charge, Connect, and Call from
Desk Phone
Charge your headset
1
Plug one end of power supply into power jack on back of the base and
other end into working power outlet.
2
To charge, dock headset in base for minimum of 20 minutes.
Connect desk phone
Connect cables from desk phone to base.
Make desk phone call
1
While wearing headset, press Call button.
2
Remove the desk phone handset.
NOTE
For remote call control capability (HL10 lifter or EHS cable), see
plantronics.com/accessories
.
3
Dial test call from desk phone.
4
End call by pressing headset Call button and hang up the handset.
Troubleshooting Tip: If you do not hear a dial tone, adjust the slide
switch (A–G) until you do. Default setting A works for majority of desk
phones.
=
20
1
Call status
• Idle = unlit
• Incoming call = fast blue flash
• On call = solid blue
• Call (headset mic) muted = slow blue
flash
2
Power LED
• Power off = unlit
• Powered = solid blue
• In pairing mode = red/blue flashing
• Pairing successful = solid blue
3
Headset battery LED (when docked)
• Full Battery, charging stopped = solid
blue
• High, Charging = 3 Blue flashes every
10 seconds
• Medium, Charging = 2 Blue flashes
every 10 seconds
• Low, Charging = 2 Red Flashes every
10 seconds
• Critical, Charging = 3 Red flashes
every 10 seconds
1
2
3
Recyclable where
facilities exist
NEED MORE HELP?
Technical support
plantronics.com/support
Online user guide
FCC Regulatory Information
FCC Requirements Part 15
This device complies with part 15 of the FCC Rules. Operation is subject to the following two
conditions: (1) This device may not cause harmful interference, and (2) this device must accept any
interference received, including interference that may cause undesired operation.
Note: This equipment has been tested and found to comply with the limits for a Class B digital
device, pursuant to part 15 of the FCC Rules. These limits are designed to provide reasonable
protection against harmful interference in a residential installation. This equipment generates,
uses, and can radiate radio frequency energy and, if not installed and used in accordance with
the instructions, may cause harmful interference to radio communications. However, there is no
guarantee that interference will not occur in a particular installation. If this equipment does cause
harmful interference to radio or television reception, which can be determined by turning the
equipment off and on, the user is encouraged to try to correct the interference by one or more of
the following measures: 1. Reorient or relocate the receiving antenna. 2. Increase the separation
between the equipment and receiver. 3. Connect the equipment into an outlet on another
circuit that to which the receiver is connected. 4. Consult the dealer or an experienced radio/TV
technician for help.
FCC Registration Information — Part 68
This equipment complies with Part 68 of the FCC rules and the requirements adopted by ACTA.
On the exterior of this equipment is a label that contains a product identifier in the format
US:AAAEQ##TXXXX. If requested, this information must be provided to your telephone company. A
plug and jack used to connect this equipment to the premises wiring and telephone network must
comply with the applicable FCC Part 68 rules and requirements adopted by ACTA. A compliant
telephone cord and modular plug is provided with this product. It is designed to be connected
to a compatible jack that is also compliant. See installation instructions for details. The REN is
useful to determine the quantity of devices you may connect to your telephone line. Excessive
RENs on a telephone line may result in the devices not ringing in response to an incoming call.
In most, but not all areas, the sum of the RENs should not exceed five (5.0). To be certain of the
number of devices you may connect to your line, as determined by the REN, contact your local
telephone company. For products approved after August 8, 2001, the REN for this product is
part of the product identifier that has the format US:AAAEQ##TXXXX. The digits represented by
## are the REN without the decimal point. (For example, 03 represents a REN of 0.3.) For earlier
producers, the REN is separately shown on the label. If this telephone equipment causes harm
to the telephone network, the telephone company will notify you in advance that temporary
discontinuance of service may be required. But if advance notice isn’t practical, the telephone
company will notify the customer as soon as possible. Also, you will be advised of your right to file
a complaint with the FCC if you believe it is necessary. The telephone company may make changes
in its facilities, equipment, operations, or procedures that could affect the proper functioning of
your equipment. If they do, you will be notified in advance in order for you to make necessary
modifications to maintain uninterrupted service. If trouble is experienced with this unit, for repair
or warranty information, please contact customer service at (800) 544-4660. If the equipment
is causing harm to the network, the telephone company may request that you disconnect the
equipment until the problem is resolved.
DO NOT DISASSEMBLE THIS EQUIPMENT: it does not contain any user-serviceable components.
We recommend the installation of an AC surge arrester in the AC outlet to which this equipment is
connected. Telephone companies report that electrical surges, typically lighting transients, are very
destructive to customer terminal equipment connected to AC power sources.
Exposure to RF Radiation
The internal wireless radio operates within the guidelines found in radio frequency safety
standards and recommendations, which reflect the consensus of the scientific community.
Independent studies have shown that the internal wireless radio is safe for use by consumers. Visit
plantronics.com for more information.
In order to comply with FCC RF Exposure requirements, the base must be installed and operated
such that a minimum separation distance of 20 cm is maintained between the base and all
persons during normal operation. The headset complies with FCC radiation limits set forth for an
uncontrolled environment.
NOTE Modifications not expressly approved by Plantronics, Inc. could void the user’s authority to
operate the equipment.
BC
Plantronics, Inc.
345 Encinal Street
Santa Cruz, CA 95060
United States
Please refer to the separate safety instructions for important product
safety information prior to installation or use.
The Voyager Legend CS Headset System consists of a CSEB-01 headset
base and a Voyager Legend Bluetooth headset.
89650-01 (07.13)