ProForm T35 English Manual
ProForm T35 Manual
 |
View all ProForm T35 manuals
Add to My Manuals
Save this manual to your list of manuals |
ProForm T35 manual content summary:
- ProForm T35 | English Manual - Page 1
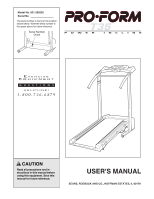
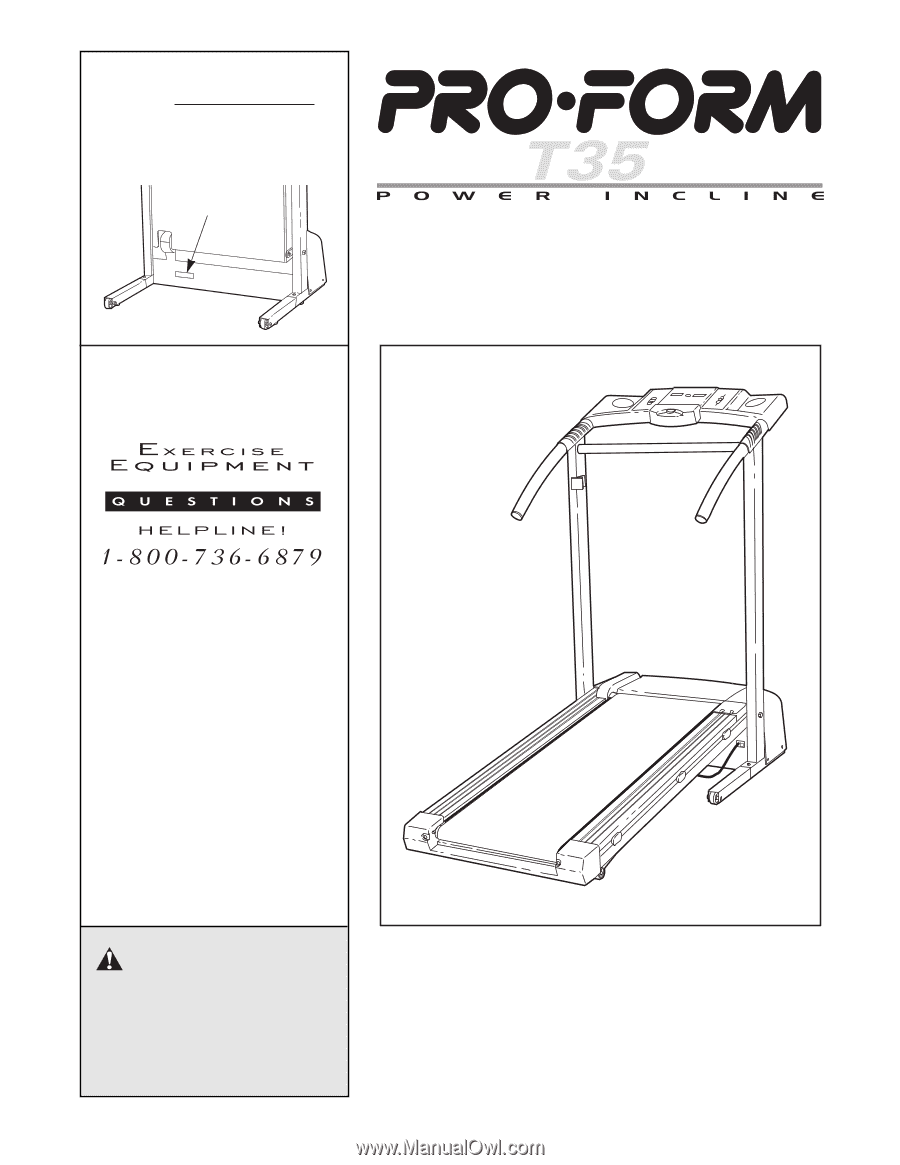
shown below. Write the serial number in the space above for future reference. Serial Number Decal CAUTION Read all precautions and instructions in this manual before using this equipment. Save this manual for future reference. USER'S MANUAL SEARS, ROEBUCK AND CO., HOFFMAN ESTATES, IL 60179 - ProForm T35 | English Manual - Page 2
FOLD AND MOVE THE TREADMILL 10 TROUBLE-SHOOTING 12 CONDITIONING GUIDELINES 14 ORDERING REPLACEMENT PARTS Back Cover FULL 90 DAY WARRANTY Back Cover Note: An EXPLODED DRAWING and a PART LIST are attached in the center of this manual. Save the EXPLODED DRAWING and PART LIST for future reference - ProForm T35 | English Manual - Page 3
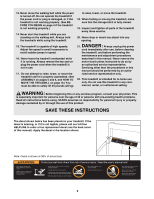
Always unplug the power cord immediately after use, before cleaning the treadmill, and before performing the maintenance and adjustment procedures described in this manual. Never remove the motor hood unless instructed to do so by an authorized service representative. Servicing other than the - ProForm T35 | English Manual - Page 4
, please review the drawing below and familiarize yourself with the parts that are labeled. Console Water Bottle Holder (Bottle not included) Storage Latch Handrail Key/Clip Upright Walking Belt Foot Rail Rear Roller Adjustment Bolts BACK RIGHT SIDE Circuit Breaker Power Cord Incline Leg - ProForm T35 | English Manual - Page 5
amount of lubricant may be transferred to the top of the walking belt or the shipping carton. This is a normal condition and does not affect treadmill performance. If there is lubricant on top of the walking belt, simply wipe off the lubricant with a soft cloth and a mild, non-abrasive cleaner - ProForm T35 | English Manual - Page 6
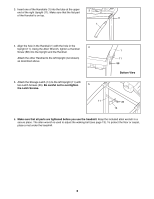
Latch Screws (35). Be careful not to overtighten 5 the Latch Screws. 1 11 88 Bottom View 11 35 14 6. Make sure that all parts are tightened before you use the treadmill. Keep the included allen wrench in a secure place. The allen wrench is used to adjust the walking belt (see page 13). To - ProForm T35 | English Manual - Page 7
be seriously damaged by sudden voltage changes in your homeÕs power. Voltage surges, spikes, and noise interference can result from weather conditions or from other appliances being turned on or off. To decrease the possibility of your treadmill being damaged, always use a surge suppressor with your - ProForm T35 | English Manual - Page 8
console, read the following precautions. ¥ Do not stand on the walking belt when turning on the power. ¥ Always wear the clip (see the drawing at the lower right) while using the treadmill. When the key is removed from the console, the walking belt will stop. ¥ Adjust the speed in small increments - ProForm T35 | English Manual - Page 9
1 Insert the key into the power switch. Inserting the key will not turn on the displays. The displays position. 4 Adjust the incline of the treadmill as desired. To change the incline of the treadmill, press the top or bottom of the incline control until the desired incline level is reached. 5 - ProForm T35 | English Manual - Page 10
HOW TO FOLD AND MOVE THE TREADMILL HOW TO FOLD THE TREADMILL FOR STORAGE Before folding the treadmill, unplug the power cord. Caution: You must be able to safely lift 45 pounds (20 kg) in order to raise, lower, or move the treadmill. 1. Hold the treadmill with your hands in the locations shown at - ProForm T35 | English Manual - Page 11
as shown. Using your left thumb, press the storage latch and hold it. Pivot the treadmill until the frame and foot rail are past the storage latch. 2. Hold the treadmill firmly with both hands, and lower the treadmill to the floor. To decrease the possibility of injury, bend your legs and keep your - ProForm T35 | English Manual - Page 12
TROUBLE-SHOOTING Most treadmill problems can be solved by following the simple steps below. in. b. Make sure that the power cord is plugged in. c. Remove the key from the console. Reinsert the key fully into the console. See step 1 on page 9. d. If the treadmill still will not run, please call - ProForm T35 | English Manual - Page 13
, and the right bolt counterclockwise, 1/4 of a turn each. Be careful not to over- tighten the walking belt. Plug in the power cord, insert the key and run the treadmill for a few minutes. Repeat until the walking belt is centered. b. If the walking belt has shifted to the right, first remove - ProForm T35 | English Manual - Page 14
health problems. system, the key to achieving the heart rate as a guide. The chart below shows the speed and incline of the treadmill until your treadmill until your heart rate is near one of the lower two numbers in your A well-rounded workout includes the following three important parts - ProForm T35 | English Manual - Page 15
flexibility of your muscles and will help to prevent post-exercise problems. Exercise Frequency To maintain or improve your condition, complete three workouts each week if desired. The key to success is to make exercise a regular and enjoyable part of your everyday life. SUGGESTED STRETCHES The - ProForm T35 | English Manual - Page 16
Handrail Key/Clip Screw Battery Cover Foot Rail Lift Motor Frame Guide Speed Incline Leg 83 2 Rear Roller Adj. Bolt 84 1 Rear Endcap 85 1 Latch Decal 86 1 Rear Roller 87 1 1Ó Grommet 88 2 Handrail Screw # 1 8Ó White Wire, Pigtail # 1 UserÕs Manual * Includes all parts - ProForm T35 | English Manual - Page 17
EXPLODED DRAWINGÑModel No. 831.299202 R1299A 22 2 12 46 13 9 10* 8 3 88 11 21 1 41 61 13 13 4 13 5 48 13 13 76 14 34 35 36 37 48 47 38 45 44 49 39 40 25 38 33 43 13 78 71 73 50 48 51 39 27 20* 18 19 17 29 28 31 30 23 3 24 88 25 54 55 70 56 25 26 49 62 42 73 25 72 5 67 68 - ProForm T35 | English Manual - Page 18
of your PROFORM¨ T35 treadmill are listed on a decal attached to the frame. See the front cover of this manual to find the location of the decal. All replacement parts are available for immediate purchase or special order when you visit your nearest SEARS Service Center. To request service or to
-
 1
1 -
 2
2 -
 3
3 -
 4
4 -
 5
5 -
 6
6 -
 7
7 -
8
-
9
-
10
-
11
-
12
-
13
-
14
-
15
-
16
-
17
-
18
 |
 |
¤
USER’S MANUAL
Serial Number
Decal
Model No. 831.299202
Serial No.
The serial number is found in the location
shown below. Write the serial number in
the space above for future reference.
SEARS, ROEBUCK AND CO., HOFFMAN ESTATES, IL 60179
CAUTION
Read all precautions and in-
structions in this manual before
using this equipment. Save this
manual for future reference.