Pyle PIPCAMHD47 Instruction Manual
Pyle PIPCAMHD47 Manual
 |
View all Pyle PIPCAMHD47 manuals
Add to My Manuals
Save this manual to your list of manuals |
Pyle PIPCAMHD47 manual content summary:
- Pyle PIPCAMHD47 | Instruction Manual - Page 1
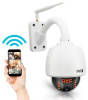
OUTDOOR WIRELESS/WIRED HD P2P NETWORK CAMERA (with H.264 image compression) INSTRUCTION MANUAL Models: PIPCAMHD46, PIPCAMHD47 - Pyle PIPCAMHD47 | Instruction Manual - Page 2
Views ...5 1.4 PC System Requirements ...7 1.5 Hardware Installation ...7 2. INSTALLATION AND SETTINGS ...8 2.1 Network Connection ...8 2.2 Browser Settings (For IE only) ...9 2.3 UPnP Service ...10 2.4 IPCam IP Address Search Tool (for IE browser only 11 2.5 Install the OCX ActiveX (For IE only - Pyle PIPCAMHD47 | Instruction Manual - Page 3
4.7.2 Auto Maintain ...39 4.7.3 System ...39 4.8 Dropbox ...39 5. PLAYBACK for IE browser only...41 6. FREQUENTLY ASKED QUESTIONS ...43 7. SPECIFICATIONS...48 8. OBTAINING TECHNICAL SUPPORT ...49 3 - Pyle PIPCAMHD47 | Instruction Manual - Page 4
pls check Quick Start Guide, as it is very easy to set up. IMPORTANT NOTICE The various screens throughout this owner's manual will look different is based on the TCP/IP standard, build-in WEB server which supports Internet Explorer. Therefore the management and maintenance of your camera becomes - Pyle PIPCAMHD47 | Instruction Manual - Page 5
NFS RTSP RTP RTCP. ☆ Supports WEP/WPA/WPA2 encryption ☆ Supports IE, Firefox, Safari, and Google chrome browsers 1.2 Packing List ● IP Camera ● Wi-Fi Antenna ● User Manual & Quick Setup Guide ● DC Power Supply ● CD ● Network Cable ● * Built-in 64GB SD Card *PIPCAMHD47 Model ONLY 1.3 Product Views 5 - Pyle PIPCAMHD47 | Instruction Manual - Page 6
1.3.1 Rear View 1 Wireless Antenna: WI-FI Antenna (rotate to vertical position as shown above). 2 Housing: Alloy waterproof housing. 3 Infrared LEDs: infrared LEDs with 15-20 meters night vision. 4 LENS: zoom lens. 1.3.2 Bottom View Figure 1.2 Audio Output: The jack is used to connect an external - Pyle PIPCAMHD47 | Instruction Manual - Page 7
set back to the factory default settings. (Please keep the power on when doing a RESET). 1.4 PC System Requirements System configuration requirements: CPU: 2.06 GHZ or above. Memory: 256M or above. Network Card: 10M or above. Display Card: 64M or above memory. Recommended Operating system: Windows - Pyle PIPCAMHD47 | Instruction Manual - Page 8
2. INSTALLATION AND SETTINGS System Requirement: Operating System: Windows 2000 / XP / Vista / 7 Network Protocol: TCP/IP Network Structure: Applies to all network connections 10/100M LAN platform Browser: Internet Explorer 6.0 or above. Firefox, Google, Safari, or Chrome. 2.1 Network Connection - Pyle PIPCAMHD47 | Instruction Manual - Page 9
Internet IP camera 2.2 Browser Settings (For IE only) OCX will be downloaded automatically when you login to the IP Camera, but you might have to set the IE browser to enable the OCX to be downloaded automatically after signing in. Steps as below: 1. Close the firewall of your computer. 2. Change - Pyle PIPCAMHD47 | Instruction Manual - Page 10
video, please close your firewall or anti-virus software, and try again. 2.3 UPnP Service UPnP could help you to find your camera's IP more quickly. For Window XP . Enable it, then it can allow your operating system to support UPnP. Alternatively, you can also click "Start" menu>"Internet Explorer - Pyle PIPCAMHD47 | Instruction Manual - Page 11
2.4 IPCam IP Address Search Tool (for IE browser only) Step 1: Use tool "SearchIPCam.exe" to find IP address of LAN. Step 2: Double click "Search IPCam" on your desktop, the camera's IP & MAC address will be displayed. If you want to search again, click "Search". Step 3: Double-click the IP address - Pyle PIPCAMHD47 | Instruction Manual - Page 12
2.5 Install the OCX ActiveX (For IE only) Install the OCX ActiveX for the first time login; You will get tips after enter user and password in login page. Download the OCX file, then double click to install it automatically. After OCX installed fully, then input the user and password to login the - Pyle PIPCAMHD47 | Instruction Manual - Page 13
13 - Pyle PIPCAMHD47 | Instruction Manual - Page 14
3. SOFTWARE OPERATION 3.1 Software operation for IE Browser Choose your desired language, input correct user name and password, then click "Login" User name: admin Password: Pylecam, : Choose languages here 14 - Pyle PIPCAMHD47 | Instruction Manual - Page 15
3.2 Software Operation For Chrome, Firefox, Safari: Choose the suitable language, input correct user name and password, then click "Login" User name: admin Password: Pylecam Choose the login mode. 15 - Pyle PIPCAMHD47 | Instruction Manual - Page 16
QuickTime: Choose QuickTime, login to the camera directly. if there is prompt for installing the QuickTime player, just download and install it. Sever Push: For Firefox, Chrome, or Safari browser. VLC: If you use VLC, should download the VLC player first. During the VLC installation, you must enable - Pyle PIPCAMHD47 | Instruction Manual - Page 17
Figure 2.3 3.3 Functions 3.3.1 Three main functions (For IE): Live video: Click it, back to live video window from "Playback" or "Params settings" Playback:Click to query and playback the video files (Details see 5 Playback) Params Settings:Setting the camera's parameters (Details see 4 Params - Pyle PIPCAMHD47 | Instruction Manual - Page 18
color camera if audio device connected. Click it again, will stop talk function. can talk between PC and Clear Alarm: Click to stop the alarm manually when there is an alarm triggered, and pop-up prompt as below: Fullscreen: Click to get fullscreen view; OSD Settings: Click it will pop-up - Pyle PIPCAMHD47 | Instruction Manual - Page 19
OSD Color: Including Disabled, Black, Red, Green, Blue, Purple, Gray, Silver, Yellow, Olive, Turquoise, White, Light Blue etc. Frequency: Including 50HZ, 60HZ, Outdoor. 50HZ/60HZ for the users who use 50HZ/60HZ frequency, outdoor for the users who want to use this camera to monitor an outdoor - Pyle PIPCAMHD47 | Instruction Manual - Page 20
Capture: Click to take snapshot, the picture be saved in the PC to its appointed path as JPG format, will pop-up the snapshot, right click the picture to save it. Fullscreen: Click to have fullscreen view; : Click to exit fullscreen. OSD Settings: Click it will pop-up the OSD settings interface, - Pyle PIPCAMHD47 | Instruction Manual - Page 21
NOTE: You can choose Mirror and Flip function if you set up the camera in a special position, upside down for example. 3.5.2 Top Menu For VLC Mode: This will be the same as 3.3.1 TOP Menu For QuickTime Mode. 3.6 Left Side Menu: 3.6.1 Left Side Menu For IE browser There are some basic operation icons - Pyle PIPCAMHD47 | Instruction Manual - Page 22
the special position you need to set, click Set Preset button (1-9). it will pop-up a dialog frame (Figure 4.0), choose any number Call Preset: It supports 9 preset positions. If you want to monitor an important area quickly and precisely, just click Call Preset Position button it will pop-up - Pyle PIPCAMHD47 | Instruction Manual - Page 23
NOTE: If you want to view 4/9 channels, you should set the Multi-Device firstly (See section 4.13 Multi-Device Settings). PTZ speed: set value from 1 to 100, click the icon, it will change back to the factory settings. Brightness: set value from 0 to 255, click the icon, it will change back to the - Pyle PIPCAMHD47 | Instruction Manual - Page 24
the movement. NOTE: It is the same operation as left, right, up-left, up-right, down-left, down-right etc. Figure 4.5 Set Preset: It supports 9 preset positions. First, control the camera to rotate to the special position you need to set, click Set Preset button (1-9). it will pop-up a dialog - Pyle PIPCAMHD47 | Instruction Manual - Page 25
If you want to use Call Preset, you have to Set Preset first. NOTE: If you set different positions with a same number, camera will record the last position setting only. Cruise: Preset cruise, camera can cruise according to the different presets you set. Click this icon, the camera will rotate up - Pyle PIPCAMHD47 | Instruction Manual - Page 26
4. SETTINGS 4.1 Status----Device Info. Click " Settings" icon select "Status", it will show the basic information such as "Device ID", "Device Client Version", "Device System Version", "Description", "IP Address", "UPNP Status", "DDNS Status" etc. Default device name is "IP Camera", users can - Pyle PIPCAMHD47 | Instruction Manual - Page 27
-Device Settings Note: Multi-Device only can be set under IE Browser, for Firefox, Safari, Chrome, you cannot see these setting, as they do not support ActiveX. Click "Multi-Device Settings" to enter the interface: 27 - Pyle PIPCAMHD47 | Instruction Manual - Page 28
IP, input host(for camera in different network, you will need to input external ip address/DDNS address), web port, media port, username, and password manually, click Add to submit. 4.2.3 Date & Time Date Time: Display the current date and time Time Zone: Set the current time zone Selest the working - Pyle PIPCAMHD47 | Instruction Manual - Page 29
adjust the volume of Speaker. 4.3 Network Settings 4.3.1 IP Network Type: User can set Dynamic Address to obtain IP directly from router, or set a Static IP manually. Media Port: User can set the Media port to transfer video if need to view camera remotely.(Work with DDNS or external IP) Web Port - Pyle PIPCAMHD47 | Instruction Manual - Page 30
the camera will do port forwarding automatically. It's helpful for using DDNS, if your router support UPNP, then you no need do port forwarding in router. NOTE: Here UPNP only for : If your router doesn't support UPNP function, it may show error information. So we recommend you do port forwarding - Pyle PIPCAMHD47 | Instruction Manual - Page 31
for free using. Default user: admin; password: Pylecam;User can change the password here or change a new P2P GUID here. 4.3.6 FTP Settings Set FTP service, Snapshots will be delivered to appointed FTP server when alarmed. Enable FTP: Set FTP function ON/OFF. FTP Server: Set FTP server address. 31 - Pyle PIPCAMHD47 | Instruction Manual - Page 32
that the folder you plan to store images exists. (The camera cannot create the folder itself). Also, the folder must be erasable. FTP Mode: It supports standard (POST) mode and passive (PASV) mode. Click save to submit, click test to check the settings. NOTE: When alarmed, there will be 3 snapshots - Pyle PIPCAMHD47 | Instruction Manual - Page 33
4.4 Video Info. Click "Video Info" to enter the interface as below: There are two options for stream, Main-Stream and Sub-Stream, you can set the stream based on the actual operation environment, for example, if the bandwidth is good enough, set Main-Stream as Initial-Stream, or choose Sub-Stream if - Pyle PIPCAMHD47 | Instruction Manual - Page 34
, you should set "Motion Detection" to "ON", then press left mouse, drag the mouse onto video area to set the detection zone, and save it, supports 3 areas. 34 - Pyle PIPCAMHD47 | Instruction Manual - Page 35
, 30s, 60s. ● Lose SD-Card Alarm: Set alarm triggered ON/OFF if the SD-Card is lost. ● Alarm Input: Set alarm input ON/OFF, it supports NO/NC external alarm device, choose the correct mode 35 - Pyle PIPCAMHD47 | Instruction Manual - Page 36
Note: This feature will suitable for IE only, as other broswers not support IE activeX. Enable Alarm Record: Camera will record to the path user the record time when Alarm happens. Such as 2 mins. Manual Record Pack time: User can set the manual record time, such as 2 hours. Once click the "Record - Pyle PIPCAMHD47 | Instruction Manual - Page 37
Set the Pre-recording time, can be from 1 to 6 seconds. Record Stream: Choose the stream here:Main Stream and Sub Stream. 4.7 Cruise Cruise works support 9 directions; User can set the locations, then camera can keep cruising under the directions. Cruise Name: User can set the a Name for the crusing - Pyle PIPCAMHD47 | Instruction Manual - Page 38
Preset: Camera will follow from 1 to 9; User can set different location with different Number. Residert Time: Camera stay time: Such as, Preset 1; Resident time: 3 seconds; Then when camera in preset 1 location, will stay for 3 seconds. Speed: camera moving speed. Note: After setup, user can go to - Pyle PIPCAMHD47 | Instruction Manual - Page 39
4.7.2 Auto Maintain Auto Maintain provides an auto protection of hardware; Set a time such as 24:00; Then camera will auto reboot; and refresh the hardware proformance. 4.7.3 System Reboot Device: Camera will get reboot. Restore factory settings: User can restore factory settings once forget - Pyle PIPCAMHD47 | Instruction Manual - Page 40
40 - Pyle PIPCAMHD47 | Instruction Manual - Page 41
5. PLAYBACK for IE browser only Note: Playback function shows under IE ActiveX mode only. Other broswers not support this feature. Click login the playback interface, this is for SD Card files playback. So If User not have SD card in the camera or - Pyle PIPCAMHD47 | Instruction Manual - Page 42
42 - Pyle PIPCAMHD47 | Instruction Manual - Page 43
button unless you are sure you want to do it. 2. There is no picture displayed in IE browser (For IE only) It maybe the ActiveX problem, If using the IE browser for the first time, you should install the ActiveX control, details as below: Before login, click the ActiveX icon it - Pyle PIPCAMHD47 | Instruction Manual - Page 44
, DirectX function is disabled, which will cause slow display of images and abnormal color. Possible Reason 2: Hardware problem, graphics card doesn't support image acceleration and hardware zooming functions. (For hardware issue, the only solution is to change your graphics card). Solution: Install - Pyle PIPCAMHD47 | Instruction Manual - Page 45
it means your DirectX is not installed properly or hardware doesn't support this function. 9. Fail to use DDNS Possible Reason 1: The PC Servers" 3. Click the Add New button, pop-up below: Figure 13.1 Fill in the service port (don't use 80), IP address of the camera, then click Save NOTE: The port - Pyle PIPCAMHD47 | Instruction Manual - Page 46
Fill in the web port, for example port 85, IP address as 192.168.1.100, click Save. (1) Repeat step 3 above, it will pop-up the window again, fill in the media port as 38401, IP address as 192.168.1.100, then save. (2) Then check the "Device Info" -"DDNS Status", It will show DDNS: http://test. - Pyle PIPCAMHD47 | Instruction Manual - Page 47
Figure 13.3 47 - Pyle PIPCAMHD47 | Instruction Manual - Page 48
-45 TCP/IP HTTP DNS DHCP PPPoE SMTP FTP SSL TFTP NTP Supported Protocol ARP/RARP NFS RTSP RTP RTCP Communication Compress rate level 128Kbps~4Mbps above (suggested 3.0GHz) PC System Requirements Memory Size Display Card Supported OS 256MB or above (suggested 1.0GHz) 64M or above Microsoft - Pyle PIPCAMHD47 | Instruction Manual - Page 49
Guide has not answered, please email us. [email protected] If your camera does not support some special functions shown in this manual, please contact our technical support that is, in strict accordance with the manufacturer's instructions, it may cause interference to radio and television
-
 1
1 -
 2
2 -
 3
3 -
 4
4 -
 5
5 -
 6
6 -
 7
7 -
8
-
9
-
10
-
11
-
12
-
13
-
14
-
15
-
16
-
17
-
18
-
19
-
20
-
21
-
22
-
23
-
24
-
25
-
26
-
27
-
28
-
29
-
30
-
31
-
32
-
33
-
34
-
35
-
36
-
37
-
38
-
39
-
40
-
41
-
42
-
43
-
44
-
45
-
46
-
47
-
48
-
49
 |
 |

OUTDOOR WIRELESS/WIRED HD P2P NETWORK CAMERA
(with H.264 image compression)
INSTRUCTION MANUAL
Models:
PIPCAMHD46, PIPCAMHD47