Pyle PTCDCS32BT User Manual
Pyle PTCDCS32BT Manual
 |
View all Pyle PTCDCS32BT manuals
Add to My Manuals
Save this manual to your list of manuals |
Pyle PTCDCS32BT manual content summary:
- Pyle PTCDCS32BT | User Manual - Page 1
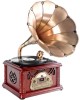
CLASSICAL TURNTABLE WITH AM/FM RADIO , CD PLAYER, CASSETTE, USB RECORDING, AUX IN, BLUETOOTH - Pyle PTCDCS32BT | User Manual - Page 2
to alert the user to the presence of important operating and maintenance (servicing) instructions in the literature accompanying the appliance. IMPORTANT SAFETY INSTRUCTIONS 1. Read these instructions. 2. Keep these instructions. 3. Heed all warnings. 4. Follow all warnings. 5. Do not use this - Pyle PTCDCS32BT | User Manual - Page 3
to clean this unit with chemical solvents as this might damage the nish. Use a clean dry cloth. • Operate controls and switches as described in the manual. • Before turning On the power, make certain the AC power cord is plugged in. • Store your CDs, In a cool area to avoid damage from heat - Pyle PTCDCS32BT | User Manual - Page 4
POWER SOURCE This product is designed to operate on 120V 60Hz AC only. Attempting to operate this system from any other power source may cause damage to the system, and such damage is not covered by your warranty. NOTE: You will note that this system is equipped with domestic standard AC power - Pyle PTCDCS32BT | User Manual - Page 5
LOCATION OF CONTROLS AND INDICATORS FRONT PANEL 1) Turntable. 2) Stylus. 3) Speakers. 4) Tuning Control Knob. 5) FM Dial Scale. 6) Bluetooth Indicator. 7) AM DialScale. 8) AM/FM/PH/CD/USB/TAPE Function Selector. 9) USB Socket. 10) RANDOM Control Button. 11) REPEAT Control Button. 12) PROGRAM - Pyle PTCDCS32BT | User Manual - Page 6
LOCATION OF CONTROLS AND INDICATORS BACK PANEL PHONOGRAPH 32.) Antenna Jack/FM Antenna. 33.) AUX IN (Audio input). 34.) AC Power Cord. 35.) 45 RPM Adapter. 36.) Speed Selector(33/45/78 RPM). 37.) Tone Arm with Stylus. 38.) Speed Display. 39.) - Pyle PTCDCS32BT | User Manual - Page 7
PARTS LIST A) Horn Speaker (1pc) B) U- type Bracket (1pc) C) Middle Tube (1pc) D) Bottom Tube (1pc) E) Screw A (2pc) (KM5*8mm) F) Screw B (2pc) (PM4*16mm) G) Screw C (3pc) (BA4*18mm) H) Screw D (4pc) (KA3*14mm) Important note: Assemble this unit on clean and smooth surface, so as not to scratch or - Pyle PTCDCS32BT | User Manual - Page 8
BIG HORN SPEAKER ASSEMBLY INSTRUCTIONS 1.) Look at picture Fig1. According to the correct position, . 3.) Look at Fig4.1t shows the assembled big horn speaker apparatus 4.) Look at Fig5. Put the PTCDCS32BT host cabinet at on the table. Line the holes on the bottom tube (D) up as shown with the - Pyle PTCDCS32BT | User Manual - Page 9
. Rotate clockwise four screws D(H) into the holes on the sides and one screw B(F) inot the middle and tighten. 8.) Look at Fig8. It shows the assembled PTCDCS32BT host cabinet with the U-type bracket (B) apparatus. 9.) Look at Fig9. Nest the assembled big horn speaker (A) into the tubing of the - Pyle PTCDCS32BT | User Manual - Page 10
OPERATING INSTRUCTIONS RADIO OPERATION 1) Rotate the OFF/VOLUME control clockwise until a 'click' is heard and set the volume to a low level. 2) Set the Function selector(AM/FM/ - Pyle PTCDCS32BT | User Manual - Page 11
5) Press the OPEN/CLOSE button again to close the CD drawer. The disc will spin for a few seconds while the player is reading the disc, then the disc stops spinning and start to play the rst track on the disc. The playing track number, Cd and the folder name will be shown on the screen 5 seconds in - Pyle PTCDCS32BT | User Manual - Page 12
PROGRAMMED PLAYBACK This feature allows you to program up to 20 CD tracks and 99 MP3 tracks on a disc for playback in any desired order. 1) Press the PROGRAM button to enter the Program mode. The program number brie y shows' P01', the Program indicator ashes. 2) Press SKIP REV. or SKIP FWD. button - Pyle PTCDCS32BT | User Manual - Page 13
sure that there is no excess slack in the cassette that could become jammed in the mechanism. Refer to the Care and Maintenance section for instructions on removing excess slack from the cassette. 1) Rotate the OFF/VOLUME control clockwise until a 'click' is heard and set the volume to a low level - Pyle PTCDCS32BT | User Manual - Page 14
ann reaches the end of the record, it will continue turning until PHONO switch is pressed again. NOTE: Do not tum or stop the turntable manually. Moving or jarring the Turntable without securing the Tone Arm clamp could result in damage to the Tone Arm. SKIPPING TRACKS AND HIGH SPEED MUSIC - Pyle PTCDCS32BT | User Manual - Page 15
tone can be heard, then the Bluetooth indicator will be ashing. 2. Turn on your Bluetooth device and scan. It will be displayed as "Pyle Turntable" when discovered by your Bluetooth device. Enter password "0000" during pairing if necessary 3. When the unit is paired with your Bluetooth device - Pyle PTCDCS32BT | User Manual - Page 16
RECORDING tracks from CD/MP3/PHONO/CASSTTE to USB CD RECORDING 1) Rotate the VOLUME control clockwise and set the volume to a low level. 2) Set the function selector (AM/FM/PH/CD/USB/TA) to CD/USB position, place CD disc into the CD drawer, press PLAY/PAUSE to play the disc. 3) Press SKIP FWD.or - Pyle PTCDCS32BT | User Manual - Page 17
choose the song you want to delete. Press DELETE one time only delete 1 track. CARE AND MAINTENANCE CASSETTE CARE Two common causes of trouble experienced when using cassettes are: 1) Tape jamming- Leading to uneven speed in playback. 2) Tape entangling- the tape wraps itself around vital parts of - Pyle PTCDCS32BT | User Manual - Page 18
CARE OF THE CABINETS You should care for the cabinet as you would care for any piece of the furniture. When the cabinet becomes dusty wipe it with a soft, non-abrasive dust cloth. If the cabinet becomes smudged with ngerprints you may use any good quality commercial dusting and polishing spray - Pyle PTCDCS32BT | User Manual - Page 19
• Check that there are no loose layers of tape visible through the cassette centre window (see Fig. 1). Take up any loose layers, using a pencil or hexagonally barrelled ballpoint pen, before inserting the cassette into the machine (see Fig.2). • If the cassette feels tight while performing
-
 1
1 -
 2
2 -
 3
3 -
 4
4 -
 5
5 -
 6
6 -
 7
7 -
8
-
9
-
10
-
11
-
12
-
13
-
14
-
15
-
16
-
17
-
18
-
19
 |
 |

CLASSICAL TURNTABLE WITH AM/FM RADIO ,
CD PLAYER, CASSETTE, USB RECORDING,
AUX IN, BLUETOOTH