Pyle SQBK-2 Instruction Manual
Pyle SQBK-2 Manual
 |
View all Pyle SQBK-2 manuals
Add to My Manuals
Save this manual to your list of manuals |
Pyle SQBK-2 manual content summary:
- Pyle SQBK-2 | Instruction Manual - Page 1
PLEASE READ THIS MANUAL CAREFULLY BEFORE OPERATION Features • Lightweight, High-Quality Durable PP Plastic • 10 anti-slip foot pads on the unit to keep the board stable while doing push ups. Instructions 1. Set up the push-up board on an even surface. Secure the handles in the appropriate color - Pyle SQBK-2 | Instruction Manual - Page 2
. www.SQUATZ.com Important Safety Precautions Please keep this instruction manual in a safe place for future reference 1. Please allow equipment. 8. If you encounter any problems or need our assistance during installation or use, please contact customer service. 10-Week Super Training Program 30-
-
 1
1 -
 2
2
 |
 |

www.SQUATZ.com
PLEASE READ THIS MANUAL CAREFULLY BEFORE OPERATION
Features
•
Lightweight, High-Quality Durable PP Plastic
•
Durable and Not Easily Damaged
•
Thickened Grip, Anti-Slip Sticker at the Bottom
•
Soft Silicone Handle
•
Fit for all Kinds of Ground
•
Avoid Excessive Wrist Pressure
•
Improve Fitness and Flexibility, Helps Build Muscles
•
Rubberized Easy-Grip Platform Pad
•
User-Friendly, Portable and Exercise Mat
•
Durable Fitness Mat with Non-Slip Texture
•
Convenient to Carry and More Stable
•
Efficient and Safe with Carrying Bag
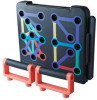
What's in the Box:
•
(1) Foldable Board
•
(20) Bottom Stickers
•
(2) Handles
•
(1) Side Inserter
Technical Specs:
•
Construction Materials: PP, PVC, TPE
•
Weight Capacity: 661.4 Lbs.
•
Rod Length: 35.4’’ -inches
•
Board Length: 19.7” inches
•
Board Handle Size: 7.87’’ x 3.96’’ -inches
•
Product Dimensions (L x W x H):
25.1" x 7.48" x 3.93"-inches
www.SQUATZ.com
Assembly Method
Install the Portable Push Up Board firmly before use.
Portable Push Up Board
Installation
1. Open the package, paste the anti-slip foot pads on the bottom, and then exercise according to the
training method.
2. You can attach 10 anti-slip foot pads on the unit to keep the board stable while doing push ups.
Instructions
1. Set up the push-up board on an even surface. Secure the handles in the appropriate color-coded
position based on the muscle you are planning to target. Once you have the board ready, get into the
starting position by grabbing the handles with an overhand grip. Your hands should be directly under
your shoulders, and your body should be in a straight line throughout the movement. Slowly lower your
torso towards the board until your shoulders are a few inches away from the handles.
Return to the starting position explosively. Pause and contract your target muscles at the top.
2. With the help of this push-up board you can train your chest, shoulder and triceps muscles.
Different color-coded push up board targets specifics muscles worked, making your posture more standard,
and matching with the gifted professional training schedule to make your fitness more efficient.
3. Do not change the handle position during push-ups.
Digital Display Push Up Counter Function Description
1.
Power ON:
After installing the battery, press the left button to power ON then the buzzer will sound.
2.
Switching Mode:
Press and hold the left button to switch the counting mode; free counting >
countdown > and so on;
a. In free counting mode, the maximum count is 999, and the time is up to 19 minutes and 59 seconds.
b. In countdown mode, short press the left button to set the
countdown duration from 1 to 10 minutes.
When the time is up, the buzzer will sound "di-di" for 10 seconds and the
countdown will no longer
be possible.
c. In the
countdown mode, short press the left button to set the countdown to 10-100 times, when the
count is over, the buzzer "di-di" sounds for 10 seconds, and no more counts can be made.
3.
Restart:
Short press
the left button to restart this
mode,and the timing and count values will return to
the initial values.
4.
Start Exercise:
After setting the
mode,start to do the first push-up and
automatically start counting.
5.
Shutdown:
In the
case of no movement and
no key operation,the counter will automatically enter the
shutdown state after 2 minutes or press and hold the right button to enter the shutdown state.
•
(1) Pilate Rod
•
(5) Resistance
•
(1) Elastic Bands
•
(1) Bag
Questions? Comments?
We are here to help!