RCA 25255RE2 User Guide
RCA 25255RE2 - ViSYS Cordless Phone Base Station Manual
 |
UPC - 845679000018
View all RCA 25255RE2 manuals
Add to My Manuals
Save this manual to your list of manuals |
RCA 25255RE2 manual content summary:
- RCA 25255RE2 | User Guide - Page 1
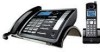
2-Line Intercom Speakerphone DECT6.0 Corded/Cordless Handset Telephone Answering System User's Guide V i S Y S™ 25255RE2 - RCA 25255RE2 | User Guide - Page 2
is located on the cabinet bottom 2 Rights of the Telephone Company Should your equipment cause trouble on your line which may harm the telephone network, the telephone company shall, where practicable, notify you that temporary discontinuance of service may be required. Where prior notice is not - RCA 25255RE2 | User Guide - Page 3
- RCA 25255RE2 | User Guide - Page 4
. For body worn operation, this phone has been tested and meets the FCC RF exposure guidelines when used with the belt clip supplied with this product. Use of other accessories may not ensure compliance with FCC RF exposure guidelines. Information for DECT Product This telephone is compliant with - RCA 25255RE2 | User Guide - Page 5
32 17 -Answering an intercom call 32 17 -Page 32 -Registration 17 -Auto Standby 32 -Register 18 Caller ID (CID) 33 -Remove Handset -De-Register 18 18 -Receiving and storing CID records -Reviewing CID records 33 33 -2nd Call Alert -Handset Name -Update Handset List -Display Setting - RCA 25255RE2 | User Guide - Page 6
incoming calls -Memo record -Memo recording -Message/memo playback -Erasing messages -Remote access from remote party -Memory full Changing the Battery Battery Safety Precautions Display Messages Handset Sound Signals -Backup battery operation Troubleshooting Guide -Telephone solutions -Caller ID - RCA 25255RE2 | User Guide - Page 7
adaptor (for charging cradle) Charging Cradle Telephone 2- Line cords Handset battery pack Short Line Cord Cordless Handset Telephone Jack Requirements To use this phone, you will need a RJ11C (for a single line) or a RJ14C (for two lines) type modular phone jack, which might look like the - RCA 25255RE2 | User Guide - Page 8
's manual for these devices on how to properly set channels to avoid interference. Typical devices that may use the 1.9 GHz frequency for communication include wireless audio/video senders, wireless computer networks, multi-handset cordless telephone systems, and some longrange cordless telephone - RCA 25255RE2 | User Guide - Page 9
Handset Layout 3 Soft keys DND/ Privacy (button) Exit (button) VOL +/(buttons) DIR (button) Talk (button) * Tone (button) Mute/ Del (button) Int/ Hold (button) Visual Indicator Display Spk (Speaker button) Headset Jack CID (button) End (button) # Pause (button) Redial (button) Menu/ Flash (button) - RCA 25255RE2 | User Guide - Page 10
Keys Ans Sys (button) One Touch/ Memory Log (1- 10) buttons Exit (button) Play/ Stop (button) Memo (button) Delete (button) Headset Jack * Tone (button) Headset (button) Hold (button) # Pause (button) Mute (button) Redial (button) Flash (button) Speaker (button) Page (button) Intercom (button - RCA 25255RE2 | User Guide - Page 11
into position. 6. Place cordless handset in remote charger. The charge indicator illuminates, verifying the battery is charging. 7. Allow the phone to charge for 14 hours prior to first use. If you don't properly charge the phone, battery performance is compromised. NOTE: If the model you bought is - RCA 25255RE2 | User Guide - Page 12
need to replace the batteries. It is important that you replace them as soon as possible to maintain unit operation when electrical power is off. As a precaution, you may want to write down any stored information you do not want erased. IMPORTANT: If you are not going to use the telephone for more - RCA 25255RE2 | User Guide - Page 13
on the back of the telephone. Line 2 Line 1 If you have Line 1 and Line 2 wired into one wall jack in your home or office, you can use one of the supplied telephone line cords to connect from the wall jack to the Line 1 + 2 jack on the back of the phone as shown below. Line 1 + 2 5. If you want to - RCA 25255RE2 | User Guide - Page 14
Line 2 Line 1 -OR- Line 1 & 2 6. Connect the handset cord: Connect one end of the coiled handset cord to the jack on the side of the base and the other end into the jack in the handset, and place the handset in the cradle. 14 - RCA 25255RE2 | User Guide - Page 15
items: Date/Time (base only), Auto Answer (handset only), Auto Answer Intercom (both base and handset), Dial Mode (base only), Area Code (base only), Registration (handset only), De-Registration (base only), 2nd Call Alert (both base and handset), Handset Name (handset only), Update Handset - RCA 25255RE2 | User Guide - Page 16
Caller ID service, the current Date/Time is set automatically when you receive your first CID record and will override manually set Date/Time. However the Year must still be set manually. The Year information is not in the CID record. NOTE: The Date/Time setting item only exists in base menu, handset - RCA 25255RE2 | User Guide - Page 17
Up to 10 cordless handsets can be registered to one base. NOTE: If a handset has not been registered to the base, then the display will show PRESS REG TO INITIATE REGISTRATION once the handset has been activated. Press the REG Soft key to start the registration. From the Phone Setting Menu: 1. Press - RCA 25255RE2 | User Guide - Page 18
de-registration process, keep the handset near the base. WARNING: It is not recommended that a handset be deregistered unless absolutely necessary because once a handset is deregistered, that handset's telephone features cannot be used until the handset is re-registered. From the Phone Setting Menu - RCA 25255RE2 | User Guide - Page 19
SAVE Soft key to save your name. You will hear a confirmation tone and the display shows Saved. Update Handset List (only applicable for base) This function is used to update all registered handsets from the current handset name list. From the Phone Setting Menu: 1. Press the vol (- or +) button to - RCA 25255RE2 | User Guide - Page 20
key to confirm and you may program the following items in base and handset: Ring Tone, Ring Volume and Key Tone. Ring Tone There are 5 tone levels for your selection. They are Melody 1 to 5 for Line 1 and Line 2 respectively. From the Sound Setting Menu: 1. Press the VOL (- or +) button to scroll to - RCA 25255RE2 | User Guide - Page 21
. You may program the following items in base: On/Off Status, OGA Playback, OGA Record, Set OGA, Set Office Time, Ring Delay, Message Length, Call Screening, Message Alert, Remote Password. On/Off Status This is used to set the answering system On or Off for each telephone line individually. From the - RCA 25255RE2 | User Guide - Page 22
call, the "Work Hours" OGA or "After Hours" OGA will be played to the caller according to the office time you set. Set Office Time From the Answering Sys Menu: 1. Press the VOL (- or +) button to scroll to the Set Office Time . 2. Press SELECT Soft key. You can program the following items: Work - RCA 25255RE2 | User Guide - Page 23
when answering the call is in the answering mode. Set After Hours This will allow you to program the start time for the after work hour. From the Set Office Time Menu: 1. Press the VOL (- or +) button to scroll to the Set After Hours . 2. Press SELECT Soft key. 3. Use the touch-tone pad to set the - RCA 25255RE2 | User Guide - Page 24
to scroll to the Call Screening . 2. Press SELECT Soft key. Use the VOL (- or +) button to select On or Off . 3. Press the SELECT Soft key to save your selection and the screen displays Saved . Message Alert This feature set your answering system to give an alert tone every 10 seconds when there - RCA 25255RE2 | User Guide - Page 25
, press the NO Soft key. Telephone Operation Making Calls with the Cordless Handset 1. Press the Talk button, the unit will pick the first available line for you. -OR- Press line 1 or line 2 Soft key to select a line you wanted. 2. Wait for a dial tone then dial the phone number. 3. Press the end - RCA 25255RE2 | User Guide - Page 26
to select a specific line. The handset will activate the ear piece. 2. Press the Spk button to switch to speakerphone mode. 3. Wait for a dial tone then dial the phone number. 4. Press the end button when finished. Making Calls with the Optional Headset 1. Plug the headset into the Headset jack on the - RCA 25255RE2 | User Guide - Page 27
), Spk button, Talk button (handset only), or line 1 or line 2 button to take a line, or pick up the corded handset (on the base only) and then the telephone number will be dialed out. Answering a Call For cordless handset: 1. Press the Talk button to answer the call in receiver mode, -OR- 2. Press - RCA 25255RE2 | User Guide - Page 28
. Flash If you subscribe to Call Waiting Caller ID service from your local telephone company and you receive an incoming call during a call, you will hear a beep to indicate another call is waiting on the line and Caller ID information (if available) for the waiting call shows on the display. • To - RCA 25255RE2 | User Guide - Page 29
Talk button on the cordless handset, or press the Spk button (speakerphone mode), or press the headset button (headset mode), or pick up the corded handset from the base and the first available line will go off hook. If both lines are available, Line 1 will be used. -ORPress a line button to select - RCA 25255RE2 | User Guide - Page 30
unit. NOTE: 1. If the call is not accepted, the caller will be able to leave a message on the answering system if it is activated. Ringer On/Off and Ringer Volume 1. Make sure the phone is in idle mode. 2. Press the VOL (- or +) button to activate the ringer volume setting. Use the VOL (- or - RCA 25255RE2 | User Guide - Page 31
Calls This system can support 3-way and 4-way conference calls. Join a call in progress: 1. While a call is in progress, another user can join that call by pressing the corresponding line button on the base unit or Soft key in the handset. Both parties on the original call will hear a tone - RCA 25255RE2 | User Guide - Page 32
30 seconds, the intercom call is cancelled. You will hear an error tone and the screen displays Unavailable . Answering an Intercom Call If you do not want to answer this intercom call, press the REJECT Soft key. Page The page feature helps you locate a misplaced handset. 1. Press the page button - RCA 25255RE2 | User Guide - Page 33
Name/Number Caller ID Service or Call Waiting Caller ID Service. To know who is calling while you are on the phone, you must subscribe to Call Waiting Caller ID Service. When the unit receives an incoming call with CID information, the CID can be shown on the base and handsets. Base Display - RCA 25255RE2 | User Guide - Page 34
to confirm. All CID Records Deleted shows for 3 seconds. Dialing Back When reviewing CID records, you can dial back the numbers showing on the display by pressing the headset button, or the Talk button, or the Spk button or the line 1 or line 2 button. If You Programmed Your Local Area Code 1. Use - RCA 25255RE2 | User Guide - Page 35
you want to dial. You will only see 10-digit numbers (i.e. 234-555-1234). 2. Press Talk , Spk, headset button or select a Line to dial back or pick up the handset from the base . You may adjust the number format by pressing the FORMAT Soft key before dialing. Call Waiting Caller ID This feature - RCA 25255RE2 | User Guide - Page 36
pad to input a telephone number. TIP: Press the #pause button twice to insert a pause in a number if necessary. 6. Press the SAVE Soft key to enter VIP tone melody selection. NOTE: If an incoming call number matches this record the VIP Tone Melody will ring. 7. Use VOL (- or +) button to scroll to - RCA 25255RE2 | User Guide - Page 37
screen displays Enter Number. 7. Use the number pad to input a telephone number. TIP: Press the #pause button twice to insert a pause in a number if necessary. 8. Press the SAVE Soft key to save. Reviewing Directory Records 1. Make sure the phone is OFF (not in Talk mode). 2. Press the DIR button - RCA 25255RE2 | User Guide - Page 38
incoming call number matches this record the VIP Tone Melody will ring. 5. Press SELECT Soft key to complete. NOTE: Press the BACK Soft key to keep the previous setting (making no changes). Copying a Directory Record You can copy one directory record or the whole directory from the handset extension - RCA 25255RE2 | User Guide - Page 39
Talk Spk button, selecting a line or pick up the handset from the base . 2. Press the DIR button to access the phone book. 3. Use the VOL (- or +) button to scroll to the desired record. 4. Press the DIAL Soft key to dial the number. -ORDial a directory record while reviewing it: 1. Make sure the - RCA 25255RE2 | User Guide - Page 40
The unit will answer incoming calls or routed calls after X rings (pickup delay set in Menu) and play the outgoing greeting. After hearing the greeting followed by a long beep, the caller can leave a message. If there is a new message recorded in the unit, the Answering system indicator will flash - RCA 25255RE2 | User Guide - Page 41
, only the new messages will be played, otherwise all messages will be played. Unit will play messages to the end. During each message playback, it shows the current message information on the screen. If the message playback is a stored incoming message from the telephone line , it shows the message - RCA 25255RE2 | User Guide - Page 42
the next message Press four (4) to turn On and Off the Answering System Press seven (7) to review menu again 4. Enter the remote commands. 5. To exit remote operation, hang up. The system will automatically disconnect the call if the user does not enter a command within 10 seconds. NOTE: Only the - RCA 25255RE2 | User Guide - Page 43
model T-2 734 , which is compatible with this unit. 1. Make sure the telephone is OFF (not in Talk mode) before you replace battery. 2. Remove the battery compartment door. 3. Disconnect the battery plug from the jack inside the battery compartment and remove the battery pack from the handset - RCA 25255RE2 | User Guide - Page 44
being worked cannot continue. The system is busy or some other higher priority function is being performed. For example, the message playback function will be stopped when there is an incoming call. NO LINE Indicates that the telephone line is not connected. LINE IN USE Display on handset while - RCA 25255RE2 | User Guide - Page 45
(with ringer on) Signals an incoming call Two short beeps (several times) Page signal One beep every 14 seconds Low battery warning One long beep after press one key Confirm A short warbling tone (with ringer on) Error Backup Battery Operation If the power cord is not plugged into the unit - RCA 25255RE2 | User Guide - Page 46
Troubleshooting Guide Telephone Solutions No dial tone • Check or repeat installation steps: Make sure the base power cord is connected to a working electrical outlet. Make sure the telephone line cord is connected to the base and the wall jack. • Connect another phone to the same jack. If it doesn - RCA 25255RE2 | User Guide - Page 47
must be subscribed to the standard Name/Number Caller ID service from your local telephone company to receive CID information. Battery If you experience any of the following problems, even after recharging the battery, you may need to replace the battery pack: • Short talk time • Poor sound quality - RCA 25255RE2 | User Guide - Page 48
other electronic devices. • Baby monitor is using the same frequency. • Handset battery is low. • Make sure the hook switch pops up when the handset is lifted. • You're out of range of the base. • The 5"AAA" batteries need replacing or are improperly installed or not installed at all. • Intercom - RCA 25255RE2 | User Guide - Page 49
49 - RCA 25255RE2 | User Guide - Page 50
50 - RCA 25255RE2 | User Guide - Page 51
OR IN ANY WAY INCREASE THE SCOPE OF THIS WARRANTY . • REPAIR OR REPLACEMENT AS PROVIDED UNDER THIS WARRANTY IS THE EXCLUSIVE REMEDY OF THE CONSUMER . PARTICULAR PURPOSE ON THIS PRODUCT IS LIMITED TO THE APPLICABLE WARRANTY PERIOD SET FORTH ABOVE. How state law relates to this warranty: • Some - RCA 25255RE2 | User Guide - Page 52
Accessory Information DESCRIPTION MODEL NO. Handset Replacement Battery T-2734 AC Power Adaptor T-2757 (base)/T-8BXD (charger) To place order, have your Visa, MasterCard, or Discover Card ready and call toll-free 1- 800- 511 -318 0. A shipping and handling fee will be charged upon ordering.
-
 1
1 -
 2
2 -
 3
3 -
 4
4 -
 5
5 -
 6
6 -
 7
7 -
8
-
9
-
10
-
11
-
12
-
13
-
14
-
15
-
16
-
17
-
18
-
19
-
20
-
21
-
22
-
23
-
24
-
25
-
26
-
27
-
28
-
29
-
30
-
31
-
32
-
33
-
34
-
35
-
36
-
37
-
38
-
39
-
40
-
41
-
42
-
43
-
44
-
45
-
46
-
47
-
48
-
49
-
50
-
51
-
52
 |
 |
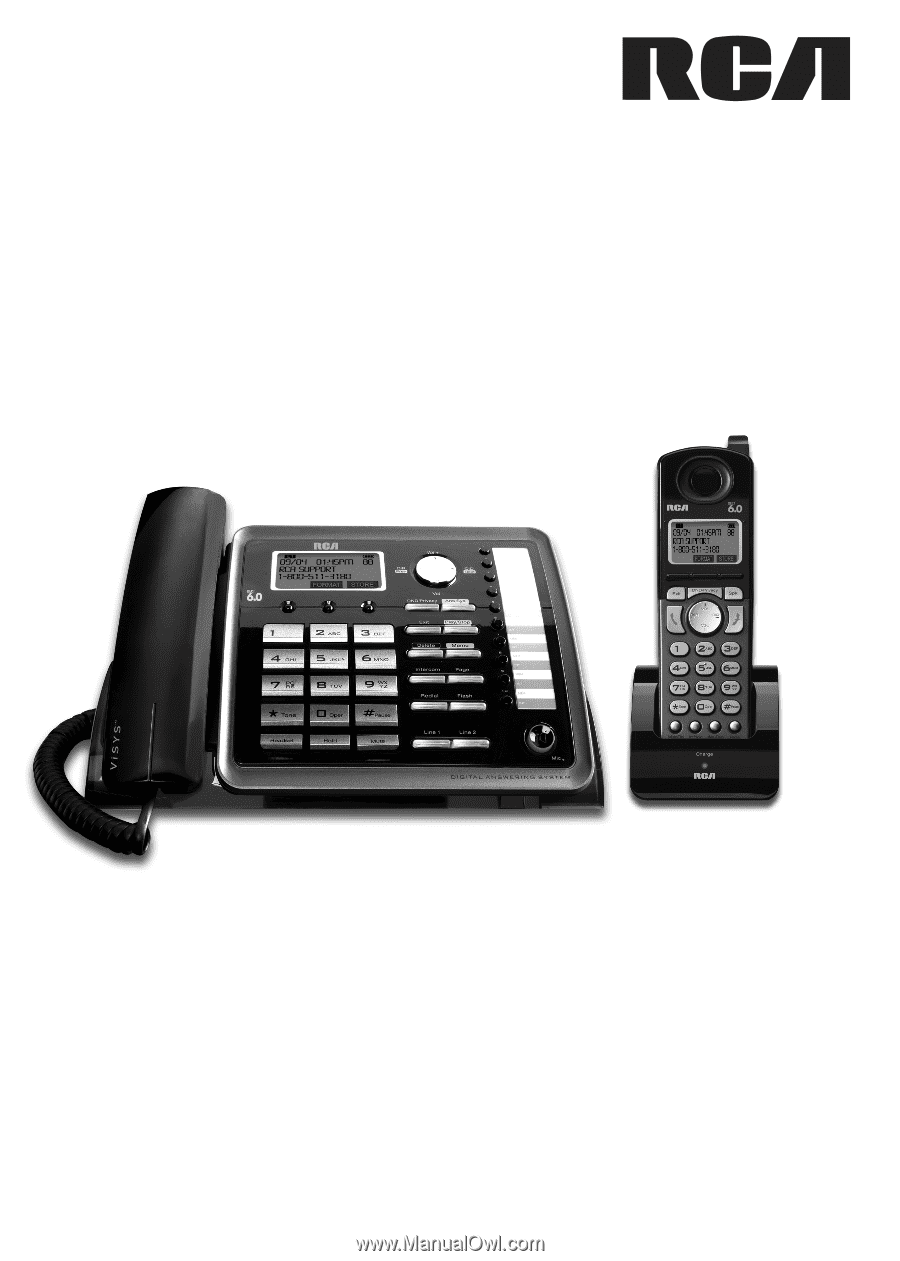
2-Line Intercom
Speakerphone DECT6.0
Corded/Cordless
Handset Telephone
Answering System
User’s Guide
ViSYS
™
ViSYS
25255RE2