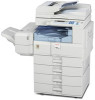
Ricoh Aficio MP 2500SPF Facsimile Reference
Ricoh Aficio MP 2500SPF Manual
 |
View all Ricoh Aficio MP 2500SPF manuals
Add to My Manuals
Save this manual to your list of manuals |
Ricoh Aficio MP 2500SPF manual content summary:
- Ricoh Aficio MP 2500SPF | Facsimile Reference - Page 1
FAX Option Type 2500 Operating Instructions Facsimile Reference 1 Transmission 2 Send Settings 3 Reception 4 Changing/Confirming Communication Information 5 Fax via Computer 6 Appendix Read this manual carefully before you use this machine and keep it handy for future reference. For safe and correct - Ricoh Aficio MP 2500SPF | Facsimile Reference - Page 2
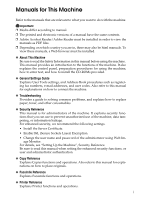
Introduction This manual contains detailed instructions and notes on the operation and use of this machine. For your safety and benefit, read this manual carefully before using the machine. Keep this manual in a handy place for quick reference. Important Contents of this manual are subject to change - Ricoh Aficio MP 2500SPF | Facsimile Reference - Page 3
such as registering fax numbers, e-mail addresses, and user codes. Also refer to this manual for explanations on how to connect the machine. ❖ Troubleshooting Provides a guide to solving common problems, and explains how to replace paper, toner, and other consumables. ❖ Security Reference This - Ricoh Aficio MP 2500SPF | Facsimile Reference - Page 4
systems that are supported might also differ slightly from those of this machine. ❖ Other manuals • PostScript 3 Supplement • UNIX Supplement • Manuals for DeskTopBinder Lite • DeskTopBinder Lite Setup Guide • DeskTopBinder Introduction Guide • Auto Document Link Guide Note ❒ Manuals provided are - Ricoh Aficio MP 2500SPF | Facsimile Reference - Page 5
for This Machine i NOTICE ...1 Important Safety Instructions 4 Caution ...4 How to Read This Manual 5 Symbols ...5 Name of Major Option 5 Names of Major Functions 5 Reading the Display 6 Reading the Display Panel and Using Keys 7 Function List ...9 1. Transmission Transmission Modes 13 - Ricoh Aficio MP 2500SPF | Facsimile Reference - Page 6
Search by Fax Number 73 Search by E-mail Address 75 Search by IP-Fax Destination 77 Search by LDAP Server 79 On Hook Dial ...83 Manual Dial ...85 Memory Storage Report 86 Canceling a Transmission 87 Before the Original Is Scanned 87 While the Original Is Being Scanned 87 While the Original - Ricoh Aficio MP 2500SPF | Facsimile Reference - Page 7
118 Substitute Reception 119 Receiving documents unconditionally 119 Receiving documents according to parameter-specified settings 120 Reception Modes 121 Manual Reception 121 Auto Reception...121 Switching the Reception Mode 122 Receiving Internet Fax Documents 123 Auto E-mail Reception 123 - Ricoh Aficio MP 2500SPF | Facsimile Reference - Page 8
mail 153 Printing a File Received with Memory Lock 154 5. Fax via Computer Sending Fax Documents from Computers 157 Before Use ...158 Using the Software 158 LAN-Fax Driver...159 Address Book ...159 LAN-Fax Cover Sheet Editor 160 Auto Run program 160 Installing Individual Applications 161 When - Ricoh Aficio MP 2500SPF | Facsimile Reference - Page 9
6. Appendix Programming Frequently Used Functions to User Function Keys 181 Optional Equipment 182 Handset ...182 Specifications...183 Specifications Required for the Internet Fax Destination Machines 185 Maximum Values 186 INDEX...187 vii - Ricoh Aficio MP 2500SPF | Facsimile Reference - Page 10
viii - Ricoh Aficio MP 2500SPF | Facsimile Reference - Page 11
jack that is also compliant. See installation instructions for detail. D The REN is service. G If trouble is experienced with this equipment, for repair or warranty information, please contact Ricoh Americas Corporation Customer Support Department at 1-800-FASTFIX. If this device is causing problems - Ricoh Aficio MP 2500SPF | Facsimile Reference - Page 12
state tariffs. Contact the state public utility commission, public service commission or corporation commission for information. J If your home energy and, if not installed and used in accordance with the instructions, may cause harmful interference to radio communications. However, there is no - Ricoh Aficio MP 2500SPF | Facsimile Reference - Page 13
FAX machine, you should complete the following steps: Follow the FAX HEADER programming procedure in the Programming chapter of the operating instructions to enter the business identification and telephone number of the terminal or business. This information is transmitted with your document by the - Ricoh Aficio MP 2500SPF | Facsimile Reference - Page 14
leak. • Use only the power cord and batteries indicated in this manual. Do not dis- pose of batteries in a fire. They may explode. Check with local codes for possible special disposal instructions. Save these instructions. IMPORTANTES MESURES DE SÉCURITÉ Certaines mesures de sécurité doivent être - Ricoh Aficio MP 2500SPF | Facsimile Reference - Page 15
explanations. Indicates supplementary explanations of the machine's functions, and instructions on resolving user errors. This symbol is located at the Option Major option of this machine is referred to as follows in this manual: • Auto Document Feeder capable of scanning both side of a sheet → - Ricoh Aficio MP 2500SPF | Facsimile Reference - Page 16
the keys on the control panel and screen items. The display guides you through operations, shows messages, machine status, and destinations Facsimile Auto Reset Timer in System Settings. ❒ To return to the standby screen manually, do one of the following: • If you have placed the original in the - Ricoh Aficio MP 2500SPF | Facsimile Reference - Page 17
: The standby display • When the instruction "Press [ ]" appears in this manual, press the left selection key. • When the instruction "Press [Tone]" appears in this manual, press the middle selection key. • When the instruction "Press [TX Mode]" appears in this manual, press the right selection key - Ricoh Aficio MP 2500SPF | Facsimile Reference - Page 18
menu. Reference p.13 "Transmission Modes" p.58 "Specifying a destination using the Quick Dial key" p.67 "Searching for a Destination in the Address Book" "Fax Features", General Settings Guide "Registering Addresses and Users for Facsimile/Scanner Functions", General Settings - Ricoh Aficio MP 2500SPF | Facsimile Reference - Page 19
. Click the {User Tools/Counter} key to display the Fax Features menu. For details about the settings, see "Fax Features", General Settings Guide. ❖ General Settings/Adjust Function name Adjust Sound Volume Program Fax Information On Hook Release Time Set User Function Key Description Adjust the - Ricoh Aficio MP 2500SPF | Facsimile Reference - Page 20
❖ E-mail Settings Function name Internet Fax Settings Maximum E-mail Size SMTP RX File Delivery ❖ IP-Fax Settings Function name Enable H.323 Enable SIP H.323 Settings SIP Settings Gateway Settings Description You can select to display or not. When you want to send an Internet Fax, set On to - Ricoh Aficio MP 2500SPF | Facsimile Reference - Page 21
G3 Analog Line before you connect the machine to a standard G3 analog line. If your machine has a problem, a service representative can perform various diagnostic tasks over the telephone line from the service station to try to find out what is wrong with your machine. Using Menu Protect, you can - Ricoh Aficio MP 2500SPF | Facsimile Reference - Page 22
12 - Ricoh Aficio MP 2500SPF | Facsimile Reference - Page 23
1. Transmission This section explains basic transmission operations such as specifying a transmission mode or a destination. Transmission Modes There are two types of transmission: • Memory Transmission • Immediate Transmission Important ❒ It is recommended that you call the receivers and confirm - Ricoh Aficio MP 2500SPF | Facsimile Reference - Page 24
Transmission You can change transmission mode by pressing the {Transmission Mode} key. 1 ARX021S Check the indicator on the operation panel to see which mode is currently active. Reference p.18 "Parallel Memory Transmission" p.19 "Simultaneous Broadcast" Selecting Type of Transmission You can select - Ricoh Aficio MP 2500SPF | Facsimile Reference - Page 25
Fax Functions" p.27 "Internet Fax Functions" "Fax Features", General Settings Guide Memory Transmission Memory transmission mode has standard fax, Internet Fax and IP-Fax not delete stored documents. See "Troubleshooting When Using the Facsimile Function", Troubleshooting. ❒ If memory is full (0% - Ricoh Aficio MP 2500SPF | Facsimile Reference - Page 26
Transmission C Make the scan settings you require. D Using the number keys or a Quick Dial key, specify a destination. 1 To specify a destination using a Quick Dial key, see "Using the Quick Dial Keys". If you make a mistake, press the {Clear/Stop} key, and then enter the correct number. E When - Ricoh Aficio MP 2500SPF | Facsimile Reference - Page 27
57 "Using the Quick Dial Keys" p.62 "Redial" p.186 "Maximum Values" "Fax Features", General Settings Guide "Troubleshooting When Using the Facsimile Function", Troubleshooting Sending multiple originals using the exposure glass (Memory Transmission) Follow these steps to send multiple originals - Ricoh Aficio MP 2500SPF | Facsimile Reference - Page 28
number is printed on the header of the fax, the total number of originals is not automatically printed. Reference "Fax Features", General Settings Guide Automatic Redial If a fax document could not be sent because the line was busy or an error occurred during transmission, redial is attempted at - Ricoh Aficio MP 2500SPF | Facsimile Reference - Page 29
(switch 17, bit 2) in the Fax Features menu. Reference p.139 "Printing a List of Files in Memory (Print TX Standby File List)" "Fax Features", General Settings Guide 19 - Ricoh Aficio MP 2500SPF | Facsimile Reference - Page 30
. If you want to delete the scanned pages and cancel transmission in this case, contact your service representative. ECM (Error Correction Mode) If part of a transmission fails because of a line problem, the lost data is automatically resent. Important ❒ For this function to work, the other machine - Ricoh Aficio MP 2500SPF | Facsimile Reference - Page 31
A Make sure that Immediate Trans. indicator is lit. Transmission Modes 1 ARX023S If Memory Trans. indicator is lit, press the {Transmission Mode} key to select Immediate Transmission mode. B Place the original. C Select the scan settings you require. D Using the number keys or a Quick Dial key, - Ricoh Aficio MP 2500SPF | Facsimile Reference - Page 32
Transmission Sending multiple originals using the exposure glass (Immediate Transmission) Follow these steps to send multiple originals using the exposure glass. 1 A Make sure that Immediate Trans. indicator is lit. B Place the first page face down on the exposure glass. C Specify a - Ricoh Aficio MP 2500SPF | Facsimile Reference - Page 33
IP-Fax Functions IP-Fax Functions The IP-Fax function sends or receives documents between two facsimiles direct- ly via a TCP/IP network. 1 This function has the following advantages and is suitable for communication within the same LAN: • Reducing communication costs • Communicating between - Ricoh Aficio MP 2500SPF | Facsimile Reference - Page 34
using this function, configure the network in the System Settings menu. ❒ The facsimile function of this machine cannot be used with IPv6. Note ❒ IP-Fax supported by this machine is ITU-T Recommendation T.38 compliant. 24 - Ricoh Aficio MP 2500SPF | Facsimile Reference - Page 35
IP-Fax Functions Reference p.117 "Types of Reception" "Connecting the Machine", General Settings Guide "System Settings", General Settings Guide 1 "Fax Features", General Settings Guide Terminology The following are words you should know when using IP-Fax: ❖ H.323 A multimedia communication - Ricoh Aficio MP 2500SPF | Facsimile Reference - Page 36
the Facsimile Function", Troubleshooting. Reference "Troubleshooting When Using the Facsimile Function", Troubleshooting Functions Not Available for IP-Fax Transmission You can use the following functions with standard fax transmission, but not IPFax transmission: • On hook dial • Manual dial 26 - Ricoh Aficio MP 2500SPF | Facsimile Reference - Page 37
Internet Fax Functions Internet Fax Functions This machine converts scanned document images to e-mail format and transmits the data over the Internet. 1 The e-mail sent by this machine can be received by another Internet Fax machine. Instead of dialing the telephone number of the destination - Ricoh Aficio MP 2500SPF | Facsimile Reference - Page 38
Transmission Note ❒ The Internet Fax function supported by this machine is compliant with ITUT Recommendation T.37. 1 ❒ "Checking the Transmission Result (TX File Status)" "Connecting the Machine", General Settings Guide "System Settings", General Settings Guide "Fax Features", General Settings - Ricoh Aficio MP 2500SPF | Facsimile Reference - Page 39
telephone network for confidential communications. • Voice communication is not supported over a LAN. • Internet Fax delivery might be delayed Operation switch does not delete stored documents. See "Troubleshooting When Using the Facsimile Function", Troubleshooting. • You may not be able to send - Ricoh Aficio MP 2500SPF | Facsimile Reference - Page 40
Faxing. • Immediate Transmission • Transmission by SUB Code • On Hook Dial • Manual Dial • JBIG Transmission • ECM (Error Correction Mode) Functions Not Available for E-mail Reception The following functions are supported with standard fax reception, but not with Internet Faxing. • Memory - Ricoh Aficio MP 2500SPF | Facsimile Reference - Page 41
the receiver's reception capability cannot be registered. If you know the receiver's reception capability, you can set it manually. ❖ Requesting a Reception Notice When the receiver's machine supports T.37 full mode and is programmed as a full mode machine in the Address Book, the machine requests - Ricoh Aficio MP 2500SPF | Facsimile Reference - Page 42
Transmission Placing Originals Place the original either on the exposure glass or in the optional ARDF. For de- 1 tails about how to place originals, see the following: • Placing originals on the exposure glass "Placing Originals on the Exposure Glass", Copy Reference • Placing originals in - Ricoh Aficio MP 2500SPF | Facsimile Reference - Page 43
Placing Originals Note ❒ To scan multiple originals using the ARDF, set originals in a stack. ❒ When sending a fax, the image output at the other end depends on the size and orientation of paper used in the receiver's machine. If the receiver does not use paper of the same size and orientation - Ricoh Aficio MP 2500SPF | Facsimile Reference - Page 44
38 "Original Sizes Difficult to Detect" p.39 "Transmission with Image Rotation" p.41 "Detecting Blank Sheet" "System Settings", General Settings Guide "Placing Originals", Copy Reference Acceptable Original Sizes Where original is set Acceptable original size Maximum number of sheets Paper - Ricoh Aficio MP 2500SPF | Facsimile Reference - Page 45
Placing Originals Paper Size and Scanned Area Important ❒ If you place an original larger than A3, 11"×17" on the exposure glass, only an 1 A3, 11"×17" area is scanned. ❖ Exposure Glass ❖ ARDF BAM006S ❖ Maximum scan area The following shows the maximum scan area: • Memory Transmission: 297 × - Ricoh Aficio MP 2500SPF | Facsimile Reference - Page 46
Transmission Note ❒ There may be a difference in the size of the image when it is printed at the destination. ❒ Even if an original is correctly placed on the exposure glass or in the ARDF, a 1 margin of 3 mm (0.1") around each edge of the original may not be sent. ❒ If the receiver uses paper - Ricoh Aficio MP 2500SPF | Facsimile Reference - Page 47
Placing Originals If the Machine Cannot Detect the Size of Your Original If the machine cannot detect the original size, the "Cannot detect original size. Place original again, then press Start key." message appears. 1 If this happens, do the following: A Press [Exit]. The previous display - Ricoh Aficio MP 2500SPF | Facsimile Reference - Page 48
Transmission Original Sizes Difficult to Detect The machine has difficulty detecting the size of the following kinds of originals. 1 (When this happens, the receiving machine may not select print paper of the correct size.) • documents placed on the exposure glass of sizes other than those - Ricoh Aficio MP 2500SPF | Facsimile Reference - Page 49
Placing Originals Transmission with Image Rotation Generally, place A4, 81/2"×11" originals in the landscape orientation (L). If you place an A4, 81/2"×11" original in the portrait orientation (K), the image is sent rotated by 90°. Providing the receiver has A4, 81/2"×11" landscape paper (L), 1 - Ricoh Aficio MP 2500SPF | Facsimile Reference - Page 50
even if stamping is performed. ❒ You cannot turn the Stamp function on or off while an original is being scanned. Reference "Fax Features", General Settings Guide "Adding Paper, Toner and Staples", Troubleshooting 40 - Ricoh Aficio MP 2500SPF | Facsimile Reference - Page 51
11, bit 2) in the Fax Features menu. ❒ To cancel scanning if a blank sheet is detected, press the {Clear/Stop} key. Reference "Fax Features", General Settings Guide 41 - Ricoh Aficio MP 2500SPF | Facsimile Reference - Page 52
the document with the best possible image quality. ❖ Original Type: Text, Photo ❖ Resolution: Standard, Detail, Fine ❖ Image Density (Contrast): Manual Image Density (five levels) Original Type To optimize image clarity, select the appropriate original type. The following settings for original - Ricoh Aficio MP 2500SPF | Facsimile Reference - Page 53
Scan Settings Reference p.44 "Image Density (Contrast)" "Fax Features", General Settings Guide 1 JBIG Transmission If you use JBIG (Joint Bi-level Image experts Group) compression, you can send originals scanned using Photo faster than with other compression - Ricoh Aficio MP 2500SPF | Facsimile Reference - Page 54
. You can check the resolution at which you actually sent by 1 printing the Journal. ❒ The machine supports reception at both Standard and Detail resolution. ❒ When using Internet Fax transmission, documents are sent at "Detail" resolution, even if you have specified "Fine". To - Ricoh Aficio MP 2500SPF | Facsimile Reference - Page 55
Scan Settings Mixing Scan Settings for a Multiple Page Original When sending an original of several pages, you can select a different image den- sity, resolution, and original type setting for each page. 1 It is recommended that originals be placed on the exposure glass when mixing scan - Ricoh Aficio MP 2500SPF | Facsimile Reference - Page 56
Transmission Specifying a Destination This section explains how to specify a destination. 1 Fax numbers, IP-Fax destinations, and e-mail addresses can be specified. Note ❒ The display shows the percentage of free memory space for storing originals. Since fax numbers, IP-Fax destinations and e- - Ricoh Aficio MP 2500SPF | Facsimile Reference - Page 57
list. Entering a tone This function allows a machine connected to a pulse dialing line to send tonal signals (for example if you want to use a special service on a tone dialing line). When you press [Tone], the machine dials the number using tonal signals. This section explains how to use the tone - Ricoh Aficio MP 2500SPF | Facsimile Reference - Page 58
the originals. After transmission, the standby display appears. Note ❒ Certain services may be unavailable even when using the Tone function. ❒ A tone follows. For details about IP-Fax Settings, see "Fax Features", General Settings Guide. • If you are using a gatekeeper server, set [Enable H.323] - Ricoh Aficio MP 2500SPF | Facsimile Reference - Page 59
{OK} key. C Select [H.323] or [SIP] using {U} or {T}, and then press the {OK} key. D Press the {Escape} key. The standby screen appears. E Press [Manual]. To specify a destination using a Quick Dial key, see "Using the Quick Dial Keys". F Enter the IP-Fax destination, and then press the {OK} key - Ricoh Aficio MP 2500SPF | Facsimile Reference - Page 60
indicator lights and transmission starts. Note ❒ Depending on security settings, [Manual] may not appear, and you may be unable to enter the IP with this machine, contact your local reseller or service representative. ❒ Methods of entering a destination vary Features", General Settings Guide 50 - Ricoh Aficio MP 2500SPF | Facsimile Reference - Page 61
Specifying a Destination Regarding IP-Fax destinations Depending on the network to which this machine is connected or this machine's configuration, enter the IP-Fax destination as follows: 1 ❖ When not using a gatekeeper/SIP server • From IP-Fax to IP-Fax Specify the IPv4 address or host name of the - Ricoh Aficio MP 2500SPF | Facsimile Reference - Page 62
Transmission Note ❒ To send to a G3 fax via a gateway connected to a public telephone line, you must specify it's the receiver's machine telephone number. For example, if the receiver's fax number is "0312345678", specify "5678". To send from an IP-Fax 1 to G3 fax without using gatekeeper or - Ricoh Aficio MP 2500SPF | Facsimile Reference - Page 63
A Press [ ] to display . B Press [Manual]. Specifying a Destination 1 To specify a destination using a Quick Dial key, see "Using the Quick Dial Keys". C Enter the e-mail address destination, and then press the {OK} - Ricoh Aficio MP 2500SPF | Facsimile Reference - Page 64
indicator lights and transmission starts. Note ❒ Depending on security settings, [Manual] may not appear, and you may be unable to enter the e- This Machine "System Settings", General Settings Guide "Fax Features", General Settings Guide "Registering Addresses and Users for Facsimile/Scanner - Ricoh Aficio MP 2500SPF | Facsimile Reference - Page 65
function, the following settings must be made. For details about these settings, see "System Settings", General Settings Guide and "Using a Host Name Instead of an IPv4 Address", Network Guide. • In "System Settings", "SMTP" in "E-mail Communication Port", set the port number to "25". • To specify - Ricoh Aficio MP 2500SPF | Facsimile Reference - Page 66
Transmission ❖ Specify the other party's IPv4 address Specify a destination's e-mail address by changing the domain part of the e- mail address to the other party's IPv4 address. xxxx@[the other party's IPv4 address] 1 Example: The other party's e-mail address is "[email protected]" and the - Ricoh Aficio MP 2500SPF | Facsimile Reference - Page 67
Fax Documents from Computers" "System Settings", General Settings Guide "Fax Features", General Settings Guide "Registering Addresses and Users for Facsimile/Scanner Functions", General Settings Guide "Special Operations under Windows", Network Guide Using the Quick Dial Keys You can specify - Ricoh Aficio MP 2500SPF | Facsimile Reference - Page 68
[Add Dest] when adding the same type of destina- tion as you specified in step A using the Quick Dial keys. Reference "System Settings", General Settings Guide "Registering Addresses and Users for Facsimile/Scanner Functions", General Settings - Ricoh Aficio MP 2500SPF | Facsimile Reference - Page 69
Specifying a Destination Specifying a group of destinations using the Quick Dial key If you program multiple destinations into a group, you can send documents to all destinations in that group using just a few keystrokes. Destinations pro- grammed in a group are indicated by . 1 Important ❒ In - Ricoh Aficio MP 2500SPF | Facsimile Reference - Page 70
using {U} or {T}, and then press the {Clear/Stop} key. Reference p.61 "Checking the Specified Destination" p.186 "Maximum Values" "System Settings", General Settings Guide "Fax Features", General Settings Guide "Registering Addresses and Users for Facsimile/Scanner Functions", General Settings - Ricoh Aficio MP 2500SPF | Facsimile Reference - Page 71
Specifying a Destination Checking the Specified Destination This section explains how to check the specified destinations. If you specified a destination from the destination list, you can display names, 1 fax numbers, e-mail addresses, or IP-Fax destinations. If a group is specified as the - Ricoh Aficio MP 2500SPF | Facsimile Reference - Page 72
Transmission Redial The machine stores the latest destinations specified for each transmission meth- 1 od. This function saves time when you are sending to the same destination repeatedly, as you do not have to enter the destination again. Important ❒ The following kinds of destinations are not - Ricoh Aficio MP 2500SPF | Facsimile Reference - Page 73
Specifying a Destination Note ❒ You can specify Internet Fax destination using the Redial function. Select this function before pressing [Manual]. ❒ When you press [Program], you can register a selected recipient in the destination list. 1 ❒ For the maximum number of redials the machine can - Ricoh Aficio MP 2500SPF | Facsimile Reference - Page 74
Transmission Programming Destinations in the Address Book 1 You can program fax numbers, e-mail addresses, IP-Fax destinations, and folder destinations using Address Book Management in Administrator Tools in the System Settings menu. A Press the {User Tools/Counter} key. ARX033S B Select [ - Ricoh Aficio MP 2500SPF | Facsimile Reference - Page 75
then press the {OK} key. 1 For the procedure to follow, see "Registering Addresses and Users for Facsimile/Scanner Functions", General Settings Guide. Note ❒ You can also register programmed fax numbers, e-mail addresses, IP-Fax destinations, and folder destinations in a group. ❒ When the facsimile - Ricoh Aficio MP 2500SPF | Facsimile Reference - Page 76
Ad- dress Book. B Press [Program]. For details about registering destinations, see "Registering Addresses and Users for Facsimile/Scanner Functions", General Settings Guide. C Make the settings, and then press the {OK} key. The screen returns to that of step A. Note ❒ Depending on security settings - Ricoh Aficio MP 2500SPF | Facsimile Reference - Page 77
for at a time. Press [Exit] and change the destination name to view fewer destinations. Reference p.186 "Maximum Values" "System Settings", General Settings Guide Search by Name Follow these steps to search for a destination registered in the Address Book by name. Important ❒ If [LDAP Search] is - Ricoh Aficio MP 2500SPF | Facsimile Reference - Page 78
Transmission B Press the {Search Destination} key. 1 ARX034S C Select [Search Address Book] using {U} or {T}, and then press the {OK} key. D Select [Search by Name] using {U} or {T}, and then press the {OK} key. E Enter the destination name you want to search for, and then press the {OK} key. - Ricoh Aficio MP 2500SPF | Facsimile Reference - Page 79
Searching for a Destination in the Address Book G Select a destination using {U} or {T}, and then press {V} to specify it (put a tick against it). 1 Multiple destinations can be selected. Press {W} to deselect a destination. H Press the {OK} key. Note ❒ If no destination matches the specified text, - Ricoh Aficio MP 2500SPF | Facsimile Reference - Page 80
Transmission B Press the {Search Destination} key. 1 ARX034S C Select [Search Address Book] using {U} or {T}, and then press the {OK} key. D Select [Display List] using {U} or {T}, and then press the {OK} key. Destinations appear in registration number order. E Select a destination using {U} or {T}, - Ricoh Aficio MP 2500SPF | Facsimile Reference - Page 81
Searching for a Destination in the Address Book Search by Registration Number Follow these steps to search for a destination by specifying a registration number stored in the destination list. 1 Important ❒ If [LDAP Search] is set to [Off] in Administrator Tools, in the System Settings menu, - Ricoh Aficio MP 2500SPF | Facsimile Reference - Page 82
Transmission E Enter the three-digit registration number using the number keys, and then press the {OK} key. 1 If you enter the wrong registration number, before pressing the {OK} key, press the {Clear/Stop} key, and then enter the correct registration number. When the search is finished, the result - Ricoh Aficio MP 2500SPF | Facsimile Reference - Page 83
Searching for a Destination in the Address Book Search by Fax Number Follow these steps to search for a destination registered in the Address Book by fax number. 1 Important ❒ If [LDAP Search] is set to [Off] in Administrator Tools, in the System Settings menu, the display for selecting either - Ricoh Aficio MP 2500SPF | Facsimile Reference - Page 84
Transmission E Enter the number you want to search for, and then press the {OK} key. 1 If you enter the wrong number, before pressing the {OK} key, press the {Clear/Stop} key, and then enter the correct number. F Confirm the numbers you entered, and then press the {OK} key. When the search is - Ricoh Aficio MP 2500SPF | Facsimile Reference - Page 85
Searching for a Destination in the Address Book Search by E-mail Address Follow these steps to search for a destination registered in the destination list by e-mail address. 1 Important ❒ If [LDAP Search] is set to [Off] in Administrator Tools, in the System Settings menu, the display for - Ricoh Aficio MP 2500SPF | Facsimile Reference - Page 86
Transmission E Enter the e-mail address you want to search for, and then press the {OK} key. 1 If you enter the wrong e-mail address, before pressing the {OK} key, press the {Clear/Stop} key, and then enter the correct e-mail address. F Confirm the e-mail address you entered, and then press the {OK} - Ricoh Aficio MP 2500SPF | Facsimile Reference - Page 87
Searching for a Destination in the Address Book Search by IP-Fax Destination Follow these steps to search for a destination registered in the Address Book by IP-Fax destination. 1 Important ❒ If [LDAP Search] is set to [Off] in Administrator Tools, in the System Settings menu, the display for - Ricoh Aficio MP 2500SPF | Facsimile Reference - Page 88
Transmission E Press [IP]. 1 The Search IP-Fax Destination screen appears. F Enter the IP-Fax destination you want to search for, and then press the {OK} key. If you enter the wrong destination, before pressing the {OK} key, press the {Clear/Stop} key, and then enter the correct destination. G - Ricoh Aficio MP 2500SPF | Facsimile Reference - Page 89
Searching for a Destination in the Address Book Search by LDAP Server Follow these steps to search for a destination registered in the Address Book us- ing the LDAP server. 1 Important ❒ This function is not available if [LDAP Search] is set to [Off] under Administrator Tools, in the System - Ricoh Aficio MP 2500SPF | Facsimile Reference - Page 90
Transmission E Select [Advanced Search] using {U} or {T}, and then press the {OK} key. 1 F Select a search condition using {U} or {T}, and then press the {OK} key. Conditions (Name, E-mail Address, Fax Destination, Company Name, and Department Name) are those programmed in the LDAP server. G Enter a - Ricoh Aficio MP 2500SPF | Facsimile Reference - Page 91
match the specified character. Example: When searching for "ABC", enter "ABC". • [Fuzzy Search]: Perform a fuzzy search (according to the searching method supported by the LDAP server). I Press the {Escape} key. The screen returns to that of step E. J Press [Search]. When the search is finished - Ricoh Aficio MP 2500SPF | Facsimile Reference - Page 92
search. The address retrieved by the search depends on the searching method supported by the LDAP server. Howev- 1 er, the address programmed first For details about setting Search Options, see "System Settings", General Settings Guide. ❒ The string you enter in the [Name] condition field in - Ricoh Aficio MP 2500SPF | Facsimile Reference - Page 93
On Hook Dial On Hook Dial The On Hook Dial function allows you to dial while listening to the tone from the internal speaker. You can send a fax checking the connection. 1 Important ❒ This function is not available for Internet Fax and IP-Fax. A Place the original, and then select the scan - Ricoh Aficio MP 2500SPF | Facsimile Reference - Page 94
you want to send a fax document (ask them to switch to facsimile mode). ❒ For details about On Hook Release Time, see "Fax Features", General Settings Guide. Reference p.57 "Using the Quick Dial Keys" "Fax Features", General Settings - Ricoh Aficio MP 2500SPF | Facsimile Reference - Page 95
Manual Dial Manual Dial Pick up the optional handset or the handset of the external telephone and dial. When the line is connected and you hear a high-pitched - Ricoh Aficio MP 2500SPF | Facsimile Reference - Page 96
. ❒ You can select whether to display a sender name with the User Parameters (switch 04, bit 5) in the Fax Features menu. Reference "Fax Features", General Settings Guide 86 - Ricoh Aficio MP 2500SPF | Facsimile Reference - Page 97
Canceling a Transmission Canceling a Transmission This section explains how to cancel a fax transmission. Important 1 ❒ Remember that the Communicating indicator turns off almost immediately when an Internet Fax is being sent. Before the Original Is Scanned Use this procedure to cancel a - Ricoh Aficio MP 2500SPF | Facsimile Reference - Page 98
Transmission While the Original Is Being Transmitted Follow these steps to cancel a transmission while the Communicating indicator 1 is lit. A Press the {Clear/Stop} key. ARX036S B Select the file you want to cancel using {U} or {T}, and then press [Stop TX]. C Press [Delete]. To cancel - Ricoh Aficio MP 2500SPF | Facsimile Reference - Page 99
Canceling a Transmission Before the Transmission Is Started Use this procedure to cancel a transmission after the original is scanned. This function is useful to cancel a transmission when you notice a mistake in des- 1 tination or with the originals after storing. To cancel Memory Transmission - Ricoh Aficio MP 2500SPF | Facsimile Reference - Page 100
Transmission D Press [Delete]. 1 The display returns to that of step C. To cancel another file, repeat from step C. To cancel stopping transmission, press [No]. E Press the {Escape} key twice. The standby display appears. Note ❒ If you cancel a transmission while the file is being sent, some pages - Ricoh Aficio MP 2500SPF | Facsimile Reference - Page 101
Sending at a Specific Time (Send Later) Using this function, you can instruct the machine to delay transmission of your fax document until a specified later time lost documents. For details, see "Troubleshooting When Using the Facsimile Function", Troubleshooting. ❒ This function is unavailable with - Ricoh Aficio MP 2500SPF | Facsimile Reference - Page 102
within 24 hours of the current time. ❒ If the current time shown is not correct, change it. Reference p.87 "Canceling a Transmission" "System Settings", General Settings Guide "Troubleshooting When Using the Facsimile Function - Ricoh Aficio MP 2500SPF | Facsimile Reference - Page 103
Sender Settings Sender Settings Use this function to set sender information. If the sender's e-mail address is registered in the destination list, the sender can receive transmission results by e-mail. Also, if you enable the Stamp Sender Name, the registered sender's name (user name) appears - Ricoh Aficio MP 2500SPF | Facsimile Reference - Page 104
Send Settings E Confirm the selected sender, and then press the {OK} key. 2 F To print the sender's name on the receiver's sheet, select [Stamp] using {U} or {T}, and then press the {OK} key. If you enable this function, the sender's name (user name) appears on the receiver's sheet, lists, and - Ricoh Aficio MP 2500SPF | Facsimile Reference - Page 105
number of uses by each user. ❒ To cancel the Sender Settings, cancel the transmission. See "Canceling a Transmission". Reference p.87 "Canceling a Transmission" "Fax Features", General Settings Guide "Registering Addresses and Users for Facsimile/Scanner Functions", General Settings - Ricoh Aficio MP 2500SPF | Facsimile Reference - Page 106
. If you want to use PIN Code Transmission, ask the PABX administrator the PABX you are connected to supports the PIN Code function, and if it does, contact your service representative for information about setting up. Important ❒ Program the PIN Code TX function to a User Function key beforehand - Ricoh Aficio MP 2500SPF | Facsimile Reference - Page 107
. ❒ You can set the machine so that a PIN Code must be entered after the fax number before you can send a fax. For details, contact your service representative. Reference p.186 "Maximum Values" "Fax Features", General Settings - Ricoh Aficio MP 2500SPF | Facsimile Reference - Page 108
Send Settings E-mail Options This section explains the settings required for using the Internet Fax function. Important ❒ To use Internet Fax functions, the optional printer/scanner unit must be installed. 2 Entering the Subject Allows you to enter a subject for the e-mail document you want to send. - Ricoh Aficio MP 2500SPF | Facsimile Reference - Page 109
E-mail Options F Press the {Escape} key twice. The standby screen returns. To check the settings, press [TX Mode]. G Specify a destination. H Specify the sender. For details about specifying senders, see "Sender Settings". 2 I Press the {Start} key. Note ❒ If you send e-mail without setting - Ricoh Aficio MP 2500SPF | Facsimile Reference - Page 110
, allowing the originator to verify the 2 transmission was received. Important ❒ The Reception Notice feature is only available if the receiver supports MDN (Message Disposition Notification). A Place the original, and then select the scan settings you require. B Press [TX Mode]. C Select - Ricoh Aficio MP 2500SPF | Facsimile Reference - Page 111
are sent to the destinations in the order in which they were specified. Reference p.93 "Sender Settings" p.150 "Printing the Journal" "Fax Features", General Settings Guide 101 - Ricoh Aficio MP 2500SPF | Facsimile Reference - Page 112
Send Settings Fax Header Print When the Fax Header is set to "On", the stored name is printed on the receiver's paper. Important ❒ In the USA, the Fax Header must contain the telephone number of the line 2 your machine is connected to. It will be printed on the header of every page you send. - Ricoh Aficio MP 2500SPF | Facsimile Reference - Page 113
the fax number and switch on Fax Header Print with User Parameters (switch 18, bit 1) in the Fax Features menu. See "Fax Features", General Settings Guide. Reference "Fax Features", General Settings - Ricoh Aficio MP 2500SPF | Facsimile Reference - Page 114
Send Settings Label Insertion With this function you can have the receiver's name printed on the document that is received at the other end. Important 2 ❒ To use this function, set Label Insertion to [On] when registering fax destinations in the Address Book, and also select [Programmed Name] - Ricoh Aficio MP 2500SPF | Facsimile Reference - Page 115
F Specify a destination, and then press the {Start} key. Note ❒ [Programmed Name] is selected by default. Label Insertion 2 105 - Ricoh Aficio MP 2500SPF | Facsimile Reference - Page 116
Send Settings Setting SUB Codes for Transmission Follow these steps to send a document with a SUB Code as a confidential transmission. A SUB Code is an ID consisting of numbers, q, p, and spaces. Document trans- mitted with a SUB Code is stored in the other party's memory, and not printed - Ricoh Aficio MP 2500SPF | Facsimile Reference - Page 117
Setting SUB Codes for Transmission D Select [On] using {U} or {T}, and then press the {OK} key. The screen returns to that of step C. 2 E Press the {Escape} key. The standby screen returns. F Enter the fax number of a destination or an IP-Fax destination. G Press the User Function key ({F1} to - Ricoh Aficio MP 2500SPF | Facsimile Reference - Page 118
you use Immediate Transmission and the fax machine at the destination does not support the SUB Code function, a message will appear on the display to Features", General Settings Guide "Registering Addresses and Users for Facsimile/Scanner Functions", General Settings Guide Setting a Password There - Ricoh Aficio MP 2500SPF | Facsimile Reference - Page 119
's memory if the document has the same SEP Code as the SEP Code you entered. This function enables the machine to utilize services that use the polling function 2 or receive documents from multiple destinations. Important ❒ Documents can be received from facsimiles that have Information Boxes - Ricoh Aficio MP 2500SPF | Facsimile Reference - Page 120
names and fax numbers in the destination list. ❒ The SEP Code is printed on lists and reports. Reference p.186 "Maximum Values" "Fax Features", General Settings Guide "Registering Addresses and Users for Facsimile/Scanner Functions", Gen- 110 eral Settings - Ricoh Aficio MP 2500SPF | Facsimile Reference - Page 121
of digits for the PWD Code, see "Maximum Values". Reference p.186 "Maximum Values" "Registering Addresses and Users for Facsimile/Scanner Functions", General Settings Guide SEP Code RX Reserve Report This report is printed after SEP Code Reception is set up. You can use this report to check the - Ricoh Aficio MP 2500SPF | Facsimile Reference - Page 122
menu. ❒ You can display a sender name with the User Parameters (switch 04, bit 5) in the Fax Features menu. Reference p.149 "Journal" "Fax Features", General Settings Guide 112 - Ricoh Aficio MP 2500SPF | Facsimile Reference - Page 123
Two-Sided Transmission (Double-Sided Transmission) Two-Sided Transmission (Double-Sided Transmission) Use this function to send two-sided originals. Important ❒ The optional ARDF is required. 2 A Place the original in the ARDF, and then select the scan settings you require. B Press [TX Mode]. - Ricoh Aficio MP 2500SPF | Facsimile Reference - Page 124
Send Settings E Select the position of the placed document using {U} or {T}, and then press the {OK} key. 2 To cancel Two-Sided Transmission, press the {Escape} key. The display re- turns to that of step C. F Select the page opening orientation using {U} or {T}, and then press the {OK} key. - Ricoh Aficio MP 2500SPF | Facsimile Reference - Page 125
orientation of originals loaded in the ARDF. Reference p.32 "Placing Originals" p.39 "Transmission with Image Rotation" p.39 "Stamp" p.42 "Scan Settings" "Fax Features", General Settings Guide 115 - Ricoh Aficio MP 2500SPF | Facsimile Reference - Page 126
Send Settings 2 116 - Ricoh Aficio MP 2500SPF | Facsimile Reference - Page 127
communication is terminated. Note ❒ If the Substitute Reception is used, a fax document is not printed: it is stored in memory. ❒ This machine supports Standard and Detail resolutions for reception. Faxes sent at Fine or Super Fine resolution is printed on your machine at Detail resolution. This may - Ricoh Aficio MP 2500SPF | Facsimile Reference - Page 128
Failure Report is automatically printed when the operation switch is turned on. Use this report to identify lost documents. See "Troubleshooting When Using the Facsimile Function", Troubleshooting. ❒ The machine may not be able to receive fax documents when free memory space is low. ❒ If free memory - Ricoh Aficio MP 2500SPF | Facsimile Reference - Page 129
documents using Immediate Reception. Reference "Fax Features", General Settings Guide Receiving documents unconditionally If one of the conditions in the occurs, the machine receives all fax documents using Substitute Reception. Problems The machine is printing with a different function. h is lit - Ricoh Aficio MP 2500SPF | Facsimile Reference - Page 130
"Adding Paper, Toner and Staples", Troubleshooting. The message "Problem All trays are out of action. Call your service representative. with this tray." ap- pears "Fax Features", General Settings Guide "Adding Paper, Toner and Staples", Troubleshooting "Clearing Misfeeds", Troubleshooting 120 - Ricoh Aficio MP 2500SPF | Facsimile Reference - Page 131
handset or the handset of the external telephone. B If you hear beeps, press the {Start} key or the User Function key pro- grammed with Start Manual Reception. (The {Start} key is only available in facsimile mode when an original is not placed.) C Replace the optional handset or the handset of the - Ricoh Aficio MP 2500SPF | Facsimile Reference - Page 132
using {U} or {T}, and then press the {OK} key. The standby display appears. To cancel the selection, press the {Escape} key. Reference "Fax Features", General Settings Guide 122 - Ricoh Aficio MP 2500SPF | Facsimile Reference - Page 133
Fax. There are two methods of receiving e-mail: Auto E-mail Reception and Manual E-mail Reception. Important ❒ To use Internet Fax functions, the optional printer/scanner the reception interval in minutes. ❒ E-mail can be received manually. Reference "System Settings", General Settings Guide 123 - Ricoh Aficio MP 2500SPF | Facsimile Reference - Page 134
Function key beforehand. A Press the User Function key ({F1} to {F3}) programmed with Manual E-mail Reception. 3 ARX030S B Press the {Start} key. The machine accesses the {Job Information} key, and then select [Manual E-mail Reception] to receive e-mail. Reference "Fax Features", General Settings - Ricoh Aficio MP 2500SPF | Facsimile Reference - Page 135
) Queries to: "Administrator's e-mail address"". To check the host name and e-mail address, see "System Settings", General Set- 3 tings Guide. 1. E-mail transmitted without speci- fying a subject in "E-mail Options". 2. E-mail transmitted with a subject specified in "E-mail Options". 3. From The - Ricoh Aficio MP 2500SPF | Facsimile Reference - Page 136
other functions. ❒ The display format of the subject varies according to Stamp Sender Name and other settings. Reference p.30 "E-mail Subject" "System Settings", General Settings Guide 3 126 - Ricoh Aficio MP 2500SPF | Facsimile Reference - Page 137
Reception Functions Reception Functions This section explains useful functions for receiving fax documents. Important ❒ To use Internet Fax and IP-Fax functions, the optional printer/scanner unit must be installed. Forwarding Received Documents This machine can forward received documents to - Ricoh Aficio MP 2500SPF | Facsimile Reference - Page 138
the forwarding destinations to which documents are sent from all senders or Special Senders. For details, see "Fax Features", General Settings Guide. ❒ For the maximum number of destinations you can program in a group, see "Maximum Values". Reference p.186 "Maximum Values" "Fax Features", General - Ricoh Aficio MP 2500SPF | Facsimile Reference - Page 139
SMTP server usually tries re- sending the documents until the set timeout. Reference p.123 "Auto E-mail Reception" "System Settings", General Settings Guide Routing e-mail received via SMTP E-mail received via SMTP can be routed to other fax machines. ALT006S Important ❒ Before routing e-mail - Ricoh Aficio MP 2500SPF | Facsimile Reference - Page 140
the maximum number of destinations you can program in a group, see "Maximum Values". Reference p.186 "Maximum Values" "Fax Features", General Settings Guide JBIG Reception If you use JBIG (Joint Bi-level Image Experts Group) compression, you can send photographic originals faster than with other - Ricoh Aficio MP 2500SPF | Facsimile Reference - Page 141
menu. ❒ You can also have fax documents received by Memory Reception (Substitute Reception) printed after the machine is turned on. Reference "Fax Features", General Settings Guide 131 - Ricoh Aficio MP 2500SPF | Facsimile Reference - Page 142
", Troubleshooting Checkered Mark When this function is turned on, a Checkered Mark is printed on the first page of fax documents to help you separate them. Note ❒ You can turn this function on or off using Checkered Mark in the Fax Features menu. Reference "Fax Features", General Settings Guide - Ricoh Aficio MP 2500SPF | Facsimile Reference - Page 143
may deviate a little from the exact center of the edge. Reference "Fax Features", General Settings Guide Reception Time You can have the date, time, and file number printed at the bottom of need this function, contact your service representative. Reference "Fax Features", General Settings Guide 133 - Ricoh Aficio MP 2500SPF | Facsimile Reference - Page 144
Reception Image Rotation If you have set paper in the standard tray K, incoming fax documents are automatically rotated to fit onto the paper. 3 Page Separation and Length Reduction If the size of a received document is longer than the paper loaded in the machine, each page of the document can be - Ricoh Aficio MP 2500SPF | Facsimile Reference - Page 145
Printing Options Note ❒ Your service representative can customize this function with the following settings: • Reduction • Print split mark • Overprinting • Overprinting length • as good as usual. Reference p.134 "Page Separation and Length Reduction" "Fax Features", General Settings Guide 135 - Ricoh Aficio MP 2500SPF | Facsimile Reference - Page 146
3 ❒ You can turn this function on or off in the User Parameters (switch 02, bit 3) in the Fax Features menu. Reference "Fax Features", General Settings Guide If There Is No Paper of the Correct Size If there is no paper in the machine that matches the size of a received document, the - Ricoh Aficio MP 2500SPF | Facsimile Reference - Page 147
the received document is used. 3 Reference "System Settings", General Settings Guide Just size printing If you enable this function, received documents are printed on off. • If any documents or reports were being printed manually, the printer does not resume printing. Perform the operation from - Ricoh Aficio MP 2500SPF | Facsimile Reference - Page 148
Reception 3 138 - Ricoh Aficio MP 2500SPF | Facsimile Reference - Page 149
4. Changing/Confirming Communication Information This section explains the features of the {Job Information} key, which you can use to confirm communication results on the screen or printed reports. Printing a List of Files in Memory (Print TX Standby File List) Print this list if you want to find - Ricoh Aficio MP 2500SPF | Facsimile Reference - Page 150
whether or not to display a sender name with the User Param- eters (switch 04, bit 5) in the Fax Features menu. Reference "Fax Features", General Settings Guide 4 140 - Ricoh Aficio MP 2500SPF | Facsimile Reference - Page 151
Printing a File from Memory Printing a File from Memory If you want to check the contents of a file that is stored in memory and not yet sent, use this procedure to print it out. A Press the {Job Information} key. 4 ARX037S B Select [Check/Stop TX File] using {U} or {T}, and then press the {OK} - Ricoh Aficio MP 2500SPF | Facsimile Reference - Page 152
Changing/Confirming Communication Information E Press the {Start} key. To cancel printing after pressing the {Start} key, press the {Clear/Stop} key. The display returns to that of step C. The display returns to that of step C after printing a TX Standby File. Repeat from step C, if you want to - Ricoh Aficio MP 2500SPF | Facsimile Reference - Page 153
Checking the Transmission Result (TX File Status) Checking the Transmission Result (TX File Status) You can confirm transmission by the display, report, or e-mail. Confirming on Display Follow these steps to display the transmission results. A Press the {Job Information} key. 4 ARX037S B Select [TX - Ricoh Aficio MP 2500SPF | Facsimile Reference - Page 154
if the documents are sent to the receiver, confirm the same File No. 4 Reference p.186 "Maximum Values" "Fax Features", General Settings Guide Confirming by Report Print reports for confirmation. ❖ Memory Transmission If a document cannot be sent, a Communication Failure Report is automatically - Ricoh Aficio MP 2500SPF | Facsimile Reference - Page 155
(Memory Transmission)" p.146 "Immediate TX Result Report (Immediate Transmission)" "Registering Addresses and Users for Facsimile/Scanner Functions", General Settings Guide Confirming by Report and E-mail You can confirm transmission results using both the E-mail TX Result function, which sends the - Ricoh Aficio MP 2500SPF | Facsimile Reference - Page 156
this machine. (However, this does not mean the e-mail was delivered.) Reference p.147 "Communication Failure Report" "Fax Features", General Settings Guide Immediate TX Result Report (Immediate Transmission) If you turn this report on, a report is printed after every Immediate Transmission so you - Ricoh Aficio MP 2500SPF | Facsimile Reference - Page 157
the page was sent successfully, the Page column gives the total number of pages sent successfully. Reference "Fax Features", General Settings Guide Communication Failure Report 4 This report is printed when a document could not be successfully transmitted with Memory Transmission. If the machine - Ricoh Aficio MP 2500SPF | Facsimile Reference - Page 158
Changing/Confirming Communication Information Checking the Reception Result (RX File Status) Confirm the reception result on the screen or in a report. Confirming on Display Follow these steps to display the reception result. A Press the {Job Information} key. 4 ARX037S B Select [RX File Status] - Ricoh Aficio MP 2500SPF | Facsimile Reference - Page 159
for this function. Using the key allows you to omit steps A and B. Reference p.186 "Maximum Values" "Fax Features", General Settings Guide 4 Confirming by Report Print a report to confirm reception results. Journal Print the Journal to confirm the latest reception results. For details, see - Ricoh Aficio MP 2500SPF | Facsimile Reference - Page 160
Changing/Confirming Communication Information Printing the Journal You can print the Journal manually. Important ❒ The contents of a Journal printed automatically are deleted after printing. Keep the journal if you require a record of transmissions and receptions. A Press the {Job - Ricoh Aficio MP 2500SPF | Facsimile Reference - Page 161
Reference p.186 "Maximum Values" "Fax Features", General Settings Guide Journal This section explains the items printed in the Journal. Printing the Journal 4 1. Printing date Shows the date and time the report was printed. 2. Programmed - Ricoh Aficio MP 2500SPF | Facsimile Reference - Page 162
Shows the sender's name. 11. File number Shows file management numbers. Note ❒ To prioritize a fax number or name programmed in the destination list, contact your service representative. 152 - Ricoh Aficio MP 2500SPF | Facsimile Reference - Page 163
:40 on 20th, December, 2007 is "JOURNAL200712201440.csv". ❒ The subject of a Journal sent by e-mail begins with "Journal". Reference "Fax Features", General Settings Guide Journal by e-mail If the setting is made so that the Journal is transmitted as e-mail, it is transmitted to the e-mail address - Ricoh Aficio MP 2500SPF | Facsimile Reference - Page 164
happens, the Power Failure Report is printed so you can confirm which documents have been deleted. For details, see "Troubleshooting When Using the Facsimile Function", Troubleshooting. A Confirm that the Receive File indicator is blinking. ARX038S B Press the {Job Information} key. 154 ARX037S - Ricoh Aficio MP 2500SPF | Facsimile Reference - Page 165
Reception are automatically printed even if this function is switched on. ❒ If you print a Memory Lock File, it is deleted. Reference "Fax Features", General Settings Guide "Troubleshooting When Using the Facsimile Function - Ricoh Aficio MP 2500SPF | Facsimile Reference - Page 166
Changing/Confirming Communication Information 4 156 - Ricoh Aficio MP 2500SPF | Facsimile Reference - Page 167
5. Fax via Computer This section explains how to use this machine's facsimile function from a computer via a network. Sending Fax Documents from Computers You can send a document created with a Windows application from a computer connected to the machine to another fax machine. Connect computers to - Ricoh Aficio MP 2500SPF | Facsimile Reference - Page 168
❒ If your operating system is Windows Me, download USB Printing Support for Windows Me from the supplier's Web site. ❒ The Guide. Reference "Connecting the Machine", General Settings Guide "System Settings", General Settings Guide "Preparing the Machine", Printer Reference Using the Software - Ricoh Aficio MP 2500SPF | Facsimile Reference - Page 169
Windows 98/Me \DRIVERS\LAN-FAX\WIN9X_ME • LAN-Fax Driver for Windows 2000/XP/Vista, Windows Server 2003 \DRIVERS\LAN-FAX\XP_VISTA 5 ❖ Operating AT compatible • Operating systems Microsoft Windows 98/Me Microsoft Windows 2000/XP/Vista Microsoft Windows Server 2003 Microsoft Windows NT 4.0 - Ricoh Aficio MP 2500SPF | Facsimile Reference - Page 170
the installation. If you cancel the installation, restart your computer and install the rest of the software or printer driver. Note ❒ If your operating system is Windows 2000/XP, Windows Server 2003, installing a printer driver using Auto Run requires Administrator permissions. When you install - Ricoh Aficio MP 2500SPF | Facsimile Reference - Page 171
-click "Setup.exe" in the CD-ROM root directory to launch the installer. C Select the interface language of the software, and then click [OK]. D Click [LAN-Fax Driver]. The software license agreement window appears. E Read all of the terms and, if you agree, select [I accept the agreement.], and - Ricoh Aficio MP 2500SPF | Facsimile Reference - Page 172
and Sound]. C Click [Printers]. D Click [Add a printer]. E Follow the instructions displayed by the Add Printer Wizard. The LAN-Fax Driver for Windows Vista is located in . Note ❒ If your operating system is Windows 2000/XP/Vista, Windows Server 2003, Windows NT 4.0, log on using - Ricoh Aficio MP 2500SPF | Facsimile Reference - Page 173
Print as Graphics D When using Windows NT 4.0, set the following properties. • Paper Size • Orientation • Tray • Resolution E When using Windows 2000/XP/Vista, Windows Server 2003, click the [Printing Preferences...] button to set the following properties. • Paper Size • Orientation • Tray - Ricoh Aficio MP 2500SPF | Facsimile Reference - Page 174
the following items besides option configuration items. • Prohibit manual destination entry Check this option to inhibit direct destination specification Note ❒ If the options on this machine are not configured as instructed, LAN-Fax functions may fail. ❒ When this machine is connected to - Ricoh Aficio MP 2500SPF | Facsimile Reference - Page 175
Sending Fax Documents from Computers Basic Transmission This section explains how to send fax documents created using Windows applications. To send a fax, simply select [Print...] from the Windows application, then select [LAN-Fax M10] as the printer, and then specify a destination in the [LAN-Fax - Ricoh Aficio MP 2500SPF | Facsimile Reference - Page 176
Fax via Computer Reference p.166 "Specifying a destination using a destination list" p.167 "Specifying a destination using Address Book" p.168 "Specifying a destination by directly entering a fax number, Internet Fax destination, or IP-Fax destination" p.169 "Specifying Options" p.171 "Confirming - Ricoh Aficio MP 2500SPF | Facsimile Reference - Page 177
Sending Fax Documents from Computers Specifying a destination using Address Book Important ❒ In order to use this method, you need to register destinations in the address list using Address Book. A Click the [Address Book] tab. The [Address Book] tab appears. B Select a CSV file containing the - Ricoh Aficio MP 2500SPF | Facsimile Reference - Page 178
Fax via Computer Specifying a destination by directly entering a fax number, Internet Fax destination, or IP-Fax destination A Click the [Specify Destination] tab. The [Specify Destination] tab appears. B Select the type of fax from the [Type:] dropdown menu. To send by standard fax or IP-Fax, - Ricoh Aficio MP 2500SPF | Facsimile Reference - Page 179
Sending Fax Documents from Computers Specifying Options You can specify the options in the following list. For details about transmission options, see the LAN-Fax Driver's Help. • Sending at specific time • Print Fax Header • Attach a Cover Sheet • Preview • Save as file To send a fax document at - Ricoh Aficio MP 2500SPF | Facsimile Reference - Page 180
as file] check box. C Click [Save to...]. D Select a folder on the folder tree. E Select a method of file naming. To enter a file name manually, select the [Specify file name when saving] check box. To have the file assigned a name and saved automatically, select the [Automatically create a new - Ricoh Aficio MP 2500SPF | Facsimile Reference - Page 181
Sending Fax Documents from Computers Note ❒ Single-page documents are saved as single TIFF files, and multiple-page documents are saved as multiple TIFF files. Checking Transmission Using LAN-Fax Driver From "SmartDeviceMonitor for Admin", "SmartDeviceMonitor for Client", or Web Image Monitor, - Ricoh Aficio MP 2500SPF | Facsimile Reference - Page 182
"Off", the LAN-Fax result notification e-mail is not transmitted, and the LAN-Fax Result Report is printed. See "System Settings", General Settings Guide for the e-mail set- tings, and see "LAN-Fax Result Report" for the LAN-Fax Result Report. Reference p.146 "Communication Result Report (Memory - Ricoh Aficio MP 2500SPF | Facsimile Reference - Page 183
of time the machine keeps document data in memory if print failed due to problems such as paper shortage or paper jams. Make this setting with User Parameters (switch p.170 "Saving as files" "Fax Features", General Settings Guide Editing Address Book You can program and edit destinations in the - Ricoh Aficio MP 2500SPF | Facsimile Reference - Page 184
under [Fax Number:], the following line types are selectable; G3, G3-2, G3-3, G4, G3 Dir. Auto, G3 PABX Auto, or I-G3. However, this machine supports G3 only. ❒ For [Protocol:] under [IP-Fax address:], select [H.323] or [SIP]. ❒ To bypass the SMTP server, under the [E-mail address:] box, select the - Ricoh Aficio MP 2500SPF | Facsimile Reference - Page 185
Sending Fax Documents from Computers Editing programmed destinations A On the [Start] menu, point to [Programs], [LAN-Fax Utilities], and then click [Address Book]. The [Address Book] dialog box appears. If LAN-Fax Driver has already started up, click [Edit Address Book...]. B Click [New/Browse - Ricoh Aficio MP 2500SPF | Facsimile Reference - Page 186
Fax via Computer Using the Machine's Address Book Data in the Destination List of the LAN-Fax You can save information about fax destinations registered to this machine in a personal computer as a CSV file using "Address Management Tool" in "SmartDeviceMonitor for Admin". Saved CSV files can be - Ricoh Aficio MP 2500SPF | Facsimile Reference - Page 187
Sending Fax Documents from Computers A On the [Start] menu, point to [Programs], [LAN-Fax Utilities], and then click [LAN-Fax Cover Sheet Editor]. The [LAN-Fax Cover Sheet Editor] dialog box appears. B Edit the cover sheet. For details about operations, see Help. C Click [Save as...] on the [File] - Ricoh Aficio MP 2500SPF | Facsimile Reference - Page 188
and its installation, see "Monitoring and Configuring the Printer", Network Guide. ❒ For details, see Network Guide and SmartDeviceMonitor for Admin Help. 5 Reference "Monitoring and Configuring the Printer", Network Guide LAN-Fax Operation Messages This section explains typical operation error - Ricoh Aficio MP 2500SPF | Facsimile Reference - Page 189
newly received e-mail overwrite the existing information. Reference p.31 "T.37 Full Mode" "System Settings", General Settings Guide "Monitoring and Configuring the Printer", Network Guide To Edit Machine Properties Already Programmed Follow these steps to use Web Image Monitor to edit information - Ricoh Aficio MP 2500SPF | Facsimile Reference - Page 190
Fax via Computer F Set the properties for Internet Fax data format other than the mode selection. If you change the mode to "Simple Mode", you cannot set machine properties. G Click [OK] at the upper or lower left of the screen. To cancel the setting, click [Cancel] at the upper or lower left of - Ricoh Aficio MP 2500SPF | Facsimile Reference - Page 191
RX File Status • 2 Sided TX (option) • Print Fax Header • Forwarding • Switch Reception Mode • Start Manual Reception • Sender Settings • Transmission Stamp • E-mail Options (option) • Print TX Status Report • Manual E-mail Reception (option) • Select Line/SMTP (option) • SUB/SEP Code • PIN Code TX - Ricoh Aficio MP 2500SPF | Facsimile Reference - Page 192
Appendix Optional Equipment This section explains the functions of options. Handset You can make or receive calls by installing the optional handset and dialing manually. Reference p.83 "On Hook Dial" p.85 "Manual Dial" 6 182 - Ricoh Aficio MP 2500SPF | Facsimile Reference - Page 193
Specifications Specifications ❖ Fax Transmission and Reception Standard G3 Resolution G3: 8 × 3.85/mm, 200 × 100 dpi (Standard character), 8 × 7.7/mm, 200 × 200 dpi (Detail character), 8 × 15.4/mm (Fine character) Transmission time G3: 3 seconds at 28,800 bps, Standard resolution (JBIG - Ricoh Aficio MP 2500SPF | Facsimile Reference - Page 194
Appendix ❖ IP-Fax Transmission and Reception Network LAN: Local Area Network Ethernet/10base-T, 100base-TX, IEEE802.11b (wireless LAN) Scan line density 8 × 3.85/mm, 200 × 100 dpi (Standard character), 8 × 7.7/mm, 200 × 200 dpi (Detail character), 8 × 15.4/mm (Fine character) Maximum original - Ricoh Aficio MP 2500SPF | Facsimile Reference - Page 195
Specifications Specifications Required for the Internet Fax Destination Machines This machine can communicate with Internet Fax machines that satisfy the following specification requirements. When communicating with full mode compatible machines, you can take advantage of higher specifications for - Ricoh Aficio MP 2500SPF | Facsimile Reference - Page 196
Appendix Maximum Values The following list contains the maximum value for each item. Item Description Memory 4 MB Number of documents you can store in memory for Memory Transmission 200 Number of pages you can store in memory (using A4 Standard ) Number of - Ricoh Aficio MP 2500SPF | Facsimile Reference - Page 197
INDEX 1 Sided for 1st Page, 113 2 Sided from 1st Page, 113 2 Sided TX, 113 A Acceptable original sizes, 34 Add Dest, 19 Address Book, 159, 173 Address Book Management, 64 Add User, 180 Adjust Sound Volume, 9 Administrator Tools, 9 Advanced Search, 79 Attach a Cover Sheet, 169 Attaching a created - Ricoh Aficio MP 2500SPF | Facsimile Reference - Page 198
H H.323, 25 H.323 Settings, 9 Handset, 85, 121, 182 How to Read This Manual, 5 I If memory runs out while storing an original, 20 If the machine cannot detect the 13, 20 Immediate TX Result Report, 146 Important Safety Instructions, 4 Installing individual applications, 161 Installing the LAN-Fax - Ricoh Aficio MP 2500SPF | Facsimile Reference - Page 199
M Making settings for option configuration, 164 Managing facsimile functions using SmartDeviceMonitor for Admin, 178 Manual, 48, 52 Manual Dial, 85 Manual E-mail Reception, 124 Manual Reception, 121 Manuals for This Machine, i Maximum E-mail Size, 9 Maximum values, 186 MDN, 100 Memory Lock, 9 Memory - Ricoh Aficio MP 2500SPF | Facsimile Reference - Page 200
an alias telephone number, 51 Specifying an IPv4 address, 48 Specifying a SIP user name, 51 Specifying options, 169 Stamp, 39, 93 Standard, 43 Start Manual Reception, 121 Stop TX, 88, 89 SUB Code TX, 106 Subject, 98 SUB/SEP Code, 106, 109 Substitute Reception, 119 Switching between Memory and - Ricoh Aficio MP 2500SPF | Facsimile Reference - Page 201
key, 9, 64 Using the machine's Address Book data in the destination list of the LAN-Fax, 176 Using the Quick Dial keys, 57 Using the software, 158 191 - Ricoh Aficio MP 2500SPF | Facsimile Reference - Page 202
192 EN USA D327-7623 - Ricoh Aficio MP 2500SPF | Facsimile Reference - Page 203
Me is Microsoft® Windows® Millennium Edition (Windows Me) • The product names of Windows 2000 are as follows: Microsoft® Windows® 2000 Professional Microsoft® Windows® 2000 Server Microsoft® Windows® 2000 Advanced Server • The product names of Windows XP are as follows: Microsoft® Windows® XP - Ricoh Aficio MP 2500SPF | Facsimile Reference - Page 204
FAX Option Type 2500 Operating Instructions Facsimile Reference EN USA D327-7623
-
 1
1 -
 2
2 -
 3
3 -
 4
4 -
 5
5 -
 6
6 -
 7
7 -
8
-
9
-
10
-
11
-
12
-
13
-
14
-
15
-
16
-
17
-
18
-
19
-
20
-
21
-
22
-
23
-
24
-
25
-
26
-
27
-
28
-
29
-
30
-
31
-
32
-
33
-
34
-
35
-
36
-
37
-
38
-
39
-
40
-
41
-
42
-
43
-
44
-
45
-
46
-
47
-
48
-
49
-
50
-
51
-
52
-
53
-
54
-
55
-
56
-
57
-
58
-
59
-
60
-
61
-
62
-
63
-
64
-
65
-
66
-
67
-
68
-
69
-
70
-
71
-
72
-
73
-
74
-
75
-
76
-
77
-
78
-
79
-
80
-
81
-
82
-
83
-
84
-
85
-
86
-
87
-
88
-
89
-
90
-
91
-
92
-
93
-
94
-
95
-
96
-
97
-
98
-
99
-
100
-
101
-
102
-
103
-
104
-
105
-
106
-
107
-
108
-
109
-
110
-
111
-
112
-
113
-
114
-
115
-
116
-
117
-
118
-
119
-
120
-
121
-
122
-
123
-
124
-
125
-
126
-
127
-
128
-
129
-
130
-
131
-
132
-
133
-
134
-
135
-
136
-
137
-
138
-
139
-
140
-
141
-
142
-
143
-
144
-
145
-
146
-
147
-
148
-
149
-
150
-
151
-
152
-
153
-
154
-
155
-
156
-
157
-
158
-
159
-
160
-
161
-
162
-
163
-
164
-
165
-
166
-
167
-
168
-
169
-
170
-
171
-
172
-
173
-
174
-
175
-
176
-
177
-
178
-
179
-
180
-
181
-
182
-
183
-
184
-
185
-
186
-
187
-
188
-
189
-
190
-
191
-
192
-
193
-
194
-
195
-
196
-
197
-
198
-
199
-
200
-
201
-
202
-
203
-
204
 |
 |
FAX Option Type 2500
Operating Instructions
Facsimile Reference
Read this manual carefully before you use this machine and keep it handy for future reference. For safe and correct use, be sure to read the
Safety Information in "About This Machine" before using the machine.
Transmission
Send Settings
Reception
Changing/Confirming Communication Information
Fax via Computer
Appendix
1
2
3
4
5
6