Ricoh Aficio SP 3510DN Manuals
Ricoh Aficio SP 3510DN Manual
 |
View all Ricoh Aficio SP 3510DN manuals
Add to My Manuals
Save this manual to your list of manuals |
Ricoh Aficio SP 3510DN manual content summary:
- Ricoh Aficio SP 3510DN | Manuals - Page 1
Operating Instructions Hardware Guide For safe and correct use, be sure to read "Safety Information" before using the machine. - Ricoh Aficio SP 3510DN | Manuals - Page 2
- Ricoh Aficio SP 3510DN | Manuals - Page 3
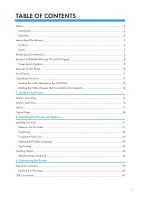
and CAUTION labels 8 Power Switch Symbols...9 Manuals for This Printer...10 List of Option...11 Operating Instructions...12 Reading the HTML Manuals on the CD-ROMs 12 Reading the HTML Manuals That You Install on the Computer 12 1. Guide to the Printer Exterior: Front View...15 Exterior: Rear - Ricoh Aficio SP 3510DN | Manuals - Page 4
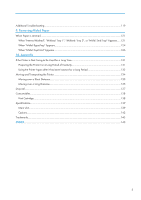
Paper in the Bypass Tray...79 Loading Paper in Tray 2...85 Loading Envelopes in Bypass Tray...88 6. Replacing Consumables Replacing the Print Cartridge...93 7. Cleaning the Printer Cautions to Take When Cleaning...99 Cleaning the Friction Pad and the Paper Feed Roller 100 8. Troubleshooting Error - Ricoh Aficio SP 3510DN | Manuals - Page 5
Additional Troubleshooting...119 9. Removing Misfed Paper When Paper is Jammed...121 When "Internal Misfeed", "Misfeed: Tray 1", "Misfeed: Tray 2", or "Misfd: Stnd Tray" Appears.....121 When "Misfd: BypssTray" Appears...124 When "Misfd: Dupl Unit" Appears...126 10. Appendix If the Printer is Not - Ricoh Aficio SP 3510DN | Manuals - Page 6
Notice Introduction This manual contains detailed instructions and notes on the operation and use of this machine. For your safety and benefit, read this manual carefully before using the machine. Keep this manual in a handy place for quick reference. Do not copy or print any item for which - Ricoh Aficio SP 3510DN | Manuals - Page 7
using the machine, and explanations of likely causes of paper misfeeds, damage to originals, or loss of data. Be sure to read these explanations. Indicates supplementary explanations of the machine's functions, and instructions on resolving user errors. This symbol is located at the end of sections - Ricoh Aficio SP 3510DN | Manuals - Page 8
procedures that are model-specific, this manual refers to the different printer models as Type 1 or Type 2. The following table describes the model types. Model types Model type Model name Duplex Printing Type 1 SP 3500N Manual Type 2 SP 3510DN Automatic Furthermore, there is a label on - Ricoh Aficio SP 3510DN | Manuals - Page 9
• Dimensions in this manual are given in two units of measure: metric and inch. If your machine is a Region A model, refer to the metric units. If your machine is a Region B model, refer to the inch units. 7 - Ricoh Aficio SP 3510DN | Manuals - Page 10
has labels for WARNING and CAUTION at the positions shown below. For safety, please follow the instructions and handle the machine as indicated. 1 2 3 4 CMC004 1 Do not incinerate toner or toner containers. Toner dust may cause flashback when exposed to an open flame. 2 Do not touch the parts - Ricoh Aficio SP 3510DN | Manuals - Page 11
4 • Type 1 Model The machine weighs approximately 11.4 kg (25.2 lb.) . When moving the machine, use the inset grips on both sides, and lift slowly. • Type 2 Model The machine weighs approximately 12.4 kg (27.4 lb.). When moving the machine, use the inset grips on both sides, and lift slowly. Power - Ricoh Aficio SP 3510DN | Manuals - Page 12
such as installing options, replacing consumables, responding to error messages, and resolving jams. Driver Installation Guide Contains procedures for installing the PCL 6 and PostScript 3 printer drivers. This manual is included on the driver CD-ROM. Software Guide Contains information about using - Ricoh Aficio SP 3510DN | Manuals - Page 13
List of Option This section provides a list of option for this printer, and how it is referred to as in this manual. Option List Paper Feed Unit TK1080 Referred to as Paper feed unit • For details about the specifications of this option, see "Specifications". • p.139 "Specifications" 11 - Ricoh Aficio SP 3510DN | Manuals - Page 14
your computer. 1. Insert the CD-ROM into the CD-ROM drive of your computer. 2. Select a language and a product, and then click [OK]. 3. Click [Install manuals]. 4. Install the HTML manuals following the on-screen instructions. 5. When the installation is complete, click [Finish]. 6. Click [Exit]. 12 - Ricoh Aficio SP 3510DN | Manuals - Page 15
for installing the manuals are as follows: • Operating system: Windows XP/Vista/7, Windows Server 2003/2003 R2/2008/2008 R2 • Minimum display resolution: 800 × 600 pixels • If you cannot install a manual, copy the "MANUAL_HTML" folder to your computer's hard drive, and then run "Setup.exe". • To - Ricoh Aficio SP 3510DN | Manuals - Page 16
14 - Ricoh Aficio SP 3510DN | Manuals - Page 17
Cover Open this cover to replace the print cartridge or remove jammed paper. 7. Tray 1 This tray can hold up to 250 sheets of plain paper. 8. Bypass Tray Extension Pull this out when loading a sheet that is longer than A4 SEF on the Bypass Tray. 9. Bypass Tray This tray can hold up to 50 sheets - Ricoh Aficio SP 3510DN | Manuals - Page 18
. 2. USB Port Use a USB cable to connect the printer to the host computer. 3. Rear Cover Open this cover to remove jammed paper or when printing on envelopes. 4. Tray 1 Rear cover Remove this cover when you load paper larger than A4 in the paper tray. 5. Power Socket For connecting the power cord to - Ricoh Aficio SP 3510DN | Manuals - Page 19
Interior Interior 1 CMC009 1. Print Cartridge If the following message appears on the control panel, replace the print cartridge. "Replace Print Cartridge" • For details about the messages which appear on the screen to prompt you to replace the units, see p.103 "Error & Status Messages on the - Ricoh Aficio SP 3510DN | Manuals - Page 20
1. Guide to the Printer Control Panel 1 2 10 3 9 4 8 7 5 6 CMC010 1. Display Displays current printer status and error message. You can set the display up with your hands. Adjust the angle of it to see clearly. CMC011 2. Scroll Keys Press to move the - Ricoh Aficio SP 3510DN | Manuals - Page 21
display to check the error. Flashes in yellow when toner is nearly empty. 7. Power Indicator Remains lit while the power is on. It is unlit when the power is off. 8. [Stop/Start] key If you press this key, the printer stops receiving data, and printing is not possible. 9. [Job Reset] key Press this - Ricoh Aficio SP 3510DN | Manuals - Page 22
1. Guide to the Printer 20 - Ricoh Aficio SP 3510DN | Manuals - Page 23
how to set up, configure the printer for operation, and install the optional paper feed unit for this printer. Installing the Printer This section describes how to install the printer and perform settings after installation. Where to Put the Printer The printer's location should be carefully chosen - Ricoh Aficio SP 3510DN | Manuals - Page 24
2. Installing the Printer and Options • Keep the machine in an area that is within optimum environmental conditions. Operating the machine in an environment that is outside the recommended - Ricoh Aficio SP 3510DN | Manuals - Page 25
Installing the Printer CER119 gases • Areas that are excessively cold, hot, or humid • Areas directly exposed to currents of hot, cold, or room-temperature air from for a long time or print large quantities, you might detect an odd smell. This might cause the output paper to also have an odd - Ricoh Aficio SP 3510DN | Manuals - Page 26
10 A, 60 Hz Please be sure to connect the power cord to a power source as above. Unpacking To protect it from shock and vibration during transit, this printer cord plug from the wall outlet. Then contact your service representative and report the problem. Do not use the machine. Doing so could - Ricoh Aficio SP 3510DN | Manuals - Page 27
Installing the Printer • Do not incinerate toner (new or used) or toner containers. Doing so risks burns. Toner will ignite on contact with naked flame. • Do not use the cleaner to suck spilled toner (including used toner). Sucked toner may cause firing or explosion due to electrical contact - Ricoh Aficio SP 3510DN | Manuals - Page 28
on the tray area when lifting the printer. • Do not allow paper clips, staples, or other small metallic objects to fall inside the machine. • Keep the uncovered print cartridge away from direct sunlight. • Do not touch the print cartridge's photo conductor. CMC013 Do not touch the ID chip on the - Ricoh Aficio SP 3510DN | Manuals - Page 29
2. Lift the printer by using the inset grips on both sides of the printer. Installing the Printer CMC015 3. Remove the protective materials attached on the printer's exterior. CMC016 CMC007 • Wait until step 4 before removing the adhesive tape on the rear cover. 27 - Ricoh Aficio SP 3510DN | Manuals - Page 30
different positions. Make sure to check the printer's exterior for all protective materials, and remove them completely. 6. Make sure the levers are pulled up. CMC104 • If you leave the levers lowered, toner may not settle properly when printing on standard paper. Make sure the levers are pulled up - Ricoh Aficio SP 3510DN | Manuals - Page 31
front cover, and then carefully lower it. 2 1 CMC017 8. Remove the protective material attached inside the printer. 1 3 2 CMC018 9. Unpack the print cartridge. Then, place it on a flat surface, and remove the protection sheet. CMC019 Shake the print cartridge from side to side five or six times. 29 - Ricoh Aficio SP 3510DN | Manuals - Page 32
2. Installing the Printer and Options CMC020 10. Slide the print cartridge in horizontally. When the cartridge can go no further, raise it slightly and push it fully in. Then push down on the cartridge until it clicks into place. CMC021 11. Using both hands, carefully push up the front cover until - Ricoh Aficio SP 3510DN | Manuals - Page 33
12. Carefully pull tray 1, and then pull out with both hands. Installing the Printer CMC023 13. Remove the protective material attached inside the tray. CMC024 14. Carefully push tray 1 straight into the printer. CMC025 31 - Ricoh Aficio SP 3510DN | Manuals - Page 34
2. Installing the Printer and Options 15. Pull out and raise the stop fence. 2 1 CMC026 Turning the Power On Follow the procedure below to turn the power on. • Do not use any power sources other than those that match the specifications shown in this manual. Doing so could result in fire or electric - Ricoh Aficio SP 3510DN | Manuals - Page 35
Installing the Printer • The supplied power cord is for use with this machine only. Do not use it with other appliances. Doing so could result in fire or - Ricoh Aficio SP 3510DN | Manuals - Page 36
2. Installing the Printer and Options 3. Turn the power switch to On. CMC028 The Power appear on the display. If you want to use the display in English, the following procedures are unnecessary. • The default setting is English. 1. Press the [Menu] key. CMC034 2. Press the [ ] or [ ] key to display - Ricoh Aficio SP 3510DN | Manuals - Page 37
4. Press the [Menu] key to return to the initial screen. Test Printing The following explains the procedure for performing a test print. Perform the test print to verify the printer is working normally. Test printing checks printer performance only; it does not test the connection to the computer - Ricoh Aficio SP 3510DN | Manuals - Page 38
care that the power cord is not damaged under the machine. Failing to take these precautions could result in fire or electric shock. • Tray 1 is required to print using the optional paper feed unit. Without Tray 1, paper jams will occur. • Do not grip on the tray area when lifting the printer. 36 - Ricoh Aficio SP 3510DN | Manuals - Page 39
1. Check the package contains Paper Feed Unit. Installing Option CMC030 2. Turn off the printer's power switch, and then unplug the printer's power cord from the wall outlet. 3. Remove the adhesive tape from the optional paper feed unit. CMC031 4. Lift the printer using the inset grips on both - Ricoh Aficio SP 3510DN | Manuals - Page 40
cannot install it properly even after attempting reinstallation, contact your sales or service representative. • For printing the configuration page, see Software Guide. • For loading paper into the paper tray, see p.67 "Loading Paper". • When adjusting the printing position, see Software Guide. 38 - Ricoh Aficio SP 3510DN | Manuals - Page 41
the procedure below to connect the printer to the computer through the network. connecting the 10BASE-T or 100BASE-TX cable to the printer's Ethernet port. • Do not connect the Ethernet . • The Ethernet cable is not supplied with this printer. Select your cable according to the network environment. 1. - Ricoh Aficio SP 3510DN | Manuals - Page 42
3. Connecting the Printer Reading the LED Lamps 1 2 CMF062 1. Yellow: flashes when 100BASE-TX/RX or 10BASE-TX/RX is being used. 2. Green: comes on when the printer is properly connected to the network. 40 - Ricoh Aficio SP 3510DN | Manuals - Page 43
it separately, according to the computer you are using. • USB connection is possible under Windows XP/Vista/7, Windows Server 2003/2003 R2/2008/2008 R2, and Mac OS X. • USB connection with Macintosh 's USB interface. • For details about settings for USB connection printing, see Software Guide. 41 - Ricoh Aficio SP 3510DN | Manuals - Page 44
3. Connecting the Printer 42 - Ricoh Aficio SP 3510DN | Manuals - Page 45
4. Configuration This chapter explains supported network connections and settings for the IP addresses. Ethernet Configuration If connecting the printer to a network using an Ethernet cable, set the necessary settings, depending on the network environment, on the control panel. Web Image Monitor - Ricoh Aficio SP 3510DN | Manuals - Page 46
, the IPv6 address obtained from a DHCP server is displayed. • Manual Address: • Manual Address: 0000:0000:0000 • Prefix Length: (0-128) 0 • Gateway XXXX: XXXX: XXXX: XXXX *1 *1 "X" indicates a unique address number for your printer. • If [DHCP] is in use, the IP address, subnet mask, and gateway - Ricoh Aficio SP 3510DN | Manuals - Page 47
Network Setting: IPv4 Config. When [IPv4 Config.] setting is changed, Alert indicator lights up indicating that the machine needs to be restarted. Although the printer can be used normally, the light will not turn off until you restart the machine. 5. Press the [ ] or [ ] key to display [DHCP], and - Ricoh Aficio SP 3510DN | Manuals - Page 48
the all field, press the [OK] key. 9. Use this method to assign Subnet Mask and Gateway Address. 10. Press the [Menu] key. 11. If you are requested to restart the printer, turn off the printer, and then turn it back on. 12. Print a configuration page to confirm the settings made. • For details about - Ricoh Aficio SP 3510DN | Manuals - Page 49
[Active], and then press the [OK] key. DHCP: Active The address will be detected by the printer. 7. Press the [Menu] key. 8. If you are requested to restart the printer, turn off the printer, and then turn it back on. 9. Print a configuration page to confirm the settings made. • For details about - Ricoh Aficio SP 3510DN | Manuals - Page 50
Network Setting: IPv6 Config. When [IPv6 Config.] setting is changed, Alert indicator lights up indicating that the machine needs to be restarted. Although the printer can be used normally, the light will not turn off until you restart the machine. 5. Press the [ ] or [ ] key to display [IPv6], and - Ricoh Aficio SP 3510DN | Manuals - Page 51
If you are requested to restart the printer, turn off the printer, and then turn it back on. 17. Print a configuration page to confirm the settings made. • For details about printing the configuration page using control panel, see p.35 "Test Printing". Receiving an IP Address for IPv6 Automatically - Ricoh Aficio SP 3510DN | Manuals - Page 52
Network Setting: IPv6 Config. When [IPv6 Config.] setting is changed, Alert indicator lights up indicating that the machine needs to be restarted. Although the printer can be used normally, the light will not turn off until you restart the machine. 5. Press the [ ] or [ ] key to display [IPv6], and - Ricoh Aficio SP 3510DN | Manuals - Page 53
the configuration page using control panel, see p.35 "Test Printing". Setting the Ethernet Speed You can set the speed that the printer will use for Ethernet communication. For normal usage, the default setting [Auto Select] is suitable and does not need to be changed. This setting allows two - Ricoh Aficio SP 3510DN | Manuals - Page 54
OK] key. Network Setting: Ethernet Speed 5. Press the [ ] or [ ] key to select the Ethernet speed, and then press the [OK] key. 6. Press the [Menu] key. 7. Print a configuration page to confirm the settings made. • For details about printing the configuration page using control panel, see p.35 "Test - Ricoh Aficio SP 3510DN | Manuals - Page 55
paper sizes and types supported by this printer, and how to load paper into the paper trays. Paper and Other Medias Supported by This Printer This section describes the type, size, and weight of paper that can be loaded in each tray. The capacity of each paper tray is also provided. • All paper - Ricoh Aficio SP 3510DN | Manuals - Page 56
Paper Thick Paper 1 Plain Paper Recycled Paper Color Paper Preprinted Paper Prepunched Paper Letterhead Bypass tray Type Thin Paper Thick Paper 1 Thick Paper 2 Plain Paper Recycled Paper Color Paper Preprinted Paper Prepunched Paper Letterhead Bond Paper Cardstock Label Paper 267 mm) Com 10 (41/8" × - Ricoh Aficio SP 3510DN | Manuals - Page 57
Paper and Other Medias Supported by This Printer • The number of sheets that can be printed in one minute may become lower than normal when printing on Legal size paper. 55 - Ricoh Aficio SP 3510DN | Manuals - Page 58
Bypass Tray: Print side facing up • Print quality cannot be guaranteed if paper other than the ones recommended is used. For more information about recommended paper, contact your sales or service representative. • Do not use paper that has already been printed onto by other printers. • When loading - Ricoh Aficio SP 3510DN | Manuals - Page 59
for Tray 1 and Tray 2" and p.84 "Specifying a paper type for the bypass tray". Specifications of Paper Types The following tables describe the types of paper that can be used with this printer. • Depending on the paper type, the toner may take a while to dry. Before handling, make sure printed - Ricoh Aficio SP 3510DN | Manuals - Page 60
(81/4 " × 13 "), or 16K (195 × 267 mm). Thick Paper 2 Item Description Paper thickness 131 to 162 g/m2 (34.7 to 43.0 lb.) Supported paper tray Tray 1 and bypass tray Duplex supported size None Notes • The number of sheets that can be printed in one minute is approximately half that of plain - Ricoh Aficio SP 3510DN | Manuals - Page 61
size Notes A4, Legal (81/2 " × 14 "), Letter (81/2 " × 11 ") If the paper thickness is outside the specified range, select [Thin Paper], [Thick Paper 1], or [Thick Paper 2]. Prepunched Item Paper thickness Supported paper tray Duplex supported size Description 75 to 90 g/m2 (20.0 to 24.0 lb.) Any - Ricoh Aficio SP 3510DN | Manuals - Page 62
specified range, select [Thin Paper], [Thick Paper 1], or [Thick Paper 2]. Bond paper Item Description Paper thickness 105 to 160 g/m2 (28.0 to 42.6 lb.) Supported paper tray Tray 1 and bypass tray Duplex supported size None Notes • The number of sheets that can be printed in one minute is - Ricoh Aficio SP 3510DN | Manuals - Page 63
adhesive label paper on which glue is exposed. Glue may stick to the inner parts of the machine, which can cause paper feed problems, deterioration in print quality, or premature wear of the print cartridge's photo conductor unit. OHP Item Supported paper tray Bypass tray Duplex supported size None - Ricoh Aficio SP 3510DN | Manuals - Page 64
to stick to the fusing unit and cause misfeeds. Envelope Item Supported paper tray Bypass tray Duplex supported size None Description Notes • The number of envelopes that can be printed in one minute is approximately half that of plain paper. • Paper can be loaded only up to the lower of the two - Ricoh Aficio SP 3510DN | Manuals - Page 65
Paper Recommendations CMC039 • Fan envelopes, and then align their edges before loading. CMC040 • When fanning envelopes, flaps are not stuck together. If they are stuck together, separate them. • Before loading envelopes, flatten them out so that their curl does not exceed that shown in the - Ricoh Aficio SP 3510DN | Manuals - Page 66
to the fusing unit and cause a paper jam. • Do not use paper that has already been printed onto by other printers. • When loading paper, take care not to touch the surface of the paper. • Even supported types of paper may cause paper jams or malfunctions if the paper is not in good condition. 64 - Ricoh Aficio SP 3510DN | Manuals - Page 67
should always be stored properly. Improperly stored paper might result in poor print quality, paper jams, or printer damage. Recommendations are as follows: • Avoid storing paper in areas that are excessively cold, hot, humid, or dry. • Avoid exposing paper to direct sunlight. • Store on a flat - Ricoh Aficio SP 3510DN | Manuals - Page 68
mm (0.17 inches) 4. Approx. 4.2 mm (0.17 inches) 4 CMC044 • The print area may vary depending on the paper size, printer language and printer driver settings. • For better envelope printing, we recommend you set the right, left, top, and bottom print margins to at least 15 mm (0.59 inches) each - Ricoh Aficio SP 3510DN | Manuals - Page 69
tray. Misfeeds might occur. • After loading paper in the tray, specify the paper type and size using control panel to avoid printing problems. This printer does not detect the paper size automatically. • Do not mix different types of paper in the same paper tray. • Do not move the side paper guides - Ricoh Aficio SP 3510DN | Manuals - Page 70
and Other Media Place the tray on a flat surface. 2. Pinch the clip on the side paper guide and slide it to match the standard size. CMC046 CMC047 When loading custom size paper, position the paper guide slightly wider than the actual paper size. 3. Pinch the end paper guide and slide it inward to - Ricoh Aficio SP 3510DN | Manuals - Page 71
Loading Paper CMC049 When loading custom size paper, position the paper guide slightly wider than the actual paper size. 4. Load the new paper stack print side down. Make sure paper is not stacked higher than the upper limit marked inside the tray. CMC050 Slide the guides inward, until they are - Ricoh Aficio SP 3510DN | Manuals - Page 72
gaps between the paper and the paper guides; both side and end paper guides. CMC052 If there is a gap between the paper and the end paper guide, as in the example below, the paper might not feed in correctly. CMC058 6. Carefully push Tray 1 straight into the printer. CMC053 To avoid paper jams, make - Ricoh Aficio SP 3510DN | Manuals - Page 73
supported by the printer, see p.56 "Paper Recommendations". • For details about the paper settings, see Software Guide. Loading paper longer than A4 This section explains how to load paper longer than A4 (297 mm) into the printer. • Make sure paper is not stacked above the limit mark inside the tray - Ricoh Aficio SP 3510DN | Manuals - Page 74
5. Paper and Other Media 3. Release the extender locks on both sides of the tray, and then pull out the extender until it clicks. CMC057 4. Lock the extender in the extended position. CMC055 5. Pinch the clip on the side paper guide, and then slide it to match the standard size. 72 CMC059 - Ricoh Aficio SP 3510DN | Manuals - Page 75
Loading Paper CMC047 6. Pinch the end paper guide and slide it inward to match the paper size. CMC060 CMC049 7. Load the new paper stack print side down. Make sure paper is not stacked higher than the upper limit marked inside the tray. 73 - Ricoh Aficio SP 3510DN | Manuals - Page 76
higher than the projection on the side paper guides. CMC051 8. Check there are no gaps between the paper and the paper guides; both side and end paper guides. CMC062 If there is a gap between the paper and the end paper guide, as in the example below, the paper might not feed in correctly. 74 - Ricoh Aficio SP 3510DN | Manuals - Page 77
side of the paper tray shows approximately how much paper is remaining. • For details about paper types supported by the printer, see p.56 "Paper Recommendations". • For details about the paper settings, see Software Guide. Setting a paper size using the control panel To load paper whose size cannot - Ricoh Aficio SP 3510DN | Manuals - Page 78
the loaded paper size, and then press the [OK] key. Tray 1 Ppr Size: A4 6. Press the [Menu] key. • If the [Auto Continue] setting under [System] is enabled, the printer ignores the paper type and size settings and prints on whatever paper is loaded. Printing stops temporarily when the error is - Ricoh Aficio SP 3510DN | Manuals - Page 79
Loading Paper • Paper sizes between 100 - 216 mm (3.94 - 8.50 inch) in width and 148 - 356 mm (5.83 - 14.02 inch) in length can be loaded in the tray 1. • The printer cannot print from applications that do not support custom size paper. 1. Press the [Menu] key. CMC034 2. Press the [ ] or [ ] key to - Ricoh Aficio SP 3510DN | Manuals - Page 80
and size settings and prints on whatever paper is loaded. Printing stops temporarily when the error is detected, and restarts automatically after about ten seconds using the settings made on the control panel. Specifying a paper type for Tray 1 and Tray 2 Improve printer performance by selecting the - Ricoh Aficio SP 3510DN | Manuals - Page 81
printer ignores the paper type and size settings and prints on whatever paper is loaded. Printing stops temporarily when the error is detected, and restarts automatically after about ten seconds using the settings made on the control panel. Loading Paper in the Bypass Tray • Before printing on paper - Ricoh Aficio SP 3510DN | Manuals - Page 82
5. Paper and Other Media 1. Open the bypass tray. CMC073 If you load A4 (297 mm) or larger size paper, pull out the bypass tray extension. CMC005 2. Slide the side guides outward, then load paper with the print side up, and push in until it stops against the printer. 80 CMC074 - Ricoh Aficio SP 3510DN | Manuals - Page 83
the side guides to the paper width. Loading Paper CMC075 • After loading paper in the tray, specify the paper type and size using the control panel. Also, specify the printer driver's paper setting accordingly before printing. • For details about supported types of paper, see p.53 "Paper and Other - Ricoh Aficio SP 3510DN | Manuals - Page 84
of pages that can be loaded in the bypass tray differs depending on the paper type. Specifying custom size paper for the bypass tray • When you specify a custom size paper and specify the bypass tray as the input tray on the printer driver, and perform printing with [Bypass Priority] set to [Any - Ricoh Aficio SP 3510DN | Manuals - Page 85
control panel or printer driver. • You cannot print on custom size paper with an application that does not support the custom size setting. • Paper sizes between 90 - 216 mm (3.54 - 8.50 inches) in width and 140 - 356 mm (5.51 - 14.02 inches) in length can be loaded in the bypass tray. 1. Press the - Ricoh Aficio SP 3510DN | Manuals - Page 86
driver, see the printer driver Help. Specifying a paper type for the bypass tray By selecting the paper type you want to load, the printer performs better. You can select from the following paper types: • [Thin Paper], [Thick Paper 1], [Thick Paper 2], [Plain Paper], [Recycled Paper], [Color Paper - Ricoh Aficio SP 3510DN | Manuals - Page 87
cause print quality problems when printing on paper other than envelopes. • Make sure paper is not stacked above the limit mark inside the tray. Misfeeds might occur. • After loading paper in the tray, specify the paper type and size using the control panel to avoid printing problems. This printer - Ricoh Aficio SP 3510DN | Manuals - Page 88
it at a slant can damage the printer. 1. Pull out tray 2 carefully with both hands. CMC065 Place the tray on a flat surface. 2. Pinch the clips on the side paper guide, and then adjust the guide to the paper size. CMC066 3. Pinch the clip on the end paper guide, and slide it inward to match the - Ricoh Aficio SP 3510DN | Manuals - Page 89
Loading Paper CMC068 4. Load the new paper stack print side down. Make sure paper is not stacked higher than the upper limit marked inside the tray. CMC069 Make sure the paper is not stacked higher than the projection on the side paper guides. CMC070 87 - Ricoh Aficio SP 3510DN | Manuals - Page 90
For details about paper types supported by the printer, see p.53 "Paper and Other Media". • For details about the paper settings, see p.75 "Setting a paper size using the control panel" and p.78 "Specifying a paper type for Tray 1 and Tray 2". Loading Envelopes in Bypass Tray The following explains - Ricoh Aficio SP 3510DN | Manuals - Page 91
environment, the envelope might be output creased or improper printing quality. • After loading envelopes in the tray, specify the paper type and size using the control panel to avoid printing problems. This printer does not detect the paper size automatically. 1. Open the bypass tray. CMC073 89 - Ricoh Aficio SP 3510DN | Manuals - Page 92
5. Paper and Other Media 2. Slide the side guides outward, then load envelopes with the print side up, and push in until it stops against the printer. Envelopes whose flaps are open must be printed with the flaps open, and envelopes whose flaps are closed must be printed with the flaps closed. - Ricoh Aficio SP 3510DN | Manuals - Page 93
before printing. For details, see the printer driver Help. • For details about paper types supported by the printer, see p.53 "Paper and Other Media". • For details about the paper settings, see p.75 "Setting a paper size using the control panel" and p.84 "Specifying a paper type for the bypass tray - Ricoh Aficio SP 3510DN | Manuals - Page 94
5. Paper and Other Media 92 - Ricoh Aficio SP 3510DN | Manuals - Page 95
This chapter explains how to replace consumables. Replacing the Print Cartridge • Do not incinerate toner (new or used) or toner containers. Doing so risks burns. Toner will ignite on contact with naked flame. • Do not store toner (new or used) or toner containers anywhere near naked flames - Ricoh Aficio SP 3510DN | Manuals - Page 96
vary depending on image volume and density, number of pages printed at a time, paper type and size, and environmental conditions such as temperature and humidity. Toner quality degrades over time. Early replacement of the print cartridge might be necessary. Therefore, we recommend you always keep - Ricoh Aficio SP 3510DN | Manuals - Page 97
• Do not touch the ID chip on the side of the print cartridge as indicated in the illustration below. CMC014 • If toner runs out, you cannot print until the black cartridge is replaced. 1. If paper is loaded in the bypass tray, remove the paper and close the bypass tray. 2. Push the side button to - Ricoh Aficio SP 3510DN | Manuals - Page 98
6. Replacing Consumables 3. Carefully pull out the print cartridge horizontally, holding its center. CMC081 • Do not shake the removed print cartridge. Doing so can cause remaining toner to leak. • Place the old print cartridge on paper or similar material to avoid dirtying your workspace. 4. Take - Ricoh Aficio SP 3510DN | Manuals - Page 99
Replacing the Print Cartridge 6. Hold the print cartridge and shake it from side to side five or six times. CMC020 Even distribution of toner within the bottle improves print quality. 7. Slide the print cartridge in horizontally. When the cartridge can go no further, raise it slightly and push it - Ricoh Aficio SP 3510DN | Manuals - Page 100
the box. CMC083 • Make sure to cover the old print cartridge with the protective cover for recycling and environmental purposes. • Comply with the print cartridge Recycling Program, whereby used print cartridges are collected for processing. For details, ask your sales or service representative. 98 - Ricoh Aficio SP 3510DN | Manuals - Page 101
the printer. Cautions to Take When Cleaning • Do not remove any covers or screws other than those explicitly mentioned in this manual. Inside this machine are high voltage components that are an electric shock hazard and laser components that could cause blindness. Contact your sales or service - Ricoh Aficio SP 3510DN | Manuals - Page 102
Printer Cleaning the Friction Pad and the Paper Feed Roller If the friction pad or paper feed roller is dirty, a multi-feed or misfeed might occur. In this case, clean the friction pad and paper feed roller pull out the paper tray forcefully. If you do, the tray might fall and cause an injury. - Ricoh Aficio SP 3510DN | Manuals - Page 103
the Friction Pad and the Paper Feed Roller CMC084 5. Wipe the rubber part of the roller with a soft damp cloth. After that, wipe it with a dry cloth to remove moisture. CMC085 6. Reload the removed paper into the tray, and then push the tray carefully into the printer until it clicks into place - Ricoh Aficio SP 3510DN | Manuals - Page 104
7. Cleaning the Printer • If jams or multi-sheet feeds occur after cleaning the friction pad, contact your sales or service representative. • If the optional tray 2 is installed, clean its friction pad and paper feed roller in the same way as you did for tray 1. 102 - Ricoh Aficio SP 3510DN | Manuals - Page 105
a while. data to print. Printing... The printer is printing. Wait a while. Processing... The printer is printing. Wait a while. Ready This is the default ready message. The printer is ready for use. No action is required. Warming up... The printer is warming up or toner is being supplied - Ricoh Aficio SP 3510DN | Manuals - Page 106
8. Troubleshooting Message Explanation Controller FW download failed Controller FW could not be downloaded. Incor Prt Cart Internal Misfeed Irregular toner is set. There is a paper jam in the fusing unit. Load Paper # The indicated tray # (1, 2, bypass) is out of paper. Memory Overflow - Ricoh Aficio SP 3510DN | Manuals - Page 107
p.93 "Replacing the Print Cartridge". Replace soon Print Cartridge The printer is almost out of toner . Prepare a new print cartridge. Replace Transfer Roller It is time to replace the transfer Contact your sales or service roller. representative. Reset Tray 1 The indicated paper input tray - Ricoh Aficio SP 3510DN | Manuals - Page 108
is flashing. The Data In indicator is lit. The Power indicator is lit. Cause The printer cannot be used normally. Check the error on the control panel. Toner is nearly empty. The printer is receiving print data from a computer. There is data to be printed. The printer is ready for use. 106 - Ricoh Aficio SP 3510DN | Manuals - Page 109
the required action. Is paper loaded? Load paper into the paper tray or the bypass tray. See p.67 "Loading Paper". Can you print a configuration page? If you cannot print a configuration page, it probably indicates a printer malfunction. Contact your sales or service representative. For details - Ricoh Aficio SP 3510DN | Manuals - Page 110
8. Troubleshooting When the Printer is Directly Connected to a Computer via USB Cable Windows When the printer is driver. • For details about installation and port settings, see Software Guide. Windows Vista and Windows Server 2008 1. Click [Control Panel] on the [Start] menu, and then click [Printer - Ricoh Aficio SP 3510DN | Manuals - Page 111
Printer Does Not Print 4. Check the [Print to the following port(s).] box to confirm that the correct port is selected. If the port (such as LPT1) is not correct, reinstall the driver. • For details about installation and port settings, see Software Guide. Windows 7 and Windows Server 2008 R2 1. - Ricoh Aficio SP 3510DN | Manuals - Page 112
8. Troubleshooting 4. Select the name of the printer you are using, and then click [Add]. Check that the printer appears in the browser. If it does not, reinstall the driver. 110 - Ricoh Aficio SP 3510DN | Manuals - Page 113
Problems Other Printing Problems Status Toner smears appear on the print side of the page. Possible Causes, Descriptions, and Solutions • The paper setting may not be correct. For example, although you are using thick paper, the setting for thick paper may not be set. Check the printer driver - Ricoh Aficio SP 3510DN | Manuals - Page 114
higher than the limit mark inside the tray. See p.67 "Loading Paper". • There may be a gap between the front end paper guide and the paper, or between the paper guide both side and the paper in the paper tray. Make sure there are no gaps. See p.67 "Loading Paper". • Paper is either too thick or too - Ricoh Aficio SP 3510DN | Manuals - Page 115
Printing Problems Status Prints do not stack properly. Possible Causes, Descriptions, and Solutions • Paper is damp. Use paper that has been stored properly. See p.53 "Paper On]. Note that the first print takes longer than subsequent prints to complete. See the printer driver help. • Raise the - Ricoh Aficio SP 3510DN | Manuals - Page 116
the front end paper guide and paper, or between the paper guide both side and paper in the paper tray. Make sure there are no gaps. See p.67 "Loading Paper". • Paper is either too thick or too thin. See p.53 "Paper and Other Media". • Paper has already been printed on. See p.53 "Paper and Other - Ricoh Aficio SP 3510DN | Manuals - Page 117
the pages Adjust the front end paper guide and both side paper guides to match the paper size. See p.67 "Loading Paper". CER091 Horizontal lines appear on the printed paper. • Impact can cause lines to appear on printed paper and other malfunctions. Protect the printer from impact at all times - Ricoh Aficio SP 3510DN | Manuals - Page 118
size selected in the application, use the same size paper as that selected in the application. If you cannot load paper of the correct size, use the reduction function to reduce the image, and then print. See the printer driver Help. Photo images are coarse. Some applications lower the resolution - Ricoh Aficio SP 3510DN | Manuals - Page 119
, replace the print cartridge: [Replace Print Cartridge] See p.93 "Replacing the Print Cartridge". • Condensation may have collected. If rapid change in temperature or humidity occurs, use this printer only after it has acclimatized. White streaks appear. Toner is almost depleted. If an error - Ricoh Aficio SP 3510DN | Manuals - Page 120
8. Troubleshooting Status Possible Causes, Descriptions, and Solutions The toner is powdery and comes away from the paper, or the printed image has a matt appearance. Check if the levers are lowered. Raise the levers. Printed envelopes come out creased. Check if thelevers are properly set. If - Ricoh Aficio SP 3510DN | Manuals - Page 121
Additional Troubleshooting Problems Solutions Strange noise is heard. If a supply was recently replaced or an option attached in the area the strange noise is coming from, check the supply or option is properly attached. If the strange noise persists, contact your sales or service representative - Ricoh Aficio SP 3510DN | Manuals - Page 122
8. Troubleshooting 120 - Ricoh Aficio SP 3510DN | Manuals - Page 123
not to get toner on your hands or clothes. • Toner on prints made after removing misfed paper may be loose (inadequately fused). Make a few test prints until smudges no longer appear. • Do not forcefully remove misfed paper, it will tear. Torn pieces remaining inside the printer will cause further - Ricoh Aficio SP 3510DN | Manuals - Page 124
CMC091 2. Carefully slide tray 1 back in until it stops. 3. If paper is loaded in the bypass tray, remove the paper. 4. Close the bypass tray. 5. Push the side button to open the front cover, and then carefully lower it. 2 1 CMC096 6. Carefully pull out the print cartridge horizontally, holding its - Ricoh Aficio SP 3510DN | Manuals - Page 125
. Doing so can cause remaining toner to leak. • Place the print cartridge on paper or similar material to avoid dirtying your workspace. 7. Lifting the guide plate, remove the jammed paper carefully. 1 2 CMC088 8. Slide the print cartridge in horizontally. When the cartridge can go no further, raise - Ricoh Aficio SP 3510DN | Manuals - Page 126
that the error is cleared. When "Misfd: BypssTray" Appears "Misfd: BypssTray" appears when a paper jam has occurred in the bypass tray. Use the following procedure to remove paper that has become jammed after being fed in from the bypass tray. 1. If paper is jammed in the bypass tray input area - Ricoh Aficio SP 3510DN | Manuals - Page 127
. Doing so can cause remaining toner to leak. • Place the print cartridge on paper or similar material to avoid dirtying your workspace. 5. Lifting the guide plate, remove the jammed paper carefully. 1 2 CMC088 6. Slide the print cartridge in horizontally. When the cartridge can go no further, raise - Ricoh Aficio SP 3510DN | Manuals - Page 128
side of the cover firmly. After closing the cover, check that the error is cleared. When "Misfd: Dupl Unit" Appears "Misfd: Dupl Unit" appears when a paper jam has occurred in the duplex unit. Use the following procedure to remove paper that has become jammed in the exit area or inside the duplex - Ricoh Aficio SP 3510DN | Manuals - Page 129
2. Remove the jammed paper carefully. When Paper is Jammed CMC090 3. Close the rear cover. CMC080 4. Pull tray 1 halfway out, and check for jammed paper. If there is jammed paper, remove it carefully. CMC091 127 - Ricoh Aficio SP 3510DN | Manuals - Page 130
9. Removing Misfed Paper 5. Pull tray 1 out completely with both hands. CMC105 Place the tray on a flat surface. 6. Push the blue lever. Pushing the blue lever lowers the duplex transport unit. CMC093 7. If there is jammed paper, carefully remove it. 128 CMC094 - Ricoh Aficio SP 3510DN | Manuals - Page 131
back in until it stops. CMC106 9. If paper is loaded in the bypass tray, remove the paper and close the bypass tray. 10. Push the side button to open the front cover, and then carefully lower it. 2 1 CMC096 11. Carefully pull out the print cartridge horizontally, holding its center. CMC081 • Do not - Ricoh Aficio SP 3510DN | Manuals - Page 132
9. Removing Misfed Paper 12. Lifting the guide plate, remove the jammed paper carefully. 1 2 CMC088 13. Slide the print cartridge in horizontally. When the cartridge can go no further, raise it slightly and push it fully in. Then push down on the cartridge until it clicks into place. CMC097 14. - Ricoh Aficio SP 3510DN | Manuals - Page 133
of inactivity with its power switch turned to off. Note that not using the following procedure could result in unusual noises when use of this printer is resumed. • Do not switch off the printer during printing. 1. Turn off the power switch. 2. Pull out the plug from the socket. 131 - Ricoh Aficio SP 3510DN | Manuals - Page 134
10. Appendix 3. Pull the opening lever on the front cover, and then carefully lower the front cover. 2 1 CMC096 4. Lower the levers with thumb fingers. CMC079 5. Close the front cover with both hands carefully. CMC098 • This step is not necessary if the printer's power switch is on but the printer - Ricoh Aficio SP 3510DN | Manuals - Page 135
If the Printer is Not Going to Be Used for a Long Time 1. Plug in the power cable. 2. Pull the opening lever on the front cover, and then carefully - Ricoh Aficio SP 3510DN | Manuals - Page 136
10. Appendix Moving and Transporting the Printer • If you have to move the machine when the optional paper tray unit is attached, do not push on the main unit's top section. Doing so can cause the optional paper tray out the toner to prevent toner spill inside the machine. Repack the printer in its - Ricoh Aficio SP 3510DN | Manuals - Page 137
• Be sure to move the printer horizontally. To prevent toner from scattering, move the printer carefully. Moving over a Long Distance If you intend to move the printer over a long distance, you must pack it well. Empty all the paper trays, but do not remove the print cartridge. Take care not to tip - Ricoh Aficio SP 3510DN | Manuals - Page 138
10. Appendix • The interface cable is unplugged from the printer. • All paper trays are empty. 2. If Tray 2 is installed, remove it. • Toner might spill inside the printer if the printer is not kept level during transit. • For more information about moving the printer, contact your sales or service - Ricoh Aficio SP 3510DN | Manuals - Page 139
Disposal Disposal Ask your sales or service representative for information about correct disposal of this machine. 137 - Ricoh Aficio SP 3510DN | Manuals - Page 140
the printer. • The supplied print cartridge is good for approximately 1,500 pages. • To prevent a cleaning malfunction, you may need to replace a print cartridge even if it is not empty. • If the toner has run out but you urgently need to continue printing, see p.111 "Other Printing Problems". 138 - Ricoh Aficio SP 3510DN | Manuals - Page 141
. Doing so could result in fire or electric shock. Main Unit Configuration Desktop Print Process Laser beam scanning & Electrophotographic printing First Print Speed 8 seconds or less (A4/Letter, 600 × 600) • If the printer has not been used for a while, there may be a short delay before the - Ricoh Aficio SP 3510DN | Manuals - Page 142
125 sheets (80 g/m2, 20 lb.) Paper Input Capacity Standard Paper Tray Bypass Tray Optional Paper Feed Units 250 sheets *1 50 sheet *1 250 sheets *1 *1 Paper weight: 80 g/m2 (20 lb. bond) Power Source • 220-240 V, 5A, 50/60 Hz • 120 V, 10 A, 60 Hz Power Consumption Maximum power consumption - Ricoh Aficio SP 3510DN | Manuals - Page 143
Stand-by Less than 40 dB (A) Printing Less than 65.8 dB (A) Sound Power Level (Complete system) Stand-by Less than 40 dB (A) Printing Less than 69.8 dB (A) Sound Ethernet (10 Base-T/100 Base-TX) • USB2.0 It requires a USB computer port and cable that support USB 2.0. Printer Language PCL 6, - Ricoh Aficio SP 3510DN | Manuals - Page 144
10. Appendix Fonts 80 fonts Options Paper Feed Unit TK1080 Paper capacity 250 sheets Paper size A4, B5 JIS, A5, Legal (81/2" × 14"), Letter (81/2" × 11), Half Letter (51/2" × 81/2") Dimensions (W × D × H) 370 × 392 × 89 mm (14.6 × 15.5 × 3.5 inches) Paper weight 60 - 105 g/m2, (16.0 - 28.0 lb.) - Ricoh Aficio SP 3510DN | Manuals - Page 145
Windows Server®, Windows Vista®, and Internet Explorer® are either registered trademarks or trademarks of Microsoft Corporation in the United States and/or other countries. The proper names of Internet Explorer 6 is Microsoft® Internet Explorer® 6. PCL® is a registered trademark of Hewlett-Packard - Ricoh Aficio SP 3510DN | Manuals - Page 146
® 2008 R2 Standard Microsoft® Windows Server® 2008 R2 Enterprise Microsoft® Windows Server® 2008 R2 Datacenter Microsoft® Windows Server® 2008 R2 for Itanium-based Systems Microsoft® Windows® Web Server 2008 R2 Microsoft® Windows® HPC Server 2008 R2 • PostScript® 3 in this manual stands for "Adobe - Ricoh Aficio SP 3510DN | Manuals - Page 147
Address 47, 49 J Job reset key 18 L Label paper 57 LED Lamps 40 Letterhead 57 List of options 11 Loading envelopes 88 Loading paper 56 Bypass tray 79 Legal size paper 71 Paper longer than A4 71 Tray 1 67 Tray 2 85 M Manuals 12 Manuals for this printer 10 Menu key 18 Messages 103 - Ricoh Aficio SP 3510DN | Manuals - Page 148
57 Print area 65 Print cartridge 93, 138 Printing configuration page 35 Printing test page 35 R Recycled paper 57 Region A model 6 Region B model 6 Remove misfed paper bypass tray 124 duplex unit 126 tray 1 121 tray 2 121 Removing misfed paper 121 Replacing the print cartridge 93 - Ricoh Aficio SP 3510DN | Manuals - Page 149
MEMO 147 - Ricoh Aficio SP 3510DN | Manuals - Page 150
MEMO 148 EN GB EN US M117-8504 - Ricoh Aficio SP 3510DN | Manuals - Page 151
- Ricoh Aficio SP 3510DN | Manuals - Page 152
EN GB EN US M117-8504 © 2011
-
 1
1 -
 2
2 -
 3
3 -
 4
4 -
 5
5 -
 6
6 -
 7
7 -
8
-
9
-
10
-
11
-
12
-
13
-
14
-
15
-
16
-
17
-
18
-
19
-
20
-
21
-
22
-
23
-
24
-
25
-
26
-
27
-
28
-
29
-
30
-
31
-
32
-
33
-
34
-
35
-
36
-
37
-
38
-
39
-
40
-
41
-
42
-
43
-
44
-
45
-
46
-
47
-
48
-
49
-
50
-
51
-
52
-
53
-
54
-
55
-
56
-
57
-
58
-
59
-
60
-
61
-
62
-
63
-
64
-
65
-
66
-
67
-
68
-
69
-
70
-
71
-
72
-
73
-
74
-
75
-
76
-
77
-
78
-
79
-
80
-
81
-
82
-
83
-
84
-
85
-
86
-
87
-
88
-
89
-
90
-
91
-
92
-
93
-
94
-
95
-
96
-
97
-
98
-
99
-
100
-
101
-
102
-
103
-
104
-
105
-
106
-
107
-
108
-
109
-
110
-
111
-
112
-
113
-
114
-
115
-
116
-
117
-
118
-
119
-
120
-
121
-
122
-
123
-
124
-
125
-
126
-
127
-
128
-
129
-
130
-
131
-
132
-
133
-
134
-
135
-
136
-
137
-
138
-
139
-
140
-
141
-
142
-
143
-
144
-
145
-
146
-
147
-
148
-
149
-
150
-
151
-
152
 |
 |

Operating Instructions
Hardware Guide
For safe and correct use, be sure to read "Safety Information" before using the machine.