Ricoh C222SF Quick Guide
Ricoh C222SF - Aficio SP Color Laser Manual
 |
UPC - 026649061363
View all Ricoh C222SF manuals
Add to My Manuals
Save this manual to your list of manuals |
Ricoh C222SF manual content summary:
- Ricoh C222SF | Quick Guide - Page 1
SP C221SF/C222SF Quick Guide Names and Locations Using the Copier Function Using the Scanner Function Using the Fax Function Error Messages Removing Paper Jams Troubleshooting Replacing Print Cartridges Read this manual carefully before you use the product and keep it handy for future reference. For - Ricoh C222SF | Quick Guide - Page 2
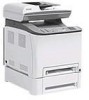
feed in automatically. Output Tray for the ADF Originals scanned with the ADF are output here. Top Cover Open this cover to replace the print cartridges. Tray 1 Tray 2 (option) Front Cover Open this cover to replace the waste toner bottle or remove jammed paper. Control Panel Output Tray Printed - Ricoh C222SF | Quick Guide - Page 3
Interior Print Cartridges Load from the machine rear, in the order of cyan (C), magenta (M), yellow (Y), and black (K). BAA373S Waste Toner Bottle Collects excess toner during printing. Transfer Unit Remove this unit when replacing the waste toner bottle. BAA303S BAA308S 3 - Ricoh C222SF | Quick Guide - Page 4
menu tree. Number keys Use to enter numerical values when specifying settings such as fax numbers and copy quantities, or enter letters when specifying names. [Clear/Stop] Start] key Press to scan or copy in black and white, or start sending a fax. [Color Start] key Press to scan or copy in color. 4 - Ricoh C222SF | Quick Guide - Page 5
One Touch buttons (scanner mode/fax mode) [On Hook Dial] key (fax mode) [Address book] key (scanner mode/fax mode) [Image Quality] key (copier mode/scanner mode/fax mode) [Density] key (copier mode/scanner mode/fax mode) [Reduce/Enlarge] key (copier mode/scanner mode) [Copy] key Press to switch to - Ricoh C222SF | Quick Guide - Page 6
Copier Function Initial Screen The following is the initial screen in copier mode. 1. Reproduction ratio 2. Status of the machine 3. Copy quality 4. Paper size BAA350S 5. Copy quantity Basic Operation • The original in the ADF takes precedence over the original on the exposure glass if you - Ricoh C222SF | Quick Guide - Page 7
the jammed paper is removed, printing restarts from the jammed page automatically. • If a scanning jam occurs in the ADF, copying is canceled immediately. In this case, copy the originals again starting from the jammed page. • For information about originals, see "Getting Started", User Guide. 7 - Ricoh C222SF | Quick Guide - Page 8
There are two ways to set the scaling ratio: using a preset ratio or manually specifying a custom ratio. 1. Press the [Reduce/Enlarge] key. 2. Press the • To use this function, the paper tray specified for photocopying must contain A4, Letter, or Legal size paper. You can combine two or four pages - Ricoh C222SF | Quick Guide - Page 9
Selecting the Document Type You can select the best document type for the original that you are scanning. 1. Press the [Image Quality] key. 2. Press the [Image Quality] key or [ see "Using the Copier Function", User Guide. • If you would like to change the default settings of the machine, see " - Ricoh C222SF | Quick Guide - Page 10
to FTP), or to the shared folder of a computer on a network (Scan to Folder). • Scan destinations must be registered using a Web browser in advance. For details, see "Using the Scanner Function", User Guide. • To send files via e-mail, SMTP and DNS settings must be configured properly in advance - Ricoh C222SF | Quick Guide - Page 11
holding the input tray. Otherwise, the ADF might be damaged. Exposure Glass ADF BAA357S BAA353S • If necessary, configure advanced scan settings. For more details, see "Advanced Scan Settings" on page 13. Press the [Address book] key. You can press the [ ][ ] keys to scroll the address book - Ricoh C222SF | Quick Guide - Page 12
discarded. In this case, scan the entire originals again. To remove paper jams in the ADF, see "Removing from the ADF" page 25. • You can also specify a destination using the One Touch buttons or [Pause/Redial] key. For details, see "Using the Scanner Function", User Guide. • For information about - Ricoh C222SF | Quick Guide - Page 13
then press the [OK] key. • For more details about the scanner function, including how to scan originals from a computer (TWAIN scanning), see "Using the Scanner Function", User Guide. • If you would like to change the default settings of the machine, see "Configuring the Machine Using the Control - Ricoh C222SF | Quick Guide - Page 14
2. Status of the machine 3. Current month and date BAA352S 4. Current time Basic Operation for Sending a Fax • Make sure to establish a telephone line connection, and configure the settings for fax transmission in advance. • The original in the ADF takes precedence over the original on the - Ricoh C222SF | Quick Guide - Page 15
. Otherwise, the ADF might be damaged. Exposure Glass ADF BAA357S BAA353S • If necessary, configure the advanced fax settings. For details, see "Advanced Scan Settings" on page 17. Enter the fax number (up to 40 characters) using the number keys. Press the [B&W Start] key. Depending on the - Ricoh C222SF | Quick Guide - Page 16
resend the fax starting from the jammed page. When in Memory Transmission mode, scan the entire originals again. • You can also specify a fax destination using the Quick Dial, Speed Dial, Broadcast, or Redial functions. For details, see "Using the Fax Function", User Guide. • By default, the machine - Ricoh C222SF | Quick Guide - Page 17
OK] key. Normal Dark Light ❖ Specifying Resolution You can specify the resolution for scanning the original for the current job. 1. Press the [Image Quality] key. details about the fax function, see "Using the Fax Function", User Guide. • If you would like to change the default settings of the - Ricoh C222SF | Quick Guide - Page 18
Remove jammed originals, and then place them again. See "Removing from the ADF" on page 25. • Check the originals are suitable for scanning. See "Placing Originals", User Gudie. The bypass tray has run out of paper. Load paper to the bypass tray. See "Loading Paper in the Bypass Tray", User Guide - Ricoh C222SF | Quick Guide - Page 19
button. See "Registering Scan Destinations", User Guide. Outer Jam Paper has been jammed in the machine. Paper size X illegal on X The tray does not support printing on the selected paper size. Remove the jammed paper. See "Removing Paper Jams" on page 21. Select a supported paper size, or load - Ricoh C222SF | Quick Guide - Page 20
jammed paper. See "Removing Paper Jams" on page 21. The paper type set for the document differs from the type of the paper in the tray. Load paper of the selected type in the tray, or change the paper type setting. See "Specifying Paper Type and Paper Size", User Guide. The tray does not support - Ricoh C222SF | Quick Guide - Page 21
Removing Paper Jams Removing Jammed Paper • Jammed paper may be covered in toner. Be careful not to get toner on your hands or clothes. • Toner on prints made immediately after clearing a paper jam may be insufficiently fused and can smudge. Make test prints until smudges no longer appear. • Do not - Ricoh C222SF | Quick Guide - Page 22
The fusing section of this machine might be very hot. Caution should be taken when removing jammed paper. • Since the temperature around the guide is high, wait for it to cool before checking for jammed paper. Pull the opening lever on the front cover, and then carefully lower the front cover. Lower - Ricoh C222SF | Quick Guide - Page 23
front cover, and then carefully lower the front cover. Pull out the jammed paper carefully. If paper has become jammed inside the transfer unit, pull the paper forward. • Do not pull out the paper tray (Tray 1). • If paper is jammed in tray 2 but is difficult to locate, pull out tray 2 to remove - Ricoh C222SF | Quick Guide - Page 24
Pull the opening lever on the front cover, and then carefully lower the front cover. Carefully remove any paper that is jammed under the transfer unit. If you cannot find the jammed paper, look inside the machine BAA311S Using both hands, carefully push up the front cover until it closes. • When - Ricoh C222SF | Quick Guide - Page 25
Open the ADF cover. Gently pull the jammed original to remove it. Be careful not to pull the original too hard, as it may rip. If you cannot pull out the jammed original easily, unlock the paper feed roller by raising the green lever. Lift the paper feed roller slightly and pull it out - Ricoh C222SF | Quick Guide - Page 26
Removing Paper Jams Gently pull the jammed original to remove it. BAA381S If you cannot pull out the jammed original easily, raise the input tray to see if the original is jammed in the output area. BAA385S Gently pull the jammed original to remove it. BAA386S Put the paper feed roller back in with - Ricoh C222SF | Quick Guide - Page 27
Lower the green lever to lock the paper feed roller. BAA383S Close the ADF cover. BAA314S Lift the ADF, and if there is original remaining in the ADF, gently pull the jammed original to remove it. Be careful not to hold the input tray when lifting the ADF, for the tray might be - Ricoh C222SF | Quick Guide - Page 28
Troubleshooting Printing or Scanning Problems ❖ Images are too dark or too light on the copied pages or scanned files. Image density is too dark or too light. Adjust the image density. ❖ Toner smears on the printed surface. Toner on the printed surface is not dry. Do not touch printed surfaces - Ricoh C222SF | Quick Guide - Page 29
Paper", User Guide. • The tray for printing faxes does not contain A4, Letter, Legal, size paper. Change the tray setting, and load paper of the approriate size. For more details, see "Fax Settings", User Guide. • If you cannot solve the problem, contact your local sales or service representative - Ricoh C222SF | Quick Guide - Page 30
air environment. Consult a doctor if necessary. • Avoid getting toner on your clothes or skin when removing a paper jam or replacing toner. If your skin comes into contact with toner, wash the affected area thoroughly with soap and water. • If toner gets on your clothing, wash with cold water. Hot - Ricoh C222SF | Quick Guide - Page 31
when any of the following messages appear on the screen: • "Life End K Toner Cartridge" • "Life End M Toner Cartridge" • "Life End C Toner Cartridge" • "Life End Y Toner Cartridge" • Do not allow paper clips, staples, or other small metallic objects to fall inside the machine. • Do not expose - Ricoh C222SF | Quick Guide - Page 32
glass cover or ADF is closed. BAA315S Tilt the print cartridge forward and pull it out. • Do not shake the removed print cartridge. Doing so can cause remaining toner to leak. • Place the old print cartridge on paper or similar material to avoid dirtying your BAA316S workspace. • The - Ricoh C222SF | Quick Guide - Page 33
it out of the plastic bag. Hold the print cartridge and shake it from side to side five or six times. Even distribution of toner within the bottle improves print quality. Remove the cover from the print cartridge. Check that the toner color and location correspond, and carefully insert the print - Ricoh C222SF | Quick Guide - Page 34
the box. BAA322S • Make sure to cover the old print cartridge with the protective cover for recycling and environmental purposes. • Comply with the print cartridge recycling program, whereby used print cartridges are collected for processing. For details, ask your sales or service representative. 34 - Ricoh C222SF | Quick Guide - Page 35
Saver] setting under [Admin Settings]. For details about [Power Saver], see "Administrator Settings", User Guide. ❖ Opening Manuals The "Manuals" CD-ROM provided with the machine contains manuals in HTML format and PDF. Install the manuals before using the machine. There are two ways to view the - Ricoh C222SF | Quick Guide - Page 36
SP C221SF/C222SF Quick Guide Names and Locations Using the Copier Function Using the Scanner Function Using the Fax Function Error Messages Removing Paper Jams Troubleshooting Replacing Print Cartridges GB GB EN USA G184-8508
-
 1
1 -
 2
2 -
 3
3 -
 4
4 -
 5
5 -
 6
6 -
 7
7 -
8
-
9
-
10
-
11
-
12
-
13
-
14
-
15
-
16
-
17
-
18
-
19
-
20
-
21
-
22
-
23
-
24
-
25
-
26
-
27
-
28
-
29
-
30
-
31
-
32
-
33
-
34
-
35
-
36
 |
 |

Quick Guide
Names and Locations
Using the Copier Function
Using the Scanner Function
Using the Fax Function
Error Messages
Removing Paper Jams
Troubleshooting
Replacing Print Cartridges
Read this manual carefully before you use the product and keep it handy for future
reference. For safe and correct use, please be sure to read "Safety Information" before using
the machine.
SP C221SF/C222SF