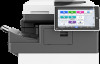
Ricoh IM C400SRF AirPrint Guide
Ricoh IM C400SRF Manual
 |
View all Ricoh IM C400SRF manuals
Add to My Manuals
Save this manual to your list of manuals |
Ricoh IM C400SRF manual content summary:
- Ricoh IM C400SRF | AirPrint Guide - Page 1
Operating Instructions AirPrint Guide For safe and correct use, be sure to read Safety Information before using the machine. - Ricoh IM C400SRF | AirPrint Guide - Page 2
- Ricoh IM C400SRF | AirPrint Guide - Page 3
TABLE OF CONTENTS How to Read the Manuals...2 Symbols Used in Manuals...2 Disclaimer...2 1. How to Use AirPrint Before Using AirPrint...5 About AirPrint...5 Requirements for using AirPrint...5 Confirming Settings...6 Notes and Limitations...7 Using AirPrint From OS X or macOS... - Ricoh IM C400SRF | AirPrint Guide - Page 4
How to Read the Manuals Symbols Used in Manuals This manual uses the following symbols: Indicates supplementary explanations of the product's functions and instructions on resolving user errors. [ ] Indicates the names of keys or buttons on the product or display. Disclaimer To the maximum extent - Ricoh IM C400SRF | AirPrint Guide - Page 5
3 - Ricoh IM C400SRF | AirPrint Guide - Page 6
4 - Ricoh IM C400SRF | AirPrint Guide - Page 7
use the print, scan, and fax functions via wired LAN, wireless LAN, or a USB connection on the same network, without installing any printer drivers or software. • Available functions may differ depending on connected device or connection method. • For details about available functions, see our web - Ricoh IM C400SRF | AirPrint Guide - Page 8
the following settings. These settings are set to [Active] by default. • AirPrint • Bonjour • IPP A device certificate must be We use Web Image Monitor installed on the printer or multi-function printer. To log in Web Image Monitor, see the web manual for your machine. Confirming AirPrint settings 1. - Ricoh IM C400SRF | AirPrint Guide - Page 9
expiration date in "Validity Period". If an error message appears, see the web manual for your machine. 4. Click [OK]. 5. Click [SSL/TLS] in " AirPrint when AirPrint is set to [Inactive]). • The default for "Permit SSL/TLS Communication" is [Ciphertext/Cleartext]. You your service representative. 7 - Ricoh IM C400SRF | AirPrint Guide - Page 10
print job authentication to [Simple (All)]. For details, see the web manual for your machine. • When printing with AirPrint, your machine cannot accept type: Classic). For details about the settings, see the web manual for your machine. If you want to use a name other than that set in [First - Ricoh IM C400SRF | AirPrint Guide - Page 11
are ignored when sending a fax. • The line type for fax transmission is set to external line (default). If you want to use an extension line for fax transmissions, contact your service representative. • You can check transmission results in the Record. • You cannot check the contents of documents - Ricoh IM C400SRF | AirPrint Guide - Page 12
From OS X or macOS This section describes how to use the print, fax, and scan functions of printers and multi-function printers from OS X and macOS. OS X 10.14 is used for example in this manual. Connecting the Machine to OS X or macOS Use the following procedure to connect the machine to OS - Ricoh IM C400SRF | AirPrint Guide - Page 13
You can change the print settings from OS X and macOS. Setting items may differ depending on the application you are using, the specifications of the connected machine, and the configuration of options. 1 2 3 9 4 10 5 6 11 7 8 1. Printer Select the machine to use for printing. DVL901 11 - Ricoh IM C400SRF | AirPrint Guide - Page 14
workflow menu for PDF. 8. Hide Details Hides the print settings. 9. Black & White Select this item to print in black and white. 10. Two-Sided You can print on both sides of the paper when this item is checked. 11. Print option menu Displays the menu according to the specifications of the connected - Ricoh IM C400SRF | AirPrint Guide - Page 15
Using AirPrint From OS X or macOS [Layout] Configure settings for two-sided printing or to combine multiple pages on one sheet. 1 2 3 4 5 6 DVL903 1. Pages per Sheet Specify the number of pages to combine on one side of the paper. 2. Layout Direction Specify how to arrange the pages. 3. Border - Ricoh IM C400SRF | AirPrint Guide - Page 16
of stapling. 2. Output Bin Select the output tray. 3. Fold Specify how to fold. [Supply Levels] You can check the remaining amount of consumables, such as toner and paper. When you click [More Info...], Web Image Monitor starts and you can check more detailed information. 14 - Ricoh IM C400SRF | AirPrint Guide - Page 17
1. Place originals in the Auto Document Feeder (ADF) or on the exposure glass. For details about placing originals, see the web manual for your machine. 2. Click [System Preferences...] under the Apple menu. 3. Click [Printers & Scanners]. 4. Select the device to use for scanning from the list of - Ricoh IM C400SRF | AirPrint Guide - Page 18
settings You can change the scan settings from OS X and macOS. Setting items may differ depending on the application you are using, the specifications of the connected machine, and the configuration of options. 1 2 3 4 5 6 7 8 9 10 11 12 14 13 DVL908 1. Scan Mode Select whether to scan from - Ricoh IM C400SRF | AirPrint Guide - Page 19
the application. Using AirPrint From OS X or macOS 2. Select the device to use for sending fax from "Printer". The machines that can be used to send faxes have "- Fax" at the end of their names. 3. you are using, the specifications of the connected machine, and the configuration of options. 17 - Ricoh IM C400SRF | AirPrint Guide - Page 20
Use AirPrint 1 2 3 4 5 6 7 8 9 DVL909 1. Printer Select the machine to use for sending fax. 2. Presets You can 8. PDF Displays the workflow menu for PDF. 9. Hide Details Hides the fax transmission settings. Fax transmission option menu Setting items may differ depending on specifications of - Ricoh IM C400SRF | AirPrint Guide - Page 21
[Fax Information] Enter information necessary for sending faxes. 1 2 3 Using AirPrint From OS X or macOS DVL910 1. To Enter the fax number of the destination. 2. Dialing Prefix Enter the phone number necessary to call an external line from the phone being used. 3. Use cover page Select this item - Ricoh IM C400SRF | AirPrint Guide - Page 22
1. How to Use AirPrint 4. Reverse page orientation Reverse the orientation of the fax to be sent. 5. Flip horizontally Print by flipping the entire image on the page left to right. [Paper Handling] Specify the order of the pages to be sent, or send only the odd or even pages. 1 2 3 DVL912 1. Pages - Ricoh IM C400SRF | AirPrint Guide - Page 23
Tap [Print]. If [Print] is not displayed, flick the bottom area to the left. 3. Tap [Select Printer]. 4. Tap the name of the device to use. 5. Tap [Options]. 6. Change the print settings as necessary items may differ depending on specifications of the connected device or optional configurations. 21 - Ricoh IM C400SRF | AirPrint Guide - Page 24
1. How to Use AirPrint 1 2 3 4 5 6 7 8 9 DVL907 1. Printer Select the device to use for printing. 2. Quantity Specify the quantity to print. 3. Options Show or hide the print settings. 4. Range Specify the pages to - Ricoh IM C400SRF | AirPrint Guide - Page 25
2. Trademarks This section describes about trademarks. Trademarks Apple, Bonjour, Macintosh, OS X, macOS and Safari are trademarks of Apple Inc., registered in the U.S. and other countries. To control this AirPrint-enabled product, the latest iOS and macOS versions are recommended. AirPrint and - Ricoh IM C400SRF | AirPrint Guide - Page 26
MEMO 24 EN GB EN US EN AU M0BQ-7664B - Ricoh IM C400SRF | AirPrint Guide - Page 27
- Ricoh IM C400SRF | AirPrint Guide - Page 28
EN GB EN US EN AU M0BQ-7664B © 2018, 2019, 2020
-
 1
1 -
 2
2 -
 3
3 -
 4
4 -
 5
5 -
 6
6 -
 7
7 -
8
-
9
-
10
-
11
-
12
-
13
-
14
-
15
-
16
-
17
-
18
-
19
-
20
-
21
-
22
-
23
-
24
-
25
-
26
-
27
-
28
 |
 |

Operating Instructions
AirPrint Guide
For safe and correct use, be sure to read Safety Information before using
the machine.