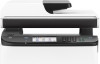
Ricoh M C251FW Setup Guide
Ricoh M C251FW Manual
 |
View all Ricoh M C251FW manuals
Add to My Manuals
Save this manual to your list of manuals |
Ricoh M C251FW manual content summary:
- Ricoh M C251FW | Setup Guide - Page 1
Setup Guide Setting Up the Machine 1 Configuring the Network Setting 2 Fax Settings 3 Installing the Printer Driver 4 Scan Settings Control Panel Sheet 1 2 - Ricoh M C251FW | Setup Guide - Page 2
- Ricoh M C251FW | Setup Guide - Page 3
, 11 A or more 220 - 240 V, 50/60 Hz, 6 A or more ECC007 ECC011 Check the supplied items. For information on the supplied items, see the User's Guide on the website. ECC012 ECC013 ECC014 ECC015 ECC020 ECC021 ECC022 ECC023 ECC042 1 - Ricoh M C251FW | Setup Guide - Page 4
ECC024 ECC025 ECC028 ECC029 ECC031 ECC032 ECC034 ECC035 ECC038 1 2 ECC039 2 ECC026 ECC030 ECC033 ECC036 ECC040 - Ricoh M C251FW | Setup Guide - Page 5
ECC283 ECC286 ECC289 ECC284 ECC287 ECC290 M0EQPC5001 M0ESPC0025 Configure the network setting. Go to page 4 "2. Configuring the Network Setting". ECC285 ECC288 ECC291 3 - Ricoh M C251FW | Setup Guide - Page 6
page 6 "Easy Setup Using the WPS Button". • To connect using a PIN code, go to page 7 "Easy Setup Using a PIN Code". • To set up manually, see the User's Guide in our website. • When the Wi-Fi Direct function is enabled, a Wi-Fi Direct compliant device is recognized as a router (access point), and - Ricoh M C251FW | Setup Guide - Page 7
and Encryption key, refer to the router (access point) manual. SSID :XXXXXXXXXXXXX Encryption key :XXXXXXXXXXXXX Configuring Settings Using the Press [Quick Setup]. For details about [Detailed Setup], see User's Guide. DSG099 Confirm the SSID and Encryption key, and write them down on the - Ricoh M C251FW | Setup Guide - Page 8
2. Press [Quick Setup]. For details about [Detailed Setup], see User's Guide. 6. Press [Connect]. 7. After "Please wait for 2 minutes" appears, CHV607 • For details about how to use the WPS button, refer to the manuals for the router (access point). 8. Check the result. Connection has succeeded: " - Ricoh M C251FW | Setup Guide - Page 9
) on the router (access point)'s web page (The web page accessed in Step 2). 3. Press [Quick Setup]. For details about [Detailed Setup], see User's Guide. 9. Execute WPS (PIN system) from the router (access point)'s web page. ECC292 4. Press [Change Wi-Fi Connection Mode]. ECC293 5. Press [WPS - Ricoh M C251FW | Setup Guide - Page 10
via USB or Ethernet DUE036 DUE037 ● For details about IPv4 or IPv6 settings manually, see User's Guide. ● When connecting the machine via USB, USB cable is necessary to set up. Do not connect the cable until you are instructed to do so on the screen. ● When connecting the machine via the Ethernet - Ricoh M C251FW | Setup Guide - Page 11
1. Press [Setting]. 4. Press [Dial/Push Phone]. 2. Press [Administrator Tools]. M0EQPC5002 5. Press the telephone line type appropriate for your telephone service. 6. Press [PSTN / PBX]. 3. Enter the password using the number keys, and then press [OK]. You can display the software keyboard - Ricoh M C251FW | Setup Guide - Page 12
return the initial screen. 3. Press the [B&W Start] key. Depending on the machine's settings, you may be prompted to enter the fax number again if you manually entered the fax number. Enter the fax number within 60 seconds. If the fax numbers do not match, go back to step 2. 4. If you place - Ricoh M C251FW | Setup Guide - Page 13
4. Installing the Printer Driver ● If you connect the computer by a USB cable, do not connect the cable until you are instructed to do so on the screen. 8. Follow the instructions in the setup wizard. If you already completed the Wi-Fi setting, click [The machine's IP address has been already - Ricoh M C251FW | Setup Guide - Page 14
information about specifying the initial scan settings, see "What You Can Do with the Scanner Function", User's Guide in our website. For safe and correct use, be sure to read the "Safety Information" before using the machine. Control Panel Sheet 1 2 3 4 5 67 1 NFC 2 [Home] - Ricoh M C251FW | Setup Guide - Page 15
and openSUSE are registered trademarks of Novell, Inc. Ubuntu and Canonical are registered trademarks of Canonical Ltd. Other product names used in this manual are for identification purposes only and may be trademarks of their respective companies. We do not have any or all rights to these marks - Ricoh M C251FW | Setup Guide - Page 16
EN GB EN US EN AU M0EQ-8503A
-
 1
1 -
 2
2 -
 3
3 -
 4
4 -
 5
5 -
 6
6 -
 7
7 -
8
-
9
-
10
-
11
-
12
-
13
-
14
-
15
-
16
 |
 |

Setup Guide
1
Setting Up the Machine
2
Configuring the Network Setting
3
Fax Settings
4
Installing the Printer Driver
1
2
Scan Settings
Control Panel Sheet