Ryobi A99HT3 Operation Manual
Ryobi A99HT3 Manual
 |
View all Ryobi A99HT3 manuals
Add to My Manuals
Save this manual to your list of manuals |
Ryobi A99HT3 manual content summary:
- Ryobi A99HT3 | Operation Manual - Page 1
and understand completely this operator's manual and the operator's manual for any power tools used. purpose: Installing hinges on wood doors only INSTRUCTIONS Set up door: See Figure 3. Cut length. When selecting hinge length using the guide stop, ensure that the arrow is pointing to - Ryobi A99HT3 | Operation Manual - Page 2
charnières sur des postes en bois uniquement INSTRUCTIONS Installation de la porte : Voir la figure rayons de 6,35 mm (1/4 po), ne pas utiliser les guides de coin. L'embout de la toupie créera naturellement un comprendido por completo este manual del operador y el manual del operador para toda
-
 1
1 -
 2
2
 |
 |
-1/8 in.
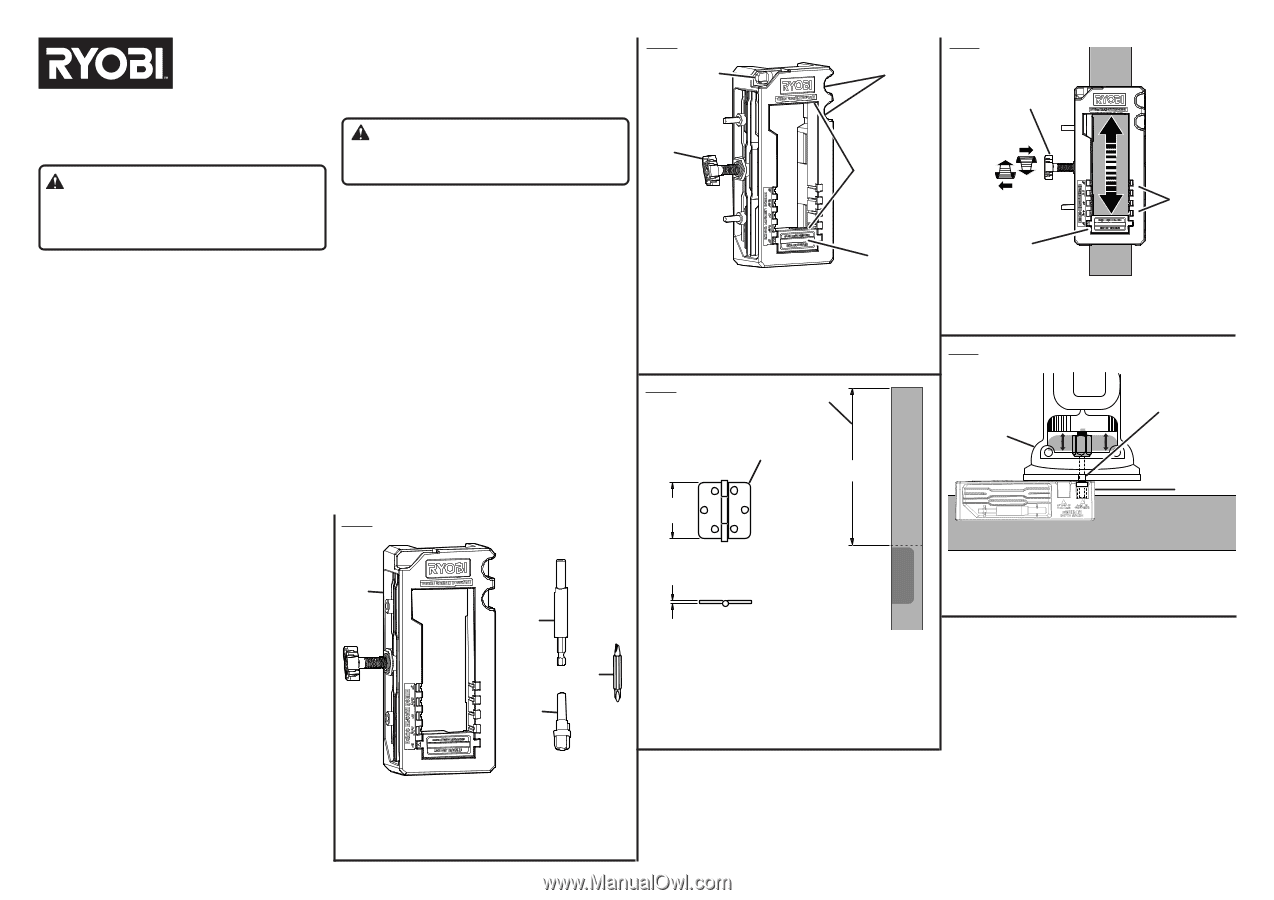
A - Clamp screw (vis de serrage, tornillo de sujeción)
B - Router bit storage (logement pour fraises, espacio para guardar la punta
buriladora)
C - Router bit depth set (réglage de la profondeur de fraisage, set de
profundidad de la punta buriladora)
D - Corner guide (guide en coin, guía de esquinas)
E - Hinge length guide stop (butée de guide de longueur de charnière, tope
de guía de longitud de bisagra)
Fig. 1
Fig. 2
A
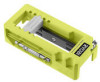
DOOR HINGE ROUTER
TEMPLATE
A99HT3
WARNING:
To reduce the risk of injury, do not attempt to use this
product until you have read thoroughly and understand
completely this operator’s manual and the operator’s
manual for any power tools used.
PACKING LIST
See Figures 1 - 2.
Hinge Mortiser
Router Bit
Self-Centering Hinge Bit
PH2/8-10SL Double Ended Bit
TOOLS NEEDED
Router or Compact Router
Hammer and/or Chisel, optional for square hinges
APPLICATIONS
You may use this tool for the following purpose:
Installing hinges on wood doors only
INSTRUCTIONS
Set up door:
See Figure 3.
Cut door to length, if necessary.
Transfer hinge locations from door frame. Measure from the
top of the frame (not the floor) and subtract 1/8 in. from the
measurement. Measure hinge length and determine hinge
thickness.
Transferring hinge locations can also be done by laying the
old door on top of the new one and marking the locations.
Set up hinge mortiser:
See Figure 4.
Determine hinge shape. For hinges with 1/4 in. radius
corners, do not use corner guides. The router bit will
naturally create a 1/4 in. corner radius.
For hinges with round 5/8 in. radius corners, use the corner
guides.
For hinges with square corners, do not use corner guides.
Create route as you would for 1/4 radius hinge. Remove
hinge mortiser and use chisel to square off corners.
Position hinge mortiser over marks for hinges. Clamp hinge
mortiser securely to the door.
Turn clamp screw clockwise to tighten on door.
Remove the hinge length guide stop and insert in the tabs
that correspond to the size of the hinge. Snap into place
with arrow pointing to desired length.
When selecting hinge length using the guide stop, ensure
that the arrow is pointing to the desired length. Otherwise,
the stop will not be flush with the jig and will not allow the
surface to be cleanly routed.
Using router or compact router:
See Figure 5.
WARNING:
Read your router or laminate trimmer instructions before
installing bit and operating. Unplug router or trimmer before
installing bit or making any adjustments.
Install router bit (included).
Set depth using router bit depth gauge, located on outer
wall of routing area.
For hinges 3”, 3-1/2”, & 4” use the router bit depth gauge
on the left (which is not as deep).
For hinges 4-1/2” & 5” use the router bit depth gauge on
the right (which is deeper).
Turn on power tool and remove wood from template area.
Using a chisel:
If using a chisel, begin by scoring the outline of the hinge.
Remove hinge mortiser.
Slowly make recesses by first cutting small sections. Then
chisel across the grain to remove chips.
Repeat steps for each hinge. Attach hinges to door and frame
using included tools. Hang door in frame.
Using self-centering hinge bit:
A self-centering hinge bit is included to help pre-drill
the hinge screws into the door directly on center. Use a
screwdriver or the included double ended driver bit placed
in a drill to install the hardware to the door.
A - Hinge mortiser (mortaiseuse à charnière, mortajadora de bisagra)
B - Self-centering hinge bit (embout à charnière auto-centreur, punta de
bisagra que se centra sola)
C - Router bit (fraise, punta buriladora)
D - PH2/8-10SL double ended bit (embout double 8-10SL nº 2 , broca de
doble extremo 8-10SL N.º 2)
Fig. 4
A - Measure from the top and subtract 1/8 in. [mesurer à partir du haut et
soustraire 3,18 mm (1/8 po), medir desde la parte superior y restar 3,18
mm (1/8 pulg.)]
B - Measure hinge length (mesurer la longueur de la charnière, medir la
longitud de la bisagra)
C - Determine hinge thickness (déterminer l’épaisseur de la charnière,
determinar el espesor de la bisagra)
D - Determine hinge edge radius (déterminer le rayon du rebord de la
charnière, determinar el radio del borde de la bisagra)
A - Clamp screw (vis de serrage, tornillo de sujeción)
B - Guide stop tabs (onglets d’arrêt du guide, lengüetas de tope guía)
C - Hinge length guide stop (butée de guide de longueur de charnière, tope
de guía de longitud de bisagra)
Fig. 3
A
B
C
A
C
E
D
B
B
D
C
Fig. 5
A - Router (toupie, buriladora)
B - Router bit (fraise, punta buriladora)
C - Router bit depth gauge (jauge de profondeur de foret, rmedidor de
profundidad de punta de fresadora)
A
C
B
A
B
D
C