Ryobi TS1143L User Manual
Ryobi TS1143L Manual
 |
View all Ryobi TS1143L manuals
Add to My Manuals
Save this manual to your list of manuals |
Ryobi TS1143L manual content summary:
- Ryobi TS1143L | User Manual - Page 1
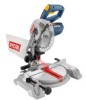
OPERATOR'S MANUAL 10 in. Compound Miter Saw TS1344L - Double Insulated Your miter saw has been engineered and manufactured to our high standard for dependability, ease of operation, and operator safety. When properly cared for, it will give you years of rugged, trouble-free performance. WARNING: To - Ryobi TS1143L | User Manual - Page 2
this warranty or you may exchange any RYOBI® power tool which does not work properly due to defective workmanship or materials by returning the power tool to the dealer from which it was purchased. To receive a replacement power tool or requested warranty service, you must present proof of purchase - Ryobi TS1143L | User Manual - Page 3
and any other conditions that may affect its operation. A guard or other part that is damaged must be properly repaired or replaced by an authorized service center to avoid risk of personal injury. USE THE RIGHT DIRECTION OF FEED. Feed work into a blade or cutter against the direction or rotation - Ryobi TS1143L | User Manual - Page 4
. WHEN SERVICING use only identical replacement parts. Use of any other parts may create a hazard or cause product damage. USE ONLY RECOMMENDED ACCESSORIES listed in this manual or addendums. Use of accessories that are not listed may cause the risk of personal injury. Instructions for safe use - Ryobi TS1143L | User Manual - Page 5
blade or servicing. h) No load speed. ALWAYS carry the tool only by the "D" handle. AVOID direct eye exposure when using the laser guide. THIS SAW CAN TIP OVER if the saw head is released suddenly and the saw is not secured to a work surface. ALWAYS secure this saw to a stable work surface - Ryobi TS1143L | User Manual - Page 6
their meaning. Proper interpretation of these symbols will allow you to operate the tool better and safer. SYMBOL NAME DESIGNATION/EXPLANATION Safety Alert Precautions that involve your safety. Read Operator's Manual Eye Protection To reduce the risk of injury, user must read and understand - Ryobi TS1143L | User Manual - Page 7
and should be performed only by a qualified service technician. For service, we suggest you return the tool to the nearest authorized service center for repair. Always use original factory replacement parts when servicing. ELECTRICAL CONNECTION This tool has a precision-built electric motor. It - Ryobi TS1143L | User Manual - Page 8
the workpiece. Dado Cut (table saws and compound sliding miter saws) A non-through cut which produces a square, three-sided notch or trough in the workpiece. Featherboard (table saws) A device used to help control the workpiece by guiding it securely against the table or fence during any ripping - Ryobi TS1143L | User Manual - Page 9
nominal lumber sizes 2 x 4 UPPER BLADE GUARD "D" HANDLE DUST BAG BLADE WRENCH BEVEL LOCK KNOB MITER FENCE MITER TABLE BASE SWITCH TRIGGER LOWER BLADE GUARD THROAT PLATE "NO HANDS ZONE" BOUNDARY LINE "NO HANDS ZONE" LABEL MITER SCALE WORK CLAMP 9 CONTROL ARM MITER LOCK HANDLE Fig. 1 - Ryobi TS1143L | User Manual - Page 10
GUIDE For more accurate cuts, a laser guide is included with your miter saw. When used properly, the laser guide makes accurate, precision cutting simple and easy. MITER FENCE The miter fence on the compound miter saw has been provided to hold the workpiece securely against when making all cuts. 10 - Ryobi TS1143L | User Manual - Page 11
miter table. SELF-RETRACTING LOWER BLADE GUARD The lower blade guard is made of shock-resistant, seethrough plastic that provides protection from each side of the blade. It retracts over the upper blade guard as the saw of the compound miter saw, disconnect it . TOOLS NEEDED The following tools (not - Ryobi TS1143L | User Manual - Page 12
LOOSE PARTS The following items are included with the tool: Miter Lock Handle Dust Bag Work Clamp Blade Wrench AAA Batteries Operator's Manual DUST BAG AAA BATTERIES BLADE WRENCH WORK CLAMP MITER LOCK HANDLE Fig. 6 WARNING: The use of attachments or accessories not listed might be - Ryobi TS1143L | User Manual - Page 13
the compound miter saw without checking for interference between the blade and the miter fence. Damage could result to the blade if it strikes the miter fence during operation of the saw. WARNING: This saw can tip over if the saw head is released suddenly and the saw is not secured to a work surface - Ryobi TS1143L | User Manual - Page 14
, simply reverse the above procedure. WORK CLAMP See Figure 10. The work clamp provides greater control by clamping the workpiece to the fence. It also prevents the workpiece from creeping toward the saw blade. This is very helpful when cutting compound miters. Depending on the cutting operation and - Ryobi TS1143L | User Manual - Page 15
battery compartment. Replace the battery compartment cover. Reinstall screw and tighten securely. DANGER: Laser radiation. Avoid direct eye LASER GUIDE LINE See Figure 12. Unplug the saw. Draw a line on the workpiece. When the laser guide switch is turned on it will generate a red line on the work - Ryobi TS1143L | User Manual - Page 16
TO INSTALL / REPLACE THE BLADE See Figures 13 - 14. WARNING: A 10 in. blade is the maximum blade capacity of the saw. Never use a blade that is too thick to allow laser guide washer to engage with the flats on the spindle. Larger blades will come in contact with the blade guards, while thicker - Ryobi TS1143L | User Manual - Page 17
in this manual show only portions of the compound miter saw. This is intentional so that we can clearly show points being made in the illustrations. Never operate the saw without all guards securely in place and in good operating condition. SQUARING THE SAW BLADE TO THE FENCE See Figures - Ryobi TS1143L | User Manual - Page 18
SCREW BEVEL SCALE SCALE INDICATOR INDICATOR SCREW Fig. 19 BLADE MITER TABLE FRAMING SQUARE MITER LOCK HANDLE VIEW OF BLADE NOT SQUARE WITH FENCE, ADJUSTMENTS ARE REQUIRED Fig. 18 COMBINATION SQUARE MITER TABLE MITER LOCK HANDLE BEVEL LOCK KNOB POSITIVE STOP ADJUSTMENT SCREWS CORRECT - Ryobi TS1143L | User Manual - Page 19
. Loosen bevel lock knob and set saw arm at 0° bevel (blade set 90° to miter table). Tighten bevel lock knob. Place a combination square against the miter table and the flat part of saw blade. NOTE: Make sure that the square contacts the flat part of the saw blade, not the blade teeth. Rotate - Ryobi TS1143L | User Manual - Page 20
do so could result in objects being thrown into your eyes, resulting in possible serious injury. CUTTING WITH YOUR COMPOUND MITER SAW WARNING: When using a work clamp or C-clamp to secure the workpiece, clamp workpiece on one side of the blade only. The workpiece must remain free on one side of the - Ryobi TS1143L | User Manual - Page 21
, support the opposite end of the stock with a roller stand or with a work surface level with the miter table. See Figure 28. Align cutting line on workpiece with edge of saw blade or laser line. Grasp the stock firmly with one hand and secure it against the fence. Use the optional work clamp or - Ryobi TS1143L | User Manual - Page 22
COMPOUND MITER CUT WORK CLAMP Fig. 26 Before turning on the saw, perform a dry run of the cutting operation just to make sure that no problems will occur when the cut is made. Make a test cut in scrap material. Place the workpiece flat on the miter table with one edge securely against the fence - Ryobi TS1143L | User Manual - Page 23
be placed along the workpiece so it does not sag. The support should let the workpiece lay flat on the base of the saw and work table during the cutting operation. Use the optional work clamp or a C-clamp to secure the workpiece. 45° X 45° COMPOUND MITER CUT Fig. 27 LONG WORKPIECE 0 WORKPIECE - Ryobi TS1143L | User Manual - Page 24
COMPOUND MITERS To aid in making the correct settings, the compound angle setting chart below has been provided. Since compound M- 27.62° M- 23.56° M- 20.58° M- 18.26° M- 16.41° B- 17.39° B- 14.38° B- 12.20° B- 10.57° B- 9.31° B- 8.31° B- 7.50° M- 40.89° M- 32.18° M- 26.57° M- 22.64° M- 19.73° M- - Ryobi TS1143L | User Manual - Page 25
is placed flat on the miter table using the compound features of your miter saw. 52° 38° CEILING W A L L FENCE INSIDE CORNER TOP EDGE AGAINST FENCE = LEFT SIDE, INSIDE CORNER RIGHT SIDE, OUTSIDE CORNER MITER TABLE FENCE OUTSIDE CORNER BOTTOM EDGE AGAINST FENCE = RIGHT SIDE, INSIDE CORNER - Ryobi TS1143L | User Manual - Page 26
material, always make sure it is positioned on the miter table with the convex side against the fence as shown in figure 30. If the warped material the fence. CLAMPING WIDE WORKPIECES See Figure 32. When cutting wide workpieces, such as 2 in. x 6 in., boards should be clamped with a C-clamp as - Ryobi TS1143L | User Manual - Page 27
RYOBI AUTHORIZED SERVICE CENTER. DEPTH STOP The depth stop limits the blade's downward travel. It allows the blade to go below the miter table enough to maintain full cutting capacities. The depth stop is factory set to provide maximum cutting capacity for the 10 in. blade provided with the saw - Ryobi TS1143L | User Manual - Page 28
of procedures other than those specified herein can result in hazardous radiation exposure. TO ADJUST THE LASER GUIDE See Figure 34. Use the work clamp or a C-clamp to secure a piece of scrap wood. Plug the saw into the power source and make a slight cut to score the wood. Release the switch - Ryobi TS1143L | User Manual - Page 29
MAINTENANCE WARNING: When servicing, use only identical Ryobi replacement parts. Use of any other parts can create a hazard or cause product damage. WARNING: Always wear eye protection with side shields marked to comply with ANSI Z87.1 during product operation. If - Ryobi TS1143L | User Manual - Page 30
OPERATOR'S MANUAL 10 in. Compound Miter Saw TS1344L - Double Insulated WARNING: This product and some dust created by power sanding, sawing, grinding, drilling, and other construction activities may contain chemicals, including lead, known to the State of California to cause cancer, birth defects,
-
 1
1 -
 2
2 -
 3
3 -
 4
4 -
 5
5 -
 6
6 -
 7
7 -
8
-
9
-
10
-
11
-
12
-
13
-
14
-
15
-
16
-
17
-
18
-
19
-
20
-
21
-
22
-
23
-
24
-
25
-
26
-
27
-
28
-
29
-
30
 |
 |

SAVE THIS MANUAL FOR FUTURE REFERENCE
OPERATOR’S MANUAL
10 in. Compound Miter Saw
TS1344L - Double Insulated
Your miter saw has been engineered and manufactured to our high standard for dependability, ease of operation, and
operator safety. When properly cared for, it will give you years of rugged, trouble-free performance.
WARNING:
To reduce the risk of injury, the user must read and understand the operator’s manual before using
this product.
Thank you for your purchase.