Samsung HMX-QF20BN User Manual Ver.1.0 (English)
Samsung HMX-QF20BN Manual
 |
View all Samsung HMX-QF20BN manuals
Add to My Manuals
Save this manual to your list of manuals |
Samsung HMX-QF20BN manual content summary:
- Samsung HMX-QF20BN | User Manual Ver.1.0 (English) - Page 1
USER MANUAL HMX-Q20BN/HMX-Q20TN/HMX-Q20RN HMX-Q200BN/HMX-Q200TN/HMX-Q200RN HMX-QF20BN www.samsung.com/register For video recording, use a memory card that supports faster write speeds. - Recommended Memory Card: 6MB/s (Class 6) or above. - Samsung HMX-QF20BN | User Manual Ver.1.0 (English) - Page 2
Important safety instructions CAUTION RISK OF ELECTRIC SHOCK. DO NOT OPEN. CAUTION: TO REDUCE THE RISK OF ELECTRIC SHOCK, DO NOT REMOVE COVER (OR BACK). NO USER-SERVICEABLE PARTS INSIDE. REFER SERVICING TO QUALIFIED SERVICE PERSONNEL. This symbol indicates that dangerous voltage constituting a risk - Samsung HMX-QF20BN | User Manual Ver.1.0 (English) - Page 3
Important safety instructions 14 Refer all servicing to qualified service personnel. Servicing is required when the This CAMCORDER is intended to be powered by a rechargeable battery or by its power supply. Refer to the operating instructions. 18 GROUNDING OR POLARIZATION: This CAMCORDER may be - Samsung HMX-QF20BN | User Manual Ver.1.0 (English) - Page 4
Important safety instructions 23 SERVICING: Do not attempt to service this CAMCORDER yourself. Opening or removing the covers may expose you to dangerous voltage or other hazards. Refer all servicing to qualified service personnel. 24 DAMAGE REQUIRING SERVICE: Unplug this CAMCORDER from the wall - Samsung HMX-QF20BN | User Manual Ver.1.0 (English) - Page 5
see lamprecycle.org, eiae.org, or call 1-800-Samsung (7267864) CALIFORNIA USA ONLY This Perchlorate warning applies and used in accordance with the instructions, may cause harmful interference to radio How to Identify and Resolve Radio-TV Interference Problems." This Booklet is available from the U.S. - Samsung HMX-QF20BN | User Manual Ver.1.0 (English) - Page 6
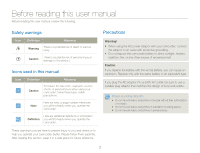
Before reading this user manual Before reading this user manual, review the following. Safety warnings Icon expose the camcorder battery to direct sunlight, heaters, radiators, fire, or any other source of excessive heat. Caution If you replace the battery with the wrong battery, you can - Samsung HMX-QF20BN | User Manual Ver.1.0 (English) - Page 7
for purchasing this Samsung Camcorder. Please read this user manual carefully before you use the camcorder and keep it handy for future reference. Should your camcorder fail to operate correctly, refer to Troubleshooting. ¬pages 108~120 This User Manual covers HMX-Q20, HMX-Q200, and HMX-QF20 models - Samsung HMX-QF20BN | User Manual Ver.1.0 (English) - Page 8
Before reading this user manual • The wireless version of this camcorder may emit radio interference. Avoid using it near pacemakers precautions when using wireless network products. Samsung is not responsible for any damages that may arise from security problems caused by the failure to implement - Samsung HMX-QF20BN | User Manual Ver.1.0 (English) - Page 9
damages. Heed all instructions carefully. WARNING There is a potential risk of death or serious injury. Do not overload outlets or extension cords as this may result in abnormal heat or fire. Using the camcorder at temperatures over 140˚F (60˚C) may result in fire. Keeping the battery at a high - Samsung HMX-QF20BN | User Manual Ver.1.0 (English) - Page 10
out of the reach of children. If the lithium battery or memory card is swallowed by a child, consult a physician immediately. If the camcorder emits an abnormal sound or smell or smokes, unplug the power-cord immediately and request service from a Samsung service center. There is a risk of fire or - Samsung HMX-QF20BN | User Manual Ver.1.0 (English) - Page 11
object. If you press or strike the LCD surface, you can cause display unevenness or damage the display. Do not drop or expose the camcorder, battery, AC adaptor, or other accessories to severe vibrations or impact. Severe vibration or impact can cause these items to malfunction and lead to personal - Samsung HMX-QF20BN | User Manual Ver.1.0 (English) - Page 12
camcorder on a PC, DVD disc, CD disc, etc. Samsung is not responsible for data loss. Only plug the adaptor plug into a socket that is easily accessible. If any problem this camcorder are responsible for their own products. Use the optional accessories according to their safety instructions. Samsung - Samsung HMX-QF20BN | User Manual Ver.1.0 (English) - Page 13
Camcorder layout 13 Inserting/Ejecting the battery and memory card 15 Inserting/ejecting the battery 15 Inserting/ejecting a memory card (not supplied 16 Charging the battery 20 Checking the battery state 21 Turning your camcorder Using the Manual modes 45 HMX-QF20 only 63 Delete 65 Delete My - Samsung HMX-QF20BN | User Manual Ver.1.0 (English) - Page 14
Contents Combine 69 File Info 70 Wireless network (HMX-QF20 only 71 Connecting to a WLAN and configuring network settings .. 72 Connecting to a WLAN 72 Configuring the network settings 73 Manually setting the IP address 74 Network connection tips 75 Entering text 75 Using video or photo - Samsung HMX-QF20BN | User Manual Ver.1.0 (English) - Page 15
, and home screen. Unpacking 12 Camcorder layout 13 Inserting/Ejecting the battery and memory card 15 Inserting/ejecting the battery 15 Inserting/ejecting a memory card (not supplied 16 Charging the battery 20 Checking the battery state 21 Turning your camcorder on/off 24 Using the touch - Samsung HMX-QF20BN | User Manual Ver.1.0 (English) - Page 16
from your box, call Samsung's Customer Care Center. Checking your accessories Battery (BP125A) (AD43-00197A) AC power adaptor (AA-MA9) (AD44-00151A) USB cable (AD39-00194A) Model name HMX-Q20BN HMX-Q200BN HMX-Q20TN HMX-Q200TN HMX-Q20RN HMX-Q200RN HMX-QF20BN Color Internal memory Lens Black - Samsung HMX-QF20BN | User Manual Ver.1.0 (English) - Page 17
Camcorder layout Top/Front/Left 2 1 56 7 89 23 4 10 1 Lens 2 Charging indicator 3 Home ( ) button 4 LCD screen (Touch screen) 5 Internal microphone 6 Internal speaker 7 Jack cover (AV/HDMI/ - Samsung HMX-QF20BN | User Manual Ver.1.0 (English) - Page 18
Camcorder layout Rear/Right/Bottom 3 4 5 6 1 2 11 12 7 8 9 10 1 Lens open/close switch 2 Grip belt 3 Jack cover (DC IN) 4 DC IN jack 5 Zoom (T/W) button 6 My Clip ( / ) button 7 Recording start/stop button 8 Battery slot 9 Memory card slot 10 Battery/Memory card cover 11 Battery release switch - Samsung HMX-QF20BN | User Manual Ver.1.0 (English) - Page 19
battery. 3 Close the battery slot cover. • Samsung is not responsible for problems that are caused by using unapproved batteries. If you use batteries from other manufacturers, there is a danger of overheating, fire, or explosion. • Purchase extra batteries to allow continuous use of your camcorder - Samsung HMX-QF20BN | User Manual Ver.1.0 (English) - Page 20
Inserting/Ejecting the battery and memory card Inserting/ejecting a memory card (not supplied) card to eject it. 3 Close the memory card cover. • To avoid the data loss, turn off the camcorder by pressing and holding the [Home ( )] button before inserting or ejecting the memory card. • Be careful - Samsung HMX-QF20BN | User Manual Ver.1.0 (English) - Page 21
Inserting/Ejecting the battery and memory card Compatible memory cards • You can use SD, SDHC, and SDXC cards with this camcorder. We recommend you use an SDHC card. This camcorder supports SD cards up to 2GB. We cannot guarantee normal operation with SD cards bigger than 2GB. • MMC (Multi Media - Samsung HMX-QF20BN | User Manual Ver.1.0 (English) - Page 22
battery it on this camcorder without reformatting it on the camcorder may result in trouble with recording and/or playback. Samsung is not responsible memory card out of the reach of children, who might swallow it. The camcorder supports SD, SDHC, and SDXC memory cards, giving you a wider choice of - Samsung HMX-QF20BN | User Manual Ver.1.0 (English) - Page 23
battery and memory card Recording time available for video in minutes Resolution Storage media (Capacity) 1GB 2GB 4GB 8GB 16GB 32GB 64GB Full HD 1080/60i 7 14 30 61 123 247 497 HD 720/60p 10 21 42 86 174 349 702 Web/HD resolution, the more memory the camcorder uses. • Lower resolution and - Samsung HMX-QF20BN | User Manual Ver.1.0 (English) - Page 24
cable and AC power adaptor are connected, the AC power adaptor will override the USB. • You cannot operate the camcorder using USB power only. Use the AC power adaptor or battery to power the camcorder. • USB charging time may depend on the type of USB host on your PC. • If you use the - Samsung HMX-QF20BN | User Manual Ver.1.0 (English) - Page 25
will be forced to turn off after 3 minutes. Change the battery as soon as possible. - After 3 seconds, the camcorder turns off. Message - - Low Battery The figures above are based on a fully charged battery at a normal temperature. Low ambient temperature may affect the use time. Getting - Samsung HMX-QF20BN | User Manual Ver.1.0 (English) - Page 26
battery. • Recording/Playback time: Approximate time available when you have fully charged the battery. • Times shown above are measured under Samsung the camcorder from a household AC outlet when recording and playing the camcorder indoors. The connection is the same as that for battery charging. - Samsung HMX-QF20BN | User Manual Ver.1.0 (English) - Page 27
to warm it, then install it in the camcorder. • Make sure to store the battery separately after use. - A small amount of battery power is consumed when the battery is stored in the camcorder even if the camcorder power is off. - The battery may be completely discharged, if it has been installed - Samsung HMX-QF20BN | User Manual Ver.1.0 (English) - Page 28
connect the AC power adaptor or insert the battery into the camcorder with the LCD screen open. LCD screen 1 Turn on the camcorder by opening the LCD screen. • Your camcorder turns on automatically when you open the LCD screen. • To turn the camcorder on when the LCD screen is already open, press - Samsung HMX-QF20BN | User Manual Ver.1.0 (English) - Page 29
rear side of the LCD screen to support it. Then, touch the items displayed on to select or execute. Manual Art Film Social Sharing Auto Backup Vertical HD Recording Album Settings 1• current recording/playback status of your camcorder. • The camcorder does not recognize touches if you touch - Samsung HMX-QF20BN | User Manual Ver.1.0 (English) - Page 30
Using the touch screen Switching the information display mode You can switch the on-screen information display mode. Each time you touch the LCD screen, the full and minimum display modes alternate. Full display mode STBY 00:00:00 [253Min] Minimum display mode STBY Warning icons and messages may - Samsung HMX-QF20BN | User Manual Ver.1.0 (English) - Page 31
offers high quality image viewing. When you reverse and close the LCD screen by rotating it to 180° towards the lens, the camcorder switches to the playback mode automatically. 1 Open the LCD screen with your finger. • The screen opens up to 90°. 2 Rotate the LCD screen towards the - Samsung HMX-QF20BN | User Manual Ver.1.0 (English) - Page 32
Month Date Year JAN 01 2012 4 Touch the time ( ) tab, and then set the time. Date / Time Set Hour Min 12 : 00 AM Internal rechargeable battery • Your camcorder includes a internal rechargeable battery that retains the date and time settings even after the power is turned off. • If the - Samsung HMX-QF20BN | User Manual Ver.1.0 (English) - Page 33
messages in the language you selected. Manual Art Film Social Sharing Auto Backup Vertical HD Recording Album Settings 1• • Language options may be changed without prior notice. • The camcorder retains the language you select even when not connected to the battery or AC power. • The date and - Samsung HMX-QF20BN | User Manual Ver.1.0 (English) - Page 34
Icon Description / / Smart Auto mode/Manual mode/ Art Film mode/Art Time Lapse mode/ / / Vertical HD Recording mode Video/Photo recording mode tab the LCD screen Icon Description Storage media (Memory card) Battery information (remaining charge level) Optical zoom/Digital zoom bar - Samsung HMX-QF20BN | User Manual Ver.1.0 (English) - Page 35
00AM Left of the LCD screen Icon Description / / Smart Auto mode/Manual mode/ Art Film mode Video/Photo recording mode tab Zoom tab Playback (total number of recordable photos) Storage media (Memory card) Battery information (remaining charge level) Optical zoom/Digital zoom bar Photo - Samsung HMX-QF20BN | User Manual Ver.1.0 (English) - Page 36
00:00:20/00:01:03 Time code (elapsed time/recorded time) 100_0001 File name (File number) Storage media (memory card) Battery information (remaining battery level) Playback progress bar Video resolution Video playback option Erase protection My Clip Bottom of the LCD screen Icon Description - Samsung HMX-QF20BN | User Manual Ver.1.0 (English) - Page 37
mode Photo image counter (current image/ total number of recorded images) File name (file number) Storage media (memory card) Battery information (remaining battery level) Photo resolution Erase protection Bottom of the LCD screen Icon Description Thumbnail view tab MENU tab Slide show start - Samsung HMX-QF20BN | User Manual Ver.1.0 (English) - Page 38
camcorder. ¬page 42 Manual: Record a video or photo using functions you set manually. HD Recording: Record a video in portrait mode. ¬page 39 Album: Views videos or photos using playback or editing functions. ¬pages 56~70 Social Sharing: Upload videos or photos to share web sites. ¬page 76 (HMX-QF20 - Samsung HMX-QF20BN | User Manual Ver.1.0 (English) - Page 39
menu. ¬page 105 STBY 00:00:00 [253Min] 90˚ Vertical grip Select Vertical HD Recording to record in a vertical position. ¬page 39 Rotate your camcorder to the vertical position. STBY 00:00:00 [253Min] STBY 00:00:00 [253Min] - Samsung HMX-QF20BN | User Manual Ver.1.0 (English) - Page 40
Basic functions Learn about basic functions for video and photo shooting. Recording videos 37 Recording videos in portrait mode 39 Tagging great moments while recording (My Clip function)........ 40 Recording photos 41 Recording with ease for beginners (SMART AUTO 42 Zooming 43 - Samsung HMX-QF20BN | User Manual Ver.1.0 (English) - Page 41
to adjust the size of the subject. ¬page 43 4 To stop recording, press the [Recording start/stop] button again. Recording pause/resume The camcorder allows you to pause temporarily while recording a video. With this function, you can record your favorite scenes as a single video. Touch the Pause - Samsung HMX-QF20BN | User Manual Ver.1.0 (English) - Page 42
may not be recorded/edited. • Samsung is not responsible for any damage recovered. • Do not turn off the camcorder or remove the memory card while accessing the problems with the audio or video recording. • For various functions available during recording, see pages 45~54. • If the power cable/battery - Samsung HMX-QF20BN | User Manual Ver.1.0 (English) - Page 43
to the vertical position. 1 Press the [Home ( )] button Š touch Vertical HD Recording. • The camcorder switches to portrait mode (vertical position). Smart Auto Manual Art Film Art Time Lapse Vertical HD Recording 1• Album 2 Rotate the camcorder to 90º for vertical recording. STBY 00:00:00 - Samsung HMX-QF20BN | User Manual Ver.1.0 (English) - Page 44
and then extract the scenes tagged as My Clip ( ) from a long video later for viewing. [My Clip ( )] button [Recording start/stop] button • The camcorder tags the scene as My Clip ( ). 00:00:07 [253Min] 5 To stop recording, press the [Recording start/stop] button again. Understanding the My Clip - Samsung HMX-QF20BN | User Manual Ver.1.0 (English) - Page 45
taking photos as it may damage the storage media or data. • The recordable number of photos varies depending on the photo resolution. ¬page 19 • The camcorder does not record audio when you take photos. • You can adjust the brightness of the LCD screen in the menu options. Adjusting the LCD screen - Samsung HMX-QF20BN | User Manual Ver.1.0 (English) - Page 46
, providing beginners with the best performance. 1 Press the [Home ( )] button Š touch Smart Auto. Smart Auto Manual Art Film Art Time Lapse Vertical HD Recording 1• Album 2 Align your subject in the frame. • The camcorder automatically detects the scene (Landscape, etc.) and adjusts the - Samsung HMX-QF20BN | User Manual Ver.1.0 (English) - Page 47
a fast zoom or zoom into a subject standing too far away. If this occurs, use the manual focus function. (Video recording mode only) ¬page 48 • The minimum distance you can have between the camcorder and subject while maintaining sharp focus is about 1cm (about 0.4 inches) for wide angle and about - Samsung HMX-QF20BN | User Manual Ver.1.0 (English) - Page 48
Extended functions Learn how to record a video and photo by selecting a mode. Using the Manual modes 45 White Balance 45 EV (Exposure Value 46 Back Light 47 Focus 48 Super C.Nite 49 Self Timer 50 Cont. Shot 50 Using the - Samsung HMX-QF20BN | User Manual Ver.1.0 (English) - Page 49
adjust the white balance to match the light source or situation. Extended functions 45 • When setting the white balance manually, the subject must be white, otherwise, your camcorder may not detect an appropriate setting value. • The adjusted setting remains until you set the white balance again - Samsung HMX-QF20BN | User Manual Ver.1.0 (English) - Page 50
be too bright or dark. In these cases, you can adjust the exposure to get a better videos and photos. 1 Press the [Home ( )] button p touch Manual p EV ( ) tab. 2 Touch the / tab to adjust the setting values. • The setting values range from -2.0 to +2.0 STBY 00:00:00 [253Min] EV : 0 Understanding - Samsung HMX-QF20BN | User Manual Ver.1.0 (English) - Page 51
is lit from behind, this function compensates for back lighting so that the subject does not appear too dark. 1 Press the [Home ( )] button p touch Manual p Back Light ( ) tab. 2 Touch the desired submenu item. STBY 00:00:00 [253Min] Back Light : Off Icon Description Off: Disables the function. On - Samsung HMX-QF20BN | User Manual Ver.1.0 (English) - Page 52
when you operate the zoom function because you might not be able to keep accurate focus after the zoom ratio has been changed. • When the camcorder exits from Manual mode or switches to the photo recording mode, the Focus function is automatically set to Auto. Extended functions 48 - Samsung HMX-QF20BN | User Manual Ver.1.0 (English) - Page 53
1 In STBY mode, touch the Video recording mode ( 2 Press the [Home ( )] button p touch Manual p Super C. Nite ( ) tab. ) tab. 3 Touch the desired submenu item. STBY 00:00:00 Super C.Nite may not appear smooth because the camcorder has recorded them at a low shutter speed. Extended functions 49 - Samsung HMX-QF20BN | User Manual Ver.1.0 (English) - Page 54
Self Timer function off after it has been used once. You must turn it on each time you want to use it. • When the camcorder exits from Manual mode, the Self Timer function is automatically set to Off. • When an error occurs (Card Full, etc.) during continuous shot, the recording stops and - Samsung HMX-QF20BN | User Manual Ver.1.0 (English) - Page 55
, press the [Recording start/stop] button to stop recording. The image and sound fade out, the screen goes black, and then the recording stops. • The camcorder automatically turns the Fader function off after it has been used once. You must reset it each time you want to use it. • When the - Samsung HMX-QF20BN | User Manual Ver.1.0 (English) - Page 56
Digital Effect : Black & White OFF You can also apply digital effects in order easily by shaking the camcorder in the Art Film mode. You do not need to set the Digital Effect function manually. ¬page 98 Extended functions 52 Description Off: Without any Digital Effect, a normal, natural image is - Samsung HMX-QF20BN | User Manual Ver.1.0 (English) - Page 57
Using the Art Time Lapse mode Using the Art Time Lapse function, you can set the camcorder to add emotion and something different experience on a dry and boring time lapse video. 1 In STBY mode, touch the Video recording mode ( ) tab. 2 Press the [ - Samsung HMX-QF20BN | User Manual Ver.1.0 (English) - Page 58
, a new video file is created automatically. • We recommend using the power adaptor instead of the battery for Art Time Lapse. • If the battery charge is exhausted during Art Time Lapse recording, the camcorder saves recording up to that point and switches to standby mode. After a while, it displays - Samsung HMX-QF20BN | User Manual Ver.1.0 (English) - Page 59
56 Starting the playback mode 56 Playing back videos 57 Tagging great moments during playback 60 Viewing photos 61 Editing videos or photos 63 Share (HMX-QF20 only 63 Delete 65 Delete My Clip 66 My Clip Creation 66 Protect 67 Smart BGM 67 Divide 68 Combine 69 File Info 70 - Samsung HMX-QF20BN | User Manual Ver.1.0 (English) - Page 60
recently created file is highlighted in the thumbnail view. • The camcorder selects the thumbnail display options based on the standby mode that thumbnail view> Smart Auto Manual Art Film Art Time Lapse Vertical HD Recording 1• Album - Samsung HMX-QF20BN | User Manual Ver.1.0 (English) - Page 61
view and find and play your desired video directly. 1 Select the video playback mode. ¬page 56 2 Touch the thumbnail of the desired video clip. • The camcorder plays the video you selected. • If you select a video tagged as My Clip, the My Clip ( ) icon on the LCD screen appears. The color of - Samsung HMX-QF20BN | User Manual Ver.1.0 (English) - Page 62
may not play back the following video files: - A video recorded on another device. - A video whose file format is not supported by the camcorder. • You can use various playback options during the video playback. ¬page 59 • You can set playback settings using the Video Play Option menu. ¬page - Samsung HMX-QF20BN | User Manual Ver.1.0 (English) - Page 63
Viewing videos or photos in playback mode Playback/Pause/Stop • Playback and pause alternate when you touch the Playback ( )/Pause ( ) tab during playback. • Touch the Thumbnail view ( ) tab to stop playback and return to the thumbnail. 00:00:20/00:01:03 100_0001 Search playback During - Samsung HMX-QF20BN | User Manual Ver.1.0 (English) - Page 64
to tag great moments during playback. [My Clip ( )] button 4 To stop playback and return to the thumbnail view, touch the Thumbnail view ( ) tab. • The camcorder tags a scene 3 seconds and 5 seconds after you press the [My Clip ( )] button. • To skip boring parts of a video and enjoy exciting parts - Samsung HMX-QF20BN | User Manual Ver.1.0 (English) - Page 65
. ¬page 56 2 Touch the thumbnail of the desired photo. • The camcorder displays the photo you selected in full screen. Find photos in various ways recorded on another device. - A photo with a file format not supported by this camcorder. (One that does not conform to DCF standards.) Do not power - Samsung HMX-QF20BN | User Manual Ver.1.0 (English) - Page 66
Viewing videos or photos in playback mode Viewing a slide show You can view a photo slide show with background music. 1 Touch the Slide show ( ) tab during photo playback. • The slide show starts from the current selected photo. • To pause the slide show, touch the LCD screen anywhere. 1/12 - Samsung HMX-QF20BN | User Manual Ver.1.0 (English) - Page 67
Editing videos or photos Share (HMX-QF20 only) During video or photo playback, you can upload the video or photo you are viewing to a sharing web site. Sharing videos 1 Select the video playback mode. ¬page 56 2 Touch a video recorded in the Web/HD resolution. • The camcorder plays the video you - Samsung HMX-QF20BN | User Manual Ver.1.0 (English) - Page 68
Editing videos or photos Sharing photos 1 Select the photo playback mode. ¬page 56 2 Touch the thumbnail of the desired photo. • The camcorder displays the photo you selected in full screen. 3 Touch the MENU ( ) tab. 1/12 100_0001 4 Touch Share. Share Delete Protect File Info 5 Touch the desired - Samsung HMX-QF20BN | User Manual Ver.1.0 (English) - Page 69
tab. • A message appears asking for your confirmation. 5 Touch Yes. • The camcorder deletes all the files having the selection ( ) indicator. • Deleted images cannot be does not work if the battery charge is insufficient. We recommend you use AC power to provide continuous power - Samsung HMX-QF20BN | User Manual Ver.1.0 (English) - Page 70
tagged as My Clip ( ). 3 Touch the MENU ( ) tab p Delete My Clip. Delete Delete My Clip My Clip Creation Protect Smart BGM 4 Touch Yes. • The camcorder will delete all My Clip tags from the video. This function is available in the video single view only. 4 Touch the desired submenu item. My - Samsung HMX-QF20BN | User Manual Ver.1.0 (English) - Page 71
67 • This function is available in the video single view only. • You can also apply background music easily by shaking the camcorder during playback. You do not need to set the Smart BGM function manually. ¬page 101 • You can change the desired background music in the Settings menu. ¬page 98 - Samsung HMX-QF20BN | User Manual Ver.1.0 (English) - Page 72
. - When the number of files reaches 9999. • This function is available in the video single view only. • You cannot divide videos recorded in the Web/HD resolution. • When you divide a video with My Clip tags, the My Clip tags disappear. • You cannot divide a video recorded in Art Time Lapse mode - Samsung HMX-QF20BN | User Manual Ver.1.0 (English) - Page 73
space on your memory card is less than 15MB. - If a video file format is not supported by the camcorder. - While the camcorder is playing a video file. • You cannot combine videos recorded in the Web/HD resolution. • When you combine a video with My Clip tags, the My Clip tags disappear. • You - Samsung HMX-QF20BN | User Manual Ver.1.0 (English) - Page 74
. • The information for the selected file appears. File Info 100VIDEO HDV_0008.MP4 Date : JAN/01/2012 Duration : 00:00:05 Size : 9.56 MB Resolution : Full HD 4 To exit the menu, touch the Return ( ) tab. Playback/Editing 70 - Samsung HMX-QF20BN | User Manual Ver.1.0 (English) - Page 75
Wireless network (HMX-QF20 only) Learn to connect to wireless local area networks (WLANs) and use functions. Connecting to a WLAN and configuring network settings .. 72 Connecting to a WLAN 72 Configuring the network settings 73 Manually setting the IP address 74 Network connection tips 75 - Samsung HMX-QF20BN | User Manual Ver.1.0 (English) - Page 76
access point) in the wireless network service area. 1 Press the [Home ( tab on the bottom left. • The camcorder automatically searches for and then displays available search for the desired AP name manually. 3 To select an unsecured AP WPS supported AP, touch the the AP, and then HMX-QF20 only) 72 - Samsung HMX-QF20BN | User Manual Ver.1.0 (English) - Page 77
need to configure them manually. 1 Press the [Home ( )] button p touch Social Sharing. 2 Touch the Wi-Fi setting ( ) tab. • The camcorder automatically searches for available AP devices. 3 Touch the tab next to an AP. Wi-Fi Setting Samsung 1 Samsung 2 Samsung 3 Samsung 4 5 Touch the tab. • The - Samsung HMX-QF20BN | User Manual Ver.1.0 (English) - Page 78
the network administrator or the service provider. • The network settings may differ, depending on network conditions. • Do not try to connect to a network that you have no permission to access. • Use a fully charged battery while you are using network services. Wireless network (HMX-QF20 only) 74 - Samsung HMX-QF20BN | User Manual Ver.1.0 (English) - Page 79
camcorder. The manufacturer is not liable for any problem camcorder service supports the wireless network, but you Item W X Description Move the cursor. cannot use the printer to connect to the network. • The service camcorder to networks only inside the service provider, you may not service service - Samsung HMX-QF20BN | User Manual Ver.1.0 (English) - Page 80
camcorder will automatically attempt to connect to a WLAN via the most recently connected AP device. • If the camcorder a sharing web site with your camcorder. 2 Touch files p the tab network administrator or network service provider. • The no files in the camcorder memory, you cannot use this - Samsung HMX-QF20BN | User Manual Ver.1.0 (English) - Page 81
cannot play HD quality videos on the TV. • You can select up to 1000 photos and videos files to watch through your TV. The more files you select, the slower the camcorder operates. We recommend selecting fewer than 1000 files. • This function may not operate properly on a Samsung HDTV that has - Samsung HMX-QF20BN | User Manual Ver.1.0 (English) - Page 82
You can connect only one camcorder to the PC at a time for sending files. • The backup may be canceled due to network conditions. • Videos or photos can be sent to a PC one time only. • Files cannot be sent again even if you reconnect your camcorder. Settings •2 Wireless network (HMX-QF20 only) 78 - Samsung HMX-QF20BN | User Manual Ver.1.0 (English) - Page 83
mode. With the WOL feature, you can automatically turn on or wake up a PC with your camcorder by touching Auto Backup. Setting the PC to wake up from sleep mode 1 Click Start, and then • Windows XP: Click Network and Internet Connection p Network Connection. Wireless network (HMX-QF20 only) 79 - Samsung HMX-QF20BN | User Manual Ver.1.0 (English) - Page 84
PC's BIOS settings other than the ones described below may damage your PC. Samsung is not responsible for damage caused by your changing your PC's BIOS settings. that the LAN connection is active. • Depending on your PC model, the camcorder may only be able to wake the PC. • Depending on your PC's - Samsung HMX-QF20BN | User Manual Ver.1.0 (English) - Page 85
Using with other devices Learn how to connect your camcorder to your TV, VCR or DVD/ HDD recorders, photo printer, or computer. Connecting to a TV 82 to your Windows computer 88 Transferring files with Intelli-studio 89 Transferring files by connecting the camcorder as a removable disk 93 - Samsung HMX-QF20BN | User Manual Ver.1.0 (English) - Page 86
the Anynet+ supported TV's user manual. • This camcorder is provided with the TV Connect Guide menu function. If you try to connect the camcorder to a TV and don't have your user's manual, you can use the TV Connect Guide menu function to view connection instructions on the camcorder's screen. ¬page - Samsung HMX-QF20BN | User Manual Ver.1.0 (English) - Page 87
Audio/Video (composite) output • This camcorder is provided with the TV Connect Guide menu function. If you try to connect the camcorder to a TV and don't have your user's manual, you can use the TV Connect Guide menu function to view connection instructions on the camcorder's screen. ¬page 103 • If - Samsung HMX-QF20BN | User Manual Ver.1.0 (English) - Page 88
the volume is too high, the video information may include noise. • If TV Display is set to Off, the TV screen does not display the camcorder's OSD (On Screen Display) menus. ¬page 102 Using with other devices 84 - Samsung HMX-QF20BN | User Manual Ver.1.0 (English) - Page 89
HDD recorder Camcorder 3 Start the playback on your camcorder, and record it on the recording device. • Refer to the instruction manuals supplied with • To copy a video recorded in HD (high definition) image quality in HD, use the built-in software of your camcorder, and copy the video to your - Samsung HMX-QF20BN | User Manual Ver.1.0 (English) - Page 90
the print setting Touch the Thumbnail view ( ) tab on the LCD screen. To stop printing after printing starts Touch Cancel on the screen. • If the camcorder fails to recognize the printer, remove the USB cable, and then turn off the printer. Set USB Connect to PictBridge, and then connect the USB - Samsung HMX-QF20BN | User Manual Ver.1.0 (English) - Page 91
does not support the option. camcorder shuts off during printing, it might damage data on the storage media. • You cannot print video images. • You cannot print photos recorded on other devices. • Various printing options are available depending on the printer. Refer to the printer's user manual - Samsung HMX-QF20BN | User Manual Ver.1.0 (English) - Page 92
1GB or higher is recommended Video Card NVIDIA GeForce 8500 or higher, ATI Radeon HD 2600 series or higher Display 1024 x 768, 16-bit color or higher ( 7, Intelli-studio may be installed and work as 32-bit program. Samsung is not responsible for any damage that results from using a computer that - Samsung HMX-QF20BN | User Manual Ver.1.0 (English) - Page 93
and then click Stop. 3. If the Stop a Hardware device window appears, click OK. 4. Disconnect the USB cable from the camcorder and PC. • Use the provided USB cable. (Supplied by Samsung) • Make sure you insert the USB plug into the micro USB jack with the plug oriented correctly. • Use the AC power - Samsung HMX-QF20BN | User Manual Ver.1.0 (English) - Page 94
Install Intelli-studio on PC. • You can update to the latest version of Intelli-studio software by clicking on Web Support € Update Intelli-studio € Start Update. • The camcorder's built-in Intelli-studio software is intended for home use. It is not for precision or industrial productions. For these - Samsung HMX-QF20BN | User Manual Ver.1.0 (English) - Page 95
to the selected file. • The selected file appears in the editing window. 3 Edit a video or photo with various edit functions. Intelli-studio supports the following file formats: - Video formats: MP4 (Video: H.264, Audio: AAC), WMV (WMV 7/8/9) - Photo formats: JPG, GIF, BMP, PNG, TIFF Using with - Samsung HMX-QF20BN | User Manual Ver.1.0 (English) - Page 96
Transferring files to your Windows computer Step 5. Sharing the videos/photos online Share your contents with the world by uploading photos and videos directly to a web site with one click. 1 Choose the videos or photos you want to share. 2 Click Share ( ) on the Intelli-studio browser. • The - Samsung HMX-QF20BN | User Manual Ver.1.0 (English) - Page 97
in different folders. 2 Set PC Software to Off. ¬page 103 3 Insert a memory card. ¬page 16 4 Connect the camcorder to the PC with the USB cable. ¬page 89 • The Removable Disk or Samsung window appears on the PC's screen after a moment. • Select Open folders to view files using Windows Explorer, and - Samsung HMX-QF20BN | User Manual Ver.1.0 (English) - Page 98
files to your Windows computer Video file (H.264) 1 • HD-quality videos have an HDV_####.MP4 name format. • The in the following order: 100VIDEO, 101VIDEO, etc. The maximum number of folders is 999. • The camcorder can create a maximum of 9,999 files in a storage media. Photo file 2 • As with video - Samsung HMX-QF20BN | User Manual Ver.1.0 (English) - Page 99
Settings Refer to items to configure your camcorder's settings. Settings menu 96 Accessing the settings menu 96 Shooting 97 Playback 98 Display 101 Connectivity 103 General 104 - Samsung HMX-QF20BN | User Manual Ver.1.0 (English) - Page 100
instructions below are an example of how to access and use the Settings menu items. When you access and use other Settings menu items (pages 97~106), use this example as a guide items. ¬page 103 General: Change the settings for the camcorder system such as memory format and default set. ¬pages 104 - Samsung HMX-QF20BN | User Manual Ver.1.0 (English) - Page 101
you select. ¬page 19 • The videos recorded in Web/HD resolution are displayed in 1280X720/60p resolution in the video thumbnail view camcorder may not playback properly on other digital devices that do not support these photo sizes. Settings 97 Description Set to compensate for camcorder - Samsung HMX-QF20BN | User Manual Ver.1.0 (English) - Page 102
digital zoom magnification. Digital Zoom When you use the digital zoom, the camcorder processes the image digitally more than in the optical zoom mode. As a your videos. You can select one of the 20 music files in the camcorder, from The Flea Waltz to The Four Seasons. or select the Random option - Samsung HMX-QF20BN | User Manual Ver.1.0 (English) - Page 103
songs as background music (Smart BGM II) You can enjoy external songs, as well as the music files in the Smart BGM Option of the camcorder, by saving the external songs to a memory card. To set external songs as background music Convert your songs to a compatible format using the Intelli-studio - Samsung HMX-QF20BN | User Manual Ver.1.0 (English) - Page 104
BGM screen or from the BGM folder in the memory card. • The camcorder can recognize external songs converted by the Intellistudio program only. • The external must be in the mp3 or m4a formats. Some MP3 files may not be supported. • External songs are saved to the BGM folder in the memory card. • - Samsung HMX-QF20BN | User Manual Ver.1.0 (English) - Page 105
to transition between photos. Set to play back background music by shaking the camcorder. • Off*: Disables the Shake It function. • On: Enables the Shake It function. Shake the camcorder while a video is playing to have the camcorder play background music. Shake It 00:00:20/00:01:03 100_0001 00 - Samsung HMX-QF20BN | User Manual Ver.1.0 (English) - Page 106
/01/2012 12:00 AM when the internal rechargeable battery is depleted. • The date and time displayed by output to match the TV you have connected the camcorder to. • Auto*: The video signals are output connecting to a standard, analog TV which supports SD (Standard Definition) progressive scan (480p) - Samsung HMX-QF20BN | User Manual Ver.1.0 (English) - Page 107
TV Connect Guide View the connection instructions before connecting the camcorder to your TV set. • HDMI: Displays the HDMI guide. • Composite: Displays the Composite guide. Anynet+ (HDMI-CEC) Set to control some functions of the camcorder with a Samsung TV remote control that supports Anynet - Samsung HMX-QF20BN | User Manual Ver.1.0 (English) - Page 108
such as memory space used and available memory space. • The actual capacity may be less than the capacity displayed on the LCD screen as the camcorder's system files occupy a part of the capacity. • If there is no storage media inserted, you cannot select the Card Info function and it will look - Samsung HMX-QF20BN | User Manual Ver.1.0 (English) - Page 109
then open it. * : Default Item Description Use to reduce energy consumption and battery drain when recording frequently for an extended time. • Off*: The camcorder turns off when you close the LCD screen. • 5 Min: The camcorder goes into the Quick On STBY mode a short period of time after you - Samsung HMX-QF20BN | User Manual Ver.1.0 (English) - Page 110
AC power adaptor to power the camcorder while formatting the storage media. The storage media may be corrupted if the battery becomes exhausted during formatting. • If . By deleting all files and options, formatting typically corrects problems, enabling stable read/write speeds and operation. * : - Samsung HMX-QF20BN | User Manual Ver.1.0 (English) - Page 111
Appendixes Get information about error messages, maintenance, and specifications. Troubleshooting 108 Warning icons and messages 108 Symptoms and solutions 114 Maintenance 121 Using your camcorder abroad 123 Glossary 124 Specifications 125 - Samsung HMX-QF20BN | User Manual Ver.1.0 (English) - Page 112
Troubleshooting Before contacting a Samsung authorized service center, perform the following simple checks. They may save you the time and expense of an unnecessary call. Warning icons and messages Problems may occur because of the following reasons. Check the information and take corrective action - Samsung HMX-QF20BN | User Manual Ver.1.0 (English) - Page 113
Informs that... The memory card has a problem and the camcorder cannot recognize it. Action • Replace the memory card with another card. Not Formatted The memory card is not formatted in this camcorder. • Format the memory card using this camcorder. Not Supported Format The memory card may have - Samsung HMX-QF20BN | User Manual Ver.1.0 (English) - Page 114
Troubleshooting Recording Message The limit of video files is reached. Cannot record video. The limit of photo files is reached. Cannot take a photo. File Limit is - Samsung HMX-QF20BN | User Manual Ver.1.0 (English) - Page 115
Troubleshooting Playback Message Read Error Corrupted file Icon Informs that... - A problem has occurred while the camcorder was reading data from the storage media. - This file cannot be read. Action • Use the camcorder to format the storage media after backing up important files to a PC or - Samsung HMX-QF20BN | User Manual Ver.1.0 (English) - Page 116
in the printer. If there is no paper, insert paper. • Your camcorder does not support this file format. • Try another file recorded on your camcorder. • Turn the printer's power off and on. • Contact the printer manufacturer's service center. • Do not remove power source or eject memory card during - Samsung HMX-QF20BN | User Manual Ver.1.0 (English) - Page 117
Troubleshooting Wireless Network (HMX-QF20 Only) Message Icon Informs that... Action Connection failed. - Camcorder's WLAN configuration does not match that • Configure the IP settings (auto or manual) of your of the AP. camcorder to match the AP's. No response from server. - No renderer - Samsung HMX-QF20BN | User Manual Ver.1.0 (English) - Page 118
Troubleshooting Symptoms and solutions If these instructions do not solve your problem, contact your nearest Samsung authorized service center. Power Symptom The camcorder does not turn on. The power turns off automatically. The power cannot be turned off. The battery discharges quickly. - Samsung HMX-QF20BN | User Manual Ver.1.0 (English) - Page 119
Troubleshooting This occurs if you disconnect the AC power adaptor or remove the battery before turning the power off. • Ambient light is too bright. Adjust start/stop] button does not start recording. Explanation/Solution • Set your camcorder to the recording mode. ¬page 37 • There is not enough - Samsung HMX-QF20BN | User Manual Ver.1.0 (English) - Page 120
Troubleshooting Recording Symptom Explanation/Solution During recording, the date/time does not display. You cannot record a photo image. • Date/Time Display is set to Off. Set the Date/Time Display to On. ¬page 102 • Set your camcorder to the photo recording mode. ¬page 41 • Release the lock - Samsung HMX-QF20BN | User Manual Ver.1.0 (English) - Page 121
is not supported on your camcorder or card has some problems. • The file may be corrupted. • The file format is not supported by your camcorder. • 48 • The recording conditions are not suitable for auto focus. Adjust the focus manually. (Video recording mode only) ¬page 48 • The lens is dusty on - Samsung HMX-QF20BN | User Manual Ver.1.0 (English) - Page 122
Troubleshooting Adjusting files recorded using another device may not play back on your camcorder. • Check memory card compatibility. ¬page 17 • Photo images This is not an error. • Check if the AC power adaptor or battery back is properly connected and secure. Playback on other devices (TV, etc.) - Samsung HMX-QF20BN | User Manual Ver.1.0 (English) - Page 123
and connect the USB cable to the micro USB jack on your camcorder firmly. • Disconnect the cable from the computer and camcorder, restart the computer, and then connect the cable again properly. • To play back an HD video file, you need a computer with better specifications. Use a computer with the - Samsung HMX-QF20BN | User Manual Ver.1.0 (English) - Page 124
Troubleshooting Connecting to a computer Symptom Explanation/Solution Your computer is not playing videos, images, or sound located on your camcorder to your computer is not affected. • If your camcorder is connected to a computer that does not support Hi-speed USB (micro USB 2.0), the image or - Samsung HMX-QF20BN | User Manual Ver.1.0 (English) - Page 125
Maintenance Cautions when storing • To protect the camcorder: - Turn it off - Remove the battery. - Remove the memory card. Cleaning the camcorder Before cleaning, turn off the camcorder and remove the battery. • To clean the exterior - Wipe gently with a soft, dry cloth. Do not apply excessive - Samsung HMX-QF20BN | User Manual Ver.1.0 (English) - Page 126
the battery, and leave the camcorder in a dry area for 1~2 hours before using it. • Use the camcorder only after dew condensation has completely disappeared. • Be sure to use the recommended accessories supplied with the camcorder. For service, contact your nearest Samsung authorized service center - Samsung HMX-QF20BN | User Manual Ver.1.0 (English) - Page 127
on the design of local wall outlets. On TV color systems Your camcorder is an NTSC based camcorder. If you want to view your recordings on a TV or to PAL format converter). The format transcoder is not provided by Samsung. NTSC-compatible countries/regions Bahamas, Canada, Central America, Japan, - Samsung HMX-QF20BN | User Manual Ver.1.0 (English) - Page 128
image sensor producing images approaching the quality of CCD (charge coupled device) sensors. It consumes less power, meaning a longer battery life on your camcorder. Digital zoom A feature that artificially increases the amount of zoom available with zoom lens (Optical zoom). When using the Digital - Samsung HMX-QF20BN | User Manual Ver.1.0 (English) - Page 129
Specifications Model name HMX-Q20BN/HMX-Q20TN/HMX-Q20RN HMX-Q200BN/HMX-Q200TN/HMX-Q200RN HMX-QF20BN Video signal NTSC Picture V, Lithium Ion battery 3.7 V Power source type Lithium Ion battery, Power supply (100 V ~ 240 V) 50/60 Hz Power consumption HMX-Q20/HMX-Q200: 2.5W, HMX-QF20: 3.0W ( - Samsung HMX-QF20BN | User Manual Ver.1.0 (English) - Page 130
installation This equipment generates, uses and can radiate radio frequency energy and, if not installed and used in accordance with the instructions, may cause harmful interference to radio communications, However, there is no guarantee that interference will not occur in a particular installation - Samsung HMX-QF20BN | User Manual Ver.1.0 (English) - Page 131
by a SEA authorized service center. The name and address of the location nearest you can be obtained by calling toll free: 1-800 SAMSUNG (1-800-726-7864). under this warranty. Customer adjustments which are explained in the instruction manual are not covered under the terms of this warranty. This - Samsung HMX-QF20BN | User Manual Ver.1.0 (English) - Page 132
in this product (Applicable in the European Union and other European countries with separate battery return systems) This marking on the battery, manual or packaging indicates that the batteries in this product should not be disposed of with other household waste at the end of their working - Samsung HMX-QF20BN | User Manual Ver.1.0 (English) - Page 133
QUESTIONS OR COMMENTS? COUNTRY IN THE US CALL 1-800-SAMSUNG (726-7864) OR VISIT US ONLINE AT www.samsung.com WRITE Samsung Electronics America, lnc. 85 Challenger Road Ridgefield Park, NJ 07660-2112 RoHS compliant Our product complies with "The Restriction Of the use of certain Hazardous
-
 1
1 -
 2
2 -
 3
3 -
 4
4 -
 5
5 -
 6
6 -
 7
7 -
8
-
9
-
10
-
11
-
12
-
13
-
14
-
15
-
16
-
17
-
18
-
19
-
20
-
21
-
22
-
23
-
24
-
25
-
26
-
27
-
28
-
29
-
30
-
31
-
32
-
33
-
34
-
35
-
36
-
37
-
38
-
39
-
40
-
41
-
42
-
43
-
44
-
45
-
46
-
47
-
48
-
49
-
50
-
51
-
52
-
53
-
54
-
55
-
56
-
57
-
58
-
59
-
60
-
61
-
62
-
63
-
64
-
65
-
66
-
67
-
68
-
69
-
70
-
71
-
72
-
73
-
74
-
75
-
76
-
77
-
78
-
79
-
80
-
81
-
82
-
83
-
84
-
85
-
86
-
87
-
88
-
89
-
90
-
91
-
92
-
93
-
94
-
95
-
96
-
97
-
98
-
99
-
100
-
101
-
102
-
103
-
104
-
105
-
106
-
107
-
108
-
109
-
110
-
111
-
112
-
113
-
114
-
115
-
116
-
117
-
118
-
119
-
120
-
121
-
122
-
123
-
124
-
125
-
126
-
127
-
128
-
129
-
130
-
131
-
132
-
133
 |
 |

www.samsung.com/register
For video recording, use a memory card that supports faster write speeds.
-
Recommended Memory Card: 6MB/s (Class 6) or above.
HMX-Q20BN/HMX-Q20TN/HMX-Q20RN
HMX-Q200BN/HMX-Q200TN/HMX-Q200RN
HMX-QF20BN
USER
M
ANUAL