Samsung ML-1865W User Manual (user Manual) (ver.1.01) (English) - Page 55
Troubleshooting, Redistributing toner, Tips for avoiding paper jams, Clearing paper jams - red light
 |
View all Samsung ML-1865W manuals
Add to My Manuals
Save this manual to your list of manuals |
Page 55 highlights
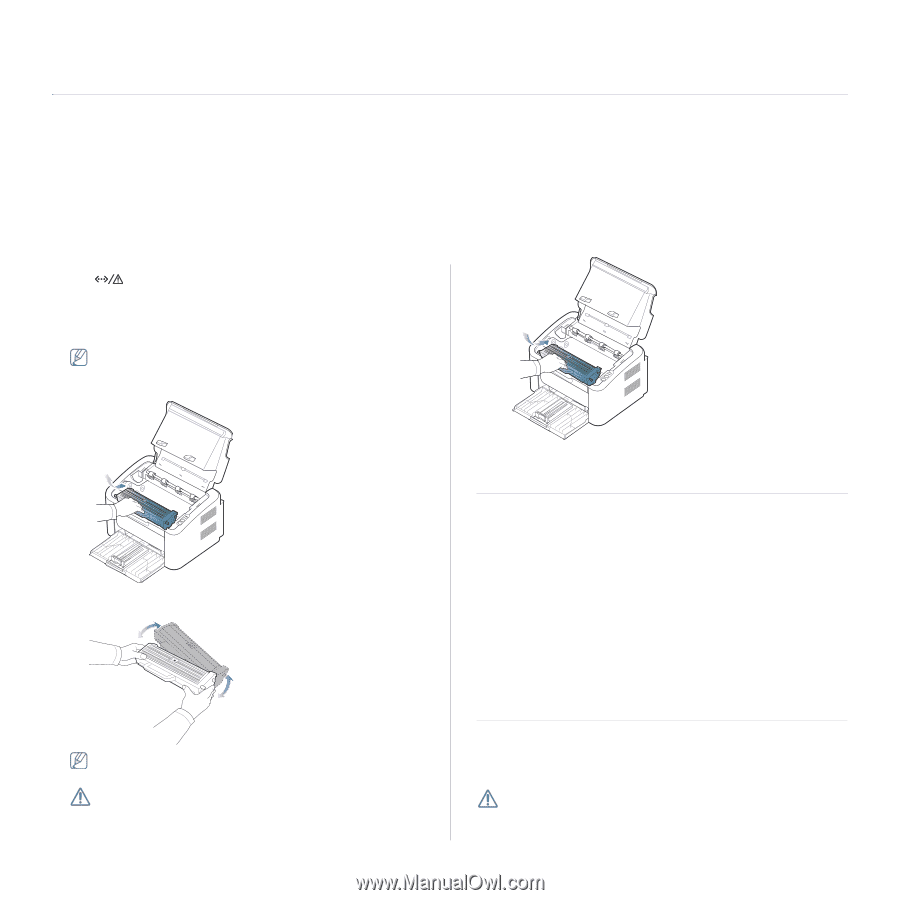
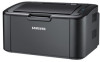
troubleshooting 9. This chapter gives helpful information for what to do if you encounter an error. This chapter includes: • Redistributing toner • Tips for avoiding paper jams • Clearing paper jams • Solving other problems Redistributing toner When the toner cartridge is near the end of its life: • White streaks or light printing occurs. • The LED blinks red. If this happens, you can temporarily improve print quality by redistributing the remaining toner in the cartridge. In some cases, white streaks or light printing will still occur even after you have redistributed the toner. 1. Open the top cover. When you open the top cover, make sure that the output tray is closed. 2. Pull the toner cartridge out. The tabs on the sides of the cartridge and corresponding grooves within the machine will guide the cartridge into the correct position until it locks into place completely. 5. Close the top cover. Ensure that the cover is securely closed. 3. Thoroughly roll the cartridge five or six times to distribute the toner evenly inside the cartridge. Tips for avoiding paper jams By selecting the correct media types, most paper jams can be avoided. When a paper jam occurs, refer to the guidelines below: • Ensure that the adjustable guides are positioned correctly. (See "Loading paper in the tray" on page 37.) • Do not overload the tray. Ensure that the paper level is below the paper capacity mark on the inside of the tray. • Do not remove paper from the tray while your machine is printing. • Flex, fan, and straighten paper before loading. • Do not use creased, damp, or highly curled paper. • Do not mix paper types in a tray. • Use only recommended print media. • Ensure that the recommended side of the print media is facing the right side. (See "Loading paper in the tray" on page 37.) If toner gets on your clothing, wipe it off with a dry cloth and wash clothing in cold water. Hot water sets toner into fabric. Do not touch the drum in the the toner cartridge or imaging unit. Use the handle on the cartridge to avoid touching this area. 4. Hold the toner cartridge by the handle and slowly insert the cartridge into the opening in the machine. Clearing paper jams If a paper jam occurs, the LED on the control panel lights orange. Find and remove the jammed paper. To resume printing after clearing paper jams, you must open and close the top cover. To avoid tearing the paper, pull the jammed paper out slowly and carefully. Follow the instructions in the following sections to clear the jam. Troubleshooting_ 55
-
 1
1 -
2
-
3
-
4
-
5
-
6
-
7
-
8
-
9
-
10
-
11
-
12
-
13
-
14
-
15
-
16
-
17
-
18
-
19
-
20
-
21
-
22
-
23
-
24
-
25
-
26
-
27
-
28
-
29
-
30
-
31
-
32
-
33
-
34
-
35
-
36
-
37
-
38
-
39
-
40
-
41
-
42
-
43
-
44
-
45
-
46
-
47
-
48
-
49
-
 50
50 -
 51
51 -
 52
52 -
 53
53 -
 54
54 -
 55
55 -
 56
56 -
 57
57 -
 58
58 -
 59
59 -
 60
60 -
61
-
62
-
63
-
64
-
65
-
66
-
67
-
68
-
69
-
70
-
71
-
72
-
73
-
74
-
75
 |
 |