Samsung SRP-270DP Operation Manual
Samsung SRP-270DP - SRP 270D Two-color Dot-matrix Printer Manual
 |
UPC - 088091666701
View all Samsung SRP-270DP manuals
Add to My Manuals
Save this manual to your list of manuals |
Samsung SRP-270DP manual content summary:
- Samsung SRP-270DP | Operation Manual - Page 1
SRP-270 SERIES 1 STATION PRINTER Operator's Manual All specifications are subjected to change without notice - Samsung SRP-270DP | Operation Manual - Page 2
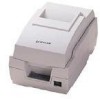
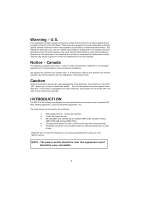
or disconnect cables. This will help protect the printer against static electricity. If the printer is damaged by the static electricity, you should turn the printer OFF, and refer to your local service provider. INTRODUCTION The SRP-270 Roll Printers are designed for use with electronic instruments - Samsung SRP-270DP | Operation Manual - Page 3
ADAPTER TO THE PRINTER 6 2-2. CONNECTING INTERFACE CABLE AND DRAWER 7 CHAPTER 3. INSTALLING THE ROLL PAPER 8 3-1. RIBBON CASSETTE INSTALLATION 8 3-2. ROLL PAPER 29 Interface Connector 30 Drawer Connector 32 APPENDIX B 33 SPECIFICATION 33 APPENDIX C 34 REMOVING JAMMED PAPER 34 3 - Samsung SRP-270DP | Operation Manual - Page 4
l Avoid locations in direct sunlight or subject to excessive heat. l Avoid using or storing the printer in places subject to excessive moisture. l Do not use or store the printer in a dusty or dirty area. Avoid places subject to intense vibration or shock. l Choose a stable and flat place for - Samsung SRP-270DP | Operation Manual - Page 5
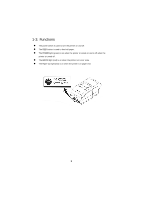
printer on and off. l The FEED button is used to feed roll paper. l The POWER light (green) is on when the printer is turned on and is off when the printer is turned off. l The ERROR light (red) is on when the printer is in error state. l The Paper Out light(red) is on when the printer is in paper - Samsung SRP-270DP | Operation Manual - Page 6
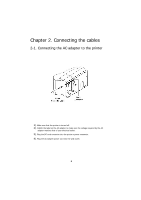
to the printer 1). Make sure that the printer is turned off. 2). CHECK the label on the AC adapter to make sure the voltage required by the AC adapter matches that of your electrical outlet. 3). Plug the DC cord connector into the printer's power connector. 4). Plug the AC adapter power cord into - Samsung SRP-270DP | Operation Manual - Page 7
's interface connector, then tighten the screws on both sides of the connector. In case of the parallel interface, squeeze the wire clips on the printer together until they lock in place on both sides of the connector. 3). Plug the drawer cable into the drawer kick-out connector on the back - Samsung SRP-270DP | Operation Manual - Page 8
the knob clockwise again to make sure the ribbon moves freely in the cassette. NOTE : Malfunctions and other problems may arise if other than specified ribbon cassettes are used in the printer. The Warranty may be voided if other than specified ribbon cassettes are used. Contact your dealer or place - Samsung SRP-270DP | Operation Manual - Page 9
. 1). When possible, make sure that the printer has no un-printed data. This data may be lost. 2). Open the printer cover and remove the used paper roll core if there is one. " SRP-270 A/C : 1Ply Paper # SRP-270 D : 2Ply Paper 3). To use a new roll paper, unroll the paper and tear off the end of the - Samsung SRP-270DP | Operation Manual - Page 10
4). Put the roll paper on the paper holder and insert the paper in the printer. " SRP-270 A/C : 1Ply Paper # SRP-270 D : 2Ply Paper 10 - Samsung SRP-270DP | Operation Manual - Page 11
Insert the end of the roll paper straight into the paper inlet. The printer feeds the paper automatically and then the printer will cut the paper automatically(SRP-270C type series and SRP-270D type series). Refer to the attached label inside the cover. 6). Tear off the paper as shown, if necessary - Samsung SRP-270DP | Operation Manual - Page 12
7). Insert the end of the roll paper into the groove on the Roller-Pulley, warp the paper around it two or three times and load the Roller-Pulley onto the groove of the Case. 8). Push the auto-cutter cover as shown below and close the printer cover. NOTE : Push upper face of the auto cutter - Samsung SRP-270DP | Operation Manual - Page 13
The DIP switches are located on the bottom of the printer. The DIP switches are used to set the printer to perform various functions. Follow these steps when changing DIP switch settings : 1. Turn the printer power switch off. 2. Turn the printer over and remove the dip switch cover. 3. Move the DIP - Samsung SRP-270DP | Operation Manual - Page 14
Interface (RS-232C/RS-485) Specification DIP Switch 1 Setting SW FUNCTION 1 2 Emulation Selection 3 Auto-Cutter 4 FONT SPACE 5 Function for 6 service 7 Engineer 8 RESERVED ON OFF Refer to the following table Enable 2 Disable 3 Emulation mode selection SW - 1 OFF OFF ON SW - Samsung SRP-270DP | Operation Manual - Page 15
Parallel/USB Interface Specification DIP Switch 1 Setting SW FUNCTION 1 2 Emulation Selection 3 Auto-Cutter 4 FONT SPACE 5 Function for 6 service 7 Engineer 8 RESERVED ON OFF Refer to the following table Enable 2 Disable 3 DEFAULT OFF OFF OFF OFF OFF OFF Emulation mode - Samsung SRP-270DP | Operation Manual - Page 16
users to see exactly what data is coming to the printer. This can be useful in finding software problems. When you turn on the hexadecimal dump function, the printer prints all commands and data in hexadecimal format along with a guide section to help you find specific commands. To use the - Samsung SRP-270DP | Operation Manual - Page 17
Chapter 6. The self test The self-test checks whether the printer has any problems. If the printer does not function properly, contact your dealer. 1. Make sure paper roll has been installed properly. 2. Turn on the power while holding down the FEED button. The self-test begins. 3. The self-test - Samsung SRP-270DP | Operation Manual - Page 18
Chapter 7. Code Table The following pages show the character code tables. To find the character corresponding to a hexadecimal number, count across the top of the table for the left digit and count down the left column of the table for the right digit. For example, 4A = J. Page 0 ( PC437 : USA, - Samsung SRP-270DP | Operation Manual - Page 19
Page 2 ( PC850 : Multilingual ) 19 - Samsung SRP-270DP | Operation Manual - Page 20
Page 3 ( PC860 : Portuguese ) 20 - Samsung SRP-270DP | Operation Manual - Page 21
Page 4 ( PC 863 : Canadian - French ) 21 - Samsung SRP-270DP | Operation Manual - Page 22
Page 5 ( PC 865 : Nordic ) 22 - Samsung SRP-270DP | Operation Manual - Page 23
Page 19 ( PC 858 : Euro ) 23 - Samsung SRP-270DP | Operation Manual - Page 24
International Character 24 - Samsung SRP-270DP | Operation Manual - Page 25
33 n 1B 63 34 n 1B 63 35 n 1B 64 n 1B 70 m t1 t2 1B 74 n Function Horizontal tab Print and line feed Print and carriage return Real-time status transmission Real-time request to printer mode Select justification Select paper sensor to output paper end signals Select paper sensor to stop printing - Samsung SRP-270DP | Operation Manual - Page 26
code 1B 72 n 1B 6D 1B 7B n 1B 65 n 1D 49 n 1D 56 m 1D 56 m n 1D 61 n 1D 72 n 31 1B, 32 1B, 43, n 1B, 66, 01 1A 1C 1B, 07, n1, n2 07 Function Select print color Execute partial cut Turn on/off upside-down printing mode Print and reverse feed n lines Transmit printer ID Select cut mode and cut paper - Samsung SRP-270DP | Operation Manual - Page 27
- n Hexadecimal code 1B 43 n 1B 52 n 1B 4D 0E 0F 12 14 1B 57 31 1B 57 01 1B 57 30 1B 57 00 1B 34 1B 35 1B 45 1B 46 1B 61 n 1B 07 n1 n2 07 1C 1A 19 (Default setting) Feed paper n lines Adjust drive pulse 2 Cancel print data in buffer Initialize printer FEED switch valid (Default setting) FEED - Samsung SRP-270DP | Operation Manual - Page 28
> "f" "f" "0" "f" Hexadecimal code 1B 7A 31 1B 7A 01 0C 1B 64 30 1B 64 31 1B 5F 31 1B 5F 01 1B 5F 30 1B 5F 00 1B 65 31 1B 65 01 1B 65 30 1B 65 00 1B 66 31 1B 66 01 1B 66 30 1B 66 00 Function Set 1/6 inch line feed Page - Samsung SRP-270DP | Operation Manual - Page 29
Appendix A Connectors 29 - Samsung SRP-270DP | Operation Manual - Page 30
Input 7 SG - 20 DTR Output Function Frame Ground Transmit Data Receive Data Data Set Ready Signal Ground Data Terminal Ready Serial Communication Interface(Example) Printer SG TXD RSD DSR DTR S.G Host(DTE ex 8251) SG TXD RSD RTS CTS DSR DTR S.G Serial Interface(RS-485) Pin No. Signal Name - Samsung SRP-270DP | Operation Manual - Page 31
5 Host / Printer Data 3 6 Host / Printer Data 4 7 Host / Printer Data 5 8 Host / Printer Data 6 9 Host / Printer Data 7 (MSB) 10 Printer nAck 11 Printer Busy 12 Printer Perror 13 14 15 16 17 18 19~30 31 32 33 34 35 36 Printer Host Printer Host Printer Printer Printer Host Select - Samsung SRP-270DP | Operation Manual - Page 32
USB Interface Pin No. Shell 1 2 3 4 Signal Name Assignment Function (Color) Shield Drain Wire Frame Ground VBUS Red Host Power drive signal 2 6 Signal ground Direction Output Input Output - * SRP-270 Series Model Listing Model Name : SRP-27xyz x 0 Ivory 5 Dark Gray y A Basic C Basic - Samsung SRP-270DP | Operation Manual - Page 33
0.5 lbs) AD-270 Free Voltage (50Hz ~ 60Hz) Gillotine type Max. 85 mm Max. 0.1mm 4k bytes SRP-270A/AS/AP/AU : 160(W)*249(D)*130(H)mm(6.3"*9.8"*5.12") SRP-270C/CS/CP/CU : 160(W)*249(D)*149(H)mm(6.3"*9.8"*5.87") SRP-270D/DS/DP/DU : 160(W)*294(D)*160(H)mm(6.3"*11.57"*6.3") Weight(printer only) / Weight - Samsung SRP-270DP | Operation Manual - Page 34
Jammed Paper 1) Open the printer cover 2) Raise the auto cutter unit by lifting the knob lock. 3) Remove the ribbon cassette. 4) Loosen the manual screw. 5) Remove the head cover. CAUTION : The printer head becomes very hot during printing. Allow it to be cool before you reach into the printer. 34 - Samsung SRP-270DP | Operation Manual - Page 35
the reverse direction of paper jam. the side of the print head as shown in the illustration. 7) Remove the jammed paper by rotating the paper-feed knob. By pushing on 8) Replace the head cover and secure it with screw. 9) Replace the ribbon cassette and roll paper, then close the printer cover. 35 - Samsung SRP-270DP | Operation Manual - Page 36
NOTE : If you are troubled with reloading the paper, the cutter blade may not be in its normal position. Insert a screw driver into the hole at the bottom side of auto cutter unit as shown followed picture, and turn the gear inside the cutter unit to move the cutter blade to its normal position. 36
-
 1
1 -
 2
2 -
 3
3 -
 4
4 -
 5
5 -
 6
6 -
 7
7 -
8
-
9
-
10
-
11
-
12
-
13
-
14
-
15
-
16
-
17
-
18
-
19
-
20
-
21
-
22
-
23
-
24
-
25
-
26
-
27
-
28
-
29
-
30
-
31
-
32
-
33
-
34
-
35
-
36
 |
 |

Operator
’
s Manual
All specifications are subjected to change without notice
SRP-270
SERIES
1 STATION PRINTER