Samsung T220 User Manual (user Manual) (ver.1.0) (English)
Samsung T220 - SyncMaster - 22" LCD Monitor Manual
 |
UPC - 729507803678
View all Samsung T220 manuals
Add to My Manuals
Save this manual to your list of manuals |
Samsung T220 manual content summary:
- Samsung T220 | User Manual (user Manual) (ver.1.0) (English) - Page 1
SyncMaster T190/T190G/T200/T200G/T220/T220G LCD Monitor User Manual - Samsung T220 | User Manual (user Manual) (ver.1.0) (English) - Page 2
used for extended period of time, set your computer to DPM. If using screen saver, set it to active screen mode. The images here are for reference only, and are not applicable in all cases (or countries). Shortcut to Anti-Afterimage Instructions Do not use a damaged power cord or plug or a damaged - Samsung T220 | User Manual (user Manual) (ver.1.0) (English) - Page 3
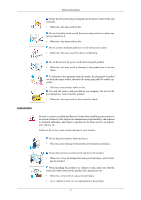
Instructions Ensure that the power plug is plugged into the power outlet firmly and correctly. • Otherwise, this may result in fire. Do not forcefully bend or pull the power Installation Be sure to contact an authorized Service Center when installing your monitor in a location with heavy dust, high - Samsung T220 | User Manual (user Manual) (ver.1.0) (English) - Page 4
carefully. • Failing to do so may damage the monitor. Do not place the front of the product on the floor. • Otherwise, this may result in damage to the screen display. Ensure that an authorized installation company installs the wall mount. • Otherwise, it may fall and cause personal injury. • Make - Samsung T220 | User Manual (user Manual) (ver.1.0) (English) - Page 5
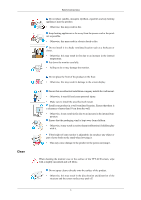
in electric shock or fire. If the product needs to be repaired, contact a Service Center. If there is a strange smell or a strange sound or smoke is coming from the product, disconnect the power plug immediately and contact a Service Center. • Otherwise, this may result in electric shock or fire. Do - Samsung T220 | User Manual (user Manual) (ver.1.0) (English) - Page 6
and contact a Service Center. • Otherwise, this may result in electric shock or fire. When using a fixed screen for a long time, an afterimage or stain may occur. • If you are not using your product for a long period of time, put it into sleep mode or use a moving screen saver. Set a resolution and - Samsung T220 | User Manual (user Manual) (ver.1.0) (English) - Page 7
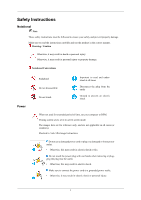
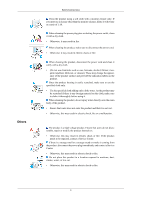
Safety Instructions If you continually move closer to the product screen, your eyesight may be failing. To ease eye strain, take at least a five-minute break after every hour of using the monitor. Do not install it in an unstable location such as an unstable rack or uneven surface or a location - Samsung T220 | User Manual (user Manual) (ver.1.0) (English) - Page 8
power plug but ventilate immediately. • If a spark occurs, it may cause an explosion or fire. If the product has been turned on for a long time, the display panel becomes hot. Do not touch it. • Keep the small accessories in personal injury. • Since the front part of the product is heavy, install the - Samsung T220 | User Manual (user Manual) (ver.1.0) (English) - Page 9
Safety Instructions • Keep your knees at greater than 90 degrees, and keep your heels firmly on the floor. Keep your arms lower than your heart. 8 - Samsung T220 | User Manual (user Manual) (ver.1.0) (English) - Page 10
are missing, contact your dealer. Contact a local dealer to buy optional items. Unpacking Manuals Monitor Quick Setup Guide Cables Warranty Card (Not available in all locations) User's Guide D-Sub Cable Others Power Cord DVI Cable (option) Cleaning Cloth Cable holding ring 9 Stand Body - Samsung T220 | User Manual (user Manual) (ver.1.0) (English) - Page 11
Base Note Cleaning Cloth is only provided for highly polished black products as a product feature. Your Monitor Initial Settings Select the language using the up or down key. The displayed content will disappear after 40 seconds. Turn the Power button off and on. It will be displayed again. It can - Samsung T220 | User Manual (user Manual) (ver.1.0) (English) - Page 12
the upper left of the screen displaying the current mode -- analog or digital input signal.) Note If you select the digital mode, you must connect your monitor to the graphic card's DVI port using the DVI cable. >> Click here to see an animation clip AUTO button Use this button for auto adjustment - Samsung T220 | User Manual (user Manual) (ver.1.0) (English) - Page 13
monitor to the POWER port on the back of the monitor. DVI IN port Connect the DVI Cable to the DVI IN port on the back of your monitor. RGB IN port Connect the D-sub cable to the 15-pin, RGB IN port on the back of your monitor. Kensington Lock The Kensington Lock is a device used to physically fix - Samsung T220 | User Manual (user Manual) (ver.1.0) (English) - Page 14
Introduction 2. Connect the Kensington Lock cable. 3. Fix the Kensington Lock to a desk or a heavy stationary object. Note See Connecting Cables for further information regarding cable connections. 13 - Samsung T220 | User Manual (user Manual) (ver.1.0) (English) - Page 15
(Digital) connector on the video card. • Connect the DVI Cable to the DVI IN Port on the back of your Monitor. [DVI IN] Connected to a Macintosh. • Connect the monitor to the Macintosh computer using the D-sub connection cable. Note If the monitor and the computer are connected, you can turn them on - Samsung T220 | User Manual (user Manual) (ver.1.0) (English) - Page 16
Using the Stand Monitor Assembly Connections Folding the base Monitor and Bottom Note You can tilt the monitor upwards at an angle of -1° to 21°. 15 - Samsung T220 | User Manual (user Manual) (ver.1.0) (English) - Page 17
download the driver program file at the Internet web site shown here. Internet web site : http://www.samsung.com/ (Worldwide) Installing the Monitor Driver (Automatic) 1. Insert CD into the CD-ROM drive. 2. Click "Windows". 3. Choose your monitor model in the model list, then click the "OK" button - Samsung T220 | User Manual (user Manual) (ver.1.0) (English) - Page 18
://www.samsung.com/ Installing the Monitor Driver (Manual) Microsoft® Windows Vista™, Operating System 1. Insert your Manual CD into your CD-ROM drive. 2. Click (Start) and "Control Panel". Then, double-click on "Appearance and Personalization". 3. Click "Personalization" and then "Display Settings - Samsung T220 | User Manual (user Manual) (ver.1.0) (English) - Page 19
is under certifying MS logo, and this installation doesn't damage your system. The certified driver will be posted on Samsung Monitor homepage. 6. Click "Update Driver..." in the "Driver" tab. 7. Check the "Browse my computer for driver software" checkbox and click "Let me pick from a list of device - Samsung T220 | User Manual (user Manual) (ver.1.0) (English) - Page 20
Using the Software 9. Select the model that matches your monitor from the list of monitor models on the screen, and click "Next". 10. Click "Close" → "Close" → "OK" → "OK" on the following screens displayed in sequence. Microsoft® Windows® XP Operating System 19 - Samsung T220 | User Manual (user Manual) (ver.1.0) (English) - Page 21
Using the Software 1. Insert CD into the CD-ROM drive. 2. Click "Start" → "Control Panel" then click the "Appearance and Themes" icon. 3. Click "Display" icon and choose the "Settings" tab then click "Advanced...". 4. Click the "Properties" button on the "Monitor" tab and select "Driver" tab. 5. - Samsung T220 | User Manual (user Manual) (ver.1.0) (English) - Page 22
see following message window, then click the "Continue Anyway" button. Then click "OK" button. Note This monitor driver is under certifying MS logo, and this installation doesn't damage your system. The certified driver will be posted on Samsung Monitor homepage. http://www.samsung.com/ 9. Click the - Samsung T220 | User Manual (user Manual) (ver.1.0) (English) - Page 23
" on your monitor, follow these steps. 1. Choose "OK" button on the "Insert disk" window. 2. Click the "Browse" button on the "File Needed" window. 3. Choose A:(D:\Driver) then click the "Open" button and then click "OK" button. How to install 1. Click "Start", "Setting", "Control Panel". 2. Double - Samsung T220 | User Manual (user Manual) (ver.1.0) (English) - Page 24
. 2. In Display Registration Information window, click Settings Tab and then click "All Display Modes". 3. Select a mode that you wish to use (Resolution, Number of colors and Vertical frequency) and then click "OK". 4. Click "Apply" button if you see the screen working normally after clicking "Test - Samsung T220 | User Manual (user Manual) (ver.1.0) (English) - Page 25
be executed. Click Natural Color on the initial screen to install the Natural Color software. To install the program manually, insert the CD included with the Samsung monitor into the CD-ROM Drive, click the [Start] button of Windows and then select [Run...]. Enter D:\color\NCProSetup.exe and then - Samsung T220 | User Manual (user Manual) (ver.1.0) (English) - Page 26
the MagicTune™ installation file. Note If the popup window to install the software for the main screen is not displayed, proceed with the installation using on specification of computer system or monitor. If that happens, press F5 Key. Installation Problems The installation of MagicTune™ can be - Samsung T220 | User Manual (user Manual) (ver.1.0) (English) - Page 27
™. 1. Go to [Task Tray] → [Start] → [Settings] and select [Control Panel] in the menu. If the program runs on Windows® XP, go to [Control Panel] in the [Start] menu. 2. Click the "Add or Remove Programs" icon in Control Panel. 3. In the "Add or Remove Programs" screen, scroll down to find "MagicTune - Samsung T220 | User Manual (user Manual) (ver.1.0) (English) - Page 28
on specification of computer system or monitor. If that happens, press F5 Key. Installation Problems The installation of MultiScreen can be or Remove Programs" option of the Windows® Control Panel. Perform the following steps remove Multiscreen. Select "Setting/Control Panel" on the "Start" menu - Samsung T220 | User Manual (user Manual) (ver.1.0) (English) - Page 29
' button is pressed, the auto adjustment screen appears as shown in the animated screen on the center. Auto adjustment allows the monitor to not work properly, press 'AUTO' button again to adjust picture with more accuracy. If you change resolution in the control panel, auto function will be executed - Samsung T220 | User Manual (user Manual) (ver.1.0) (English) - Page 30
the Monitor This is the function that locks the OSD in order to keep the current states of settings or prevent others from adjusting the current settings. Lock : Hold down the MENU button for more than five (5) seconds to activate the OSD adjustment lock function. Unlock : Hold down the MENU button - Samsung T220 | User Manual (user Manual) (ver.1.0) (English) - Page 31
Brightness Adjusting the Monitor When OSD is not on the screen, push the Brightness ( SOURCE ) button to adjust brightness. Selects the video signal while the OSD is off. OSD Function Picture Brightness Contrast Color Image MagicCol- Color Tone or Coarse Fine OSD Language H-Position Setup - Samsung T220 | User Manual (user Manual) (ver.1.0) (English) - Page 32
(Not available in MagicBright mode of Dynamic Contrast.) You can use the on-screen menus to change the contrast according to personal preference. ( Not available in MagicColor mode of Full and Intelligent. ) MENU MENU MagicBright Push the button to circle through available preconfigured modes. 31 - Samsung T220 | User Manual (user Manual) (ver.1.0) (English) - Page 33
the Monitor MagicBright is value. You can easily select one of seven settings by simply pressing Customized Key control button. • Custom Although the values are carefully chosen Color (Not available in MagicBright mode of Dynamic Contrast.) MagicColor MagicColor is a new technology that Samsung - Samsung T220 | User Manual (user Manual) (ver.1.0) (English) - Page 34
the Monitor • Demo - The screen before applying MagicColor appears on the right and the screen after applying MagicColor appears on the left. • Full - Displays not only vivid natural color but also more realistic natural skin color with clearness. • Intelligent - Displays vivid natural color with - Samsung T220 | User Manual (user Manual) (ver.1.0) (English) - Page 35
Effect Adjusting the Monitor You can change the overall mood by changing the screen colors. ( Not available in MagicColor mode of Full and Intelligent. ) • Off - This applies an achromatic color to the screen to adjust the screen effects. • Grayscale - The default colors of black and white are - Samsung T220 | User Manual (user Manual) (ver.1.0) (English) - Page 36
Image Coarse Adjusting the Monitor Fine Removes noise such as vertical stripes. Coarse adjustment may move the screen image area. You may relocate it to the center using the horizontal control menu. (Available in Analog mode only) MENU MENU Removes noise such as horizontal stripes. If the noise - Samsung T220 | User Manual (user Manual) (ver.1.0) (English) - Page 37
mode of Full and Intelligent. ) MENU MENU H-Position Changes the horizontal position of the monitor's entire display. (Available in Analog mode only) MENU MENU V-Position Changes the vertical position of the monitor's entire display. (Available in Analog mode only) MENU MENU OSD Language 36 - Samsung T220 | User Manual (user Manual) (ver.1.0) (English) - Page 38
chosen affects only the language of the OSD. It has no effect on any software running on the computer. MENU MENU H-Position You can change the horizontal position where the OSD menu appears on your monitor. MENU MENU V-Position You can change the vertical position where the OSD menu appears - Samsung T220 | User Manual (user Manual) (ver.1.0) (English) - Page 39
Adjusting the Monitor Change the transparency of the background of the OSD. • Off • On MENU → , → Display Time → , → → , → MENU The menu will be automatically turned off if no adjustments are made for a certain time period. You can set the amount of time the menu will wait before it is turned - Samsung T220 | User Manual (user Manual) (ver.1.0) (English) - Page 40
MENU Auto Source Select Auto Source for the monitor to automatically select the signal source. • Auto • Manual MENU MENU Image Size You can change the size of the screen displayed on your monitor. • Auto - The screen is displayed in accordance with the screen aspect ratio of the input signals - Samsung T220 | User Manual (user Manual) (ver.1.0) (English) - Page 41
not available in the standard mode table are not supported. • If the wide screen which is the optimal resolution for the monitor is set on your PC, this function is not performed. MENU MENU LED Brightness RTA Adjusts the brightness of the Power LED. • Off • On MENU MENU RTA (Response Time - Samsung T220 | User Manual (user Manual) (ver.1.0) (English) - Page 42
a video source, display mode on the OSD screen. MENU → , →MENU {T200,T200G,T220,T220G} Direct Functions AUTO When the 'AUTO' button is pressed, the auto adjustment screen appears as shown in the animated screen on the center. Auto adjustment allows the monitor to self-adjust to the incoming Analog - Samsung T220 | User Manual (user Manual) (ver.1.0) (English) - Page 43
Adjusting the Monitor When pressing the MENU button after locking the OSD This is the function that locks the OSD in order to keep the current states of settings or prevent others from adjusting the current settings. Lock : Hold down the MENU button for more than five (5) seconds to activate the - Samsung T220 | User Manual (user Manual) (ver.1.0) (English) - Page 44
Key. Brightness When OSD is not on the screen, push the Brightness ( SOURCE ) button to adjust brightness. Selects the video signal while the OSD is off. {T200,T200G,T220,T220G} OSD Function Picture Brightness Contrast Color Image MagicCol- Color Tone or Coarse Fine OSD Language H-Position - Samsung T220 | User Manual (user Manual) (ver.1.0) (English) - Page 45
(Not available in MagicBright mode of Dynamic Contrast.) You can use the on-screen menus to change the contrast according to personal preference. ( Not available in MagicColor mode of Full and Intelligent. ) MENU MENU MagicBright Push the button to circle through available preconfigured modes. 44 - Samsung T220 | User Manual (user Manual) (ver.1.0) (English) - Page 46
the Monitor MagicBright is value. You can easily select one of seven settings by simply pressing Customized Key control button. • Custom Although the values are carefully chosen Color (Not available in MagicBright mode of Dynamic Contrast.) MagicColor MagicColor is a new technology that Samsung - Samsung T220 | User Manual (user Manual) (ver.1.0) (English) - Page 47
the Monitor • Demo - The screen before applying MagicColor appears on the right and the screen after applying MagicColor appears on the left. • Full - Displays not only vivid natural color but also more realistic natural skin color with clearness. • Intelligent - Displays vivid natural color with - Samsung T220 | User Manual (user Manual) (ver.1.0) (English) - Page 48
Effect Adjusting the Monitor You can change the overall mood by changing the screen colors. ( Not available in MagicColor mode of Full and Intelligent. ) • Off - This applies an achromatic color to the screen to adjust the screen effects. • Grayscale - The default colors of black and white are - Samsung T220 | User Manual (user Manual) (ver.1.0) (English) - Page 49
Image Coarse Adjusting the Monitor Fine Removes noise such as vertical stripes. Coarse adjustment may move the screen image area. You may relocate it to the center using the horizontal control menu. (Available in Analog mode only) MENU MENU Removes noise such as horizontal stripes. If the noise - Samsung T220 | User Manual (user Manual) (ver.1.0) (English) - Page 50
mode of Full and Intelligent. ) MENU MENU H-Position Changes the horizontal position of the monitor's entire display. (Available in Analog mode only) MENU MENU V-Position Changes the vertical position of the monitor's entire display. (Available in Analog mode only) MENU MENU OSD Language 49 - Samsung T220 | User Manual (user Manual) (ver.1.0) (English) - Page 51
chosen affects only the language of the OSD. It has no effect on any software running on the computer. MENU MENU H-Position You can change the horizontal position where the OSD menu appears on your monitor. MENU MENU V-Position You can change the vertical position where the OSD menu appears - Samsung T220 | User Manual (user Manual) (ver.1.0) (English) - Page 52
Adjusting the Monitor Change the transparency of the background of the OSD. • Off • On MENU → , → Display Time → , → → , → MENU The menu will be automatically turned off if no adjustments are made for a certain time period. You can set the amount of time the menu will wait before it is turned - Samsung T220 | User Manual (user Manual) (ver.1.0) (English) - Page 53
MENU Auto Source Select Auto Source for the monitor to automatically select the signal source. • Auto • Manual MENU MENU Image Size You can change the size of the screen displayed on your monitor. • Auto - The screen is displayed in accordance with the screen aspect ratio of the input signals - Samsung T220 | User Manual (user Manual) (ver.1.0) (English) - Page 54
not available in the standard mode table are not supported. • If the wide screen which is the optimal resolution for the monitor is set on your PC, this function is not performed. MENU MENU LED Brightness RTA Adjusts the brightness of the Power LED. • Off • On MENU MENU RTA (Response Time - Samsung T220 | User Manual (user Manual) (ver.1.0) (English) - Page 55
Information Adjusting the Monitor Shows a video source, display mode on the OSD screen. MENU → , →MENU 54 - Samsung T220 | User Manual (user Manual) (ver.1.0) (English) - Page 56
or damaged. 4. Turn off your monitor and reconnect the video cable; then turn on both your computer and the monitor. If your monitor screen remains blank after using the previous procedure, check your video controller and computer system; your monitor is functioning properly. Warning Messages If - Samsung T220 | User Manual (user Manual) (ver.1.0) (English) - Page 57
can cause the monitor to become blank, have poor coloring, become noisy, and video mode not supported, etc. In this case, first check the source of the problem, and then contact the Service Center or your dealer. Judging the monitor's working condition If there is no image on the screen or a "Not - Samsung T220 | User Manual (user Manual) (ver.1.0) (English) - Page 58
signals. Connect the DVI cable and then reboot the system. I cannot see the On Screen Display. Q: Have you locked the On Screen Display (OSD) Menu to prevent changes? A: Unlock the OSD by pressing the [MENU/ ] button for at least 5 seconds. The screen shows strange colors or just black and white - Samsung T220 | User Manual (user Manual) (ver.1.0) (English) - Page 59
video card manual to see if the Plug & Play (VESA DDC) function can be supported. A: Install the monitor driver according to the Driver Installation Instructions. Check when MagicTune™ does not function properly. Q: MagicTune™ feature is found only on PC (VGA) with Window OS that supports Plug and - Samsung T220 | User Manual (user Manual) (ver.1.0) (English) - Page 60
monitor driver. Check if the scanning ratio of the video screen is set to between 56 Hz ~ 75 Hz. (Do not exceed 75 Hz when using the maximum resolution.) If you have problems in installing the adapter (video) driver, boot the computer in Safe Mode, remove the Display Adapter in the "Control Panel - Samsung T220 | User Manual (user Manual) (ver.1.0) (English) - Page 61
to the Windows / Computer Manual). A: Windows ME/2000: Set the resolution at the Control Panel → Display → Screen Saver. Set the function in the BIOS-SETUP of the computer. (Refer to the Windows / Computer Manual). Q: How can I clean the outer case/LCD Panel? A: Disconnect the power cord and then - Samsung T220 | User Manual (user Manual) (ver.1.0) (English) - Page 62
can cause the monitor to become blank, have poor coloring, become noisy, and video mode not supported, etc. In this case, first check the source of the problem, and then contact the Service Center or your dealer. Judging the monitor's working condition If there is no image on the screen or a "Not - Samsung T220 | User Manual (user Manual) (ver.1.0) (English) - Page 63
Can you see "Check Signal Cable" on the screen? A: (Connected using the D-sub cable) Check the signal cable connection. (Connected using the DVI cable) If you still see an error message on the screen when the monitor is connected properly, check to see if the monitor status is set to analog. If you - Samsung T220 | User Manual (user Manual) (ver.1.0) (English) - Page 64
signals. Connect the DVI cable and then reboot the system. I cannot see the On Screen Display. Q: Have you locked the On Screen Display (OSD) Menu to prevent changes? A: Unlock the OSD by pressing the [MENU/ ] button for at least 5 seconds. The screen shows strange colors or just black and white - Samsung T220 | User Manual (user Manual) (ver.1.0) (English) - Page 65
video card manual to see if the Plug & Play (VESA DDC) function can be supported. A: Install the monitor driver according to the Driver Installation Instructions. Check when MagicTune™ does not function properly. Q: MagicTune™ feature is found only on PC (VGA) with Window OS that supports Plug and - Samsung T220 | User Manual (user Manual) (ver.1.0) (English) - Page 66
card support can vary, depending on the version of the driver used. (Refer to the computer or the video card manual for details.) Q: How can I adjusts the resolution? A: Windows XP: Set the resolution in the Control Panel → Appearance and Themes → Display → Settings. A: Windows ME/2000: Set the - Samsung T220 | User Manual (user Manual) (ver.1.0) (English) - Page 67
to the Windows / Computer Manual). A: Windows ME/2000: Set the resolution at the Control Panel → Display → Screen Saver. Set the function in the BIOS-SETUP of the computer. (Refer to the Windows / Computer Manual). Q: How can I clean the outer case/LCD Panel? A: Disconnect the power cord and then - Samsung T220 | User Manual (user Manual) (ver.1.0) (English) - Page 68
2.0 V, V low ≤ 0.8 V) Maximum Pixel Clock 146 MHz (Analog, Digital) Power Supply AC 100 - 240 V~ (+/- 10 %), 50/60 Hz ± 3 Hz Signal Cable 15pin - to - 15pin D-sub cable, Detachable DVI-D to DVI-D connector, Detachable Dimensions (W x H x D) / Weight 454.5 x 331.5 x 75 mm / 17.9 x 13.1 x 3.0 inch - Samsung T220 | User Manual (user Manual) (ver.1.0) (English) - Page 69
operates with a VESA DPM compliant video card installed in your computer. Use the software utility installed on your computer to set up this feature. State Normal Operation Power saving mode Power off (Power button) EPA/ENERGY 2000 Power Indicator On Blinking Off Power Consumption 34 watts - Samsung T220 | User Manual (user Manual) (ver.1.0) (English) - Page 70
the power LED is on. Refer to the video card manual and adjusts the screen as follows. Display Mode IBM, 640 x 350 IBM, 640 x 480 IBM, 720 x 400 MAC, 640 x 480 MAC, 832 x 624 MAC, 1152 x 870 VESA, 640 x 480 VESA, 640 x 480 VESA, 800 x 600 VESA, 800 x 600 VESA, 800 x 600 VESA, 800 x 600 VESA, 1024 - Samsung T220 | User Manual (user Manual) (ver.1.0) (English) - Page 71
2.0 V, V low ≤ 0.8 V) Maximum Pixel Clock 146 MHz (Analog, Digital) Power Supply AC 100 - 240 V~ (+/- 10 %), 50/60 Hz ± 3 Hz Signal Cable 15pin - to - 15pin D-sub cable, Detachable DVI-D to DVI-D connector, Detachable Dimensions (W x H x D) / Weight 454.5 x 331.5 x 75 mm / 17.9 x 13.1 x 3.0 inch - Samsung T220 | User Manual (user Manual) (ver.1.0) (English) - Page 72
operates with a VESA DPM compliant video card installed in your computer. Use the software utility installed on your computer to set up this feature. State Normal Operation Power saving mode Power off (Power button) EPA/ENERGY 2000 Power Indicator On Blinking Off Power Consumption 34 watts - Samsung T220 | User Manual (user Manual) (ver.1.0) (English) - Page 73
VESA, 640 x 480 VESA, 640 x 480 VESA, 800 x 600 VESA, 800 x 600 VESA, 800 x 600 VESA, 800 x 600 VESA, 1024 x 768 VESA, 1024 x 768 VESA, 1024 x 768 VESA, 1152 x 864 VESA, 1280 X 960 VESA, 1280 X 1024 VESA, 1280 X 1024 VESA, 1440 x 900 VESA the screen has Name SyncMaster T200 LCD Panel Size Display area - Samsung T220 | User Manual (user Manual) (ver.1.0) (English) - Page 74
≥ 2.0 V, V low ≤ 0.8 V) Maximum Pixel Clock 146 MHz (Analog, Digital) Power Supply AC 100 - 240 V~ (+/- 10 %), 50/60 Hz ± 3 Hz Signal Cable 15pin - to - 15pin D-sub cable, Detachable DVI-D to DVI-D connector, Detachable Dimensions (W x H x D) / Weight 486 x 350 x 74.5 mm / 19.1 X 13.8 X 2.9 inch - Samsung T220 | User Manual (user Manual) (ver.1.0) (English) - Page 75
operates with a VESA DPM compliant video card installed in your computer. Use the software utility installed on your computer to set up this feature. State Normal Operation Power saving mode Power off (Power button) EPA/ENERGY 2000 Power Indicator On Blinking Off Power Consumption 40 watts - Samsung T220 | User Manual (user Manual) (ver.1.0) (English) - Page 76
VESA, 640 x 480 VESA, 640 x 480 VESA, 800 x 600 VESA, 800 x 600 VESA, 800 x 600 VESA, 800 x 600 VESA, 1024 x 768 VESA, 1024 x 768 VESA, 1024 x 768 VESA, 1152 x 864 VESA, 1280 X 960 VESA, 1280 X 1024 VESA screen lamp, the screen has to General Model Name SyncMaster T200G LCD Panel Size Display - Samsung T220 | User Manual (user Manual) (ver.1.0) (English) - Page 77
≥ 2.0 V, V low ≤ 0.8 V) Maximum Pixel Clock 146 MHz (Analog, Digital) Power Supply AC 100 - 240 V~ (+/- 10 %), 50/60 Hz ± 3 Hz Signal Cable 15pin - to - 15pin D-sub cable, Detachable DVI-D to DVI-D connector, Detachable Dimensions (W x H x D) / Weight 486 x 350 x 74.5 mm / 19.1 X 13.8 X 2.9 inch - Samsung T220 | User Manual (user Manual) (ver.1.0) (English) - Page 78
operates with a VESA DPM compliant video card installed in your computer. Use the software utility installed on your computer to set up this feature. State Normal Operation Power saving mode Power off (Power button) EPA/ENERGY 2000 Power Indicator On Blinking Off Power Consumption 40 watts - Samsung T220 | User Manual (user Manual) (ver.1.0) (English) - Page 79
edge of the screen horizontally is SyncMaster T220 LCD Panel Size Display area Pixel Pitch 22 inch (55 cm) 473.76 mm (H) x 296.1 mm (V) 0.282 mm (H) x 0.282 mm (V) Synchronization Horizontal Vertical 30 ~ 81 kHz 56 ~ 75 Hz Display Color 16.7M Resolution Optimum resolution Maximum resolution - Samsung T220 | User Manual (user Manual) (ver.1.0) (English) - Page 80
Specifications Maximum Pixel Clock 146 MHz (Analog, Digital) Power Supply AC 100 - 240 V~ (+/- 10 %), 50/60 Hz ± 3 Hz Signal Cable 15pin - to - 15pin D-sub cable, Detachable DVI-D to DVI-D connector, Detachable Dimensions (W x H x D) / Weight 520 x 373.5 x 74.5 mm / 20.5 X 14.7 X 2.9 inch ( - Samsung T220 | User Manual (user Manual) (ver.1.0) (English) - Page 81
operates with a VESA DPM compliant video card installed in your computer. Use the software utility installed on your computer to set up this feature. State Normal Operation Power saving mode Power off (Power button) EPA/ENERGY 2000 Power Indicator On Blinking Off Power Consumption 45 watts - Samsung T220 | User Manual (user Manual) (ver.1.0) (English) - Page 82
General Model Name SyncMaster T220G LCD Panel Size Display area Pixel Pitch 22 inch (55 cm) 473.76 mm (H) x 296.1 mm (V) 0.282 mm (H) x 0.282 mm (V) Synchronization Horizontal Vertical 30 ~ 81 kHz 56 ~ 75 Hz Display Color 16.7M Resolution Optimum resolution Maximum resolution 1680 x 1050 - Samsung T220 | User Manual (user Manual) (ver.1.0) (English) - Page 83
operates with a VESA DPM compliant video card installed in your computer. Use the software utility installed on your computer to set up this feature. State Normal Operation Power saving mode Power off (Power button) EPA/ENERGY 2000 Power Indicator On Blinking Off Power Consumption 45 watts - Samsung T220 | User Manual (user Manual) (ver.1.0) (English) - Page 84
the power LED is on. Refer to the video card manual and adjusts the screen as follows. Display Mode IBM, 640 x 350 IBM, 640 x 480 IBM, 720 x 400 MAC, 640 x 480 MAC, 832 x 624 MAC, 1152 x 870 VESA, 640 x 480 VESA, 640 x 480 VESA, 800 x 600 VESA, 800 x 600 VESA, 800 x 600 VESA, 800 x 600 VESA, 1024 - Samsung T220 | User Manual (user Manual) (ver.1.0) (English) - Page 85
appeared as window termination button is pressed. If there's still noise after the automatic adjustment, use the Fine/Coarse adjustment function. When viewing a fixed screen for an extended period of time, a residual image or blurriness may appear. Change the mode to energy save or set a screensaver - Samsung T220 | User Manual (user Manual) (ver.1.0) (English) - Page 86
in use • Use a Screen saver if possible • Screen saver in one color or a moving image is recommended. • Set the Monitor to power off with the PC Display Properties Power Scheme. Suggestions for specific applications Ex) Airports, Transit Stations, Stock Markets, Banks, and Controlling Systems We - Samsung T220 | User Manual (user Manual) (ver.1.0) (English) - Page 87
and background color every 30 minutes Ex) • Every 30 minutes, change the characters with movement. Ex) The best way to protect your monitor from Image retention is to set your PC or System to operate a Screen Saver program when you are not using it. Image retention may not occur when a LCD panel is - Samsung T220 | User Manual (user Manual) (ver.1.0) (English) - Page 88
Our LCD Monitor satisfies ISO13406-2 Pixel fault Class II {T200,T200G,T220,T220G} For Better Display Adjust the computer resolution and screen injection rate (refresh rate) on the computer as described below to enjoy the best picture quality. You can have an uneven picture quality on screen if - Samsung T220 | User Manual (user Manual) (ver.1.0) (English) - Page 89
appeared as window termination button is pressed. If there's still noise after the automatic adjustment, use the Fine/Coarse adjustment function. When viewing a fixed screen for an extended period of time, a residual image or blurriness may appear. Change the mode to energy save or set a screensaver - Samsung T220 | User Manual (user Manual) (ver.1.0) (English) - Page 90
Controlling Systems We recommend that you follow set colors, which can cause Image retention easily. • Avoid: Colors with big difference in luminance (Black & White, Grey) Ex) • Recommended settings: Bright colors with little difference in luminance • Change the characters color and background color - Samsung T220 | User Manual (user Manual) (ver.1.0) (English) - Page 91
Information The best way to protect your monitor from Image retention is to set your PC or System to operate a Screen Saver program when you are not using it. Image retention may not occur when a LCD panel is operated under normal conditions. Normal conditions are defined as continuously changing - Samsung T220 | User Manual (user Manual) (ver.1.0) (English) - Page 92
Information Our LCD Monitor satisfies ISO13406-2 Pixel fault Class II 91 - Samsung T220 | User Manual (user Manual) (ver.1.0) (English) - Page 93
co http://www.samsung.com/latin http://www.samsung.com/latin http://www.samsung.com/latin http://www.samsung.com/latin http://www.samsung.com/latin http://www.samsung.com/latin http://www.samsung.com/latin http://www.samsung.com/latin http://www.samsung.com/latin http://www.samsung.com/latin Europe - Samsung T220 | User Manual (user Manual) (ver.1.0) (English) - Page 94
-500-55-500 8-800-502-0000 8-10-800-500-55-500 http://www.samsung.ee http://www.samsung.com/lv http://www.samsung.lt http://www.samsung.kz http://www.samsung.com http://www.samsung.com http://www.samsung.uz AUSTRALIA CHINA HONG KONG INDIA INDONESIA JAPAN MALAYSIA NEW ZEALAND PHILIPPINES SINGAPORE - Samsung T220 | User Manual (user Manual) (ver.1.0) (English) - Page 95
and Non-Interlace Methods Plug & Play Resolution The image on a monitor is composed of red, green and blue dots. The closer the dots, the higher the resolution. The distance between two dots of the same color is called the 'Dot Pitch'. Unit: mm The screen must be redrawn several times per second - Samsung T220 | User Manual (user Manual) (ver.1.0) (English) - Page 96
connection with the furnishing, performance, or use of this material. Samsung is the registered trademark of Samsung Electronics Co., Ltd.; Microsoft, Windows and Windows NT are registered trademarks of Microsoft Corporation; VESA, DPM and DDC are registered trademarks of Video Electronics Standard
-
 1
1 -
 2
2 -
 3
3 -
 4
4 -
 5
5 -
 6
6 -
 7
7 -
8
-
9
-
10
-
11
-
12
-
13
-
14
-
15
-
16
-
17
-
18
-
19
-
20
-
21
-
22
-
23
-
24
-
25
-
26
-
27
-
28
-
29
-
30
-
31
-
32
-
33
-
34
-
35
-
36
-
37
-
38
-
39
-
40
-
41
-
42
-
43
-
44
-
45
-
46
-
47
-
48
-
49
-
50
-
51
-
52
-
53
-
54
-
55
-
56
-
57
-
58
-
59
-
60
-
61
-
62
-
63
-
64
-
65
-
66
-
67
-
68
-
69
-
70
-
71
-
72
-
73
-
74
-
75
-
76
-
77
-
78
-
79
-
80
-
81
-
82
-
83
-
84
-
85
-
86
-
87
-
88
-
89
-
90
-
91
-
92
-
93
-
94
-
95
-
96
 |
 |

SyncMaster T190/T190G/T200/T200G/T220/T220G
LCD Monitor
User Manual