Sanyo FWSB405F-A Quick Start Guide
Sanyo FWSB405F-A Manual
 |
View all Sanyo FWSB405F-A manuals
Add to My Manuals
Save this manual to your list of manuals |
Sanyo FWSB405F-A manual content summary:
- Sanyo FWSB405F-A | Quick Start Guide - Page 1
source buttons on your Soundbar Remote Control to select the correct Audio Input. • Confirm that the Soundbar is not Muted. Press the VOL +/- or MUTE ICON button's on the Remote to unmute the Sound. (See 'Adjust the Volume' on the Online Owner's Manual: www.sanyo-av.com/support/ ) • Adjust the Sound - Sanyo FWSB405F-A | Quick Start Guide - Page 2
manual the Unit when Trouble is found or not Soundbar weighs approximately 4.4 lb/2 kg, it is recommended that the wall be able to support 13.2 lb/6 kg (three times the weight of the Soundbar CA 90501 FRANÇAIS Instructions de Sécurité Les le guide. L' de service à la clientèle: www.sanyo-av.com
-
 1
1 -
 2
2
 |
 |
NOTE(S):
REMARQUE(S)
• Make sure the Soundbar is Turned Off when Connecting Cables.
• Check whether all Connection Cables are properly connected.
• If you Connect from the Headphone Output on the Device’s Source to the Line-Input on the Soundbar, make sure the Volume of the
Headphone Output on the Device’s Source is set to an appropriate mid-level sound. Setting it too Low will produce weak output from the
Soundbar or setting it too High could cause distortion.
• The OPTICAL INPUT indicator continuously blinks when No Sound is heard from the Unit therefore showing a non-compatible Format
of any Input source signal on this Unit. Check your TV or other Audio output sources to ensure they are actually outputting a Digital Audio
output format such as LPCM that are supported by this Unit.
If no LPCM is available then press [LINE] to change the INPUT to an Analog
source when you are also connected to the Unit (LINE IN jack) to your TV (Headphone/Audio Out jack) using the included Line-In cable.
• Assurez-vous que la barre de son est éteinte lorsque vous connectez les câbles.
• Vérifiez sir tous les câbles de connexion sont bien connectés.
• Si vous connectez à partir d’une sortie d’écouteur sur la source de l’appareil à l’entrée de ligne de la barre de son, assurez-vous que le volume de la
sortie d’écouteur sur la source de l’appareil est réglé à un son de niveau moyen approprié. Le régler trop bas produira une sortie faible provenant de
la barre de son ou le régler trop élever pourrait entraîner une distorsion.
• Le voyant ENTRÉE OPTIQUE clignote constamment lorsqu’aucun son ne provient de l’appareil démontrant ainsi un format non compatible de toute
source d’entrée sur cet appareil. Vérifiez votre téléviseur ou les autres sources de sortie audio afin d’assurer qu’ils émettent bien un format audio
numérique comme la MICL qui sont pris en charge par cet appareil. Si aucun MICL n’est disponible, appuyez alors sur
[LIGNE] pour modifier l’ENTRÉE
à une source analogique lorsque vous connectez aussi l’appareil (prise d’ENTRÉE DE LIGNE) à votre téléviseur (prise de sortie audio/écouteurs) à l’aide
du câble d’entrée de ligne fourni.
1
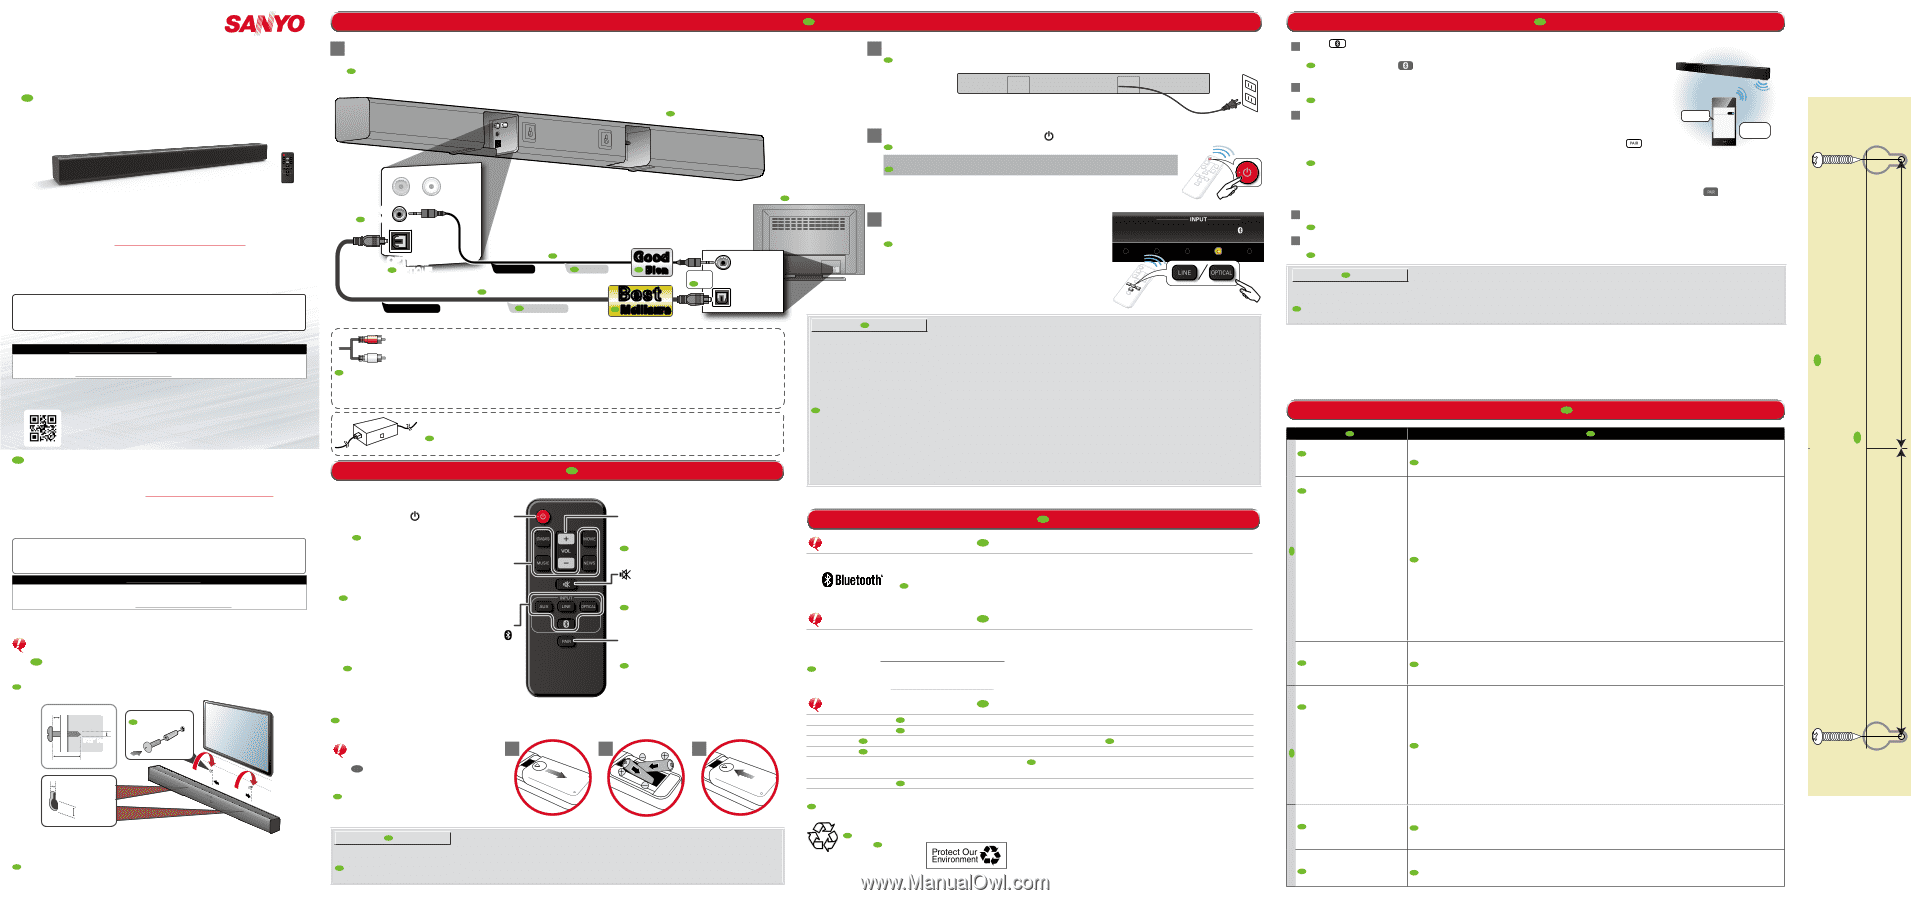
Use one of the Connection Methods shown below to Connect the Soundbar to your TV before plugging in
the AC Power cord.
Utilisez une des méthodes de connexion présentées ci-dessous pour connecter la barre de son à votre téléviseur
avant de brancher le cordon d’alimentation CA.
2
Connect AC Power cord from Soundbar to an electric outlet.
Branchez les cordons d’alimentation CA de la barre de son à une prise électrique.
HEADPHONE
or
AUDIO OUT
DIGITAL AUDIO
OUT (OPTICAL)
AUX IN
or
ou
Digital Audio Optical cable
not included
Câble optique audio numérique
non fournie
Line-In cable
included
Câble d’entrée de ligne
fourni
Rear of Soundbar
Arrière de la barre de son
LINE
LINE
LIGNE
LIGNE
OPTICAL
OPTICAL
OPTIQUE
OPTIQUE
Good
Good
Bien
Bien
Arrière du téléviseur
Rear of TV
B
est
Best
Meilleure
Meilleure
3
Turn Soundbar On using Remote
(POWER/Standby)
.
Allumez la barre de son à l’aide de la télécommande (MARCHE/Veille).
Check the LED lighting sequence when the Unit is turned On.
Vérifiez la séquence de lumières des voyants DEL lorsque vous allumez l’appareil.
4
The INPUT indicator lights up when you
Select your connected INPUT (e.g. OPTICAL).
Le voyant ENTRÉE s’allume lorsque vous
sélectionnez votre ENTRÉE connectée (par ex.
OPTICAL).
POWER
AUX
LINE
OPTICAL
PAIR
R
emote
C
ontrol
FR
T
élécommande
I
nformation
FR
Information
C
onnections
FR
C
onnexions
FR
Consultez le manuel d'utilisation en ligne pour de plus
amples renseignements:
www.sanyo-av.com/support/
1
Veuillez visiter le site Web
www.sanyo-a
v.com/support/
2
Sélectionnez Download.
3
Saisissez le numéro de « FWSB405F-A » et cliquez sur « Search ».
4
Sélectionnez le manuel et cliquez sur « Download ».
ACCESSOIRES FOURNIS
• Télécommande (NC305UH) et Piles (AAA, 1.5V x 2)
• Câble d’entrée de ligne
• Manuel de configuration
SANYO est une marque déposé SANYO Electric Co., Ltd. et est utilisé par Funai Electric Co., Ltd. et Funai Corporation, Inc.
avec l’autorisation de SANYO Electric Co., Ltd. Toute responsabilité relative aux produits SANYO, incluant la conception et la
qualité, relève uniquement de Funai Electric Co., Ltd. et Funai Corporation, Inc. Veuillez contacter Funai Corporation, Inc. pour
toute question ou demande liées aux produits SANYO:
www.sanyo-av.com
B
luetooth
S
etting
FR
R
églage du
B
luetooth
T
roubleshooting
FR
Dépannage
1
Press
(Bluetooth Icon) button on the Remote Control to switch the Soundbar to
Bluetooth mode.
Bluetooth
on
Available Devices
SANYO_FWSB405F
Pairing...
Passcode:
0000
SANYO_FWSB405F
or 2.0ch Soundbar
Appuyez sur la touche
(icône Bluetooth) sur la télécommande pour faire passer la barre de
son en mode Bluetooth.
2
Turn On your Bluetooth compatible device.
Allumez votre dispositif compatible Bluetooth.
3
On your Bluetooth compatible device search for and select “SANYO_FWSB405F” or “2.0ch Soundbar”
to pair (or register) your Soundbar with your Bluetooth compatible device.
•
If a Passcode is requested, enter “0000”
.
•
If the Soundbar name does not appear on the Bluetooth compatible device, press
button on the Remote Control.
Sur votre dispositif compatible Bluetooth, cherchez et sélectionnez « SANYO_FWSB405F » ou « 2.0ch Soundbar » pour apparier
(ou enregistrer) votre barre de son avec votre dispositif compatible Bluetooth.
• Si on vous demande votre code d’accès, saisissez « 0000 ».
• Si le nom de votre barre de son n’apparaît pas sur le dispositif compatible Bluetooth, appuyez sur la touche
(PAIRAGE) sur la
télécommande.
4
Play music on the connected Bluetooth compatible device.
Lisez de la musique sur le dispositif compatible Bluetooth.
5
To Exit Bluetooth mode, press another Audio Input Source button on the Remote Control.
Pour quitter le mode Bluetooth, appuyez sur une autre touche de source d’entrée audio sur la télécommande.
NOTE(S):
REMARQUE(S)
If reconnecting the Bluetooth device to the Soundbar fails, delete the registered profile of this Soundbar from the Bluetooth device, then
perform pairing again. This unit can store up to 4 device profiles.
Si la reconnexion du dispositif Bluetooth à la barre de son échoue, supprimez le profil enregistré de cette barre de son à partir du
dispositif Bluetooth, puis effectuez à nouveau le pairage. Cet appareil peut stocker jusqu’à 4 profils de dispositif.
(Optional-refer to ‘Installing the Soundbar on a wall’ in the Online Owner’s Manual.)
(Optionnel : consultez « Installation de la barre de son sur un mur » dans le
manuel d’utilisation en ligne.)
Use the “Wall Mounting Template” at the right of this manual when you make the screw holes
on the wall.
Place the “Wall Mounting Template” on the wall where the Soundbar is to be
installed, to determine screw locations.
Utilisez le « Modèle de montage mural » à droite de ce guide lorsque vous effectuez
les trous des vis dans le mur. Veuillez placer le « Modèle de montage mural » sur le
mur où la barre de son doit être installée afin de déterminer les emplacements de vis.
Power requirements
Exigences d’alimentation
120V AC +/- 10%, 60Hz +/- 0.5%
Output power
Puissance de sortie
26W
Dimensions
Dimensions
Soundbar
W:
39.3 x H:3.1 x D:3.1 inches
pouces
(W:999 x H:77 x D:77 mm)
Weight
Poids
Soundbar
4.41 lbs. (2.0kg)
Bluetooth
Profile
profil
:
A2DP
Version:
4.1+EDR
Optical Input
Entrée optique
Linear PCM (LPCM) 96kHz 24bit Max
Specifications
FR
Caractéristiques
If this unit becomes inoperative, do not try to correct the problem by yourself.
There are no User-serviceable Parts inside. Place the Unit into Standby mode, Unplug the Power Plug, and
then please visit:
www.sanyo-av.com/support/
Si cet appareil ne fonctionne plus, n’essayez pas de corriger le problème par vous-même. Aucune pièce réparable par
l’utilisateur n’est à l’intérieur. Mettez l’appareil en modeVeille, débranchez la prise d’alimentation,
puis veuillez visiter :
www.sanyo-av.com/support/
Servicing
FR
Entretien
Trademark Information
FR
Renseignements sur les marques de commerce
The Bluetooth
®
word mark and logos are registered trademarks owned by Bluetooth SIG, Inc. and any
use of such marks by Funai Electric Co., Ltd. is under license. Other trademarks and trade names are
those of their respective owners.
Le mot servant de marque et les logos Bluetooth
®
sont des marques déposées appartenant à Bluetooth
SIG, Inc. et toute utilisation de telles marques par Funai Electric Co., Ltd. fait l’objet d’une licence. Les autres
marques de commerce et noms commerciaux appartiennent à leurs propriétaires respectifs.
Mount Soundbar on a Wall
FR
Montage de la barre de son sur un mur
Problem
Problème
Tip
Conseil
Sound
Son
No Power
Aucune alimentation
•
Unplug AC Power cord from Soundbar, wait for 20 seconds. Then Plug in the Soundbar, immediately turn the Soundbar On using the
Remote Control.
• Débranchez le cordon d’alimentation de la barre de son, attendez 20 secondes. Puis rebranchez-la, allumez-la immédiatement à l’aide
de la télécommande.
No Sound / Distorted sound
Aucun son / aucune distorsion
du son
•
Make sure the TV, other Devices and Soundbar are all Turned On.
•
Make sure Unit is Connected to an Audio Output on your Device.
•
Press INPUT source buttons on your Soundbar Remote Control to select the correct Audio Input.
•
Confirm that the Soundbar is not Muted. Press the
VOL +/
-
or MUTE ICON button’s on the Remote to unmute the Sound. (See ‘Adjust
the Volume’ on the Online Owner’s Manual:
www.sanyo-av.com/support/
)
•
Adjust the Sound Settings on your Connected device.
•
Adjust the Headphone Volume on some TV’s if you connect this Unit to the Headphone jack on your TV using the Included 3.5mm Line-
In cable.
•
If Input is Optical Sound, make sure that the Optical Cable Connector is completely inserted into the Terminal (Click Sound heard when
properly inserted).
• Assurez-vous que le téléviseur, les autres dispositifs et la barre de son sont allumés.
• Assurez-vous que l’appareil est à une sortie audio de votre appareil.
• Appuyez sur les touches des sources d’ENTRÉE sur la télécommande de la barre de son pour sélectionner la bonne entrée audio.
• Confirmez que la barre de son n’est pas en sourdine. Appuyez sur la touche
VOL +/–
ou ICÔNE SOURDINE sur la télécommande
pour désactiver la sourdine.
(Consultez « Régler le volume » dans le manuel d’utilisation en ligne :
www.sanyo-av.com/support/
)
• Réglez les réglages du son sur votre dispositif connecté.
• Réglez le volume des écouteurs de certains téléviseurs si vous connectez cet appareil à la prise des écouteurs sur votre téléviseur à
l’aide du câble d’entrée de ligne 3,5 mm fourni.
• Si l’entrée est le son optique, assurez-vous que le connecteur du câble optique est complètement inséré dans le terminal (vous
entendrez un clic lorsqu’il sera correctement inséré).
Echo Sound is heard when both the
TV and Soundbar Sound are On.
Un écho est entendu lorsque
le téléviseur et la barre de son
sont tous les deux allumés.
•
It is normal for the TV and Soundbar Sounds to have an Echo Sound when both are turned On at the same time.
•
To Eliminate the Echo Sound Turn the Off or Mute the TV Sound.
• Il est normal d’entendre un écho lorsque le téléviseur et la barre de son sont allumés au même moment.
• Pour éliminer l’écho, éteignez ou mettez le son en sourdine.
Remote
Télécommande
Intermittent or No Reaction to the
Remote Control.
Intermittent ou aucune réaction
face à la télécommande.
•
Check the Batteries in Remote Control and make sure they are Inserted properly using + or
-
symbols.
•
Aim Remote at the Center of this Unit.
•
Use a Digital or Phone Camera pointing the Remote Control at the Camera Lens and press any Remote button.
If Remote IR LED(s)
flash on Camera Display, then the Remote is Transmitting a Signal.
Some Phone Cameras have IR filters in their Lens, therefore you
will not see the IR LED(s) flash.
•
If your Thumb is used to operate the Remote Control sometimes it may not be fully working when pointed at the Soundbar, make sure
that your Index Finger is Not blocking the IR Signal from the Front of the Remote Control.
• Vérifiez les piles de la télécommande et assurez-vous qu’elles sont insérées correctement par les symboles
+
ou
-
.
• Dirigez la télécommande vers le centre de cet appareil.
• Utilisez un appareil photo numérique ou d’un cellulaire et pointez-le vers la télécommande vers la lentille de l’appareil photo,
puis appuyez sur une des touches de la télécommande. Si le(s) DEL infrarouge(s) de la télécommande clignote(nt) sur l’affichage
de l’appareil photo, cela signifie que la télécommande transmet un signal. Certains appareils photo de cellulaire ont des filtres
infrarouges dans leurs lentilles, vous ne pourrez donc voir le(s) DEL infrarouge(s) clignote(nt).
• Si vous utilisez parfois votre pouce pour faire fonctionner la télécommande, celle-ci peut ne pas fonctionner lorsqu’elle vise la barre
de son, assurez-vous que votre index ne bloque pas le signal IR à l’avant de la télécommande.
Bluetooth
An external Device cannot connect
with the Soundbar via Bluetooth.
Un dispositif externe ne peut
pas se connecter à la barre de
son via Bluetooth.
•
Confirm that Bluetooth is Enabled on the external Device. See the User Manual on the external Device on how to enable Bluetooth.
•
Another Bluetooth Device is already connected to the Soundbar. Disconnect the connected Device, then try again.
• Confirmez que le Bluetooth est activé sur un dispositif externe. Consultez le manuel d’utilisation du dispositif externe pour savoir
comment activer le Bluetooth.
• Un autre dispositif Bluetooth est déjà connecté à la barre de son. Déconnectez le dispositif connecté, puis réessayez.
Unstable connection between the
Bluetooth Device and the Soundbar.
Connexion instable entre le dispositif
Bluetooth et la barre de son.
•
The Bluetooth reception may be poor. Confirm that there is no obstacle between the Bluetooth Device and the Soundbar. If this does
not improve the Sound quality, move the Bluetooth Device closer to the Soundbar.
• La réception du Bluetooth est faible. Assurez-vous qu’il n’y ait aucun obstacle entre le dispositif Bluetooth et la barre de son. Si cela
n’améliore pas la qualité du son, déplacez le dispositif Bluetooth plus près de la barre de son.
© 2016 Funai Electric Co., Ltd.
XHA03UH / 2VMN00270A
HHHH
SANYO is a registered trademark of SANYO Electric Co., Ltd. and is used by Funai Electric Co., Ltd. and Funai Corporation, Inc.
under license from SANYO Electric Co., Ltd. Any liability related to SANYO products, including design and quality, is the sole
responsibility of Funai Electric Co., Ltd. and Funai Corporation, Inc.
Please contact Funai Corporation, Inc. for any questions or claims related to SANYO products:
www.sanyo-av.com
See the Online Owner’s Manual for details:
www.sanyo-av.com/support/
1
Please visit website
www.sanyo-av.com/support/
2
Select Download.
3
Type in the Model # “
FWSB405F-A
”, and click “
Search
”.
4
Select the Manual and click on “
Download
”.
Register Online at
www.sanyo-av.com/support/
today to get the most benefits from your purchase.
Registering your model with SANYO makes you eligible for all of the valuable
benefits such as
software upgrades and important product notifications.
Register Online at
www.sanyo-av.com/support/
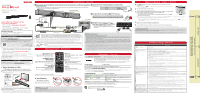
INCLUDED ACCESSORIES
• Remote Control (NC305UH) and Batteries (AAA, 1.5V x 2)
• Setup Manual
• Line-In cable
1
2
3
(POWER/Standby)
Press to Turn On or Off (Standby mode)*.
Appuyez sur cette touche pour allumer ou
éteindre (mode Veille)*.
STANDARD
/
MUSIC
/
MOVIE
/
NEWS
Press to Select desired Equalizer mode.
Appuyez sur cette touche pour sélectionner le
mode Égaliseur désiré.
VOL
(ume)
Press to adjust Volume + (up) /
-
(down)
for Soundbar.
Appuyez sur cette touche pour régler le volume
+ (haut) / – (bas) de la barre de son.
(MUTE)
Press to Mute the Sound and press
again to Unmute the Sound.
Appuyez sur cette touche pour mettre le son en
sourdine et appuyez à nouveau pour réactiver
le son.
NOTE(S):
REMARQUE(S)
• Do not mix old and new batteries.
• Do not mix alkaline, standard (carbon-zinc) or rechargeable (ni-cad, ni-mh, Li-ion, etc.) batteries.
• Ne pas mélanger d’anciennes piles avec des nouvelles.
• Ne pas mélanger les piles alcalines, standards(carbone-zinc) ou rechargeables (ni-cad, ni-mh, Li-ion, etc.).
AUX
(iliary)/
LINE
/
OPTICAL
/
Press one of the INPUT Buttons to Select
appropriate Source.
Appuyez sur une de ces touches Entrée pour
sélectionner la source appropriée.
PAIR
(ing)
Press to Start Pairing mode.
Appuyez sur cette touche pour démarrer le
mode Pairage.
*Unplug the AC Power cord to Turn Off completely.
*
Débranchez le cordon d’alimentation CA pour éteindre complètement.
Install 2 AAA (1.5V) batteries (Included)
Installez 2 piles AAA (1,5 V, fournie)
Insert Batteries
FR
Insérez les piles
Most modern digital TVs do not have Red and White Coaxial Analog Audio Outputs, but do have Red and White Coaxial
Analog Audio Inputs. If you plan to use Red and White Analog Coaxial Cables to Connect your TV to this Soundbar, please
ensure that yourTV does indeed have Red andWhite Coaxial Analog Audio OUT. Refer to yourTV’s User Manual for
details.To Connect Soundbar directly to other devices (Blu-ray player, Game System, etc.), see your Device’s User Manual.
La plupart des téléviseurs numériques modernes n’ont pas de sorties audio analogiques coaxiales rouges et blanches, mais ils ont
des entrées audio analogiques coaxiales rouges et blanches. Si vous prévoyez utiliser des câbles audio analogiques coaxiaux rouges
et blancs pour connecter votre téléviseur à ce téléviseur, veuillez vous assurer que votre téléviseur a bel et bien des sorties audio
analogiques coaxiales rouges et blanches. Consultez le manuel d’utilisation de votre téléviseur pour plus de détails.
Center line
FR
Ligne centrale
Wall Mounting Template
FR
Modèle de montage mural
3-3/4” (95mm)
3-3/4” (95mm)
Use a Coaxial (RCA) to Optical Toslink Digital Audio Converter (not included) if your TV only has Coaxial
Audio out.
Utilisez un convertisseur audio numérique pour convertir coaxial (RCA) vers Toslink optique (non inclus)
si votre téléviseur n’a qu’une sortie audio coaxiale.
•
The specifications and design of this product are subject to change without notice.
• Les caractéristiques et la conception de ce produit sont assujetties à des changements sans préavis.
For product recycling information, please visit -
www.sanyo-av.com
Pour de plus amples renseignements sur le recyclage de produits, veuillez consulter
-
www.sanyo-av.com
Click on
Cliquez sur
SOUNDBAR
S
etup
M
anual
FR
Manuel de configuration
FWSB405F A
Enregistrez-vous en ligne dès aujourd’hui au
www.sanyo-av.com/support/
pour profiter au maximum de votre achat.
L’enregistrement de votre modèle chez SANYO vous rend admissible à tous les précieux
avantages comme les mises à jour de logiciels et les notifications importantes sur le
produit.
Enregistrez-vous en ligne au
www.sanyo-av.com/support/
9/64”~5/32” (3.5~4mm)
~3/16” (5 mm’’)
~3/8” (9 mm)
7-1/2”(190mm)
5/32” (4mm)
>1-3/16” (30mm)
Molly Anchor
Pièce d’ancrage Molly