Sanyo XF46N User Manual
Sanyo XF46N - PLC XGA LCD Projector Manual
 |
UPC - 086483061042
View all Sanyo XF46N manuals
Add to My Manuals
Save this manual to your list of manuals |
Sanyo XF46N manual content summary:
- Sanyo XF46N | User Manual - Page 1
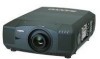
Multimedia Projector MODEL PLC-XF46N/E ✽ Projection lens is optional. Owner's Manual - Sanyo XF46N | User Manual - Page 2
problem still persists, contact the dealer where you purchased the projector or the service center. CAUTION RISK OF ELECTRIC SHOCK DO NOT OPEN CAUTION : TO REDUCE THE RISK OF ELECTRIC SHOCK, DO NOT REMOVE COVER (OR BACK). NO USER-SERVICEABLE PARTS INSIDE EXCEPT LAMP REPLACEMENT. REFER SERVICING - Sanyo XF46N | User Manual - Page 3
, be sure the service technician has used replacement parts specified by the manufacturer that have the same characteristics as the original part. Unauthorized substitutions may result in fire, electric shock, or injury to persons. Upon completion of any service or repairs to this projector, ask the - Sanyo XF46N | User Manual - Page 4
radio frequency energy and, if not installed and used in accordance with the instruction manual, may cause harmful interference to radio communications. Operation of this equipment in a residential area is likely to cause harmful interference in which case the user will be required to correct the - Sanyo XF46N | User Manual - Page 5
SELECTING COMPUTER SYSTEM PC ADJUSTMENT 26 28 AUTO PC ADJUSTMENT 28 NAME OF EACH PART OF PROJECTOR 7 MANUAL PC ADJUSTMENT 29 SETTING-UP PROJECTOR CONNECTING AC POWER CORD LENS INSTALLATION 8 PICTURE IMAGE ADJUSTMENT 31 8 IMAGE LEVEL SELECT 31 9 IMAGE LEVEL ADJUSTMENT 32 POSITIONING - Sanyo XF46N | User Manual - Page 6
via the network cable by accessing to the connected projector using the web browser on your computer. It can be controlled and set up the projector remotely. Contact the sales dealer where you purchased this projector for optional parts. Digital Zoom function adjusts image size to approx. 1/4 ~ 49 - Sanyo XF46N | User Manual - Page 7
PREPARATION NAME OF EACH PART OF PROJECTOR FRONT OF CABINET INFRARED REMOTE RECEIVER POWER CORD CONNECTOR PROJECTION LENS LENS CAP MAIN ON / OFF SWITCH CAUTION Do not turn on a projector with lens cap attached. High temperature from light beam may damage lens cap and result in fire hazard. - Sanyo XF46N | User Manual - Page 8
easily accessible. NOTE ON POWER CORD AC Power Cord must meet requirement of country where you use a projector. Confirm AC plug type with chart below and proper AC power cord must be used. If supplied AC Power Cord does not match AC outlet, contact your sales dealer. Projector side AC Outlet side - Sanyo XF46N | User Manual - Page 9
is used and prepare suitable lens. For specifications of Projection Lens, refer to manual separately attached or contact sales dealer where you purchased a projector. 2. For installation, refer to installation manual supplied to a Projector. When moving or setting up a projector, be sure to replace - Sanyo XF46N | User Manual - Page 10
FEET Height of front feet can be adjusted by turning handles. INSTALLING PROJECTOR IN PROPER POSITION Install the projector properly. Improper installation may reduce the lamp lifetime and cause a fire hazard. 10˚ Do not tilt the projector more than 10 degrees above and below. 10˚ NO UPWARD Do - Sanyo XF46N | User Manual - Page 11
sure to hold Carrying Handles on both sides by 2 or more people when moving a projector. Moving it unproperly may result in damage of cabinet or person's injury. Replace lens cap and retract feet to prevent damage to lens and cabinet. CARRYING HANDLE 1 Pull up lock buttons on each side of carrying - Sanyo XF46N | User Manual - Page 12
contact sales dealer where you purchased a projector. Replace terminal. Insert terminal along Guide to fit Plug into Socket. 4 Tighten screws to secure terminal. NOTES ON ORDERING OR USING OPTIONAL INTERFACE BOARD When ordering or using Optional Interface Board (Terminal Board), contact your sales - Sanyo XF46N | User Manual - Page 13
CONNECTING PROJECTOR INPUT/OUTPUT TERMINALS AND JACKS INPUT 2 INPUT 1 5 BNC INPUT JACKS Connect component video output (Cr, Y, Cb or Pr, Y, Pb) from video equipment to R/Pr, G/Y and B/ - Sanyo XF46N | User Manual - Page 14
computer to this terminal. USB PORT (Series B) This port is used to service this projector. Connect USB port of computer to this port. SERIAL PORT OUT TERMINAL This terminal outputs signal from SERIAL PORT IN. More than two projectors can be controlled with one computer by connecting SERIAL PORT - Sanyo XF46N | User Manual - Page 15
TO COMPUTER Cables used for connection (✽ = Cables are not supplied with this projector.) • VGA Cable (HDB 15 pin) • DVI Cable ✽ • BNC Cable (BNC x 5) ✽ • Audio Cables (RCA x 2) ✽ NOTE : When connecting cable, power cords of both a projector and external equipment should be disconnected - Sanyo XF46N | User Manual - Page 16
) Audio Cable (Stereo) ✽ AV AUDIO IN Terminals of a Projector AUDIO OUT Audio Cable (Stereo) ✽ NOTE : When connecting cable, power cords of both a projector and external equipment should be disconnected from AC outlet. Turn a projector and peripheral equipment on before computer is switched on - Sanyo XF46N | User Manual - Page 17
INDICATORS SIDE CONTROLS SIDE CONTROLS FOCUS BUTTONS Used to adjust focus. (P24) POWER ON-OFF BUTTON Used to turn a projector on or off. (P23) MENU BUTTON Used to open or close MENU operation. (P21, 22) SELECT BUTTON Used to execute item selected. It is also used to expand image in DIGITAL ZOOM - Sanyo XF46N | User Manual - Page 18
to be replaced on Lamp Status Display. (P42-44, 50) WARNING TEMP. INDICATOR This indicator flashes red when internal projector temperature is too high. (P42, 50) READY INDICATOR This indicator lights green when a projector is ready to be turned on. And it flashes green in Power Management mode - Sanyo XF46N | User Manual - Page 19
LENS SHIFT function. (P24) ZOOM BUTTONS Used to adjust zoom. (P24) FREEZE BUTTON Used to freeze picture. (P25) P-TIMER BUTTON Used to operate P-TIMER function. (P25) WIRED REMOTE JACK When using as Wired Remote Control, connect Remote Control Cable (supplied) to this jack. Battery installation - Sanyo XF46N | User Manual - Page 20
case clean and install new batteries. ● Danger of explosion if battery is incorrectly replaced. ● Dispose of used batteries according to batteries manufacturers instructions and local rules. Operating Range Point Remote Control Unit toward projector (Infrared Remote Receiver) whenever pressing - Sanyo XF46N | User Manual - Page 21
projector through ON-SCREEN MENU. Refer to following pages to operate each adjustment on ON-SCREEN MENU. REMOTE button(s) on Side Control or on Remote Control Unit. POINT BUTTONS Used to move a Pointer UP/ DOWN/ Used to select the item. SIDE CONTROL MENU LENS SHIFT SELECT POINT BUTTONS Used - Sanyo XF46N | User Manual - Page 22
input source. GUIDE WINDOW Shows selected item of ONSCREEN MENU. PC SYSTEM MENU Used to select computer system. (Refer to P27) IMAGE SELECT MENU Used to select image Progressive] (Refer to P32) SETTING MENU Used to change settings of projector or reset Lamp Replace Counter. (Refer to P39-41) FOR - Sanyo XF46N | User Manual - Page 23
equipment.) 2 Connect a projector's AC Power Cord into a wall outlet and turn MAIN ON/OFF SWITCH to ON. LAMP indicator lights RED, and READY indicator lights GREEN. LAMP STATUS INPUT 1 13 24 20 3 Press POWER ON-OFF button on Side Control or on Remote Control Unit to ON. LAMP indicator dims, and - Sanyo XF46N | User Manual - Page 24
after 4 seconds. LENS SHIFT ADJUSTMENT 1 Press the LENS SHIFT button on Side Control or on the Remote Control Unit. Message "Lens shift" is displayed. POINT UP button to reduce upper part of image, and press POINT DOWN button to reduce lower part. Message disappears after 4 seconds. Reduce - Sanyo XF46N | User Manual - Page 25
RIGHT and SELECT button. NO SHOW FUNCTION Press NO SHOW button on Remote Control Unit to black out a image. To restore to normal, No show Message disappears after 4 seconds. P-TIMER FUNCTION Press P-TIMER button on Remote Control unit. Timer display "00 : 00" appears on a screen and timer - Sanyo XF46N | User Manual - Page 26
by pressing INPUT 1/2, INPUT 3/4 or INPUT 1 - INPUT 4 buttons on Side Control or on Remote Control Unit. INPUT 1/2 button INPUT 1 INPUT 2 INPUT 3/4 button INPUT 3 INPUT 4 MENU , LLC. Should the specification be changed, this projector may not display the digital content protected by HDCP. 26 - Sanyo XF46N | User Manual - Page 27
SYSTEM This projector automatically tunes to most different types of computers based on VGA, SVGA, XGA, SXGA, manual adjustment is required. (Refer to P29 and 30.) There is no signal input from computer. Make sure connection of computer and a projector is set correctly. (Refer to TROUBLESHOOTING - Sanyo XF46N | User Manual - Page 28
or on Remote Control Unit. Store adjustment parameters. Adjustment parameters from Auto PC Adjustment can be memorized in this projector. Once parameters Adjustment function. When image is not provided properly through this function, manual adjustments are required. (Refer to page 29, 30.) ● Auto - Sanyo XF46N | User Manual - Page 29
adjust several parameters to match with those special signal formats. This projector has 5 independent memory areas to memorize those parameters manually adjusted. This enables you to recall setting for a specific computer whenever you use it. Note : This PC ADJUST Menu cannot be operated in Digital - Sanyo XF46N | User Manual - Page 30
SELECT button at Display area icon and Display area dialog box appears. Display area Display area V Adjustment of vertical area displayed with this projector. Press POINT LEFT/RIGHT button(s) to decrease/increase value and then press SELECT button. Full screen Press POINT LEFT/RIGHT button(s) to - Sanyo XF46N | User Manual - Page 31
and Image 4 by pressing IMAGE/IMAGE SEL. button on Side Control or on Remote Control Unit. Standard Normal picture level preset on this projector. Real Picture level with improved halftone for graphics. IMAGE 1~4 User preset picture adjustment in IMAGE ADJUST Menu (P32). IMAGE button Standard Real - Sanyo XF46N | User Manual - Page 32
. Dialog box display is changed to "On" to reduce noise (rough parts) of image. Press POINT LEFT/RIGHT button(s) again, to change noise reduction button(s) again, progressive scan mode to on. 3 Store 32 To store manually preset image, move a red frame pointer to Store icon and press SELECT - Sanyo XF46N | User Manual - Page 33
expanding image width uniformly. This function can be used for providing a squeezed video signal at 16 : larger than screen size. Press D.ZOOM button on Remote Control Unit. The message "D. Zoom +" is resolution to lower before connecting projector. ● Image data in other than XGA (1024 x 768) - Sanyo XF46N | User Manual - Page 34
INPUT SELECTING INPUT SOURCE DIRECT OPERATION Select INPUT source by pressing INPUT 1/2, INPUT 3/4 or INPUT 1 - INPUT 4 buttons on Side Control or on Remote Control Unit. MENU OPERATION 1 Press MENU button and ON-SCREEN MENU will appear. Press POINT LEFT/RIGHT buttons to select Input and press - Sanyo XF46N | User Manual - Page 35
signal, and adjusts itself to optimize its performance. When Video System is 1035i, 1080i50 or 1080i60, select system manually first. COMPONENT VIDEO SIGNAL FORMAT If projector cannot reproduce proper video image, it is necessary to select a specific component video signal format among 480i, 575i - Sanyo XF46N | User Manual - Page 36
Image 4 by pressing IMAGE/IMAGE SEL. button on Side Control or on Remote Control Unit. Standard Normal picture level preset on this projector. Cinema Picture level adjusted for picture with fine tone. IMAGE 1~4 User preset picture adjustment in IMAGE ADJUST Menu (P38). IMAGE button Standard Cinema - Sanyo XF46N | User Manual - Page 37
to 15.) Noise reduction Press POINT LEFT/RIGHT button(s) to change noise reduction mode. Dialog box display is changed to "On" to reduce noise (rough parts) of image. Press POINT LEFT/RIGHT button(s) again, to change noise reduction mode to off. Progressive Press POINT LEFT/RIGHT button(s) to change - Sanyo XF46N | User Manual - Page 38
. Image Level Menu Move a red frame pointer to image icon to be set and then press SELECT button. Store icon PICTURE SCREEN ADJUSTMENT This projector has a picture screen resize function, which enables you to display desirable image size. 1 Press MENU button and ON-SCREEN MENU will appear. Press - Sanyo XF46N | User Manual - Page 39
Off ···· sets On-Screen Displays disappeared except; ● ON-SCREEN MENU ● "Power off?" message ● "No signal" message ● "Please wait...." ● P-Timer /bottom and left/right reversed. This function is used to project image from a ceiling mounted projector. Rear function Rear When this function is "On - Sanyo XF46N | User Manual - Page 40
can be turned on again (Power Management mode). In this Power Management mode, Projection Lamp is automatically turned on when input signal connected or projector is operated with any button on Side Control or on Remote Control Unit again. Lamp control This function allows you to change brightness - Sanyo XF46N | User Manual - Page 41
TURNING OFF PROJECTOR" on P23). If projector is turned off in wrong steps, On Start function does not operate properly. Reset switch Lamp counter reset This function is used to reset the lamp replace counter. When replacing the projection lamp, reset the lamp replace counter by using this function - Sanyo XF46N | User Manual - Page 42
happenes, disconnect and reconnect the AC power cord, and then turn on the projector again to check its operation. If the projector shuts down again or fails to be turned on, the internal check and repair will be required. Plug off the AC power cord and contact service station. AIR FILTER CARE AND - Sanyo XF46N | User Manual - Page 43
becomes darker or color becomes unnatural, replace lamp. (LAMP REPLACE indicator lights yellow.) LAMP STATUS DISPLAY X Mark on Lamp (LAMP REPLACE indicator flashes yellow.) Projection lamp is defective or fails to be turned on. Restart a projector on, and make sure lamp is on. If this mark still - Sanyo XF46N | User Manual - Page 44
type. Do not drop a lamp assembly or touch a glass bulb! The glass can shatter and may cause injury. Follow these steps to replace lamp assembly. 1 Check number of lamp to be replaced on Lamp Status Display. 2 Turn off a projector and disconnect AC Power Cord. Allow a projector to cool down for at - Sanyo XF46N | User Manual - Page 45
No. of your projector : ● Replacement Lamp Type No. : PLC-XF46N/E POA-LMP100 (Service Parts No. 610 327 4928) LAMP REPLACE COUNTER Be sure to reset Lamp Counter when Lamp Assembly is replaced. When Lamp Replace Counter is reset, LAMP REPLACE indicator stops lighting. 1 Turn projector on, press - Sanyo XF46N | User Manual - Page 46
should be replaced, i.e., if the LAMP REPLACE INDICATOR lights up, replace the lamp with a new one IMMEDIATELY after the projector has cooled down. ( Follow carefully the instructions in the LAMP REPLACEMENT section of this manual. ) Continuous use of the lamp with the LAMP REPLACE INDICATOR lighted - Sanyo XF46N | User Manual - Page 47
, video and power cord are properly connected. 3. Verify that all power is switched on. 4. If a projector still does not produce an image, re-start your computer. 5. If an image still does not appear, unplug a projector from your computer and check your computer monitor's display.Problem may be with - Sanyo XF46N | User Manual - Page 48
APPENDIX Computer Input/Video Input Input Input 1 Input 2 Input 3 Input 4 Computer Input System (1) SVGA 1 SVGA 2 SVGA 3 MODE 1 MODE 2 PC Adjust Auto PC Adj. Fine sync. Total dots Horizontal Vertical Current mode Clamp Display area Display area - H Display area - V Full screen Reset Mode - Sanyo XF46N | User Manual - Page 49
/On Off/On Yes/No Image 1 Image 2 Image 3 Image 4 Quit Keystone Blue back Display Logo Ceiling Rear Power management Lamp control Lamp mode Remote control On start Lamp counter reset Factory default Quit English German French Italian Spanish Portuguese Dutch Swedish Russian Chinese Korean Japanese - Sanyo XF46N | User Manual - Page 50
the Indicators for projector condition. Indicators LAMP WARNING REPLACE TEMP. yellow red READY green Projector Condition LAMP red The projector is OFF. (The MAIN switch OFF position or the AC Power Cord is unplugged.) The projector is READY to be turned on with the POWER ON- ✽ OFF button - Sanyo XF46N | User Manual - Page 51
APPENDIX COMPATIBLE COMPUTER SPECIFICATIONS Basically this projector can accept a signal from all 5 SVGA 6 SVGA 7 SVGA 8 SVGA 9 SVGA 10 SVGA 11 MAC 16 XGA 1 XGA 2 XGA 3 XGA 4 XGA 5 XGA 6 XGA 7 XGA 8 XGA 9 XGA 10 XGA 11 XGA 12 XGA 13 XGA 14 XGA15 RESOLUTION 640 x 480 720 x 400 640 x 400 640 x 480 - Sanyo XF46N | User Manual - Page 52
DVI terminal, refer to chart below. ON-SCREEN DISPLAY D-VGA D-480p D-575p D-SVGA D-XGA D-WXGA 1 D-WXGA 2 D-WXGA 3 D-WXGA 4 D-WXGA 5 RESOLUTION 640 x 480 . OPTIONAL PARTS The parts listed below are optionally supplied. When ordering those parts, give the name and Type No. to the sales dealer. - Sanyo XF46N | User Manual - Page 53
˚ Dimensions : 1.97" x 1.06" x 6.61" (50mm x 27mm x 168mm) Net Weight : 4.6 oz (129 g) (including batteries) Owner's Manual (CD-ROM) Quick setup manual AC Power Cord Wireless/Wired Remote Control Transmitter and Batteries Remote Control Cable VGA Cable 6 Types Light-Block Sheet (For option lens - Sanyo XF46N | User Manual - Page 54
output terminal of computer to this terminal with VGA Cable (supplied). Pin Configuration 54 32 1 10 9 8 7 6 15 14 13 12 11 1 Red Input 9 +5V Power 2 Green Input 10 Ground (Vert.sync.) 3 Blue Input 11 Sense 0 4 Sense 2 12 DDC Data 5 Ground (Horiz.sync.) 13 Horiz. sync. 6 Ground (Red) 14 - Sanyo XF46N | User Manual - Page 55
Unit : inch (mm) 9.90 (251.5) 9.90 (251.5) 5.7° 2.36 (60.0) DIMENSIONS APPENDIX 22.87 (581.0) 10.15 (258.0) 17.56 (446.0) 22.87 (581.0) 5.18 (131 219.0) 9.25 (235.0) 1.57 (40.0) 8.27 (210.0) 8.27 (210.0) Screw Holes for Ceiling Mount Screws: 9-M8 Depth: 0.315 (8.0) 6.81 (173.0) 1.38 (35.0) 55 - Sanyo XF46N | User Manual - Page 56
1AA6P1P5138-- (KF6A) SANYO Electric Co., Ltd - Sanyo XF46N | User Manual - Page 57
LCD PROJECTOR LENS REPLACEMENT AND INSTALLATION PROCEDURES CAUTION When installing or replacing the Projection Lens, refer to this manual. For installation of the lens, use the parts designated in the manual. Do not use the installation manual and Light-Block Sheets in the lens package. Check the - Sanyo XF46N | User Manual - Page 58
LENS REPLACEMENT AND INSTALLATION PROCEDURE NOTE : The installation procedure and needed parts for lens installation depend on the type of the Projection Lens. Check the Model No. of the Projection Lens and be sure to install or replace the lens following procedure below. A 1 Remove Lens - Sanyo XF46N | User Manual - Page 59
and turn it fully upward. (See Fig. 6.) E Install the Lens into the projector. Grasp the Lens Lock Lever and turn the Lever fully downward until lever is Locked (clicked position) properly. (See Fig. 7.) When installing the Motor Driven Lens, be sure to mount Lens Motor on right side. (See Fig - Sanyo XF46N | User Manual - Page 60
projector has 6 Light-Block Sheets. Use 2 Light-Block Sheets corresponding with lens. (Refer to the list below.) Use 1 Light-block Sheet for MODEL LNS-W03 Set 2 Light-Block Sheets through the lens T01Z, LNS-S03, LNS-W04 LNS-W06 LNS-W03 Type No. (Part No.) TYPE FA1 (610 322 7559) TYPE FA2 (610 322 - Sanyo XF46N | User Manual - Page 61
Cover with 4 Screws C. (See Fig. 2.) 9 Replace Upper Lens Cover. Slide Light-Block Sheets into the guide of Upper Lens Cover and set them in front of the flap. (See Fig. 9.) Fix Upper Lens Cover with 2 Screws A. (See Fig. 1.) 10 Turn the projector on and operate Lens shift, Zoom and Focus fully - Sanyo XF46N | User Manual - Page 62
Model LNS-W03) Set up the projector and project image on the screen. 1. Loosen the Focus Lock Screw on the projection lens. 2. Rotate the projection lens to obtain proper focus on center area of the screen. ● mark (yellow) When the distance of the screen and lens is 1 meter, set ● mark (yellow - Sanyo XF46N | User Manual - Page 63
or tangled on the gear of the lens motor or the other mechanical parts. 3. Check no part is missing, and no mounting part is loose. Some parts are not used for installation or replacement. Keep these parts for later use. NOTE: Figures in this manual may differ from the actual product. E -7- - Sanyo XF46N | User Manual - Page 64
shows approximate measurement. Actual measurement depends on lens and projectors. Model No. LNS-S02 LNS-S02Z .8 36.1 26.8 90.6 61.9 600 32.6 25.1 22.5 17.3 74.2 53.1 54.0 41.8 43.4 32.2 108.7 74.2 LENS SHIFT/ CENTER RATIO U/D (MAX) SIDE (MAX) H1 H2 W1 W2 0 10 4 6 1846 1846 1846 1846 184 6 12.3 14
-
 1
1 -
 2
2 -
 3
3 -
 4
4 -
 5
5 -
 6
6 -
 7
7 -
8
-
9
-
10
-
11
-
12
-
13
-
14
-
15
-
16
-
17
-
18
-
19
-
20
-
21
-
22
-
23
-
24
-
25
-
26
-
27
-
28
-
29
-
30
-
31
-
32
-
33
-
34
-
35
-
36
-
37
-
38
-
39
-
40
-
41
-
42
-
43
-
44
-
45
-
46
-
47
-
48
-
49
-
50
-
51
-
52
-
53
-
54
-
55
-
56
-
57
-
58
-
59
-
60
-
61
-
62
-
63
-
64
 |
 |

Owner's Manual
PLC-XF46N/E
Multimedia Projector
MODEL
✽
Projection lens is optional.