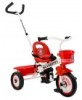
Schwinn Easy Steer Schwinn Owner's Manual
Schwinn Easy Steer Manual
 |
View all Schwinn Easy Steer manuals
Add to My Manuals
Save this manual to your list of manuals |
Schwinn Easy Steer manual content summary:
- Schwinn Easy Steer | Schwinn Owner's Manual - Page 1
® THIS MANUAL CONTAINS IMPORTANT SAFETY, PERFORMANCE AND MAINTENANCE INFORMATION. READ THE MANUAL BEFORE TAKING YOUR FIRST RIDE ON YOUR NEW BICYCLE, AND KEEP THE MANUAL HANDY FOR FUTURE REFERENCE. - Schwinn Easy Steer | Schwinn Owner's Manual - Page 2
CORRCoErreCct T FITTING Make sure your helmet covers your forehead Correct INCORIncRorrEectCT FITTING Forehead is exposed and vulnerable to serious injury ©2010 - Schwinn Easy Steer | Schwinn Owner's Manual - Page 3
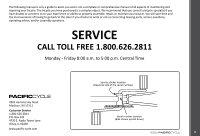
Personal Care from 2 ©2010 Congratulations on your new purchase! Our Service Department is dedicated to your satisfaction with Pacific Cycle and its products. For questions regarding performance, assembly, operation, parts or returns, contact the experts at - Schwinn Easy Steer | Schwinn Owner's Manual - Page 4
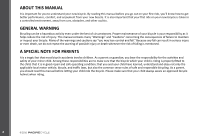
The following manual is only a guide to assist you and is not a complete or comprehensive manual of all aspects of maintaining choose to write or call us concerning missing parts, service questions, operating advice, and/or assembly questions. SERVICE CALL TOLL FREE 1.800.626.2811 Monday - Friday - Schwinn Easy Steer | Schwinn Owner's Manual - Page 5
even under the best of circumstances. Proper maintenance of your bicycle is your responsibility as it helps reduce the risk of injury. This manual contains many "Warnings" and "Cautions" concerning the consequences of failure to maintain or inspect your bicycle. Many of the warnings and cautions say - Schwinn Easy Steer | Schwinn Owner's Manual - Page 6
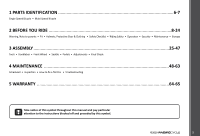
• Handlebar • Front Wheel • Saddle • Pedals • Adjustments • Final Check 4 MAINTENANCE ...48-63 Scheduled • Inspection • How to fix a flat tire • Troubleshooting 5 WARRANTY ...64-65 Take notice of this symbol throughout this manual and pay particular attention to the instructions blocked off and - Schwinn Easy Steer | Schwinn Owner's Manual - Page 7
your bicycle. This will help with assembly, maintenance, and troubleshooting. Single speed bicycles vary greatly. Your model may have bicycles also contain training wheels. Seat Rear reflector Seat post binder bolt or quick-release skewer Seat stay Training wheel bracket Rear sprocket Spokes - Schwinn Easy Steer | Schwinn Owner's Manual - Page 8
parts of your bicycle. This will help with assembly, maintenance, and troubleshooting. Multi speed bicycles vary greatly. Your model may have additional accessories such as fenders, bags, carriers, etc. Gear control cable Freewheel Wheel reflector Rim Seat Rear reflector Seat post Quick release Rear - Schwinn Easy Steer | Schwinn Owner's Manual - Page 9
as taller as you go up in size. Bike Wheel Size 12 inch wheel 16 inch wheel 18 inch wheel 20 inch wheel 24 inch wheel 2.1 Your Approx. Height 28 - 38 inches tall 38 - 48 inches tall 42 - 52 inches tall 48 - 60 inches tall 56 - 66 inches tall Wheel size is a good starting point, but bicycles vary - Schwinn Easy Steer | Schwinn Owner's Manual - Page 10
BEFORE YOU RIDE RIDING POSITION Arms not overextended Handlebar stem height about the same as seat height Saddle Height In order to obtain the most comfortable riding position and offer the best possible pedaling efficiency, the seat height should be set correctly in relation to the rider's - Schwinn Easy Steer | Schwinn Owner's Manual - Page 11
Please refer Maximum height/ to assembly-adjustments (p. 27) for instructions on installation. minimum inserƟon mark The stem's "Minimum Insertion Stem wedge cause you to lose control and fall. Place the front wheel of the bicycle between your legs and attempt to twist the handlebar/stem - Schwinn Easy Steer | Schwinn Owner's Manual - Page 12
devices which are designed as an integral part of your bicycle. Federal regulations require every bicycle (over 16") to be equipped with front, rear, wheel, and pedal reflectors. These reflectors are designed to pick up and reflect street lights and car lights in a way that helps you to be - Schwinn Easy Steer | Schwinn Owner's Manual - Page 13
the wind can be colder than just walking or standing. Reflective clothing is always recommended for cycling. Avoid wearing all black, or dark clothes. A brightly colored jacket or shirt is a great way to help motorists and others see you. Choosing to wear protective gear is the riders or parents - Schwinn Easy Steer | Schwinn Owner's Manual - Page 14
sidewall. • Ensure tires have tread and have no bulges or excessive wear. • Ensure rims run true and have no obvious wobbles or kinks. • Ensure all wheel spokes are tight and not broken. • Check that axle nuts are tight. If your bicycle is fitted with quick release axles, make sure locking levers - Schwinn Easy Steer | Schwinn Owner's Manual - Page 15
RIDE 14 ©2010 Bearings • Ensure all bearings are lubricated, run freely and display no excess movement, grinding or rattling. • Check headset, wheel bearings, pedal bearings and bottom bracket bearings. Cranks and Pedals • Ensure pedals are securely tightened to the cranks. • Ensure cranks are - Schwinn Easy Steer | Schwinn Owner's Manual - Page 16
not be ridden on streets, at night or unattended by an adult. All other bicycles are supplied with one front (white), one rear (red), two wheel (white), and four pedal (orange) reflectors. These are an important safety and legal requirement, and should remain securely fitted and in good, clean - Schwinn Easy Steer | Schwinn Owner's Manual - Page 17
BEFORE YOU RIDE RIDING SAFETY General Rules • When riding obey the same road laws as all other road vehicles, including giving way to pedestrians, and stopping at red lights and stop signs. For further information, contact the Road Traffic Authority in your State. • Ride predictably and in a - Schwinn Easy Steer | Schwinn Owner's Manual - Page 18
set of correctly positioned and clean reflectors. • Refer to p. 15 of this manual. • Use a properly functioning lighting set comprising of a white front lamp and a flashing mechanism which enhances visibility. • Wear reflective and light colored clothing. • Ride at night only if necessary. Slow down - Schwinn Easy Steer | Schwinn Owner's Manual - Page 19
off the handlebars, or your feet off the pedals when riding downhill. The Consumer Protection Safety Commission advises that the riding of small wheel diameter bicycles at excessive speeds can lead to instability and is not recommended. Children should be made aware of all possible riding hazards - Schwinn Easy Steer | Schwinn Owner's Manual - Page 20
harder you push back on the pedals, the more braking force is applied to the rear wheel. In most cases a foot operated brake is strong enough to "lock up" (stop the wheel from turning) the rear wheel and cause the tire to skid. While this will decelerate the bicycle quickly, it will also - Schwinn Easy Steer | Schwinn Owner's Manual - Page 21
however, be careful to pay close attention to front brakes locking up; If the front brake is applied too quickly or too hard, the front wheel can stop turning resulting in a front pitch over or cause the bicycle to lose steering function leading to a crash. To best avoid this, apply the - Schwinn Easy Steer | Schwinn Owner's Manual - Page 22
GEAR OPERATION Multi speed bicycles can have internal or derailleur gear systems. 1 2 WARNING: Improper shifting can result in the chain jamming, or becoming derailed resulting in loss of control or a crash. Always be sure the chain is fully engaged in the desired gear before pedaling - Schwinn Easy Steer | Schwinn Owner's Manual - Page 23
BEFORE YOU RIDE Fre ceowghseel Rear de railleur Front derailleur Derailleur control cable Guide pulley Front Crank arm chainwheels Pedal 2.15 External Gears (derailleur equipped bicycles) Derailleur equipped bicycles all have a rear derailleur. - Schwinn Easy Steer | Schwinn Owner's Manual - Page 24
an immovable object if it is left unattended. Keep in mind that individual parts of a bicycle may be stolen. Most commonly, if you lock just a wheel or just the frame, other parts may be removed from the bicycle. Although it is impossible to lock all the parts, it is suggested to - Schwinn Easy Steer | Schwinn Owner's Manual - Page 25
or spray all unpainted parts with an anti-rust treatment. Make sure wheel rims are dry so braking performance is not affected. After rain, dry adjustments as required. (Refer to Parts 4 and 5 of this manual for further details). STORAGE • Keep your bicycle in a dry location or theft. 24 ©2010 - Schwinn Easy Steer | Schwinn Owner's Manual - Page 26
pertaining to the assembly of your bicycle, call the service line direct at: SERVICE & TECHNICAL SUPPORT CALL TOLL FREE 1.800.626.2811 Monday - Friday recommend that you review the complete assembly instructions and perform checks specified in this manual before riding. We recommend that you consult - Schwinn Easy Steer | Schwinn Owner's Manual - Page 27
assembly if not already done. Turn the fork of the bicycle to face forward. Note that "forward" means that the wheel mounting slots are in the furthest forward position. So the wheel axle will be in front of the fork when assembled. (Fig. 3.3) Check handlebar stem clamp bolts to be sure they - Schwinn Easy Steer | Schwinn Owner's Manual - Page 28
line with the fork. If needed, you can re-check this after the front wheel is installed, and re-adjust. (Fig. 3.6) ASSEMBLY Top cap Pinch bolt(s) 3.6 tighten the stem bolt and damage the fork steerer tube. If these instructions are not followed, it could cause an unsafe condition and risk injury - Schwinn Easy Steer | Schwinn Owner's Manual - Page 29
axle nuts evenly; Tighten one side part way, then tighten the other side and repeat until both sides are tightened securely. Be sure that the wheel is centered between the fork legs. If it is off center, loosen the axle nut on the side that has a smaller gap between tire and - Schwinn Easy Steer | Schwinn Owner's Manual - Page 30
the quick release skewer, remove outer spring and slide the skewer through the front wheel axle so that the handle is on the left side of the bike (the the handle until you feel comfortable. DO NOT attempt to tighten the wheel by turning the handle to tighten; the handle is for 3.11 - Schwinn Easy Steer | Schwinn Owner's Manual - Page 31
SADDLE ASSEMBLY The seat post must be inserted so that the minimum insertion mark cannot be seen. The quick release mechanism must be tightened securely to prevent a sudden shift of the seat when riding. Failure to do this may cause loss of bicycle control. The saddle assembly should be - Schwinn Easy Steer | Schwinn Owner's Manual - Page 32
PEDALS AND CRANKS Attachment of an incorrect pedal into a crank arm can strip pedal threads and cause irreparable damage. Before your first ride, please check to ensure your pedals are attached correctly. Look for the letters "R" for right, and "L" for left, stamped on each pedal spindle. - Schwinn Easy Steer | Schwinn Owner's Manual - Page 33
of the front brake may cause front wheel to lock up resulting in loss of directional control or front pitch over. Grip Brake lever Determine which type of brake your bike is equipped with and refer to the appropriate assembly instructions below. *Additionally some freestyle models may be - Schwinn Easy Steer | Schwinn Owner's Manual - Page 34
pads are no longer square to the rim, repeat brake pad adjustments. Be sure that brake pads return to a centered position by spinning the wheel and listening for the brake pad rubbing the rim on either side. Readjust as needed. Check that the brake cable tension allows the brake - Schwinn Easy Steer | Schwinn Owner's Manual - Page 35
squeezing the brake, tighten the cable anchor fully with a wrench. To tension spring Spring tension nut 5mm Allen bolt To tension spring 3.24 REAR B Brake housing Frame housing stop Brake cable Cable anchor Seat Tube Brake housing Frame housing stop Cable anchor ASSEMBLY To tension spring - Schwinn Easy Steer | Schwinn Owner's Manual - Page 36
brake pads are no longer square to the rim, repeat brake pad adjustments. Be sure that brake pads return to a centered position by spinning the wheel and listening for the brake pad rubbing the rim on either side. Readjust as needed. Check that the brake cable tension allows the brake lever - Schwinn Easy Steer | Schwinn Owner's Manual - Page 37
Cable Detangler Some freestyle bicycles are equipped with a cable detangler for the rear brake. See diagram of the cable routing. If the upper cable is not already assembled, insert the cable barrel end into the right (rear) brake lever. Adjust the brake lever adjustment barrel so that the slots - Schwinn Easy Steer | Schwinn Owner's Manual - Page 38
Barrel end Single cable casing Cable adjuster Cable spliƩer Upper cable (short casing) Minimum 1mm (1/32") Bearing Upper plate Football ends Lower plate Lower cable Upper cable (long casing) AdjusƟng barrel Locknut Set for maximum travel Keyed washer Minimum 1mm (1/32") Locknut Lower cable © - Schwinn Easy Steer | Schwinn Owner's Manual - Page 39
Cable adjusƟng barrel Handlebar Noodle Grip Brake lever Cable head Ferrule 3.31 Linear Pull Brakes If the brake cable is not connected at the brake lever, slide the head of the brake cable into the brake lever per the diagram, and thread the cable through the slot in the brake lever so the cable - Schwinn Easy Steer | Schwinn Owner's Manual - Page 40
should move evenly when the brake lever is squeezed, and when released, the wheel should rotate with no brake shoe contact. (Fig. 3.35) ASSEMBLY Brake Be sure that brake pads return to a centered position by spinning the wheel and listening for the brake pad rubbing the rim on either side. Readjust - Schwinn Easy Steer | Schwinn Owner's Manual - Page 41
Cable adjusƟng barrel Handlebar Grip Brake lever Cable head Ferrule Disc Brake If the brake cable is not connected at the brake lever, line up brake barrel slots with brake lever slot before installing the cable. Then slide the head of the brake cable into the brake lever per the diagram, and - Schwinn Easy Steer | Schwinn Owner's Manual - Page 42
that there is about 1/32 of an inch of 3.39 clearance on either side of the disc rotor. Spin the front wheel and listen for any rubbing noise or . Be sure that brake pads return to a centered position by spinning the wheel and listening for the brake pad rubbing the rotor on either side. Readjust - Schwinn Easy Steer | Schwinn Owner's Manual - Page 43
-clockwise will tighten cable tension and direct the chain towards the wheel. Shift the rear shifter to the gear one and place the chain on the largest cog. Adjust the Low limit screw in quarter turn increments until the guide pulley and the largest cog are aligned vertically. Again, shift through - Schwinn Easy Steer | Schwinn Owner's Manual - Page 44
Cable anchor bolt Low adjusƟng screw Front Derailleur (Fig. 3.44) Shift both shifters to the smallest number indicated and place the chain on the corresponding cog and chainwheel. Disconnect the front derailleur cable from the cable anchor bolt. Check the position of the front derailleur; it - Schwinn Easy Steer | Schwinn Owner's Manual - Page 45
(see Fig. 3.46). Identify the mounting system used on your bicycle and follow the given instructions for that particular type of mounting system. (Fig. 3.45) Caliper Brake Mounting System First remove the front wheel from your bicycle. Remove the hex nut from the caliper brake bolt on the rear of - Schwinn Easy Steer | Schwinn Owner's Manual - Page 46
flat brace with stabilizer. Determine which brace was included with your bicycle and follow the given instructions for that particular brace. 3.47 C-Shape Brace Remove the outer axle nut and washer from the rear wheel axle. Place the brace stabilizer washer onto the axle and align the washer so that - Schwinn Easy Steer | Schwinn Owner's Manual - Page 47
er axle Flat w heel bra ce It is very important to check the training wheel connection to the bicycle. Failure to properly tighten may cause the training wheel to dislodge. Please contact Pacific Cycle Service with any questions. Brace stabilizer washer Axle nut Remove the outer axle nut - Schwinn Easy Steer | Schwinn Owner's Manual - Page 48
wheel axle nuts or the quick release mechanism securely. Failure to do this may cause the front/rear wheel allow you to pinpoint any trouble areas. If you encounter any problems, refer to the appropriate riding. Service your bicycle regularly by referring to the relevant sections of this manual, OR - Schwinn Easy Steer | Schwinn Owner's Manual - Page 49
on regular maintenance tasks. The following schedules are a useful guide and by referring to Part 5 of this manual, you should be able to accomplish most tasks. If you Weekly Monthly Every Six Months Yearly Chain Derailleur wheels Derailleurs Brake calipers Brake levers Shift levers Freewheel - Schwinn Easy Steer | Schwinn Owner's Manual - Page 50
wheels are kept in top condition. Properly maintaining your bicycle's wheels will help braking performance and stability when riding. Be aware of the following potential problems tires. It is not recommended to use a gas station service pump to inflate bicycle tires. These pumps put out a high - Schwinn Easy Steer | Schwinn Owner's Manual - Page 51
leaks and patch using a tube repair kit, carefully following the repair kit instructions, or replace the tube. NOTE: Ensure that the replacement tube size matches tire air pressure gauge to check. 16. Replace the wheel into the frame checking that all gears, brakes, axle nuts or quick - Schwinn Easy Steer | Schwinn Owner's Manual - Page 52
Have a qualified bicycle mechanic perform the adjustment if you have any doubts. (Fig. 4.4) 1. Check to make sure neither locknut is loose. 2. To adjust, remove wheel from bicycle and loosen the locknut on one side of the hub while holding the bearing cone on the same side with a cone wrench - Schwinn Easy Steer | Schwinn Owner's Manual - Page 53
Usable brake shoe Brakes Never ride a bicycle unless the brakes are functioning properly. The correct adjustment and operation of your bicycle's brakes is extremely important for safe operation. Brakes should be checked for effective operation before every ride. Frequent checking of adjustment - Schwinn Easy Steer | Schwinn Owner's Manual - Page 54
The drivetrain of a bicycle refers to all parts that transmit power to the rear wheel including the pedals, chain, chainwheel, crank set, and freewheel. 4.8 Pedals inspection Pedals beyond the scope of this manual and further assistance should be sought from a specialist. 4.9 ©2010 53 - Schwinn Easy Steer | Schwinn Owner's Manual - Page 55
Note: The right and left pedals of a bicycle each have a different thread and are not interchangeable. Never force a pedal into the incorrect crank arm. The right pedal, which attaches to the chainwheel side, is marked 'R' on the end of the axle, and screws in with a clockwise thread. The left pedal - Schwinn Easy Steer | Schwinn Owner's Manual - Page 56
manual for further information. Several specialized tools are needed for disassembly and maintenance of 3 piece cranks. Do not attempt service Fig.4.11). If the chain can be moved more than 10mm, the rear wheel should be moved back until proper chain tension is achieved. • Pull up - Schwinn Easy Steer | Schwinn Owner's Manual - Page 57
: 1. Loosen the rear axle nuts (and coaster brake arm clip if fitted) and move the wheel forward to loosen, or backward to tighten, in the frame. 2. When correctly adjusted, the chain replacement. Such action is beyond the scope of this manual and you should consult a specialist. (Fig. 4.13) 4.13 - Schwinn Easy Steer | Schwinn Owner's Manual - Page 58
care to wipe off any excess. Coaster Brake Hub Many BMX style and other children's bicycles are fitted with a coaster hub brake in the rear wheel. This type of brake offers the advantages of reliability and easy operation. The brake is operated by applying back pedal pressure and allows the rider - Schwinn Easy Steer | Schwinn Owner's Manual - Page 59
Guide broken strands and any damage to the cable housing. If you find any problems, the cables may need replacing before you ride. (Fig. 4.15 - The low limit screw determines how far the rear derailleur will travel toward the wheel of the bicycle, while the High limit screw determines how far the cage - Schwinn Easy Steer | Schwinn Owner's Manual - Page 60
enable the chain to move towards the wheel. 5. Shift through the gears ensuring each gear desired positioning. Please refer to the troubleshooting section for more assistance. Adjustment - to the bike. If you are experiencing problems shifting between gears, use the barrel adjuster to - Schwinn Easy Steer | Schwinn Owner's Manual - Page 61
the connections are made properly. (Please refer to p. 29-30 for the appropriate assembly instructions.) Reflectors (bicycles over 16") Your bicycle is supplied with one front (white), one rear (red), two wheel (white), and four pedal (orange) reflectors. These are an important safety and legal - Schwinn Easy Steer | Schwinn Owner's Manual - Page 62
Problem Possible Cause Gear shifts not working properly • Derailleur cables sticking/ stretched/damaged • Front or rear derailleur not adjusted properly • Indexed shifting not adjusted properly Slipping - Schwinn Easy Steer | Schwinn Owner's Manual - Page 63
/binding • Adjust bearings • Adjust bearings • Adjust chain line • Clean and lubricate jockey wheels • Freewheel internal pawl pins are jammed • Lubricate. If problem persists, replace freewheel • Brake pads worn down • Brake pads/rim greasy, wet or dirty • Brake cables are binding/ stretched - Schwinn Easy Steer | Schwinn Owner's Manual - Page 64
Problem Wobbling wheel Steering not accurate Frequent punctures Possible Cause Remedy • Axle broken • Wheel out of true • Hub comes loose • Headset binding • Hub bearings collapsed • QR mechanism loose • Replace axle • True wheel • Adjust hub bearings • Adjust headset • Replace bearings • - Schwinn Easy Steer | Schwinn Owner's Manual - Page 65
sales receipt for any possible warranty claims. Your Name: Address: Date Purchased: Place of Purchase: Model & Brand Information: Wheel Size: Color: Serial Number: Se rvice sƟcker loc aƟon (Opposite side of the serial number) Model #: WARRANTY 64 ©2010 - Schwinn Easy Steer | Schwinn Owner's Manual - Page 66
by an authorized dealer for indications of potential problems, inappropriate use or abuse. These are important 1. Your bicycle has been designed for general transportation and recreational use, but has not been properly, and subsequent normal maintenance services and adjustments necessary to keep the - Schwinn Easy Steer | Schwinn Owner's Manual - Page 67
4902 Hammersley Road Madison, WI 53711 Service: 1-800-626-2811 www.pacific-cycle.com ©2010
-
 1
1 -
 2
2 -
 3
3 -
 4
4 -
 5
5 -
 6
6 -
 7
7 -
8
-
9
-
10
-
11
-
12
-
13
-
14
-
15
-
16
-
17
-
18
-
19
-
20
-
21
-
22
-
23
-
24
-
25
-
26
-
27
-
28
-
29
-
30
-
31
-
32
-
33
-
34
-
35
-
36
-
37
-
38
-
39
-
40
-
41
-
42
-
43
-
44
-
45
-
46
-
47
-
48
-
49
-
50
-
51
-
52
-
53
-
54
-
55
-
56
-
57
-
58
-
59
-
60
-
61
-
62
-
63
-
64
-
65
-
66
-
67
 |
 |

®
THIS MANUAL CONTAINS IMPORTANT SAFETY, PERFORMANCE AND MAINTENANCE
INFORMATION. READ THE MANUAL BEFORE TAKING YOUR FIRST RIDE ON YOUR NEW
BICYCLE, AND KEEP THE MANUAL HANDY FOR FUTURE REFERENCE.