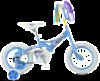
Schwinn Jules Schwinn Owner's Manual
Schwinn Jules Manual
 |
View all Schwinn Jules manuals
Add to My Manuals
Save this manual to your list of manuals |
Schwinn Jules manual content summary:
- Schwinn Jules | Schwinn Owner's Manual - Page 1
® THIS MANUAL CONTAINS IMPORTANT SAFETY, PERFORMANCE AND MAINTENANCE INFORMATION. READ THE MANUAL BEFORE TAKING YOUR FIRST RIDE ON YOUR NEW BICYCLE, AND KEEP THE MANUAL HANDY FOR FUTURE REFERENCE. - Schwinn Jules | Schwinn Owner's Manual - Page 2
CORRCoErreCct T FITTING Make sure your helmet covers your forehead Correct INCORIncRorrEectCT FITTING Forehead is exposed and vulnerable to serious injury ©2010 - Schwinn Jules | Schwinn Owner's Manual - Page 3
Personal Care from 2 ©2010 Congratulations on your new purchase! Our Service Department is dedicated to your satisfaction with Pacific Cycle and its products. For questions regarding performance, assembly, operation, parts or returns, contact the experts at - Schwinn Jules | Schwinn Owner's Manual - Page 4
manual is only a guide to assist you and is not a complete or comprehensive manual missing parts, service questions, operating advice, and/or assembly questions. SERVICE CALL TOLL FREE Service 1-800-626-2811 P.O. Box 344 4730 E. Radio Tower Lane Olney, IL 62450 www.pacific-cycle.com Service - Schwinn Jules | Schwinn Owner's Manual - Page 5
even under the best of circumstances. Proper maintenance of your bicycle is your responsibility as it helps reduce the risk of injury. This manual contains many "Warnings" and "Cautions" concerning the consequences of failure to maintain or inspect your bicycle. Many of the warnings and cautions say - Schwinn Jules | Schwinn Owner's Manual - Page 6
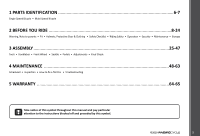
• Pedals • Adjustments • Final Check 4 MAINTENANCE ...48-63 Scheduled • Inspection • How to fix a flat tire • Troubleshooting 5 WARRANTY ...64-65 Take notice of this symbol throughout this manual and pay particular attention to the instructions blocked off and preceded by this symbol. ©2010 5 - Schwinn Jules | Schwinn Owner's Manual - Page 7
PARTS IDENTIFICATION SINGLE SPEED BICYCLE Get to know the parts of your bicycle. This will help with assembly, maintenance, and troubleshooting. Single speed bicycles vary greatly. Your model may have additional accessories such as fenders, bags, carriers, etc. Note that smaller children's bicycles - Schwinn Jules | Schwinn Owner's Manual - Page 8
PARTS IDENTIFICATION MULTI SPEED BICYCLE Get to know the parts of your bicycle. This will help with assembly, maintenance, and troubleshooting. Multi speed bicycles vary greatly. Your model may have additional accessories such as fenders, bags, carriers, etc. Gear control cable Freewheel Wheel refl - Schwinn Jules | Schwinn Owner's Manual - Page 9
SIZING GUIDE taller as you go up in size. Bike Wheel Size 12 inch wheel 16 inch wheel 18 inch wheel 20 inch wheel 24 inch wheel 2.1 Your Approx adjustment areas of this manual for seat and handlebar adjustments (p. 26 and p. 30) *Note that some bicycles such as folding bicycles may have smaller - Schwinn Jules | Schwinn Owner's Manual - Page 10
BEFORE YOU RIDE RIDING POSITION Arms not overextended Handlebar stem height about the same as seat height Saddle Height In order to obtain the most comfortable riding position and offer the best possible pedaling efficiency, the seat height should be set correctly in relation to the rider's - Schwinn Jules | Schwinn Owner's Manual - Page 11
position. binder bolt Threadless headsets and clamp-on stems are not adjustable. Please refer Maximum height/ to assembly-adjustments (p. 27) for instructions on installation. minimum inserƟon mark The stem's "Minimum Insertion" mark must not be visible above the top of the headset. If - Schwinn Jules | Schwinn Owner's Manual - Page 12
BEFORE YOU RIDE HELMETS, PROTECTIVE GEAR & CLOTHING Helmets A WORD TO PARENTS REGARDING CHILDREN AND HELMETS: and to comply with all applicable laws, including properly equipping yourself and your bike as the law requires. Reflectors are important safety devices which are designed as an - Schwinn Jules | Schwinn Owner's Manual - Page 13
weather keeping in mind that when cycling, the wind can be colder than just walking or standing. Reflective clothing is always recommended for cycling. Avoid wearing all black, or dark clothes. A brightly colored jacket or shirt is a great way to help motorists and others see you. Choosing to - Schwinn Jules | Schwinn Owner's Manual - Page 14
BEFORE YOU RIDE SAFETY CHECKLIST Before every ride, it is important to carry out the following safety checks: Brakes • Ensure front and rear brakes work properly. • Ensure brake shoe pads are not overly worn and are correctly positioned in relation to the rims. • Ensure brake control cables are - Schwinn Jules | Schwinn Owner's Manual - Page 15
are bent or broken, they should be replaced. Accessories • Ensure that all reflectors are properly fitted and not obscured. • Ensure all other fittings on the bike are properly and securely fastened, and functioning. • Ensure the rider is wearing a properly fitted helmet. - Schwinn Jules | Schwinn Owner's Manual - Page 16
. Front & rear reflectors should be mounted so that they are within 5 degrees of vertical (when looking at them from the side of the bike, while the bike is on level ground). The front reflector should aim forward (when viewed from above), and the rear reflector should aim straight back (when - Schwinn Jules | Schwinn Owner's Manual - Page 17
BEFORE YOU RIDE RIDING SAFETY General Rules • When riding obey the same road laws as all other road vehicles, including giving way to pedestrians, and stopping at red lights and stop signs. For further information, contact the Road Traffic Authority in your State. • Ride predictably and in a - Schwinn Jules | Schwinn Owner's Manual - Page 18
additional caution. • Be more visible on the road. • Wear reflective clothing and use safety lights. • Pot holes and slippery surfaces such as of correctly positioned and clean reflectors. • Refer to p. 15 of this manual. • Use a properly functioning lighting set comprising of a white front lamp - Schwinn Jules | Schwinn Owner's Manual - Page 19
BEFORE YOU RIDE Rules for Children To avoid accidents, teach children good riding skills with an emphasis on safety from an early age. Children should be supervised by an adult. 1. Many states require that children wear a helmet while cycling. Always wear a properly fitted helmet. 2. Do not play in - Schwinn Jules | Schwinn Owner's Manual - Page 20
rear brake simultaneously, and avoid locking up the front wheel, as this can cause a loss of steering control, and cause a crash. See hand operated brakes (p. 20) for more detail. ©2010 19 - Schwinn Jules | Schwinn Owner's Manual - Page 21
weight will want to shift forward, and the wheels will want to stop. See Assembly and Maintenance for further information on brake adjustment. (Fig. 2.12) 20 ©2010 - Schwinn Jules | Schwinn Owner's Manual - Page 22
geared bicycles, it is recommended to STOP pedaling while you shift gears. The bike may be sitting still or rolling to shift. Shifter designs vary, you will should not be necessary when riding, and invites the possibility of clothing being caught in the chain, and should be avoided. See Assembly - Schwinn Jules | Schwinn Owner's Manual - Page 23
de railleur Front derailleur Derailleur control cable Guide pulley Front Crank arm chainwheels Pedal 2.15 damage to the system, and can be dangerous, as the chain may jam and cause the bike to become unstable. (Fig. 2.15) Avoid back pedaling on any bicycle with derailleurs. Backpedaling - Schwinn Jules | Schwinn Owner's Manual - Page 24
hard while shifting can cause the chain to skip and not engage the appropriate gear. Backpedaling should be avoided on derailleur bikes because the chain can jam and cause the bike to become unstable. (Fig. 2.17) BEFORE YOU RIDE 2.17 SECURITY You just bought a new bicycle! Don't lose it. It is - Schwinn Jules | Schwinn Owner's Manual - Page 25
cloth soaked in a mild detergent mixture. Dry with a cloth and polish with car or furniture wax. Use soap and water to clean plastic parts and rubber tires. Chrome plated bikes as required. (Refer to Parts 4 and 5 of this manual for further details). STORAGE • Keep your bicycle in a dry - Schwinn Jules | Schwinn Owner's Manual - Page 26
pertaining to the assembly of your bicycle, call the service line direct at: SERVICE & TECHNICAL SUPPORT CALL TOLL FREE 1.800.626.2811 Monday - Friday recommend that you review the complete assembly instructions and perform checks specified in this manual before riding. We recommend that you consult - Schwinn Jules | Schwinn Owner's Manual - Page 27
ASSEMBLY 3.3 Incorrect 26 ©2010 3.2 3.4 Correct GETTING STARTED Open the carton from the top and remove the bicycle. Remove the straps and protective wrapping from the bicycle. Inspect the bicycle and all accessories and parts for possible shortages. It is recommended that the threads and all - Schwinn Jules | Schwinn Owner's Manual - Page 28
inserted at least the "Minimum Insertion" mark, it is possible to over-tighten the stem bolt and damage the fork steerer tube. If these instructions are not followed, it could cause an unsafe condition and risk injury to the rider. Check steering tightness prior to riding by straddling the front - Schwinn Jules | Schwinn Owner's Manual - Page 29
Retaining washer Axle Hub Axle nut Fork drop out Cone nuts FRONT WHEEL There are two types of front wheel hubs; Nutted and quick release. Step retaining washer 3.9 Nutted Front Wheels Loosen the axle nuts on the front wheel. If there is a washer inside of the axle nut, it belongs outside of - Schwinn Jules | Schwinn Owner's Manual - Page 30
release skewer, remove outer spring and slide the skewer through the front wheel axle so that the handle is on the left side of the bike (the side opposite the chain). (Fig. 3.11) 3. Install spring and then start to thread the lock nut back onto the skewer, but do not Close - Schwinn Jules | Schwinn Owner's Manual - Page 31
SADDLE ASSEMBLY The seat post must be inserted so that the minimum insertion mark cannot be seen. The quick release mechanism must be tightened securely to prevent a sudden shift of the seat when riding. Failure to do this may cause loss of bicycle control. The saddle assembly should be - Schwinn Jules | Schwinn Owner's Manual - Page 32
PEDALS AND CRANKS Attachment of an incorrect pedal into a crank arm can strip pedal threads and cause irreparable damage. Before your first ride, please check to ensure your pedals are attached correctly. Look for the letters "R" for right, and "L" for left, stamped on each pedal spindle. - Schwinn Jules | Schwinn Owner's Manual - Page 33
loss of directional control or front pitch over. Grip Brake lever Determine which type of brake your bike is equipped with and refer to the appropriate assembly instructions below. *Additionally some freestyle models may be equipped with a "cable detangler". See assembly steps for cable detangler - Schwinn Jules | Schwinn Owner's Manual - Page 34
or frame on either side. If it is not even, loosen wheel axle nuts and center the wheel, then proceed to centering the brake. (Fig. 3.20) 3.20 If the brake is not centered; loosen the nut on the back of the brake. Squeeze the brake and hold the brake lever closed, while - Schwinn Jules | Schwinn Owner's Manual - Page 35
FRONT Brake cable Cable anchor bolt Housing barrel Cable end cap To tension spring Spring tension nut 5mm Allen bolt Brake pads To tension spring 3.23 REAR A Brake cable Straddle cable Cable anchor Cable carrier 20mm Hook cable end U-Brake If the brake cable is not connected at the brake - Schwinn Jules | Schwinn Owner's Manual - Page 36
ASSEMBLY Brake pad aligned with the rim surface Pad and rim should be parallel Check the brake pads to be sure they are square to the rim, and do not contact the tire when the brake is applied. Adjust brake pads if needed. Then squeeze and release the brake several times squeezing as hard as you - Schwinn Jules | Schwinn Owner's Manual - Page 37
adjust the upper barrel adjusters until the flop is minimal or none at all. Now follow the brake adjustments for the type of brake the bike is equipped with (Caliper or U brake). ASSEMBLY 36 ©2010 - Schwinn Jules | Schwinn Owner's Manual - Page 38
Barrel end Single cable casing Cable adjuster Cable spliƩer Upper cable (short casing) Minimum 1mm (1/32") Bearing Upper plate Football ends Lower plate Lower cable Upper cable (long casing) AdjusƟng barrel Locknut Set for maximum travel Keyed washer Minimum 1mm (1/32") Locknut Lower cable © - Schwinn Jules | Schwinn Owner's Manual - Page 39
Cable adjusƟng barrel Handlebar Noodle Grip Brake lever Cable head Ferrule 3.31 Linear Pull Brakes If the brake cable is not connected at the brake lever, slide the head of the brake cable into the brake lever per the diagram, and thread the cable through the slot in the brake lever so the cable - Schwinn Jules | Schwinn Owner's Manual - Page 40
Brake pad aligned with the rim surface Pad and rim should be parallel 1-2 mm Correct Incorrect 3.33 Check the brake pads to be sure they are aligned with the rim, and that they do not contact the tire when the brake is applied. Adjust brake pads if needed. Then squeeze and release the brake - Schwinn Jules | Schwinn Owner's Manual - Page 41
Cable adjusƟng barrel Handlebar Grip Brake lever Cable head Ferrule Disc Brake If the brake cable is not connected at the brake lever, line up brake barrel slots with brake lever slot before installing the cable. Then slide the head of the brake cable into the brake lever per the diagram, and - Schwinn Jules | Schwinn Owner's Manual - Page 42
Adjust brake caliper so disc is centered between brake pads Centering brake If you squeeze the brake and one side moves more than the other, or one side does not move at all, then the brake is not centered, or the wheel is not centered. First determine if the wheel is centered. Look at the gap - Schwinn Jules | Schwinn Owner's Manual - Page 43
on the smallest sprocket. Adjust the High limit screw so the guide pulley and the smallest sprocket are lined up vertically. Reconnect the cog. Adjust the Low limit screw in quarter turn increments until the guide pulley and the largest cog are aligned vertically. Again, shift through each - Schwinn Jules | Schwinn Owner's Manual - Page 44
Cable anchor bolt Low adjusƟng screw Front Derailleur (Fig. 3.44) Shift both shifters to the smallest number indicated and place the chain on the corresponding cog and chainwheel. Disconnect the front derailleur cable from the cable anchor bolt. Check the position of the front derailleur; it - Schwinn Jules | Schwinn Owner's Manual - Page 45
), and the second is the 10mm nut and bolt system (see Fig. 3.46). Identify the mounting system used on your bicycle and follow the given instructions for that particular type of mounting system. (Fig. 3.45) Caliper Brake Mounting System First remove the front wheel from your bicycle. Remove the hex - Schwinn Jules | Schwinn Owner's Manual - Page 46
the c-shape brace, the flat brace and the flat brace with stabilizer. Determine which brace was included with your bicycle and follow the given instructions for that particular brace. 3.47 C-Shape Brace Remove the outer axle nut and washer from the rear wheel axle. Place the brace stabilizer washer - Schwinn Jules | Schwinn Owner's Manual - Page 47
may cause the training wheel to dislodge. Please contact Pacific Cycle Service with any questions. Brace stabilizer washer Axle nut Remove the outer axle 3.50) NOTICE: Not all bicycles will accept training wheels. If your bike did not come stock with training wheels, please call Pacific Cycle to - Schwinn Jules | Schwinn Owner's Manual - Page 48
are correct and will allow you to pinpoint any trouble areas. If you encounter any problems, refer to the appropriate section and make any necessary ensure many years of happy riding. Service your bicycle regularly by referring to the relevant sections of this manual, OR take it to a professional - Schwinn Jules | Schwinn Owner's Manual - Page 49
Correct routine maintenance of your new bike will ensure: Smooth running - Longer lasting components - Safer little time on regular maintenance tasks. The following schedules are a useful guide and by referring to Part 5 of this manual, you should be able to accomplish most tasks. If you require - Schwinn Jules | Schwinn Owner's Manual - Page 50
riding. Be aware of the following potential problems: • Dirty or greasy rims. CAUTION: tires. It is not recommended to use a gas station service pump to inflate bicycle tires. These pumps put out a both sides. To check, pump the tire up to 20 psi, then remove the pump. Spin the wheel and - Schwinn Jules | Schwinn Owner's Manual - Page 51
4. Remove the tube, leaving one tire bead on the rim. 5. Locate the leaks and patch using a tube repair kit, carefully following the repair kit instructions, or replace the tube. NOTE: Ensure that the replacement tube size matches the size stated on the tire sidewall and that the valve is the - Schwinn Jules | Schwinn Owner's Manual - Page 52
stop of the bicycle. It is recommended that the cables and housing are replaced at least every riding season to prolong the life of your bike. (Fig. 4.5) Do not ride a bicycle that is not operating properly. Good cable Kink Fray MAINTENANCE 4.5 ©2010 51 - Schwinn Jules | Schwinn Owner's Manual - Page 53
months. Squeeze each brake lever to make sure they operate freely and that the brake pads press hard enough on the rims to stop the bike. There should be about 1mm - 2mm clearance between each pad and the rim when the brakes are not applied. The brake pads must be properly - Schwinn Jules | Schwinn Owner's Manual - Page 54
every six to twelve months. Because of the wide variety of pedal types and their internal complexity, disassembly procedures are beyond the scope of this manual and further assistance should be sought from a specialist. 4.9 ©2010 53 - Schwinn Jules | Schwinn Owner's Manual - Page 55
wrong thread size into a bicycle crank. Crank Set The crank set refers to the bottom bracket axle and bearings, the crank arms, and chainrings. Your bike may be fitted with either a one piece crank, where the crank arms are connected as a single piece, or 3 piece cranks, where the crank arms bolt - Schwinn Jules | Schwinn Owner's Manual - Page 56
crank adjustments or repairs. Or refer to a detailed bicycle repair manual for further information. Several specialized tools are needed for disassembly and maintenance of 3 piece cranks. Do not attempt service without access to the proper tools. Straightedge Chain 4.11 Do not - Schwinn Jules | Schwinn Owner's Manual - Page 57
hear a grinding noise or the freewheel stops suddenly after spinning it, it may need adjustment or replacement. Such action is beyond the scope of this manual and you should consult a specialist. (Fig. 4.13) 4.13 - Schwinn Jules | Schwinn Owner's Manual - Page 58
Brake arm clip Brake arm Spocket Lubrication Remove any accumulated dirt from the freewheel with a brush and a degreaser. Disassembly of the freewheel is a complicated procedure requiring special tools, and should be left to a specialist. Apply oil to the freewheel whenever you lubricate the - Schwinn Jules | Schwinn Owner's Manual - Page 59
Freewheel MAINTENANCE Guide Pulley Tension Pulley High gear adjustment screw Low gear adjustment of rust, fraying, kinks, broken strands and any damage to the cable housing. If you find any problems, the cables may need replacing before you ride. (Fig. 4.15 - see previous page) Lubrication All the - Schwinn Jules | Schwinn Owner's Manual - Page 60
adjustments to achieve the desired positioning. Please refer to the troubleshooting section for more assistance. Adjustment - Front Derailleur (Fig. the bike, while turning counter-clockwise will increase tension and bring the cage closer to the bike. If you are experiencing problems shifting - Schwinn Jules | Schwinn Owner's Manual - Page 61
ensure the connections are made properly. (Please refer to p. 29-30 for the appropriate assembly instructions.) Reflectors (bicycles over 16") Your bicycle is supplied with one front (white), one rear ( and be sure all fasteners are tight. (Fig. 4.20, 4.21) 4.20 MAINTENANCE 4.21 60 ©2010 - Schwinn Jules | Schwinn Owner's Manual - Page 62
Problem Possible Cause Gear shifts not working properly • Derailleur cables sticking/ stretched/damaged • Front or rear derailleur not adjusted properly • Indexed shifting not adjusted properly Slipping - Schwinn Jules | Schwinn Owner's Manual - Page 63
jockey wheels • Freewheel internal pawl pins are jammed • Lubricate. If problem persists, replace freewheel • Brake pads worn down • Brake pads/rim greasy in head tube • True wheel or take to a bike shop for repair • Tighten bolts • Center brakes and/or adjust brake pads toe-in • - Schwinn Jules | Schwinn Owner's Manual - Page 64
Problem Wobbling wheel Steering not accurate Frequent punctures Possible Cause Remedy • Axle binding • Front forks or frame bent • Align wheels correctly • Adjust/tighten headset • Take bike to a bike shop for possible frame realignment • Inner tube old or faulty • Tire tread/casing worn • - Schwinn Jules | Schwinn Owner's Manual - Page 65
your purchase. *Please retain your sales receipt for any possible warranty claims. Your Name: Address: Date Purchased: Place of Purchase: Model & Brand Information: Wheel Size: number) Model #: WARRANTY 64 ©2010 Serial number locaƟon (Bike shown upside down) Date Code: - Schwinn Jules | Schwinn Owner's Manual - Page 66
model number, date received and the name of the store from which the bike was received, at the address given by an authorized dealer for indications of potential problems, inappropriate use or abuse. These are properly, and subsequent normal maintenance services and adjustments necessary to keep the - Schwinn Jules | Schwinn Owner's Manual - Page 67
4902 Hammersley Road Madison, WI 53711 Service: 1-800-626-2811 www.pacific-cycle.com ©2010
-
 1
1 -
 2
2 -
 3
3 -
 4
4 -
 5
5 -
 6
6 -
 7
7 -
8
-
9
-
10
-
11
-
12
-
13
-
14
-
15
-
16
-
17
-
18
-
19
-
20
-
21
-
22
-
23
-
24
-
25
-
26
-
27
-
28
-
29
-
30
-
31
-
32
-
33
-
34
-
35
-
36
-
37
-
38
-
39
-
40
-
41
-
42
-
43
-
44
-
45
-
46
-
47
-
48
-
49
-
50
-
51
-
52
-
53
-
54
-
55
-
56
-
57
-
58
-
59
-
60
-
61
-
62
-
63
-
64
-
65
-
66
-
67
 |
 |

®
THIS MANUAL CONTAINS IMPORTANT SAFETY, PERFORMANCE AND MAINTENANCE
INFORMATION. READ THE MANUAL BEFORE TAKING YOUR FIRST RIDE ON YOUR NEW
BICYCLE, AND KEEP THE MANUAL HANDY FOR FUTURE REFERENCE.