Schwinn Network 3.0 Schwinn Owner's Manual
Schwinn Network 3.0 Manual
 |
View all Schwinn Network 3.0 manuals
Add to My Manuals
Save this manual to your list of manuals |
Schwinn Network 3.0 manual content summary:
- Schwinn Network 3.0 | Schwinn Owner's Manual - Page 1
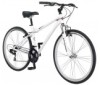
® THIS MANUAL CONTAINS IMPORTANT SAFETY, PERFORMANCE AND MAINTENANCE INFORMATION. READ THE MANUAL BEFORE TAKING YOUR FIRST RIDE ON YOUR NEW BICYCLE, AND KEEP THE MANUAL HANDY FOR FUTURE REFERENCE. - Schwinn Network 3.0 | Schwinn Owner's Manual - Page 2
CORRCoErreCct T FITTING Make sure your helmet covers your forehead Correct INCORIncRorrEectCT FITTING Forehead is exposed and vulnerable to serious injury ©2010 - Schwinn Network 3.0 | Schwinn Owner's Manual - Page 3
Personal Care from 2 ©2010 Congratulations on your new purchase! Our Service Department is dedicated to your satisfaction with Pacific Cycle and its products. For questions regarding performance, assembly, operation, parts or returns, contact the experts at Pacific Cycle directly by calling toll - Schwinn Network 3.0 | Schwinn Owner's Manual - Page 4
to properly assemble, repair, or maintain your bicycle. You will save time and the inconvenience of having to go back to the store if you choose to write or call us concerning missing parts, service questions, operating advice, and/or assembly questions. SERVICE CALL TOLL FREE 1.800.626.2811 Monday - Schwinn Network 3.0 | Schwinn Owner's Manual - Page 5
from cars, obstacles, and other cyclists. GENERAL WARNING Bicycling can be a hazardous activity even under the best of circumstances. Proper maintenance of your bicycle is your responsibility as it helps reduce the risk of injury. This manual contains many "Warnings" and "Cautions" concerning the - Schwinn Network 3.0 | Schwinn Owner's Manual - Page 6
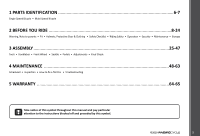
• Handlebar • Front Wheel • Saddle • Pedals • Adjustments • Final Check 4 MAINTENANCE ...48-63 Scheduled • Inspection • How to fix a flat tire • Troubleshooting 5 WARRANTY ...64-65 Take notice of this symbol throughout this manual and pay particular attention to the instructions blocked off and - Schwinn Network 3.0 | Schwinn Owner's Manual - Page 7
to know the parts of your bicycle. This will help with assembly, maintenance, and troubleshooting. Single speed bicycles vary greatly. Your model may have additional accessories such as fenders, bags, carriers, etc. Note that smaller children's bicycles also contain training wheels. Seat Rear re - Schwinn Network 3.0 | Schwinn Owner's Manual - Page 8
IDENTIFICATION MULTI SPEED BICYCLE Get to know the parts of your bicycle. This will help with assembly, maintenance, and troubleshooting. Multi speed bicycles vary greatly. Your model may have additional accessories such as fenders, bags, carriers, etc. Gear control cable Freewheel Wheel reflector - Schwinn Network 3.0 | Schwinn Owner's Manual - Page 9
although you may be able to straddle the frame, you must also be able to reach the handlebars. Bicycles get longer as well as taller as you go up in size. Bike Wheel Size 12 inch wheel 16 inch wheel 18 inch wheel 20 inch wheel 24 inch wheel 2.1 Your Approx. Height 28 - 38 inches tall 38 - Schwinn Network 3.0 | Schwinn Owner's Manual - Page 10
offer the best possible pedaling efficiency frame may slighKtnleyebent break, which could cause you to lose control and fall. Prior to your first ride, be sure to tighten the saddle adjusting mechanism properly. A loose saddle clamp or seat post binder can cause damage to the bicycle - Schwinn Network 3.0 | Schwinn Owner's Manual - Page 11
Please refer Maximum height/ to assembly-adjustments (p. 27) for instructions on installation. minimum inserƟon mark The stem's "Minimum Insertion wedge cause you to lose control and fall. Place the front wheel of the bicycle between your legs and attempt to twist the handlebar/stem assembly - Schwinn Network 3.0 | Schwinn Owner's Manual - Page 12
properly equipping yourself and your bike as the law requires. Reflectors are important safety devices which are designed as an integral part of your bicycle. Federal regulations require every bicycle (over 16") to be equipped with front, rear, wheel, and pedal reflectors. These reflectors - Schwinn Network 3.0 | Schwinn Owner's Manual - Page 13
, the riders should always consider the clothing they will wear. Any loose clothing parts or strings can get caught in a bicycles moving parts and cause an accident. Be sure there are no loose cords, strings, over sized cuffs or pant legs. Loose pants should be tied or tucked into a sock. A leg - Schwinn Network 3.0 | Schwinn Owner's Manual - Page 14
bulges or excessive wear. • Ensure rims run true and have no obvious wobbles or kinks. • Ensure all wheel spokes are tight and not broken. • Check that axle nuts are tight. If your bicycle is fitted with quick release axles, make sure locking levers are correctly tensioned and in the fully closed - Schwinn Network 3.0 | Schwinn Owner's Manual - Page 15
or rattling. • Check headset, wheel bearings, pedal bearings and bottom bracket frame and fork are not bent or broken. • If either are bent or broken, they should be replaced. Accessories • Ensure that all reflectors are properly fitted and not obscured. • Ensure all other fittings on the bike - Schwinn Network 3.0 | Schwinn Owner's Manual - Page 16
unattended by an adult. All other bicycles are supplied with one front (white), one rear (red), two wheel (white), and four pedal (orange) degrees of vertical (when looking at them from the side of the bike, while the bike is on level ground). The front reflector should aim forward (when viewed - Schwinn Network 3.0 | Schwinn Owner's Manual - Page 17
. • Wear proper riding attire and avoid open toe shoes. • Don't carry packages or passengers that will interfere with your visibility or control of the bicycle. • Don't use items that may restrict your hearing. • Do not lock up the brakes. When braking, always apply the rear brake first, then the - Schwinn Network 3.0 | Schwinn Owner's Manual - Page 18
lights for night riding in addition to a full set of CPSC compatible reflectors. • Ensure bicycle is equipped with a full set of correctly positioned and clean reflectors. • Refer to p. 15 of this manual. • Use a properly functioning lighting set comprising of a white front lamp and a red rear lamp - Schwinn Network 3.0 | Schwinn Owner's Manual - Page 19
the handlebars, or your feet off the pedals when riding downhill. The Consumer Protection Safety Commission advises that the riding of small wheel diameter bicycles at excessive speeds can lead to instability and is not recommended. Children should be made aware of all possible riding hazards and - Schwinn Network 3.0 | Schwinn Owner's Manual - Page 20
models may have a combination of foot and hand operated brakes. It is OK to operate them at the same time or independently. However, if the bicycle is equipped with a front wheel hand brake, be careful to use front and rear brake simultaneously, and avoid locking up the front - Schwinn Network 3.0 | Schwinn Owner's Manual - Page 21
up; If the front brake is applied too quickly or too hard, the front wheel can stop turning resulting in a front pitch over or cause the bicycle to lose steering function leading to a crash. To best avoid this, apply the front and rear brakes simultaneously, while shifting your body - Schwinn Network 3.0 | Schwinn Owner's Manual - Page 22
) An internal gear system is one where the gears are housed within the rear hub of the bicycle. With internally geared bicycles, it is recommended to STOP pedaling while you shift gears. The bike may be sitting still or rolling to shift. Shifter designs vary, you will either twist or operate - Schwinn Network 3.0 | Schwinn Owner's Manual - Page 23
Guide pulley Front Crank arm chainwheels Pedal 2.15 External Gears (derailleur equipped bicycles) Derailleur equipped bicycles , as the chain may jam and cause the bike to become unstable. (Fig. 2.15) Avoid back pedaling on any bicycle with derailleurs. Backpedaling can derail the chain and - Schwinn Network 3.0 | Schwinn Owner's Manual - Page 24
if it is left unattended. Keep in mind that individual parts of a bicycle may be stolen. Most commonly, if you lock just a wheel or just the frame, other parts may be removed from the bicycle. Although it is impossible to lock all the parts, it is suggested to lock the major components if - Schwinn Network 3.0 | Schwinn Owner's Manual - Page 25
manual for further details). STORAGE • Keep your bicycle in a dry location away from the weather and the sun. Ultraviolet rays may cause paint to fade or rubber and plastic parts to crack. • Before storing your bicycle for a long period of time, clean and lubricate all components and wax the frame - Schwinn Network 3.0 | Schwinn Owner's Manual - Page 26
in this manual. If you have questions about your ability to properly assemble this unit, please consult a qualified specialist before riding. If you need replacement parts or have questions pertaining to the assembly of your bicycle, call the service line direct at: SERVICE & TECHNICAL SUPPORT CALL - Schwinn Network 3.0 | Schwinn Owner's Manual - Page 27
bicycle. Remove the straps and protective wrapping from the bicycle. Inspect the bicycle and all accessories and parts bicycle to face forward. Note that "forward" means that the wheel mounting slots are in the furthest forward position. So the wheel or cable stop on the frame. If they are twisted or - Schwinn Network 3.0 | Schwinn Owner's Manual - Page 28
disassemble the headset and lose any parts. Be sure that the end of fork assembly may fall out of the frame. Loosen the top cap of the wheel in installed, and 3.7 re-adjust. (Fig. 3.7) NOTE: Comfort Series bicycles the fork steerer tube. If these instructions are not followed, it could cause - Schwinn Network 3.0 | Schwinn Owner's Manual - Page 29
step fits into the key hole at the top of the wheel slot. Tighten the two outer axle nuts evenly; Tighten one side part way, then tighten the other side and repeat until both sides are tightened securely. Be sure that the wheel is centered between the fork legs. If it is off - Schwinn Network 3.0 | Schwinn Owner's Manual - Page 30
Wheels 1. Locate the quick release skewer from the small parts carton of your bicycle. Some tire tread patterns have a direction, so compare your front tire and rear tire of the bicycle through the front wheel axle so that the handle is on the left side of the bike (the side opposite - Schwinn Network 3.0 | Schwinn Owner's Manual - Page 31
, then close the quick release lever again. Be sure that the seat post is inserted far enough into the frame to hide the "Minimum insertion" mark on the seat post. Riding a bicycle with the seat post above this line is dangerous and can cause injury to the rider or damage to the - Schwinn Network 3.0 | Schwinn Owner's Manual - Page 32
). Tighten with a 15mm narrow open ended wrench. It is very important that you check the crank set for correct adjustment and tightness before riding your bicycle. 3.15 ASSEMBLY ©2010 31 - Schwinn Network 3.0 | Schwinn Owner's Manual - Page 33
of the front brake may cause front wheel to lock up resulting in loss of directional control or front pitch over. Grip Brake lever Determine which type of brake your bike is equipped with and refer to the appropriate assembly instructions below. *Additionally some freestyle models may be - Schwinn Network 3.0 | Schwinn Owner's Manual - Page 34
wheel is not centered. First determine if the wheel is centered. Look at the gap between the tire and the fork or frame on either side. If it is not even, loosen wheel axle nuts and center the wheel return to a centered position by spinning the wheel and listening for the brake pad rubbing - Schwinn Network 3.0 | Schwinn Owner's Manual - Page 35
wrench. To tension spring Spring tension nut 5mm Allen bolt To tension spring 3.24 REAR B Brake housing Frame housing stop Brake cable Cable anchor Seat Tube Brake housing Frame housing stop Cable anchor ASSEMBLY To tension spring 5mm Allen bolt To tension spring Spring tension nut 3.25 - Schwinn Network 3.0 | Schwinn Owner's Manual - Page 36
wheel is not centered. First determine if the wheel is centered. Look at the gap between the tire and the fork or frame on either side. If it is not even, loosen wheel axle nuts and center the wheel pads return to a centered position by spinning the wheel and listening for the brake pad rubbing the - Schwinn Network 3.0 | Schwinn Owner's Manual - Page 37
Cable Detangler Some freestyle bicycles are equipped with a lower cables until the flop is reduced. Sometimes both need to be adjusted. The best thing to do is to adjust the lower cables first until the bearing unit has of brake the bike is equipped with (Caliper or U brake). ASSEMBLY 36 ©2010 - Schwinn Network 3.0 | Schwinn Owner's Manual - Page 38
Barrel end Single cable casing Cable adjuster Cable spliƩer Upper cable (short casing) Minimum 1mm (1/32") Bearing Upper plate Football ends Lower plate Lower cable Upper cable (long casing) AdjusƟng barrel Locknut Set for maximum travel Keyed washer Minimum 1mm (1/32") Locknut Lower cable © - Schwinn Network 3.0 | Schwinn Owner's Manual - Page 39
Cable adjusƟng barrel Handlebar Noodle Grip Brake lever Cable head Ferrule 3.31 Linear Pull Brakes If the brake cable is not connected at the brake lever, slide the head of the brake cable into the brake lever per the diagram, and thread the cable through the slot in the brake lever so the cable - Schwinn Network 3.0 | Schwinn Owner's Manual - Page 40
, then the brake is not centered, or the wheel is not centered. First determine if the wheel is centered. Look at the gap between the tire and the fork or frame on either side. If it is not even, loosen wheel axle nuts and center the wheel, then proceed to 3.34 centering the brake. If - Schwinn Network 3.0 | Schwinn Owner's Manual - Page 41
Cable adjusƟng barrel Handlebar Grip Brake lever Cable head Ferrule Disc Brake If the brake cable is not connected at the brake lever, line up brake barrel slots with brake lever slot before installing the cable. Then slide the head of the brake cable into the brake lever per the diagram, and - Schwinn Network 3.0 | Schwinn Owner's Manual - Page 42
wheel is not centered. First determine if the wheel is centered. Look at the gap between the tire and the fork or frame on either side. If it is not even, loosen wheel axle nuts and center the wheel side of the disc rotor. Spin the front wheel and listen for any rubbing noise or excess friction - Schwinn Network 3.0 | Schwinn Owner's Manual - Page 43
-clockwise will tighten cable tension and direct the chain towards the wheel. Shift the rear shifter to the gear one and place the chain on the largest cog. Adjust the Low limit screw in quarter turn increments until the guide pulley and the largest cog are aligned vertically. Again, shift through - Schwinn Network 3.0 | Schwinn Owner's Manual - Page 44
will loosen the cable tension and direct the chain closer to the frame while counter-clockwise will tighten the cable tension and direct the chain away from the frame. 3.44 Do not ride a bicycle that is not shifting properly. Overlooking proper adjustments may cause irreparable - Schwinn Network 3.0 | Schwinn Owner's Manual - Page 45
system (see Fig. 3.46). Identify the mounting system used on your bicycle and follow the given instructions for that particular type of mounting system. (Fig. 3.45) Caliper Brake Mounting System First remove the front wheel from your bicycle. Remove the hex nut from the caliper brake bolt on the - Schwinn Network 3.0 | Schwinn Owner's Manual - Page 46
and the flat brace with stabilizer. Determine which brace was included with your bicycle and follow the given instructions for that particular brace. 3.47 C-Shape Brace Remove the outer axle nut and washer from the rear wheel axle. Place the brace stabilizer washer onto the axle and align the washer - Schwinn Network 3.0 | Schwinn Owner's Manual - Page 47
training wheel connection to the bicycle. Failure to properly tighten may cause the training wheel to dislodge. Please contact Pacific Cycle Service with wheel to the proper height. (Fig. 3.50) NOTICE: Not all bicycles will accept training wheels. If your bike did not come stock with training wheels - Schwinn Network 3.0 | Schwinn Owner's Manual - Page 48
and bolts have been tightened securely. • Correct maintenance of your bicycle will ensure many years of happy riding. Service your bicycle regularly by referring to the relevant sections of this manual, OR take it to a professional bicycle shop. Remember: Always wear a helmet and obey all traffic - Schwinn Network 3.0 | Schwinn Owner's Manual - Page 49
bike will ensure: Smooth running - Longer lasting components - Safer riding - Lower running costs Every time you ride your bicycle guide and by referring to Part 5 of this manual, you should be able to accomplish most tasks. If you require assistance, we recommend you see a bicycle Derailleur wheels - Schwinn Network 3.0 | Schwinn Owner's Manual - Page 50
wheels are not straight, they will need to be adjusted. This is quite difficult and is best left to a bicycle bicycle tires. It is not recommended to use a gas station service pump to inflate bicycle tires. These pumps put out a high volume of air very quickly Inflating a bicycle - Schwinn Network 3.0 | Schwinn Owner's Manual - Page 51
instructions, or replace the tube. NOTE: Ensure that the replacement tube size matches the size stated on the tire sidewall and that the valve is the correct type for your bicycle rolling the last, most difficult part on using your thumbs. NOTE the wheel into the frame checking that all gears - Schwinn Network 3.0 | Schwinn Owner's Manual - Page 52
a qualified bicycle mechanic perform adjust, remove wheel from bicycle and loosen wheel can turn freely without excessive side play. Lock nut Axle Washer Axle nut 4.4 Cables and Cable Housing Cables and housing are one of the most overlooked parts on the bicycle bicycle. It is recommended that - Schwinn Network 3.0 | Schwinn Owner's Manual - Page 53
functioning properly. The correct adjustment and operation of your bicycle's brakes is extremely important for safe operation. Brakes operate freely and that the brake pads press hard enough on the rims to stop the bike. There should be about 1mm - 2mm clearance between each pad and the rim when - Schwinn Network 3.0 | Schwinn Owner's Manual - Page 54
to do this may cause the brake assembly to dislodge from the frame or fork. Some brakes have a special mechanism which enables you The drivetrain of a bicycle refers to all parts that transmit power to the rear wheel including the pedals, chain manual and further assistance should be sought from a specialist - Schwinn Network 3.0 | Schwinn Owner's Manual - Page 55
NOTE: Never try and force a pedal with the wrong thread size into a bicycle crank. Crank Set The crank set refers to the bottom bracket axle and , where the crank arms bolt onto the bottom bracket axle. Never ride your bike if the cranks are loose. This may be dangerous and will damage the crank - Schwinn Network 3.0 | Schwinn Owner's Manual - Page 56
assembly out of the frame to the right, and and replace any damaged parts. Pack the ball bicycle repair manual for further information. Several specialized tools are needed for disassembly and maintenance of 3 piece cranks. Do not attempt service than 10mm, the rear wheel should be moved back - Schwinn Network 3.0 | Schwinn Owner's Manual - Page 57
center between the chainwheel and rear sprocket. Center the wheel in the frame and re-tighten the axle nuts after any adjustment. Bicycles which have a single speed freewheel, coaster hub brake . Such action is beyond the scope of this manual and you should consult a specialist. (Fig. 4.13) 4.13 - Schwinn Network 3.0 | Schwinn Owner's Manual - Page 58
Brake Hub Many BMX style and other children's bicycles are fitted with a coaster hub brake in the rear wheel. This type of brake offers the advantages of infrequent attention as far as lubrication, adjustment or replacement of internal parts; if needed, this should be left to a specialist. Keep the - Schwinn Network 3.0 | Schwinn Owner's Manual - Page 59
Guide Pulley broken strands and any damage to the cable housing. If you find any problems, the cables may need replacing before you ride. (Fig. 4.15 - see will travel toward the wheel of the bicycle, while the High limit screw determines how far the cage will travel toward the frame. 1. Shift the - Schwinn Network 3.0 | Schwinn Owner's Manual - Page 60
the chain to move towards the wheel. 5. Shift through the gears ensuring each positioning. Please refer to the troubleshooting section for more assistance. Adjustment bike, while turning counter-clockwise will increase tension and bring the cage closer to the bike. If you are experiencing problems - Schwinn Network 3.0 | Schwinn Owner's Manual - Page 61
the connections are made properly. (Please refer to p. 29-30 for the appropriate assembly instructions.) Reflectors (bicycles over 16") Your bicycle is supplied with one front (white), one rear (red), two wheel (white), and four pedal (orange) reflectors. These are an important safety and legal - Schwinn Network 3.0 | Schwinn Owner's Manual - Page 62
Problem Possible Cause Gear shifts not working properly • Derailleur cables sticking/ stretched/ chainring, sprockets and chain • Replace chain • Lubricate or replace link • Seek advise at a bicycle shop • Re-true if possible, or replace • Tighten mounting bolts • Repair or replace chainring/ - Schwinn Network 3.0 | Schwinn Owner's Manual - Page 63
line • Clean and lubricate jockey wheels • Freewheel internal pawl pins are jammed • Lubricate. If problem persists, replace freewheel • Brake pads out of adjustment • Fork loose in head tube • True wheel or take to a bike shop for repair • Tighten bolts • Center brakes and/or adjust brake pads - Schwinn Network 3.0 | Schwinn Owner's Manual - Page 64
• Adjust headset • Replace bearings • Adjust QR mechanism • Wheels not aligned in frame • Headset loose or binding • Front forks or frame bent • Align wheels correctly • Adjust/tighten headset • Take bike to a bike shop for possible frame realignment • Inner tube old or faulty • Tire tread/casing - Schwinn Network 3.0 | Schwinn Owner's Manual - Page 65
sales receipt for any possible warranty claims. Your Name: Address: Date Purchased: Place of Purchase: Model & Brand Information: Wheel Size: Color: Serial Number: Se rvice sƟcker loc aƟon (Opposite side of the serial number) Model #: WARRANTY 64 ©2010 - Schwinn Network 3.0 | Schwinn Owner's Manual - Page 66
Please note: the fork is not part of the frame. A lifetime warranty on your frame does not guarantee that the product will last forever. The length of the useful life cycle will vary depending on the type of bike, riding conditions and care the bicycle receives. Competition, jumping, downhill racing - Schwinn Network 3.0 | Schwinn Owner's Manual - Page 67
4902 Hammersley Road Madison, WI 53711 Service: 1-800-626-2811 www.pacific-cycle.com ©2010
-
 1
1 -
 2
2 -
 3
3 -
 4
4 -
 5
5 -
 6
6 -
 7
7 -
8
-
9
-
10
-
11
-
12
-
13
-
14
-
15
-
16
-
17
-
18
-
19
-
20
-
21
-
22
-
23
-
24
-
25
-
26
-
27
-
28
-
29
-
30
-
31
-
32
-
33
-
34
-
35
-
36
-
37
-
38
-
39
-
40
-
41
-
42
-
43
-
44
-
45
-
46
-
47
-
48
-
49
-
50
-
51
-
52
-
53
-
54
-
55
-
56
-
57
-
58
-
59
-
60
-
61
-
62
-
63
-
64
-
65
-
66
-
67
 |
 |

®
THIS MANUAL CONTAINS IMPORTANT SAFETY, PERFORMANCE AND MAINTENANCE
INFORMATION. READ THE MANUAL BEFORE TAKING YOUR FIRST RIDE ON YOUR NEW
BICYCLE, AND KEEP THE MANUAL HANDY FOR FUTURE REFERENCE.