Seagate Mirra Personal Server Installation Guide (Windows)
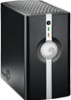
Seagate Mirra Personal Server Manual
 |
View all Seagate Mirra Personal Server manuals
Add to My Manuals
Save this manual to your list of manuals |
Seagate Mirra Personal Server manual content summary:
- Seagate Mirra Personal Server | Installation Guide (Windows) - Page 1
Mirra Sync and Share Personal Server Getting Started Guide for Windows - Seagate Mirra Personal Server | Installation Guide (Windows) - Page 2
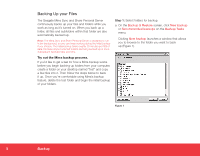
Files The Seagate Mirra Sync and Share Personal Server continuously backs up your files and folders while you work as long as it's turned on. When you back up a folder, all files and subfolders within that folder are also automatically backed up. Note: The Mirra Sync and Share Personal Server is - Seagate Mirra Personal Server | Installation Guide (Windows) - Page 3
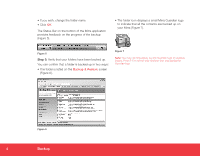
for backup (Figure 2). Figure 2 b. You can also select a folder for backup in Microsoft Windows Explorer or on your desktop by right-clicking a folder and selecting Add to Mirra Backups from the dropdown menu (Figure 3). Figure 3 Step 2: Confirm your backups. Once you've selected folders - Seagate Mirra Personal Server | Installation Guide (Windows) - Page 4
application provides feedback on the progress of the backup (Figure 5). • The folder icon displays a small Mirra Guardian logo to indicate that all the contents are backed up on your Mirra (Figure 7). Figure 5 Step 3: Verify that your folders have been backed up. You can confirm that a folder - Seagate Mirra Personal Server | Installation Guide (Windows) - Page 5
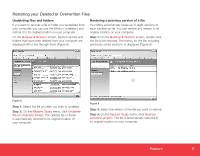
file or folder you've deleted from your computer, you can use the Mirra to undelete it and restore it to its original location on your computer. On line through them (Figure 8). Restoring a previous version of a file Your Mirra automatically saves up to eight versions of each backed up file. You - Seagate Mirra Personal Server | Installation Guide (Windows) - Page 6
access them from any computer connected to the Internet via a free Web Account at Mirra.com. You can view and download files from your Mirra, edit them, and upload them back to your Mirra. Files uploaded to your Mirra are copied back to the original folder on your computer. You can access files via - Seagate Mirra Personal Server | Installation Guide (Windows) - Page 7
Step 2: Sign in at Mirra.com by clicking Member Login. Use the email address and password you used to create your Web Account or the Shared Folders page, • Double-click a folder to view its contents. • Click the download arrow to download a file to your computer (Figure 14). Figure 14 Web Access 7 - Seagate Mirra Personal Server | Installation Guide (Windows) - Page 8
and Share Personal Server to connect securely when you access the first file in a web session. Once the connection has been made, the MIrra operates more quickly on subsequent downloads. Uploading files to your Mirra Using Mirra web services, you can either add new files to a folder or replace an - Seagate Mirra Personal Server | Installation Guide (Windows) - Page 9
to find that file on the local computer and click Overwrite. An Upload Successful window confirms that the selected file has been uploaded to your Mirra. All uploaded files are automatically backed up to your Mirra and copied to the original folder on your computer. Figure 16 The Overwrite page - Seagate Mirra Personal Server | Installation Guide (Windows) - Page 10
Sharing your Folders with Others The Mirra Sync and Share Personal Server allows you to share folders both over a local network with people whose computers are connected to your Mirra and via the web using email addresses. Sharing is secure and free for both Mirra owners and the people with whom - Seagate Mirra Personal Server | Installation Guide (Windows) - Page 11
. The Share a Folder window opens. In the Share a Folder window (Figure 20), do the download, edit, upload, and add files to or delete files from the shared folder. Download images: Recipients may access this folder on the Mirra web site and download full-size images. d. If you wish, type a personal - Seagate Mirra Personal Server | Installation Guide (Windows) - Page 12
computers, changes made to it on one computer are reflected on every other computer synchronized to that folder and are automatically backed up to the Mirra. Step 1: On each computer, click the Sharing tab. Step 2: From the list of shared folders, select the one to be synchronized. Step 3: On the - Seagate Mirra Personal Server | Installation Guide (Windows) - Page 13
instructions. e. The product has been dropped or the cabinet damaged. f. The product exhibits a distinct change in performance. Servicing: The user should not attempt service to the appliance beyond that described in the Troubleshooting section of the Mirra Sync and Share Personal Server Manual - Seagate Mirra Personal Server | Installation Guide (Windows) - Page 14
product should be operated only from the type of power source indicated on the marking label or in the Getting Started Guide. If you are not sure of the type of power supply to your home, consult your dealer or local power company. Overloaded power outlets: Do not overload wall outlets and extension - Seagate Mirra Personal Server | Installation Guide (Windows) - Page 15
, the data that was backed up on their Mirra Sync and Share Personal Server in the following way: 1. By providing technical phone support to assist in the data restoration process from the Mirra to a replacement PC drive. 2. If the over-the-phone guided data restoration process fails due to a fault - Seagate Mirra Personal Server | Installation Guide (Windows) - Page 16
Seagate service center or refer to www.seagate.com for more information regarding customer support within your jurisdiction. You also may obtain information regarding the location of authorized Seagate service centers and access Seagate automated customer service directory by calling +1-800-SEAGATE - Seagate Mirra Personal Server | Installation Guide (Windows) - Page 17
check your Mirra Manual before contacting Customer Support. Following the troubleshooting tips contained therein may save time solving your problem. For warranty service... If you believe you need service for your Mirra Sync and Share Personal Server, contact Technical Support at 1.800.SEAGATE - Seagate Mirra Personal Server | Installation Guide (Windows) - Page 18
(or jurisdiction to jurisdiction). SEAGATE'S RESPONSIBILITY FOR MALFUNCTIONS AND DEFECTS IN MIRRA SYNC AND SHARE PERSONAL SERVERS IS LIMITED TO REPAIR AND REPLACEMENT AS SET FORTH IN THIS LIMITED WARRANTY. ALL EXPRESS AND IMPLIED WARRANTIES FOR THE MIRRA PERSONAL SERVER, INCLUDING BUT NOT LIMITED - Seagate Mirra Personal Server | Installation Guide (Windows) - Page 19
: 1. Use self-service at the Seagate web site • Go to www.seagate.com/support/mirra. You'll find frequently asked questions, a troubleshooting guide, current documentation, and downloads. 2. Submit a case on line • Submit a case to the Mirra Support Team at www.mirra.com/support. • Enter the serial - Seagate Mirra Personal Server | Installation Guide (Windows) - Page 20
LLC. Other product names are registered trademarks or trademarks of their owners. Seagate reserves the right to change, without notice, product offerings or specifications. When referring to drive capacity one gigabyte, or GB, equals one billion bytes and one megabyte, or MB, equals one million
-
 1
1 -
 2
2 -
 3
3 -
 4
4 -
 5
5 -
 6
6 -
 7
7 -
8
-
9
-
10
-
11
-
12
-
13
-
14
-
15
-
16
-
17
-
18
-
19
-
20
 |
 |
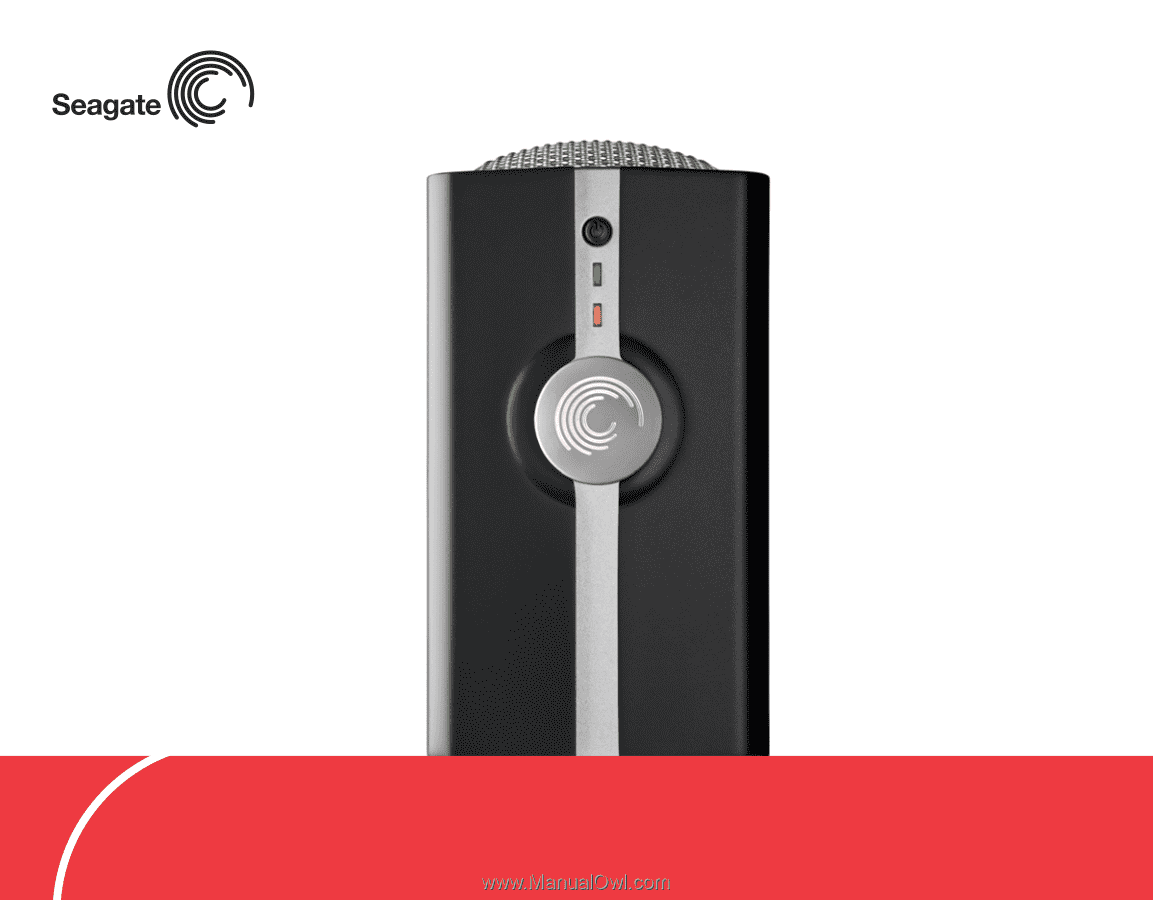
Getting Started
Guide for Windows
Mirra
Sync and Share
Personal Server