Seagate STD2401LW-S User Guide
Seagate STD2401LW-S Manual
 |
View all Seagate STD2401LW-S manuals
Add to My Manuals
Save this manual to your list of manuals |
Seagate STD2401LW-S manual content summary:
- Seagate STD2401LW-S | User Guide - Page 1
Scorpion 40 DDS-4 Tape Drive Product Manual, is the complete guide for this tape drive. Because the tape drive comes installed in your GatewayTM computer, some of the information in the product manual does not apply. This information is listed below. s Installing hardware and software Your Scorpion - Seagate STD2401LW-S | User Guide - Page 2
Scorpion 40 DDS-4 Tape Drive STD1401LW STD2401LW STD6401LW Product Manual - Seagate STD2401LW-S | User Guide - Page 3
h - Seagate STD2401LW-S | User Guide - Page 4
Scorpion 40 DDS-4 Tape Drive STD1401LW STD2401LW STD6401LW Product Manual - Seagate STD2401LW-S | User Guide - Page 5
Technology, the Seagate logo, Scorpion and the Scorpion logo are trademarks or registered trademarks of Seagate Technology, Inc. Other product names are trademarks or registered trademarks of their owners. Seagate reserves the right to change, without notice, product offerings or specifications. No - Seagate STD2401LW-S | User Guide - Page 6
instructions- may cause interference to radio communications or radio and television reception. It has been tested and found to comply with the limits for a Class B computing device in accordance with the specifications device drive described in this manual requires shielded interface cables to - Seagate STD2401LW-S | User Guide - Page 7
Technology reserves the right to change, without notification, the specifications contained in this manual. Seagate Technology assumes no responsibility for the accuracy, completeness, sufficiency, or usefulness of this manual, nor for any problem that may arise from the use of the information in - Seagate STD2401LW-S | User Guide - Page 8
Guidelines and cautions 16 Configuring an internal Scorpion 40 16 Jumper settings 16 Dip-switch settings 18 Mounting an internal Scorpion 40 20 Installing an external Scorpion 40 24 Configuring the external Scorpion 40 24 Connecting the SCSI interface cable 25 Connecting the power cord 25 - Seagate STD2401LW-S | User Guide - Page 9
conditions 32 Data compression ...33 Loading revised firmware from Seagate firmware cartridges 33 Flash memory...33 Firmware download process 33 Theory of operations 35 Overview ...35 The STD1401LW drive mechanism 36 Motors and control circuits 38 Timing tracking circuitry 38 Signal - Seagate STD2401LW-S | User Guide - Page 10
v Contents Simplified compression operation 46 Dictionary ...47 Simplified Decompression Operation 48 - Seagate STD2401LW-S | User Guide - Page 11
13. Power connector on the internal Scorpion 40 23 Figure 14. Rear panel of external Scorpion 40 24 Figure 15. SCSI termination examples for external Scorpion 40 25 Figure 16. Loading a tape cartridge ...27 Figure 17. Location of Eject button and LEDs on internal Scorpion 40 (external drive is - Seagate STD2401LW-S | User Guide - Page 12
drive and media vendors. Note: The Scorpion 40 can use 90-meter DDS-1 media but not 60-meter DDS-1 media. The Scorpion 40 drive supports DDS data compression, effectively doubling storage capacity and transfer rates. The Scorpion 40 drive complies with the following guidelines and specifications - Seagate STD2401LW-S | User Guide - Page 13
Tape capacity and sustained data-transfer rate are dependent upon the characteristics of the files being compressed, along with system parameters such as the speed of the host, the operating system and the application software used. The Scorpion 40 drive also offers synchronous or asynchronous SCSI - Seagate STD2401LW-S | User Guide - Page 14
Wide SCSI connection • Automatic power-on self-test • Support for TapeAlert™ Certified Solutions Scorpion 40 drive models The Scorpion 40 3.5-inch and 5.25-inch internal drives are tailored for easy installation in today's computers, and the full-featured embedded SCSI controller facilitates easy - Seagate STD2401LW-S | User Guide - Page 15
in a 5.25-inch, half-height space-model STD2401LW (see Figure 2). Figure 2. Internal Scorpion 40 Drive with drive rails for mounting in 5.25-inch drive bay • A complete external subsystem that contains the 3.5-inch DDS-4 drive and built- in worldwide power supply-model STD6401LW (See Figure 3). - Seagate STD2401LW-S | User Guide - Page 16
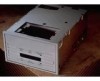
Introduction 5 Figure 3. External Scorpion 40 - Seagate STD2401LW-S | User Guide - Page 17
following specifications and requirements: • Physical specifications • Power specifications • Drive performance specifications • Environmental requirements • Reliability • DDS cartridge specifications • Regulatory compliance Physical Specifications The physical specifications of the Scorpion 40 - Seagate STD2401LW-S | User Guide - Page 18
8 Scorpion 40 DDS-4 Product Manual, Version A 41.3 mm (1.63 in) 13.0 mm (0.51 in) 2 places 5.0 mm : Tolerance for all dimensions is 0.25mm (0.01 in) 101.6 mm (4.00 in) Bottom View Figure 4. Internal Scorpion 40 Drive-Dimensions 41.3 mm (1.63 in) 31.5 mm (1.24 in) 21.8 mm (0.86 in) 9.9 mm (0.39 - Seagate STD2401LW-S | User Guide - Page 19
Specifications 9 Power Specifications The following table lists the power specifications for the internal Scorpion 40 drives. Specification Voltage Tolerance Operational Current Standby Current Surge (peak) Ripple (peak-to-peak) +12 VDC supply + or - 10% 250 milliamps max 15 milliamps max 600 - Seagate STD2401LW-S | User Guide - Page 20
Manual, Version A Drive Performance Specifications The following table lists the specifications for the Scorpion 40 drive. Specification Capacity 90 m MP 120 m MP+ 125 m MP++ 150 m MP+++ Flux density (DDS-4) Track density (DDS-4) Error recovery Recording unrecoverable errors Tape drive 5.500 - Seagate STD2401LW-S | User Guide - Page 21
meters (power off) 1.5 g (5 to 500 Hz) - - - 0 0 10 Gs peak, 11 msec 100 Gs peak, 11 msec 1. Mechanism and media 2. Mechanism Reliability The Scorpion 40 drive is designed for maximum reliability and data integrity. The following table summarizes the reliability specifications. Specification - Seagate STD2401LW-S | User Guide - Page 22
, dealer, your computer system company or your Seagate sales representative to arrange the return. DDS Cartridge Specifications DDS drives provide maximum data integrity and reliability when Seagate-qualified DDS cartridges are used as the recording media. Seagate maintains an ongoing program to - Seagate STD2401LW-S | User Guide - Page 23
Specifications 13 Regulatory Compliance These DDS drives comply with the regulations listed in the user's access to live parts, gives adequate system stability and provides the necessary grounding for the drive. • Provide the correct voltages (+5 VDC and +12 VDC) based on the regulation applied- - Seagate STD2401LW-S | User Guide - Page 24
, notify your Seagate representative. 3. Always save the containers and packing materials for any future reshipment. Installing an internal Scorpion 40 Internal drive installation involves three main steps: 1. Configuring the drive 2. Mounting the drive 3. Connecting the power and interface cables - Seagate STD2401LW-S | User Guide - Page 25
SCSI supported. If these default settings are appropriate for your needs, skip ahead to "Installing an internal Scorpion 40" on page 20. Jumper settings Configuration jumpers on the back of the drive are used to control the drive's SCSI ID, parity checking, and SCSI terminator power. The jumpers - Seagate STD2401LW-S | User Guide - Page 26
=3 SCSI ID=4 SCSI ID=5 SCSI ID=6 SCSI ID=7 SCSI ID=8 SCSI ID=9 SCSI ID=10 SCSI ID=11 SCSI ID=12 SCSI ID=13 SCSI ID=14 SCSI ID=15 Parity enable Term. power Figure 6. Jumper settings for internal Scorpion 40 SCSI Address Selection (pins 1 through 8) You can select the SCSI address used by the drive - Seagate STD2401LW-S | User Guide - Page 27
then on again. 1 O Data compressione (DC) 2 N SCSI DC control 3 Media recognition 4 Self Test 5 6 7 Operating-system configuration switches 8 9 Wide/Narrow SCSI 10 Inquiry String support Default settings shown Front of drive Figure 7. Dip-switch settings for internal Scorpion 40 - Seagate STD2401LW-S | User Guide - Page 28
to the DDS tape standard. Use of non-DDS media may appear to give satisfactory results, but the inferior specifications of such media can cause dataintegrity problems. Switch 3 enables or disables the media-recognition system (MRS). If switch 3 is ON (the default setting), the drive reads and writes - Seagate STD2401LW-S | User Guide - Page 29
Manual, Version A Mounting an internal Scorpion 40 You can install your Seagate internal DDS drive horizontally or vertically (on its side). Figure 8 shows a 3.5-inch drive being installed in a typical system using side mounting screws. Mounting the drive in a 3.5-inch drive bay Mount the drive - Seagate STD2401LW-S | User Guide - Page 30
single-ended wide SCSI bus. Note: The Scorpion 40 will not work in a SCSI-1 environment. Connecting to a 68-pin Wide SCSI or LVD bus To connect the drive to an LVD or SCSI wide bus, first turn off all power to the drive and computer. Then attach the interface cable to the SCSI interface connector on - Seagate STD2401LW-S | User Guide - Page 31
to the last connector in the chain. SCSI Terminator SCSI device (termination enabled) Scorpion 40 Tape drive (no termination) Scorpion 40 Tape drive (no termination) SCSI device (termination disabled) SCSI Controller (termination enabled) SCSI Controller (termination enabled) Figure 12. Two - Seagate STD2401LW-S | User Guide - Page 32
Connecting a power cable Attach a four-pin power cable to the power connector on the back of the drive. Figure 13 shows the location of the power connector. The recommended 4-pin power connector for the internal drive is an AMP 1-48024-0 housing with AMP 60617-1 pins or equivalent. Power connector - Seagate STD2401LW-S | User Guide - Page 33
three simple steps: 1. Configuring the drive 2. Connecting the SCSI interface cable 3. Connecting the power cord Configuring the external Scorpion 40 The following is the default configuration for the external Scorpion 40: • The SCSI ID: 6 • Media Recognition System (MRS) checking: enabled - Seagate STD2401LW-S | User Guide - Page 34
part number 10006525-001) from Seagate Express at 1-800-656-8419. External SCSI device SCSI Terminators External Scorpion 40 External Scorpion 40 External SCSI device SCSI Controller (termination enabled) SCSI Controller (termination disabled) Internal SCSI device (termination enabled) Example - Seagate STD2401LW-S | User Guide - Page 35
button, the drive automatically flushes the drive buffer to tape, rewinds the cartridge, and updates the system log before ejecting the cartridge. Several seconds may elapse between the time you press the eject button and the time the cartridge is ejected. Do not power down the tape drive or the - Seagate STD2401LW-S | User Guide - Page 36
compatibility Seagate Scorpion 40 drives are designed to use data-grade DDS cartridges, which comply with ANSI specifications listed in the "3.81 mm Helical-Scan Digital Computer Tape Cartridge for Information Interchange," ANSI X3B5/89-156 standard. The drive supports 90-meter DDS-1 media, but - Seagate STD2401LW-S | User Guide - Page 37
in Figure 19 below, the front panel of the Scorpion 40 contains three LEDs. These LEDs provide information about both normal and error conditions. The external Scorpion 40 also includes a green power-on LED on the front panel. Clean LED Media Drive LED LED Eject Button Figure 19. Front panel of - Seagate STD2401LW-S | User Guide - Page 38
30 Scorpion 40 DDS-4 Product Manual, Version A Clean LED The Clean LED functions as follows: • If the Clean LED is ON continuously, the drive requires cleaning. Specifically, this indicates that the drive has been operating for at least 25 hours (for DDS-1 or DDS-2 media) or for at least 50 hours - Seagate STD2401LW-S | User Guide - Page 39
heads If excessive dust or debris from the tape media collects at one or more of the tape heads, your drive may not be able to read from or write to tape. To avoid this situation, you must clean the tape heads on your Scorpion 40 in the following circumstances: • after every 25 hours of read/write - Seagate STD2401LW-S | User Guide - Page 40
32 Scorpion 40 DDS-4 Product Manual, Version A Seagate Express at 1-800-656-8419. Do not use an audio DAT cleaning cartridge. The drive cannot recognize it. After you insert the cleaning cartridge, the drive detects that the cartridge is a cleaning cartridge, then loads and runs the cartridge for - Seagate STD2401LW-S | User Guide - Page 41
-such as increasing the capacity of the drive through support for longer tapes-may require only a firmware upgrade. Firmware download process To load a firmware upgrade tape, follow these steps. 1. Power on the host system with the Scorpion 40 drive installed. 2. Make sure that there are no - Seagate STD2401LW-S | User Guide - Page 42
34 Scorpion 40 DDS-4 Product Manual, Version A 4. The drive automatically recognizes the firmware upgrade cartridge and begins downloading the firmware from the cartridge into DRAM. 5. The drive ejects the firmware upgrade cartridge as soon as the firmware has been completely downloaded into DRAM - Seagate STD2401LW-S | User Guide - Page 43
. • Embedding a full-LSI SCSI controller with capability for SCSI-2 command sets in single-ended SCSI DDS-DC models. • Embedded 40 Mhz ARM CPU with cache • 8-Mbyte SDRAM data buffer. This chapter describes the Scorpion 40 DDS-4 drive in more detail and explains implementation-specific information. - Seagate STD2401LW-S | User Guide - Page 44
on the tape. A bank of jumpers is available at the rear of the drive. These jumpers allow you to set the SCSI ID for the drive and to change configuration choices. Refer to chapter 3 for information about setting these jumpers. By using the jumpers, you can also enable terminator power if needed - Seagate STD2401LW-S | User Guide - Page 45
signals from another track). However, in helical scan recording, the heads are set at different azimuth angles so that alternate tracks on the tape are written at alternate azimuth angles. (See Figure 21) Because the read head is set to the same angle as its corresponding write head, it picks up - Seagate STD2401LW-S | User Guide - Page 46
40 DDS-4 Product Manual, Version A Write head B 3 tape tracks Write head A 20˚ head azimuth Figure 21. Alternating azimuth angles on tape tracks Motors and control circuits The Scorpion 40 drive uses four direct-drive, brushless motors-the capstan, cylinder and two reel motors. Using these - Seagate STD2401LW-S | User Guide - Page 47
ways: z Using a specially encoded firmware upgrade cartridge z Issuing a SCSI Write Data Buffer command to download the firmware to the EEPROM z Through the drive serial port Refer to Chapter 4 for information about loading new firmware using a Seagate firmware upgrade cartridge. Sensors A number of - Seagate STD2401LW-S | User Guide - Page 48
Scorpion 40 tape drive. About the DDS data cartridge The Scorpion 40 tape drive is designed to use data-grade DDS cartridges, which comply with the specifications in the 3.81-mm Helical-Scan Digital Computer Tape Cartridge for Information Interchange, ANSI X3B5/89-156 standard. Seagate recommends - Seagate STD2401LW-S | User Guide - Page 49
tested to comply with the ANSI DDS specifications. The Scorpion 40 drive also recognizes all MRS cartridges when MRS is enabled. MRS cartridges have a series of alternate opaque and clear stripes at the beginning of the tape. These stripes classify the media as data grade, rather than audio-grade - Seagate STD2401LW-S | User Guide - Page 50
Data compression-general Typical data streams of text, graphics, software code or other forms of data contain repeated information of some in DAT drives: • The same amount of information can be stored on a smaller length of tape. • More data can be stored on a given length of tape. • Performance - Seagate STD2401LW-S | User Guide - Page 51
44 Scorpion 40 DDS-4 Product Manual, Version A Data Compression Considerations In an effective data-compression method, specific types of data. But because varying types of data are encountered in normal day-to-day operating circumstances, an effective data compression method for a tape drive - Seagate STD2401LW-S | User Guide - Page 52
compression If data compression is used in software on the host computer rather than in the hardware of the drive, you can slow down the transfer . Seagate's data compression engine is designed to provide a complete data compression system using the DCLZ algorithm. This IC provides support circuitry - Seagate STD2401LW-S | User Guide - Page 53
Scorpion 40 DDS-4 Product Manual, Version A DCLZ algorithm Within the computer industry, algorithms developed by Abraham Lempel and Jacob Ziv (enhanced later by Terry Welch) are popular, versatile and powerful . The DCLZ algorithm used in the Scorpion 40 tape drive is based on the LZ2/LZW algorithm - Seagate STD2401LW-S | User Guide - Page 54
bytes or dictionary codes. The following points explain these three types of codewords. • Control Flags, codewords 0 through 7: These control flags are reserved codewords that flag specific conditions as follows: 0 Dictionary frozen 1 Dictionary reset 2 Increment codeword size 3 End of record - Seagate STD2401LW-S | User Guide - Page 55
48 Scorpion 40 DDS-4 Product Manual, Version A • Dictionary codes, codewords 264 through 4,095: The dictionary codes refer to dictionary entries and represent multiple bytes (a string of characters) in the input data - Seagate STD2401LW-S | User Guide - Page 56
The following steps describe a simplified version of the operation of the algorithm for decompressing data. 1. From a reset dictionary point, (which contains only control codes and encoded bytes) codewords are fetched from the input stream and looked up in the dictionary. 2. New dictionary codes are - Seagate STD2401LW-S | User Guide - Page 57
Seagate Technology, Inc. 920 Disc Drive, Scotts Valley, California 95066, USA Publication Number: 10006589-001, Version A Printed in USA - Seagate STD2401LW-S | User Guide - Page 58
A MAN US DDS-4 USR GDE V0 10/99 8505421
-
 1
1 -
 2
2 -
 3
3 -
 4
4 -
 5
5 -
 6
6 -
 7
7 -
8
-
9
-
10
-
11
-
12
-
13
-
14
-
15
-
16
-
17
-
18
-
19
-
20
-
21
-
22
-
23
-
24
-
25
-
26
-
27
-
28
-
29
-
30
-
31
-
32
-
33
-
34
-
35
-
36
-
37
-
38
-
39
-
40
-
41
-
42
-
43
-
44
-
45
-
46
-
47
-
48
-
49
-
50
-
51
-
52
-
53
-
54
-
55
-
56
-
57
-
58
 |
 |

Important information about this
document
The following document, the
Scorpion 40 DDS-4 Tape Drive Product Manual
, is
the complete guide for this tape drive. Because the tape drive comes installed
in your Gateway
TM
computer, some of the information in the product manual
does not apply. This information is listed below.
■
Installing hardware and software
Your Scorpion 40 DDS-4 Tape Drive comes installed on your Gateway
computer. Should you need to reinstall software or drivers, you can do
so using your Gateway
System Restoration CD
or Gateway
Server
Companion CD
. Disregard information about installing software and
drivers from diskettes. Use only the CDs mentioned above.
■
Reaching technical support
For technical support, contact Gateway and not the technical support
contacts mentioned in the manual. You can access Gateway technical
support at www.gateway.com.
■
Warranty information
Your Gateway warranty applies to the entire system, which includes the
Scorpion 40 DDS-4 Tape Drive. No other warranty, including the one in
the manual, is applicable.
■
Disregard the following information:
■
All references to installing a 3-5-inch internal Scorpion 40 drive or
an external Scorpion 40 drive.
■
All references to purchasing a SCSI termination connector. Gateway
supplies the SCSI termination connector on this system.
■
All references to purchasing a cleaning tape. Gateway supplies a
cleaning tape. Clean the tape heads as instructed in the manual.
■
All references to installing revised firmware.
■
All references to dip-switch 10 settings. Dip-switch 10 comes
configured in the off position. The Vendor ID for this switch is set
to “Archive Python.”