Seagate STU62001LW-S Installation Manual
Seagate STU62001LW-S Manual
 |
View all Seagate STU62001LW-S manuals
Add to My Manuals
Save this manual to your list of manuals |
Seagate STU62001LW-S manual content summary:
- Seagate STU62001LW-S | Installation Manual - Page 1
Viper 200® LTO Ultrium Tape Drive Installation Manual - Seagate STU62001LW-S | Installation Manual - Page 2
© 2002 Seagate Removable Storage Solutions LLC All rights reserved Manufacturing Part Number: 100248193 Seagate and the Seagate logo are trademarks of Seagate Technology LLC. Viper is a trademark of Seagate Removable Storage Systems LLC. Other product names are trademarks or registered trademarks of - Seagate STU62001LW-S | Installation Manual - Page 3
Viper 200 LTO Ultrium Tape Drive Installation Manual - Seagate STU62001LW-S | Installation Manual - Page 4
- Seagate STU62001LW-S | Installation Manual - Page 5
Parking the drive for shipping 31 Emergency reset and emergency cartridge eject 32 Manual cartridge removal 33 Unix configuration settings 41 A word about SCSI controllers 41 SGI Irix 53 Configuring for HP-UX 11.0 55 Technical support 57 World-wide services: 57 Regional services 57 - Seagate STU62001LW-S | Installation Manual - Page 6
Manual in accordance with the instructions, may cause harmful interference Radio-TV Interference Problems, prepared by the by Seagate, may cause radio and television interference problems that . The external device drive described in this manual requires shielded interface cables to comply with FCC - Seagate STU62001LW-S | Installation Manual - Page 7
drive is a standalone unit with built-in power supply. The following Viper 200 models are covered in this manual: Model number STU42001LW STU42001WD STU42001FC STU62001LW STU62001WD Form factor 5.25-inch Internal drive 5.25-inch Internal drive 5.25-inch Internal drive External drive External - Seagate STU62001LW-S | Installation Manual - Page 8
6 Viper 200 Installation Manual Unpacking and Inspection Although drives are inspected and carefully packaged at the list. If parts are missing or the equipment is damaged, notify your Seagate representative. 3. Save the containers and packing materials in case you ever have to reship the drive. - Seagate STU62001LW-S | Installation Manual - Page 9
Installation Manual 7 Installing an internal HVD or LVD Viper 200 This section describes the steps necessary to install an internal Viper 200 drive with an Ultra 2 Wide SCSI LVD or Ultra Wide SCSI HVD interface. For instructions on installing a Fibre Channel drive, see page 15. For instructions on - Seagate STU62001LW-S | Installation Manual - Page 10
8 Viper 200 Installation Manual • Always lay the drive either on top of the antistatic bag or place it inside of the bag to reduce the chance of damage from - Seagate STU62001LW-S | Installation Manual - Page 11
Viper 200 Installation Manual 9 Drive-configuration jumper pins Default settings: Pins: Function: 1-2 SCSI ID bit 0 3-4 SCSI ID bit 1 5-6 SCSI ID bit 2 7-8 SCSI ID bit 3 9-10 Reserved 11-12 Termination - Seagate STU62001LW-S | Installation Manual - Page 12
10 Viper 200 Installation Manual Mounting an internal HVD or LVD drive You can mount the internal Viper 200 either horizontally or vertically with the drives left side facing up ( - Seagate STU62001LW-S | Installation Manual - Page 13
Viper 200 Installation Manual 11 82.6 mm (max) 21.80 ± 0.20 mm M3 X 5.0 4X Near side 4X Far side Side View 84.26 mm (max) 9.90 ± 0.20 mm 79. - Seagate STU62001LW-S | Installation Manual - Page 14
12 Viper 200 Installation Manual Cables and connectors (internal HVD or LVD drive) Connecting the SCSI interface cable Viper 200 drives are designed to be used with an Ultra2 SCSI - Seagate STU62001LW-S | Installation Manual - Page 15
Viper 200 Installation Manual 13 SCSI Termination The Viper 200 internal drive does not provide SCSI termination. You must place a SCSI bus terminator or a SCSI device with termination enabled - Seagate STU62001LW-S | Installation Manual - Page 16
14 Viper 200 Installation Manual Pin numbers 1 through 8 9 10 11 12 13 14 15 16 Description Reserved (do not use) Lib RXD-P (input to drive) GND Lib RXD-N (input to - Seagate STU62001LW-S | Installation Manual - Page 17
Viper 200 Installation Manual 15 Installing an internal Fibre Channel Viper 200 This section describes the steps necessary to install an internal Viper 200 with a Fibre Channel LC Optical (FC) interface. For instructions on installing a drive with an Ultra 2 Wide SCSI LVD or Ultra Wide SCSI HVD - Seagate STU62001LW-S | Installation Manual - Page 18
16 Viper 200 Installation Manual • Always lay the drive either on top of the antistatic bag or place it inside of the bag to reduce the chance of damage from - Seagate STU62001LW-S | Installation Manual - Page 19
Viper 200 Installation Manual 17 BA Assigned loop identifier jumper pins 13 11 9 7 5 3 1 14 12 10 8 6 4 2 Pin Numbers Figure 8. Assigned loop identifier jumper pins for the internal FC Viper - Seagate STU62001LW-S | Installation Manual - Page 20
18 Viper 200 Installation Manual Mounting an internal Fibre Channel drive You can mount the internal Viper 200 either horizontally or vertically with the drives left side facing up (see - Seagate STU62001LW-S | Installation Manual - Page 21
Viper 200 Installation Manual 19 Figure 10. Mounting dimensions for the internal Viper 200 with Fibre Channel interface connector - Seagate STU62001LW-S | Installation Manual - Page 22
20 Viper 200 Installation Manual Cables and connectors (internal Fibre Channel drive) interface connectors on the back of the drive (labeled A and B in Figure 11). In systems that support "failover," both ports can be connected through separate loops or fabrics to the same set of host computers - Seagate STU62001LW-S | Installation Manual - Page 23
Viper 200 Installation Manual 21 BA Serial Interface connector pin numbers 17 15 13 11 9 7 5 3 1 18 16 14 12 10 8 6 4 2 Pin Numbers (Pin 17 removed to prevent connector from - Seagate STU62001LW-S | Installation Manual - Page 24
22 Viper 200 Installation Manual The recommended 4-pin power connector for the internal Viper 200 is an AMP 1-48024-0 housing with AMP 60617-1 pins or equivalent. 4-pin power connector Figure 13. Rear view of the Viper 200 FC internal drive, showing 4-pin power connector - Seagate STU62001LW-S | Installation Manual - Page 25
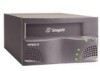
Viper 200 Installation Manual 23 Installing an external Viper 200 The external Viper 200 drives (STU62001LW and ST62001WD) are compact external units that connect to the host computer through an external SCSI port. Installing the external drive involves the three simple - Seagate STU62001LW-S | Installation Manual - Page 26
24 Viper 200 Installation Manual Connecting the SCSI interface cable The external Viper 200 provides for two SCSI termination examples. You can purchase terminating plugs on the web at http://buytape.seagate.com. Note. Termination power is enabled as a default for the external Viper 200 drive. - Seagate STU62001LW-S | Installation Manual - Page 27
Viper 200 Installation Manual 25 Operating and maintaining the Viper 200 This chapter describes how to use your Viper 200. It explains the meaning of the LEDs on the - Seagate STU62001LW-S | Installation Manual - Page 28
Verifying SCSI Active Status LED (Amber) ON 1/4 sec ON 1/4 sec OFF 1/2 sec ON 1/8 sec OFF Error LED (Orange) 1/8 sec ON 1/8 sec OFF Manual Intervention Required Power On Self Test (POST) Failure 1/8 sec ON 1/8 sec OFF ON Excessive Rewrites or Read C2 errors Cleaning Cartridge Present Cleaning - Seagate STU62001LW-S | Installation Manual - Page 29
Viper 200 Installation Manual 27 Drive Condition Power On Self Test (POST) In Progress Cleaning Failure Microcode Download Status LED (Amber) 1/2 sec OFF 1/4 sec ON 1/4 sec OFF 1/8 sec ON 1/8 - Seagate STU62001LW-S | Installation Manual - Page 30
28 Viper 200 Installation Manual Using a Blank Cartridge A blank cartridge has prewritten servo patterns and cannot be bulk erased. New cartridges should be retensioned before use. Write-protecting a cartridge Ultrium - Seagate STU62001LW-S | Installation Manual - Page 31
as described below) to allow the tape pack to become stable, for better performance. If, during storage and/or transportation, a data cartridge has been exposed to conditions outside the above range, it shift and stabilizes the tape pack. See your backup software manual for instructions on how to - Seagate STU62001LW-S | Installation Manual - Page 32
30 Viper 200 Installation Manual retension a tape cartridge. You should retension a tape cartridge under three cleaning cycles in a 72-hour period, the Status LED lights up again, contact Seagate technical support. Each time the drive is cleaned, the cleaning tape advances to a new, unused section - Seagate STU62001LW-S | Installation Manual - Page 33
Drive LED remains on. Parking the drive for shipping Seagate recommends that you "park" the Viper 200 before front of the drive, or by running special software on your host system. In either case, the using the load/unload button To park a drive manually, press and hold the load/unload button for 15 - Seagate STU62001LW-S | Installation Manual - Page 34
and from the technical support section of the Seagate web site, at www.seagate.com/support. This utility software supports firmware downloading and several the SCSI ID of the drive) See the diagnostic user guide for software installation details and command syntax for non-Windows operating systems. - Seagate STU62001LW-S | Installation Manual - Page 35
these procedures, you must return the drive to Seagate for repair. Do not attempt to use the drive until after it has been serviced. Before you start 1. Issue all possible commands and run diagnostics prior to using the procedures in this manual. 2. Turn off all power to the drive. 3. Unplug - Seagate STU62001LW-S | Installation Manual - Page 36
34 Viper 200 Installation Manual 4. Remove the drive from its operating environment. 5. Place the drive on a workbench with proper ESD grounding: attach a wrist strap to the bench and the other - Seagate STU62001LW-S | Installation Manual - Page 37
the drive to Seagate. Caution. Do NOT use the drive after you have removed a cartridge. The drive must be returned to Seagate for servicing. If you have any questions on this process, contact Seagate Technical Support for Tape Products (see the last chapter of this manual for contact numbers). - Seagate STU62001LW-S | Installation Manual - Page 38
Note. Do not touch any part of the drive mechanism except for the components specified in the instructions. Be especially careful not to touch the tape head assembly. The MR elements in this assembly of Viper 200 showing key components used in manual cartridge removal (no tape cartridge in drive) - Seagate STU62001LW-S | Installation Manual - Page 39
Viper 200 Installation Manual 37 1. Make sure the head assembly is in the lowered position by turning the lead screw (shown in Figure 21) clockwise with the flat blade - Seagate STU62001LW-S | Installation Manual - Page 40
38 Viper 200 Installation Manual 4. Insert the 1.5-mm hex wrench through the hole in the bottom plate shown in Figure 22. Turn the hex wrench clockwise slowly and smoothly to - Seagate STU62001LW-S | Installation Manual - Page 41
Viper 200 Installation Manual 39 Caution. Be especially careful not to touch the tape head assembly. The MR elements in this assembly are highly susceptible to damage from static - Seagate STU62001LW-S | Installation Manual - Page 42
40 Viper 200 Installation Manual Figure 24. Diagram of Viper 200 showing Seagate for servicing. Note. Any tape cartridge removed using this procedure should be retensioned before it is used for reading or writing data. If you have any questions on this process, contact Seagate Technical Support - Seagate STU62001LW-S | Installation Manual - Page 43
Manual 41 Unix configuration settings This section describes how to configure various UNIX systems to recognize and obtain optimal performance from the Seagate second with 2:1 compression of the data. The Viper 200 also supports the SCSI Ultra2 specification and can transfer data at burst rates of - Seagate STU62001LW-S | Installation Manual - Page 44
42 Viper 200 Installation Manual Configuring for the DEC/Compaq Unix Environment Finding existing SCSI controllers and devices SCSI the file /etc/ddr.dbase and create an entry as follows: SCSIDEVICE # Type = tape Name = "SEAGATE" "ULTRIUM" # PARAMETERS: TypeSubClass = tk TagQueueDepth =0 - Seagate STU62001LW-S | Installation Manual - Page 45
Viper 200 Installation Manual 43 MaxTransferSize = 0x0ffffff # (16MB - 1) ReadyTimeSeconds = 180 # seconds CMD_PreventAllow = supported CMD_ExtReserveRelease = supported BlockSize =0 PwrMgmt_capable =0 DENSITY: # DensityNumber = 0,2,3,4,5,6,7 DensityCode = default CompressionCode = 0x0 - Seagate STU62001LW-S | Installation Manual - Page 46
44 Viper 200 Installation Manual Configuring for the Sun Environment (Solaris 2.4, 2.5, 2.6, 7, and be set for SCSI ID address 2 thru 6 and attached to controller ithps1 (this particular controller also supports SCSI addresses 8 thru 15). See figure 1 to view how to set the SCSI ID address jumpers - Seagate STU62001LW-S | Installation Manual - Page 47
Manual 45 Configuring the device file st.conf To configure Solaris 2.4 and above to use the Viper 200 correctly, add the following lines to the file st.conf in the directory /kernel/drv. tape-config-list= "SEAGATE ULTRIUM06242-XXX","Seagate Viper 200 to: • Support variable length records (variable - Seagate STU62001LW-S | Installation Manual - Page 48
46 Viper 200 Installation Manual command. If you are replacing a tape device with the same SCSI ID you may want to delete the writing data to tape use the 'c' option. For example, tar cf /dev/rmt/0c would cause the Seagate Ultrium tape drive to compress the data before writing the data to tape. - Seagate STU62001LW-S | Installation Manual - Page 49
Viper 200 Installation Manual 47 Configuring for the IBM AIX Environment (AIX Version 4.1.x how to set the SCSI ID address jumpers for the Viper 200. Configuring the Viper 200 using SMIT The Seagate Viper 200 tape drive can be configured to work with AIX Versions 4.1.x and later by using the SMIT - Seagate STU62001LW-S | Installation Manual - Page 50
48 Viper 200 Installation Manual 5. Set "Use EXTENDED file marks" to yes. 6. Set "RESERVE/RELEASE support" to yes 7. Set "BLOCK SIZE for variable length support (Num.)" to 0 8. Set "Density 1" to 0 Leave the "Set delay. . ." and "Set timeout. . ." lines at the default value. Click on OK and the - Seagate STU62001LW-S | Installation Manual - Page 51
Viper 200 Installation Manual 49 Configuring for SCO Open Server 5.0.x Finding existing SCSI controllers and to remove the existing tape drive from the configuration files. Then follows the instructions below to add the Viper 200. 1. From the menu choose "Configure a SCSI or Enhanced IDE tape - Seagate STU62001LW-S | Installation Manual - Page 52
Manual 2. From the next menu choose "Install a SCSI tape drive". 3. When prompted enter the SCSI adapter string. You may want to use the h option to view the list of supported 'tape' commands will operate or be applicable to the Seagate Viper 200 drive (execute the command 'man tape' for the - Seagate STU62001LW-S | Installation Manual - Page 53
Viper 200 Installation Manual 51 not available for use with the Viper 200: is 1800 feet. Configuring for Linux Finding existing SCSI controllers and devices Before installing the Seagate Viper Ultrium tape drive first ensure that the requisite SCSI controllers and device drivers are installed - Seagate STU62001LW-S | Installation Manual - Page 54
52 Viper 200 Installation Manual Use the output of these two commands to see which SCSI suggest not using the erase command nor commands which attempt to partition the tape. Partitioning is not supported in the LTO format. For commands that use density and tape size settings the tape density is - Seagate STU62001LW-S | Installation Manual - Page 55
Viper 200 Installation Manual 53 Configuring for SGI Irix Finding current SCSI - 15 on controller 0 and ID's 1 - 5 and 8 - 15 on controller 1 (this particular controller supports Wide/Ultra SCSI). Note: SCSI ID #7 is almost always dedicated to the SCSI controller. Never configure your target - Seagate STU62001LW-S | Installation Manual - Page 56
200 Installation Manual Modifying the For IRIX 6.2 : {DATTAPE, TPDAT, 7, 12, "SEAGATE", "ULTRIUM06242", 0,0, {0}, MTCAN_BSF | MTCAN_BSR | MTCAN_APPEND | MTCAN_SETMK command and reboot the system. If you are replacing an existing storage device with the same SCSI ID remove the device files prior to - Seagate STU62001LW-S | Installation Manual - Page 57
Manual 55 Configuring for HP-UX 11.0 Finding current hardware/driver configuration To find currently installed SCSI controllers and devices the ioscan command can be used. The syntax would be ioscan -f. This command will list all of the system devices and their device names. Attaching the Seagate - Seagate STU62001LW-S | Installation Manual - Page 58
56 Viper 200 Installation Manual settings for rewind/no rewind, Berkeley mode, AT&T mode, ect. After performing the insf and mksf commands check the installation by using the command ioscan - - Seagate STU62001LW-S | Installation Manual - Page 59
Viper 200 Installation Manual 57 Technical support If you experience problems installing or using your tape drive, contact one of the technical support services listed below. World-wide services: Worldwide web: A wide variety of technical support services are available on Seagate's World Wide Web - Seagate STU62001LW-S | Installation Manual - Page 60
58 Viper 200 Installation Manual Support services in the Americas Telephone support (you will be directed to a product-specific phone or SEAFAX number) US customers: 1-800-SEAGATE International customers: 1-405-936-1234 Seagate Technical Support FAX (US and international): 1-405-936-1683 SeaTDD ( - Seagate STU62001LW-S | Installation Manual - Page 61
Manual 59 between 8:30 A.M. to 5:00 P.M. (European central time) Monday through Friday or send a FAX to 31-20-653-3513. Support services for Africa and the Middle East For presales, technical support, warranty repair and FAX services Japan Malaysia New Zealand Singapore Taiwan Thailand Phone
-
 1
1 -
 2
2 -
 3
3 -
 4
4 -
 5
5 -
 6
6 -
 7
7 -
8
-
9
-
10
-
11
-
12
-
13
-
14
-
15
-
16
-
17
-
18
-
19
-
20
-
21
-
22
-
23
-
24
-
25
-
26
-
27
-
28
-
29
-
30
-
31
-
32
-
33
-
34
-
35
-
36
-
37
-
38
-
39
-
40
-
41
-
42
-
43
-
44
-
45
-
46
-
47
-
48
-
49
-
50
-
51
-
52
-
53
-
54
-
55
-
56
-
57
-
58
-
59
-
60
-
61
 |
 |

Viper 200
®
LTO Ultrium Tape Drive
Installation Manual