Sharp AR M277 ARM237|ARM277 Operation Manual
Sharp AR M277 - B/W Laser - Copier Manual
 |
View all Sharp AR M277 manuals
Add to My Manuals
Save this manual to your list of manuals |
Sharp AR M277 manual content summary:
- Sharp AR M277 | ARM237|ARM277 Operation Manual - Page 1
AR-M230/M270 Series Online Manual Start Click this "Start" button. - Sharp AR M277 | ARM237|ARM277 Operation Manual - Page 2
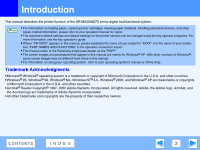
your model, see "PART NAMES AND FUNCTIONS" in the operation manual for copier. ● This manual refers to the Reversing single pass feeder as the "RSPF". ● The screen images and procedures that appear in this manual are mainly for Windows® XP. With other versions of Windows®, some screen images may be - Sharp AR M277 | ARM237|ARM277 Operation Manual - Page 3
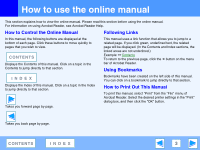
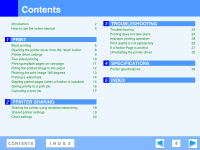
can click on a bookmark to jump directly to that section. How to Print Out This Manual To print this manual, select "Print" from the "File" menu of Acrobat Reader. Select the desired printer settings in the "Print" dialog box, and then click the "OK" button. Takes you back page by page. CONTENTS - Sharp AR M277 | ARM237|ARM277 Operation Manual - Page 4
Rotating the print image 180 degrees 13 Printing a watermark Stapling printed pages (when a finisher is installed) 14 15 5 INDEX Giving priority to a print job 16 Canceling a print job 17 2 PRINTER SHARING Sharing the printer using windows networking 18 Shared printer settings 19 Client - Sharp AR M277 | ARM237|ARM277 Operation Manual - Page 5
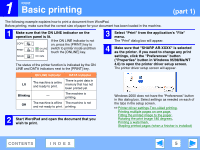
will appear. 4 Make sure that "SHARP AR-XXXX" is selected as the printer. If you need to change any print settings, click the "Preferences" button ("Properties" button in Windows 95/98/Me/NT 4.0) to open the printer driver setup screen. The printer driver setup screen will appear. ON LINE indicator - Sharp AR M277 | ARM237|ARM277 Operation Manual - Page 6
key in the touch panel, and specify the same paper type as in the printer driver. (part 2) When "Paper Selection" is set to "Auto Select" If "Paper Selection" is set to "Auto Select" in the "Paper" tab of the printer driver setup screen and the correct size of paper for a print job is not loaded in - Sharp AR M277 | ARM237|ARM277 Operation Manual - Page 7
" in the operation manual for copier. If you wish to select the "Paper Source" or "Paper Type" when printing, be sure to select these settings in the "Configuration" tab of the printer driver setup screen. (See "CONFIGURING THE PRINTER DRIVER" in the software setup guide.) You selected a "Paper - Sharp AR M277 | ARM237|ARM277 Operation Manual - Page 8
Click the "SHARP AR-XXXX" printer driver icon and select "Properties" from the "File" menu. 3 Click the "SHARP AR-XXXX" printer driver icon and select "Properties" from the "File" menu. In Windows NT 4.0, select "Document Defaults" to open Note the printer driver setup screen. 3 In Windows 95/98 - Sharp AR M277 | ARM237|ARM277 Operation Manual - Page 9
of the window and then click the setting. Some restrictions exist on the combinations of settings that can be selected in the printer driver setup screen. When exit the from a list of choices. dialog box. 3 Print setting image 8 "Cancel" button This shows the effect of the Click this button - Sharp AR M277 | ARM237|ARM277 Operation Manual - Page 10
printer driver setup screen and select "2-Sided (Book)" or "2-Sided (Tablet)" from "Document Style" in the "Main" tab. ☞See Basic printing for details on how to open the printer driver . (See "CUSTOM SETTINGS" in the operation manual for copier.) ● Two-sided printing is not possible if disabled - Sharp AR M277 | ARM237|ARM277 Operation Manual - Page 11
driver setup screen and select "2-Up" or "4-Up" for "N-Up Printing" on the "Main" tab. ☞See Basic printing for details on how to open the printer driver. The "N-Up Printing" setting is not available when "Fit To Paper Size" is selected. Note ☞Fitting the printed image to the paper N-Up Border - Sharp AR M277 | ARM237|ARM277 Operation Manual - Page 12
when "N-Up Printing" is selected. Note ☞Printing multiple pages on one page 1 Click the "Paper" tab in the printer driver setup screen. 2 Select the original size (Ledger) of the print image in "Paper Size". 4 Select the actual size of paper to be used for printing (Letter). The size of the - Sharp AR M277 | ARM237|ARM277 Operation Manual - Page 13
printer driver. The following example shows correct and incorrect rotation of an address printed on an envelope. Print data Printing result Portrait Rotate 180 degrees Portrait Rotate 180 degrees ABCD ABCD ABCD Note The procedure for loading paper is explained in operation manual for copier - Sharp AR M277 | ARM237|ARM277 Operation Manual - Page 14
, click the "Watermarks" tab, and follow the steps below. ☞See Basic printing for details on how to open the printer driver. How to Print a Watermark From the "Watermark" drop-down list, select the watermark that you wish to print (for example "CONFIDENTIAL"), and start printing. Print - Sharp AR M277 | ARM237|ARM277 Operation Manual - Page 15
B5, and Foolscap. ● Paper types that can be used for staple printing are Plain, Letter Head, Recycled and Color. ● Staple printing is not possible when the ROPM function is disabled. (See "CONFIGURING THE PRINTER DRIVER" in the software setup guide.) ● Stapling is not possible if disabled in the key - Sharp AR M277 | ARM237|ARM277 Operation Manual - Page 16
print job status screen to give priority to the job. For more information on using the job status screen, see operation manual for copier. 1 Press the [JOB STATUS] key. FAX JOB STATUS LINE DATA CUSTOM SETTING 4 Touch the [PRIORITY] key. A message appears asking you TING DETAIL to confirm the - Sharp AR M277 | ARM237|ARM277 Operation Manual - Page 17
in progress or waiting to be printed can be canceled. Use the print job status screen to cancel the job. 1 Press the [JOB STATUS] key. FAX JOB STATUS LINE DATA CUSTOM SETTING 3 The job in progress and the jobs waiting to be printed appear. Touch the key of the job that - Sharp AR M277 | ARM237|ARM277 Operation Manual - Page 18
SHARING Sharing the printer using windows networking The machine can be used as a shared printer in a Windows 95/98/Me/NT 4.0/2000/XP network environment. Note that the Windows network environment must already be established. Client Print server Shared printer Client Client "Print server - Sharp AR M277 | ARM237|ARM277 Operation Manual - Page 19
, open the printer folder and continue the setup procedures from Step 6. 6 Click "Printers and Other Hardware" in the control panel, and click "Printers and Faxes". In operating systems other than Windows XP, double-click the printer icon. 7 Click the "SHARP AR-XXXX" printer driver icon and select - Sharp AR M277 | ARM237|ARM277 Operation Manual - Page 20
click "Printers and Faxes". In Windows 95/98/Me/2000, click "Printers". 3 Click "Add a printer" in "Printer Tasks". In Windows 95/98/Me/2000, double-click the "Add Printer" icon. The "Add Printer Wizard" will appear. 4 Click the "Next" button. 5 Select "A network printer, or a printer attached to - Sharp AR M277 | ARM237|ARM277 Operation Manual - Page 21
the printer to be shared in the network, click the "OK" button and then click the "Next" button. CONTENTS INDEX The contents of this window will vary depending on your network environment. 8 Select settings in the "Default Printer" screen, and click the "Next" button. 9 Click the "Finish" button - Sharp AR M277 | ARM237|ARM277 Operation Manual - Page 22
properties after installing the printer driver. For the procedure for installing the printer driver, see "INSTALLING THE SOFTWARE" in the Software Setup Guide. 1 Click the "Start" button, select "Settings", and then click "Printers". 2 Click the "SHARP AR-XXXX" printer driver icon and select - Sharp AR M277 | ARM237|ARM277 Operation Manual - Page 23
describes how to solve printer problems. Refer to the relevant section based on the problem. To load paper, remove paper misfeeds, load staples in the finisher, remove jammed staples, or replace the toner cartridge, see "TROUBLESHOOTING" in operation manual for copier. Printing does not take - Sharp AR M277 | ARM237|ARM277 Operation Manual - Page 24
are USB and parallel cables. Check which type of cable is supported by your computer. For the specifications of the interface cable, see "CONNECTING TO A COMPUTER" in the software setup guide. ■ If the interface cable becomes disconnected If the interface cable becomes disconnected, even only - Sharp AR M277 | ARM237|ARM277 Operation Manual - Page 25
you are using Windows XP, the "Found New Hardware Note Wizard" may appear after you change the port setting. In this case, click the "Cancel" button to close the wizard, and then reinstall the printer driver as explained in "INSTALLING THE SOFTWARE" in the software setup guide. CONTENTS INDEX 25 - Sharp AR M277 | ARM237|ARM277 Operation Manual - Page 26
above errors occurs, a message will appear in the touch panel to alert you. Follow the instructions in the message to clear the error. Printing will automatically resume when the error is cleared. For information on handling errors, see "TROUBLESHOOTING" in the operation manual for copier. CONTENTS - Sharp AR M277 | ARM237|ARM277 Operation Manual - Page 27
" and then click "Printers". 2 Check if the "SHARP AR-XXXX" printer driver icon is shown. If the printer icon of the machine does not appear, the printer driver is not installed correctly. Follow the instructions in the software setup guide to correctly install the printer driver. ■ Is your machine - Sharp AR M277 | ARM237|ARM277 Operation Manual - Page 28
in the "Advanced" tab of the printer driver is "Normal" or "Photo", slow printing may result. Be sure to select a print quality that is suitable for the document or image being printed. Stapling is not possible (when a finisher is installed) ■ Is stapling disabled in the key operator programs - Sharp AR M277 | ARM237|ARM277 Operation Manual - Page 29
TROUBLESHOOTING Print quality is not satisfactory Check the paper being used ■ Non-standard paper used? Check that the paper conforms to the specification. Refer to "LOADING PAPER" in the operation manual for copier printing takes place on the back side, toner will not adhere well to the paper and - Sharp AR M277 | ARM237|ARM277 Operation Manual - Page 30
3 TROUBLESHOOTING Print quality is not satisfactory (part 2) The printed image is coarse ■ Has the printer driver been specified to suit both paper and the print job? You can select "Draft", "Normal" or "Photo" for the print quality in the "Advanced" tab of the printer driver setup screen. When " - Sharp AR M277 | ARM237|ARM277 Operation Manual - Page 31
executed. screen. (See "CONFIGURING THE PRINTER DRIVER" in the software setup guide.) If you wish to use the ROPM function, set the print quality to "Draft" or increase memory. Please refer to the operation manual for the solution method. When the Staple function is selected: Select "Draft" for - Sharp AR M277 | ARM237|ARM277 Operation Manual - Page 32
"SHARP AR-M230/M270 Series Printer Driver" from the list of applications. For more information, refer to your operating manual or to the help files for your operating system. 4 Restart your computer. When reinstalling the printer driver, install it correctly as Note explained in software setup guide - Sharp AR M277 | ARM237|ARM277 Operation Manual - Page 33
default setting for memory used for the printer function is 16 MB. The proportion of IMC memory allocated to the printer function can be changed in the key operator programs. See "MEMORY FOR PRINTER" in the key operator's guide. As a part of our policy of continuous improvement, SHARP reserves - Sharp AR M277 | ARM237|ARM277 Operation Manual - Page 34
manual 3 I "Image Orientation 13 IMC memory 31 Introduction 2 N Notice Page 31 "N-Up Printing 11 O ON LINE indicator 5 Opening the printer 8 "Output 6 P "Paper Selection 6 "Paper Source 7 "Paper Type 7 Part of the printed image is missing....30 PRINT 5 [PRINT] key 5 Printer driver
-
 1
1 -
 2
2 -
 3
3 -
 4
4 -
 5
5 -
 6
6 -
 7
7 -
8
-
9
-
10
-
11
-
12
-
13
-
14
-
15
-
16
-
17
-
18
-
19
-
20
-
21
-
22
-
23
-
24
-
25
-
26
-
27
-
28
-
29
-
30
-
31
-
32
-
33
-
34
 |
 |
AR-M230/M270 Series
Online Manual
Start
Start
Click this "Start" button.