Sharp UX CC500 UXCC500 Operation Manual
Sharp UX CC500 - B/W Thermal Transfer Manual
 |
UPC - 074000033252
View all Sharp UX CC500 manuals
Add to My Manuals
Save this manual to your list of manuals |
Sharp UX CC500 manual content summary:
- Sharp UX CC500 | UXCC500 Operation Manual - Page 1
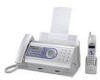
MODEL UX-CC500 FACSIMILE OPERATION MANUAL 1. Installation 2. Using the Cordless Handset 3. Using the Answering System 4. Sending Faxes 5. Receiving Faxes 6. Making Copies 7. Special Functions 8. Printing Lists 9. Maintenance 10. Troubleshooting FROM SHARP MINDS C O M E S H A R P P R O D U C T S - Sharp UX CC500 | UXCC500 Operation Manual - Page 2
Part the user is Fax machine FCC Radiation Exposure Statement: This equipment complies with FCC radiation exposure limits set Cordless handset For body worn operation, this phone machine, please refer to the appropriate instructions in the operation manual." As an ENERGY STAR partner, SHARP - Sharp UX CC500 | UXCC500 Operation Manual - Page 3
has its own personal box in the answering system. Fax machine and general specifications. Automatic dialing Common book: 40 numbers Private book: 5 numbers (each cordless handset has 1 private book) Imaging film Initial starter roll (included with machine): 32 ft. (10 m) (approx. 30 letter-size - Sharp UX CC500 | UXCC500 Operation Manual - Page 4
feeding: Width: 5.8 to 8.5" (148 to 216 mm) Length: 5.5 to 23.6" (140 to 600 mm) 8.3" (210 mm) max. 8.3" (210 mm) max. Automatic/Dark selectable TEL/FAX/TAD Single / Multi (99 copies/page) Yes (cannot be used if power fails) 120 V AC, 60 Hz 41 - 95°F (5 - 35°C) 25 - 85% RH Standby: 4.3 W Maximum - Sharp UX CC500 | UXCC500 Operation Manual - Page 5
temperature) Battery life (both normal and in standby mode) may vary depending on usage, range from base machine, and environmental conditions such as temperature. Accessory cordless handset UX-K01 (up to 3 handsets can be added) As a part of our policy of continuous improvement, SHARP reserves - Sharp UX CC500 | UXCC500 Operation Manual - Page 6
it to overheat. Do not allow the battery to become wet. Do not dispose of the battery in a fire or heat the battery. The battery may explode. Health care facilities and equipment Radio frequency energy emitted from the cordless handset equipment may cause medical equipment to malfunction. Verify - Sharp UX CC500 | UXCC500 Operation Manual - Page 7
the Imaging Film 22 Loading Printing Paper 24 Entering Your Name and Fax Number 26 Setting the Date and Time 28 Setting the Reception Mode 30 Volume Adjustment - Fax Machine 31 Volume Adjustment - Cordless Handset 32 2. Using the Cordless Handset 34 Making a Phone Call 34 Receiving - Sharp UX CC500 | UXCC500 Operation Manual - Page 8
Subscription to Service 97 Blocking Reception of Unwanted Faxes 98 8. Printing Lists 99 9. Maintenance 103 Replacing the Cordless Handset Battery 106 10. Troubleshooting 108 Problems and Solutions 108 Messages and Signals 114 Clearing Paper Jams 119 Ordering Parts 121 FCC Regulatory - Sharp UX CC500 | UXCC500 Operation Manual - Page 9
the Operation Panel Fax machine 1 23 4 TEL FAX REC/ MEMO PLAY TAD INTERCOM Z RESOLUTION/ REDIAL RECEPTION MODE STOP COPY/HELP START/MEMORY FUNCTION 8 machine. 2 INTERCOM key Press this key to page or locate the cordless handset. 3 REC/MEMO key Press this key to record an outgoing message, phone - Sharp UX CC500 | UXCC500 Operation Manual - Page 10
, press this key to print out the Help List, a quick reference guide to the operation of your fax machine. 10 START/MEMORY key Press this key after dialing to begin fax transmission. Press this key before dialing to send a fax through memory. The key can also be pressed in the date and time display - Sharp UX CC500 | UXCC500 Operation Manual - Page 11
separately) connected to the cordless handset. Ringer volume: When not talking on the cordless handset, press these keys to adjust the cordless handset ringer volume. Scroll through numbers: Press these keys to scroll when searching for an auto-dial number or reviewing received calls (only available - Sharp UX CC500 | UXCC500 Operation Manual - Page 12
key to start fax reception from the cordless handset, or to complete entries when storing, editing, or deleting auto-dial numbers. 13 REMOTE/FLASH key Press this key to perform remote operations on the fax machine. The key is also used to access special services from your phone company that require - Sharp UX CC500 | UXCC500 Operation Manual - Page 13
the reception mode on the fax machine. 17 STOP key Press on hold. Erase: Press this key to delete a phone number when searching through your recently received calls (only cordless handset. 22 Headset jack This jack lets you connect a headset (purchased separately) to the cordless handset. 23 Battery - Sharp UX CC500 | UXCC500 Operation Manual - Page 14
setting up, make sure you have all of the following items. If any are missing, contact your dealer or retailer. Paper tray Paper tray extension Operation manual Gears (2) Handset Handset cord Telephone line cord Imaging film (initial starter roll) Cordless handset Battery cover Battery - Sharp UX CC500 | UXCC500 Operation Manual - Page 15
Setting Up Setting Up Selecting a location for the fax machine To maximize the talking range of the cordless handset, we recommend installing the fax machine in a high and central location away from obstructions such as walls. High and central location with no obstructions Keep the fax machine - Sharp UX CC500 | UXCC500 Operation Manual - Page 16
identical, so they will go into either jack. Make sure the handset cord goes into the jack marked with a handset symbol on the side of the machine! Use the handset to make ordinary phone calls, or to transmit and receive faxes manually. Connecting the power cord Plug the power cord into a 120 V, 60 - Sharp UX CC500 | UXCC500 Operation Manual - Page 17
. LINE. Insert the other end into a standard (RJ11C) single-line wall telephone jack. TEL.LINE Setting the dial mode The fax machine is set for tone dialing. If you are on a pulse dial line, you must set the fax machine for pulse dialing. Press the panel keys as follows: 1 Press FUNCTION once and - Sharp UX CC500 | UXCC500 Operation Manual - Page 18
Setting Up Note: If your area experiences a high incidence of lightning or power surges, we recommend that you install surge protectors for the power and telephone lines. Surge protectors can be purchased at most telephone specialty stores. About condensation If the machine using the machine. Attach - Sharp UX CC500 | UXCC500 Operation Manual - Page 19
1. Installation Setting Up Raising the base antenna Raise the base antenna to ensure clear communication with the cordless handset. Connecting the cordless handset charger 1 Connect the AC adapter to the cordless handset charger. Fit the cord into the holders. 2 Plug the AC adapter into a - Sharp UX CC500 | UXCC500 Operation Manual - Page 20
Setting Up Installing the battery and charging the cordless handset 1 Connect the battery connector –, and then place the battery pack in the cordless handset. • Place the wires as shown. Black Red Red Black 2 Place the battery cover on the cordless handset, making sure it snaps firmly into place. - Sharp UX CC500 | UXCC500 Operation Manual - Page 21
1. Installation Setting Up When the battery needs charging, LOW BATTERY will appear in the display and you will hear beeps during a phone conversation. If you need to continue the conversation, press INTER COM to transfer the call to the fax machine. Place the cordless handset in the charger - Sharp UX CC500 | UXCC500 Operation Manual - Page 22
Setting Up Entering a name for the cordless handset You can enter a name for the cordless handset in the fax machine. ♦ The fax machine will transmit the name that you enter to your cordless handset. The name will appear in the cordless handset's display. 1 Press FUNCTION once and the fax machine. - Sharp UX CC500 | UXCC500 Operation Manual - Page 23
Accessory cordless handsets You can use up to 3 additional UX-K01 cordless handsets with the fax machine. Please purchase accessory UX-K01 handsets at your dealer or retailer. For information on setting up an accessory cordless handset for use with the fax machine, see the manual that accompanies - Sharp UX CC500 | UXCC500 Operation Manual - Page 24
heat to the imaging film to transfer ink to the paper. Follow the steps below to load or replace the film. The initial starter roll of imaging film included with your fax can print about 30 letter-size pages. When replacing the film, use a roll of Sharp UX5CR imaging film. One roll can print about - Sharp UX CC500 | UXCC500 Operation Manual - Page 25
. Make sure the gears fit into the slots in the ends of the rolls. 1 slot 2 slots 6 Insert the film into the print compartment. Fit ends of rolls onto hubs Thick roll to rear 7 Rotate the front gear as shown until the film is taut. 8 Close the operation panel (press down on both sides to make - Sharp UX CC500 | UXCC500 Operation Manual - Page 26
tray is empty, add paper. If there is paper in the tray, take it out and then reinsert it. When you are finished, press START/MEMORY . ADD PAPER & PRESS START KEY 24 - Sharp UX CC500 | UXCC500 Operation Manual - Page 27
size: LETTER: 1 LEGAL: 2 The display briefly shows your selection, then: COPY CUT-OFF 5 Press STOP to return to the date and time display. Print contrast setting Your fax has been set at the factory to print at normal contrast. If desired, you can change the print contrast - Sharp UX CC500 | UXCC500 Operation Manual - Page 28
date and time appear on each fax message you send. Enter your name and fax number here and set the date and time as explained in the following section to have the fax machine include this information automatically at the top of your fax messages. STOP START/MEMORY FUNCTION 123 456 789 0 1 Press - Sharp UX CC500 | UXCC500 Operation Manual - Page 29
. 5 Press START/MEMORY to enter the fax number in memory. 6 Enter your as shown in the chart below. Up to 24 characters can be entered. Example: SHARP = 7777 44 2 777 7 SPACE = G = N = U = A = H = O = V = B MEMORY . Display: DATE&TIME SET 8 Press STOP to return to the date and time - Sharp UX CC500 | UXCC500 Operation Manual - Page 30
printed at the top of every page you fax. Set the date and time as shown below. STOP START/MEMORY FUNCTION 123 456 789 0 1 Press FUNCTION once and 3 times. Display: ENTRY MODE 2 Press once and once. DATE&TIME SET 3 Press . The currently set date appears (example): DATE 08-15-2002 4 Enter - Sharp UX CC500 | UXCC500 Operation Manual - Page 31
2 5 TIME 09:25 PM 8 Press to select A.M. or to select P.M. 9 Press START/MEMORY to start the clock. ANTI JUNK # 10 Press STOP to return to the date and time display. Daylight Saving Time If desired, you can set the clock to move forward and backward automatically at the beginning and end of - Sharp UX CC500 | UXCC500 Operation Manual - Page 32
on four rings and receive incoming faxes. TEL mode: Select this mode when you want to receive both phone calls and faxes on the line connected to the fax machine. All calls, including faxes, must be answered by picking up the fax machine's handset or an extension phone connected to the same line - Sharp UX CC500 | UXCC500 Operation Manual - Page 33
using the up and down arrow keys. 2 Press or to select the desired volume level. • Press SPEAKER again to turn off the speaker. Fax machine handset 1 When talking through the handset, press or to select the desired volume level. • Note: The volume reverts to MIDDLE each time you replace the - Sharp UX CC500 | UXCC500 Operation Manual - Page 34
Cordless Handset Fax machine ringer 1 Press or to select the desired Display: volume level. (Make sure SPEAKER has not been pressed, the handset the ringer, press START/MEMORY . Volume Adjustment - Cordless Handset You can adjust the volume of the ringer and handset, receiver using the up - Sharp UX CC500 | UXCC500 Operation Manual - Page 35
Note: The volume reverts to MIDDLE each time you hang up (press OOFFFF ). Cordless handset display: RECEIVER: HIGH RECEIVER: MIDDLE RECEIVER: LOW Cordless handset ringer 1 When you are not talking on the cordless handset, press or to select the desired ringer volume level. • The ringer will ring - Sharp UX CC500 | UXCC500 Operation Manual - Page 36
2. Using the Cordless Handset Making a Phone Call OOFFFF TALK 1 Pick up the cordless handset and press TALK . Cordless handset display: TALK 2 When you hear the placing the cordless handset in the charger. If the display shows FAX BUSY, you must wait until the fax machine is no longer in use to use - Sharp UX CC500 | UXCC500 Operation Manual - Page 37
an outside FUNCTION line or a special service, press /PAUSE . The pause will appear as a hyphen (-). Receiving a Phone Call 1 When the cordless handset rings, pick it up and press any key (except OOFFFF ) to answer. Talk to the other party. • If the cordless handset is in the charger, simply pick - Sharp UX CC500 | UXCC500 Operation Manual - Page 38
speaks to you and then wants to send a fax, press START . This signals the fax machine to begin fax reception. START Press to begin fax reception Note: If the fax machine detects a fax signal after you answer a call on the cordless handset, it will begin reception automatically. Storing and Using - Sharp UX CC500 | UXCC500 Operation Manual - Page 39
Cordless Handset FUNCTION 3 Press . /PAUSE ENTER TEL # 4 Enter the number by pressing the number keys. (Note: A space cannot be entered.) • To clear a mistake, press HOLD . ERASE • If a pause is required between any of the digits to access a special service to Step 7.) Example: SHARP = 7777 44 2 - Sharp UX CC500 | UXCC500 Operation Manual - Page 40
COMMON w: PRIVATE 8 Return to Step 2 to store another number, or press OOFFFF to exit. Dialing an auto-dial number 1 Press SEARCH once. Cordless handset display: SELECT SEARCH v: COMMON w: PRIVATE 2 Press to select the Common book, or to select the Private book. Example: Common book selected - Sharp UX CC500 | UXCC500 Operation Manual - Page 41
auto-dial number, follow these steps: 1 Press SEARCH once. Cordless handset display: SELECT SEARCH v: COMMON w: PRIVATE 2 Press to . If a pause is required between any of the ERASE FUNCTION digits to access a special service or an outside line, press . /PAUSE • If you do not wish to change the - Sharp UX CC500 | UXCC500 Operation Manual - Page 42
OOFFFF to exit. Clearing an auto-dial number If you need to clear an auto-dial number, follow these steps: 1 Press SEARCH once. Cordless handset display: SELECT SEARCH v: COMMON w: PRIVATE 2 Press to select the Common book, or to select the Private book. Example: Common book selected COMMON - Sharp UX CC500 | UXCC500 Operation Manual - Page 43
cordless handset or the fax machine when other cordless handsets or the fax machine are already in use. Paging the fax machine from a cordless handset 1 Press INTER COM on the cordless handset. The numbers and names of the other cordless handsets appear (even the numbers of cordless handsets - Sharp UX CC500 | UXCC500 Operation Manual - Page 44
2 Press 0 on the cordless handset to select the fax machine. Cordless handset display: INTERCOM 0: BASE STATION 3 The fax machine rings. Fax machine display: INTERCOM Number and name of calling handset 1: BOB 4 The other person picks up the fax machine handset to answer. 5 Talk with the - Sharp UX CC500 | UXCC500 Operation Manual - Page 45
OOFFFF ) on the cordless handset to answer. 5 Talk with the other person. When you are ready to end the conversation, press OOFFFF . Paging a cordless handset from the fax machine (cordless handset locator) You can use this procedure to page a cordless handset, or locate a handset in the event that - Sharp UX CC500 | UXCC500 Operation Manual - Page 46
(press OOFFFF on the cordless handset or replace the fax machine handset), and then answer the outside call (press any key except OOFFFF on the cordless handset or pick up the fax machine handset). Transferring Calls You can transfer a call to the fax machine or to a cordless handset. Note: It is - Sharp UX CC500 | UXCC500 Operation Manual - Page 47
cordless handset or fax machine rings. 4 The other person answers on the cordless handset or fax machine. • To answer on a cordless handset other than the selected cordless handset, press TALK on that cordless handset. To answer on the fax machine when not selected, pick up the fax machine handset - Sharp UX CC500 | UXCC500 Operation Manual - Page 48
) on the cordless handset to answer. • To answer on a cordless handset other than the selected cordless handset, press TALK on the other cordless handset. • If no one answers for one minute when you page the cordless handset, the fax machine will ring to alert you. Pick up the fax machine handset to - Sharp UX CC500 | UXCC500 Operation Manual - Page 49
for the general box, and a greeting for each personal box you wish to use. 3. Answering Machine General Message Press Personal 1 Message 1 2 3 Personal Box 23 4 General 4 Box 1 2 3 4 Each cordless handset can be used to listen to the messages in its corresponding personal box (the - Sharp UX CC500 | UXCC500 Operation Manual - Page 50
greeting that the system plays after answering a call to inform callers that they can leave a message or send a fax. Follow the steps below to personal box. Please leave a message after the beep." Note: Do not lift the handset until Step 3 below. 1 REC/ Press MEMO . Display: MEMO RECORDING 2 Press - Sharp UX CC500 | UXCC500 Operation Manual - Page 51
a Personal Box You can set a 3-digit passcode for each personal box. When this is done, the passcode must be entered to listen to messages in a personal box at the fax machine. (Note: When listening to the messages in a personal box from its corresponding cordless handset, is not necessary to enter - Sharp UX CC500 | UXCC500 Operation Manual - Page 52
be 0, 5, 6, 7, 8, or 9. 7 Press START/MEMORY . ENTER BOX # (1-4) 8 Return to Step 5 to set another passcode, or press STOP to return to the date and enter a new passcode. Operating the Answering System Activating the answering system To turn on the answering system so that callers can leave - Sharp UX CC500 | UXCC500 Operation Manual - Page 53
, press STOP ). ♦ It will not be possible to set the reception mode to TAD if a general outgoing message has not been recorded. Note: In TAD mode, the machine will automatically switch to fax reception if it detects 6 seconds of silence after answering a call. For this reason, if a caller pauses for - Sharp UX CC500 | UXCC500 Operation Manual - Page 54
Operating the Answering System Listening to received messages (at the fax machine) When you return, the fax machine display will show , press 0 . SKIP Note: Playback will stop if you receive a call, lift the handset, or press STOP . ♦ You can print out a list of your received messages that shows - Sharp UX CC500 | UXCC500 Operation Manual - Page 55
memos for yourself and other users of the machine. These are recorded in the general box, and will be played back together with incoming messages when the PLAY key is pressed. 1 REC/ Press MEMO once and once. 2 Pick up the handset, press START/MEMORY , and speak into the handset. 3 When you have - Sharp UX CC500 | UXCC500 Operation Manual - Page 56
To record a phone conversation, hold down the MEMO key during the conversation you want to record. When you are finished, release the key. The conversation is recorded in the general box, and will be played back when the PLAY key is pressed. Listening to messages from a cordless handset You can use - Sharp UX CC500 | UXCC500 Operation Manual - Page 57
will stop automatically. Press any key to answer. • If you take no action for 60 seconds in REMOTE MODE, the cordless handset will automatically return to the STAND-BY display. Deleting all messages from a cordless handset You can use your cordless handset to delete all messages in your personal - Sharp UX CC500 | UXCC500 Operation Manual - Page 58
the date and time display. Fax reception on TAD failure If the memory for recording incoming messages becomes full while you are out, the answering system will no longer be able to record messages. The ON TAD FAILURE setting is used to choose the response of the machine to incoming calls when this - Sharp UX CC500 | UXCC500 Operation Manual - Page 59
3. Answering Machine Optional Answering System Settings ♦ Automatic fax reception YES: The reception mode will switch to FAX mode, allowing the machine to continue to receive faxes automatically. With this setting, you can still use the remote commands to listen to your messages and then erase - Sharp UX CC500 | UXCC500 Operation Manual - Page 60
used by these services may be mistaken for a CPC signal, causing the answering system to hang up during a call. If you experience this problem, follow these steps to turn off CPC Detection. 1 Press FUNCTION once and once. 2 Press once and twice. Display: T.A.D. SETTING CPC DETECTION 3 Press - Sharp UX CC500 | UXCC500 Operation Manual - Page 61
wish the machine to call (the transfer number), and record the transfer message that plays when you answer the phone at the machine the number to call (the transfer number). 1 Press FUNCTION once and once. 2 Press once and 3 times. Display: T.A.D. SETTING TRANSFER TEL # 3 Press . ENTER TEL - Sharp UX CC500 | UXCC500 Operation Manual - Page 62
answer the telephone, and informs you that the call is a transfer call. The following is an example: "Hello. This is a transfer call for (YOUR NAME). Enter your remote code number now." Note: Do not lift the handset 3 Lift the handset. 4 Press START/MEMORY and speak into the handset to record the - Sharp UX CC500 | UXCC500 Operation Manual - Page 63
Transfer Function 3. Answering Machine Turning the Transfer function on and off When you go out and wish to use the Transfer function, turn it on as follows: 1 Press FUNCTION once and once. Display: T.A.D. SETTING 2 Press once and 4 times. TRANSFER FUNC 3 Press . 4 Press 1 to turn on the - Sharp UX CC500 | UXCC500 Operation Manual - Page 64
the reception mode and other settings. Remote code number After calling the machine, you must enter your remote SETTING 2 Press once and twice. REMOTE CODE 3 Press . 4 Press the number keys to enter a 3-digit remote code number. 5 Press START/MEMORY to store the remote number. TRANSFER TEL - Sharp UX CC500 | UXCC500 Operation Manual - Page 65
want to use the Toll Saver function, you can turn it off by following the steps below. In this case, the machine will answer after the number of rings set with the NUMBER OF RINGS setting (see Changing the number of rings on page 83). 1 Press FUNCTION once and once. 2 Press once. 3 Press once - Sharp UX CC500 | UXCC500 Operation Manual - Page 66
only access one box per call. If you wish to access more than one box, you must make a separate call for each box. 1 Call the machine from a touch-tone telephone. When the general outgoing message begins, press on the telephone. • You will hear a short beep, and the outgoing message will stop - Sharp UX CC500 | UXCC500 Operation Manual - Page 67
Remote Operations 3. Answering Machine 4 While the messages are playing, you can do any of the following: • saved and any new messages will be recorded after them. If you want the machine to resume normal operation immediately, press twice before hanging up (in some cases, particularly when the Transfer - Sharp UX CC500 | UXCC500 Operation Manual - Page 68
Remote Operations Note: You can also call the machine and perform remote operations when the reception mode is set to FAX. In this case, when you call the machine, press immediately after it answers (before you hear the fax tone), and then continue from Step 2 above. Comments: ♦ When a remote - Sharp UX CC500 | UXCC500 Operation Manual - Page 69
Remote Operations 3. Answering Machine Recording a new outgoing message Note: You can only record a new . • The message can be up to 15 seconds long. After 15 seconds (or earlier if the machine detects silence after you finish speaking), you will hear a beep, and the new message will be played - Sharp UX CC500 | UXCC500 Operation Manual - Page 70
. Recording a memo You can record a memo for yourself or other users of the machine. The memo will be recorded in the general box. 1 Press and play, but callers will not be able to record a message. Faxes sent by automatic dialling will be received) To turn off OGM only mode: Press - Sharp UX CC500 | UXCC500 Operation Manual - Page 71
mm) Minimum weight Maximum weight 14 lbs. (52 g/m² ) 42 lbs. (157 g/m²) Minimum weight Maximum weight 14 lbs. (52 g/m² ) 21.5 lbs. (80 g/m²) 4. Sending Faxes Note: Letters or graphics on the edges of a document will not be scanned. 0.2"(5 mm) Letters in the shaded area will not be scanned - Sharp UX CC500 | UXCC500 Operation Manual - Page 72
greenish yellow, or light blue ink. ♦ Ink, glue, and correcting fluid on one time. The pages will automatically feed into the machine starting from the bottom page. ♦ If you need Insert gently to prevent double-feeding. 1 Adjust the document guides to the width of your document. 2 Insert the document - Sharp UX CC500 | UXCC500 Operation Manual - Page 73
contrast before sending a document. The default resolution setting is STANDARD and the default contrast setting is AUTO. You must adjust the settings each time you don't want to use the default settings. 4. Sending Faxes Note: The resolution and contrast settings are only effective for sending - Sharp UX CC500 | UXCC500 Operation Manual - Page 74
time you move through the list, the contrast setting DARK will appear. Display: STANDARD :AUTO FINE :AUTO SUPER FINE :AUTO HALF TONE :AUTO STANDARD :DARK HALF TONE :DARK Note: In order to transmit in SUPER FINE resolution, the receiving fax machine must also have that resolution. If it doesn - Sharp UX CC500 | UXCC500 Operation Manual - Page 75
4 Wait for the connection. Depending on the setting of the receiving machine, you will either hear a fax tone or the other person will answer. • If the other party answers, ask them to press their Start key (if you pressed SPEAKER , pick up the handset to speak with them). This causes the receiving - Sharp UX CC500 | UXCC500 Operation Manual - Page 76
store your most frequently dialed fax or phone numbers in the machine for automatic dialing. ♦ Auto-dial numbers can be stored using either the fax machine or the cordless handset (to store a number using the cordless handset, see page 36). ♦ Numbers stored using the fax machine are stored in the - Sharp UX CC500 | UXCC500 Operation Manual - Page 77
, or press STOP to return to the date and time display. Note: The fax machine uses a lithium battery to keep automatic dialing numbers and other programmed information in memory when the power is turned off. Battery power is consumed primarily when the power is off. With the power kept continuously - Sharp UX CC500 | UXCC500 Operation Manual - Page 78
Sending a Fax by Automatic Dialing Editing and clearing auto-dial numbers If you need to the old digit. • If you do not wish to change the number, go directly to Step 6. 6 Press START/MEMORY . 7 Make the desired changes to the name. • Press or to move the cursor to the letter or letters you - Sharp UX CC500 | UXCC500 Operation Manual - Page 79
START/MEMORY . Dialing and transmission begins. • If the transmission is completed successfully, the fax will beep once. • If an error occurs, the fax will beep three times and print a Transaction Report to inform you of the problem (see page 101). If you are making a phone call, lift the handset - Sharp UX CC500 | UXCC500 Operation Manual - Page 80
RESOLUTION/ • If desired, press RECEPTION MODE to set the resolution and/or contrast. READY TO SEND 2 Enter the number of the receiving machine by pressing the number keys. • If a pause is required between any of the digits to access a special service or an outside line, press FUNCTION . The pause - Sharp UX CC500 | UXCC500 Operation Manual - Page 81
on the fax machine. This procedure can be used to send a fax or make a phone call. Note: The fax machine and the cordless handset each retain their own separate redial numbers. 1 If you are sending a fax, load the document(s). RESOLUTION/ • If desired, press RECEPTION MODE to set the resolution - Sharp UX CC500 | UXCC500 Operation Manual - Page 82
answers the call on a telephone), automatic redialing may stop before three redialing attempts are made. Error Correction Mode The fax machine is set fax machine has ECM as well. If desired, you can turn ECM off. This will increase slightly the amount of memory available for memory transmission - Sharp UX CC500 | UXCC500 Operation Manual - Page 83
, only auto-dial numbers can be used to dial the numbers of the receiving machines. 1 Load the document(s). RESOLUTION/ • If desired, press RECEPTION MODE to set the resolution and/or contrast. 2 Press START/MEMORY . 3 Press (or ) until the name of the destination appears in the display (if no - Sharp UX CC500 | UXCC500 Operation Manual - Page 84
to those destinations again. Memory transmission You can also send a fax through memory when sending to a MEMORY . If the memory becomes full... If the memory becomes full while the document is being scanned, MEMORY IS FULL and SEE MANUAL will alternately appear in the display. ♦ Press START/MEMORY - Sharp UX CC500 | UXCC500 Operation Manual - Page 85
the arrow in the display points to FAX. RESOLUTION/ RECEPTION MODE TEL FAX TAD When the reception mode is set to FAX, the fax machine will automatically answer all calls on four rings and receive incoming faxes. ♦ If you pick up the handset before the machine answers, you can talk to the other - Sharp UX CC500 | UXCC500 Operation Manual - Page 86
above setting. Using TEL Mode To select TEL mode, press RESOLUTION/ RECEPTION MODE until the arrow in the display points to TEL. RESOLUTION/ RECEPTION MODE TEL FAX TAD When the reception mode is set to TEL, you must answer all calls by picking up the fax machine's handset or an extension phone - Sharp UX CC500 | UXCC500 Operation Manual - Page 87
Answering with the fax's handset 1 When the fax machine rings, pick up the handset. Using TEL Mode 2 If you hear a fax tone, wait until the display shows RECEIVING and then replace the handset. Beep RECEIVING Note: If you have set the Fax Signal Receive setting to NO, press START/MEMORY to begin - Sharp UX CC500 | UXCC500 Operation Manual - Page 88
fax's handset, and press START/MEMORY . • The above step is necessary if you have set the Fax Signal Receive setting to NO. Optional Reception Settings Fax Signal Receive Your fax will automatically begin reception if you hear a soft fax tone after answering a call on your fax or an extension phone - Sharp UX CC500 | UXCC500 Operation Manual - Page 89
it off. The display briefly shows your selection, then: CALLER-ID 5 Press STOP to return to the date and time display. Reception Ratio The fax has been set at the factory to automatically reduce the size of received documents to fit the size of the printing paper. This ensures that data on - Sharp UX CC500 | UXCC500 Operation Manual - Page 90
situations where printing is not possible, such as when your fax runs out of paper, the imaging film needs replacement, or the paper jams, incoming faxes will be received to memory. When you have received a document in memory, FAX RX IN MEMORY will appear in the display, alternating with ADD PAPER - Sharp UX CC500 | UXCC500 Operation Manual - Page 91
from 1 to 99. The default setting is 1. Example: Press 5 for five copies 5 6. Making Copies 3 When you are ready to begin copying, press COPY/HELP . If MEMORY IS FULL appears... If the memory becomes full while a document is being scanned, MEMORY IS FULL and SEE MANUAL will alternately appear in - Sharp UX CC500 | UXCC500 Operation Manual - Page 92
longer than the printing paper, use the copy cut-off setting to select whether the remaining part of the document will be cut off or printed on a second page. The initial setting is YES (cut off the remainder). To change the setting, follow the steps below. 1 Press FUNCTION once and once. 2 Press - Sharp UX CC500 | UXCC500 Operation Manual - Page 93
identification services. ♦ Area Code mode: This step is needed if your telephone exchange cannot dial a local phone number (within your calling area code) when the area code is dialed with the phone number (see Step 5). 1 Press FUNCTION once and the fax machine. once on Display: OPTION SETTING - Sharp UX CC500 | UXCC500 Operation Manual - Page 94
code. 7 Press START/MEMORY to store your area code. ECM MODE 8 Press STOP to return to the date and time display. How Caller ID operates When you receive a call, the name and phone number of the caller will appear in the fax machine display and cordless handset display, beginning just before - Sharp UX CC500 | UXCC500 Operation Manual - Page 95
and then press START/MEMORY . Dialing and transmission begin. Fax: START/MEMORY • Voice call: If you wish to make a voice call, pick up the handset (or press SPEAKER ). Dialing begins automatically. (If you pressed SPEAKER , pick up the handset when the other party answers.) Voice call: 4 Press - Sharp UX CC500 | UXCC500 Operation Manual - Page 96
also view the Caller ID list in the cordless handset display, and automatically dial a number from the list. (Note that the cordless handset and the fax machine share the same list.) 1 Press REVIEW . Cordless handset display: REVIEW CALLS vw: REVIEW 2 Press or to scroll through the numbers in - Sharp UX CC500 | UXCC500 Operation Manual - Page 97
. Cordless handset display: REVIEW CALLS vw: REVIEW 2 HOLD Press . ERASE 3 Press START . • To cancel, press OOFFFF . ERASE ALL? PRESS START KEY Priority Call If you have turned on Caller ID, you can set the machine to make a special ringing sound when you receive a call from a designated phone - Sharp UX CC500 | UXCC500 Operation Manual - Page 98
Caller ID (Requires Subscription to Service) 4 Press 1 to store a number. (To clear a previously stored number, press 2 and go to Step 6.) 5 Enter the number by pressing the number keys (max. 20 digits). 6 Press START/MEMORY to store (or clear) the number. HS NAME SET 7 Press STOP to return to - Sharp UX CC500 | UXCC500 Operation Manual - Page 99
service from your local phone company. ♦ Your fax machine may not be compatible with some distinctive ring services. Distinctive ring is a service number. If you subscribe to a distinctive ring service, you can set the fax machine to automatically answer when your second number is called. This allows - Sharp UX CC500 | UXCC500 Operation Manual - Page 100
date and time display. 6 Set the reception mode to FAX. RESOLUTION/ RECEPTION MODE TEL FAX TAD ♦ When using distinctive ring, you must set the reception mode of your fax machine to FAX. When your designated fax number is dialed, your fax will automatically answer and begin reception after two - Sharp UX CC500 | UXCC500 Operation Manual - Page 101
Lists 8. Printing Lists You can print lists showing settings and information entered in the fax machine. The lists are described below. To print a list, follow these steps. 1 Press FUNCTION once and twice. 2 Press once. Display: LISTING MODE TEL # LIST 3 Press or until the desired list - Sharp UX CC500 | UXCC500 Operation Manual - Page 102
key settings. The list also shows your name and fax/telephone number as entered in the machine, and a sample of the header printed at the top of every page you transmit (HEADER PRINT). Message List This list shows information about the messages currently recorded in the answering machine, including - Sharp UX CC500 | UXCC500 Operation Manual - Page 103
Printing Lists Transaction Report This report is printed out automatically after an operation is completed to allow you to check the result. Your fax machine is set at the factory to print out the report only when an error occurs. ♦ The Transaction report cannot be printed on demand. Headings in - Sharp UX CC500 | UXCC500 Operation Manual - Page 104
the steps below. 1 Press FUNCTION once and once. Display: OPTION SETTING 2 Press once and once. TRANSACTION 3 Press once. 1:ALWAYS PRINT reception, or error. A report will be printed after an error or a memory operation. A report will be printed after each transmission. A report will be - Sharp UX CC500 | UXCC500 Operation Manual - Page 105
Take the imaging film out of the print compartment and place it on a sheet of paper. 3 Wipe the print head with isopropyl alcohol or denatured alcohol. Caution! • Do not use benzene or thinner. Avoid touching the print head with hard objects. • The print head may be hot if your fax machine has just - Sharp UX CC500 | UXCC500 Operation Manual - Page 106
back in the print compartment. 5 Rotate the front gear until the film is taut, and then close the operation panel (press down on both sides to make sure it clicks into place). Scanning glass and rollers Clean - Sharp UX CC500 | UXCC500 Operation Manual - Page 107
side of the white roller. Rotate the front gear until the film is taut, and then close the operation panel (press down on both sides to make sure it clicks into place). The housing Wipe the external parts and surface of the machine with a dry cloth. Caution! Do not use benzene or thinner - Sharp UX CC500 | UXCC500 Operation Manual - Page 108
on the conditions of use. If LOW BATTERY continues to appear in the cordless handset display after the battery has been charged for 10 hours, replace it with the following battery: Replacement battery: Use only a Sharp UX-BA01 battery (3.6 V Ni-MH battery, capacity: 850 mAh) Caution: Danger of - Sharp UX CC500 | UXCC500 Operation Manual - Page 109
snaps firmly into place. Maintenance 5 Place the cordless handset in the charger with the dial pad facing forward. • Let the new battery charge for at least 10 hours. Battery disposal The battery pack contains a Nickel Metal Hydride battery. The battery must be disposed of properly. Contact local - Sharp UX CC500 | UXCC500 Operation Manual - Page 110
10. Troubleshooting Problems and Solutions If you have any problems with your fax, first refer to the following troubleshooting guide. If you cannot solve the problem, call Sharp's Customer Assistance Center at 1-877-794-8675. Line error Problem Solution LINE ERROR appears in Try the transaction - Sharp UX CC500 | UXCC500 Operation Manual - Page 111
handset on page press the SPEAKER key. 14. Dialing is not possible. • Make sure the power cord is properly plugged into a power outlet. • Make sure that the telephone line is properly connected to both the TEL. LINE jack and the wall jack (see page 15). • Make sure that the fax machine is set - Sharp UX CC500 | UXCC500 Operation Manual - Page 112
and Solutions Reception and copying problems Problem Solution The fax machine doesn't receive documents automatically. • Make sure that the reception mode is set to FAX. If you subscribe to a distinctive ring service, make sure that the Distinctive Ring function is set to the correct ring - Sharp UX CC500 | UXCC500 Operation Manual - Page 113
lines appear • Try changing the print contrast setting to LIGHT on copies and received (see page 25). faxes. General problems Problem Solution Auto-dial numbers cannot be stored in the fax. • Make sure the fax is plugged in and the imaging film has been loaded. (Auto-dial numbers cannot - Sharp UX CC500 | UXCC500 Operation Manual - Page 114
is properly connected to both the TEL. LINE jack on the fax machine and the wall jack (see page 15). (If the telephone line is connected correctly, you should hear a dial tone when you pick up the fax machine handset.) • The battery may be low. Place the cordless handset in the charger and let it - Sharp UX CC500 | UXCC500 Operation Manual - Page 115
Problems and Solutions 10. Troubleshooting The battery does not charge. • Make sure the cordless handset is placed in the of the talking range. Move closer to the fax machine. When you press the INTERCOM key, the name of one of the other cordless handsets does not appear in the list (only the - Sharp UX CC500 | UXCC500 Operation Manual - Page 116
in the following section, Clearing Paper Jams. The paper size setting is incorrect. Change the paper size setting as explained on page 25. The cordless handset is in use. Wait until this message no longer appears to send a fax or make a phone call. The original document is jammed. See the following - Sharp UX CC500 | UXCC500 Operation Manual - Page 117
been received in memory because the imaging film needs replacement, you have run out of printing paper, or the paper is jammed. The fax will print out automatically when the problem is fixed. The FUNCTION key has been pressed. A cordless handset is paging the fax machine (lift the handset to talk - Sharp UX CC500 | UXCC500 Operation Manual - Page 118
setting to LIGHT (see page 25). The print head has failed and requires service. A document has been loaded and the fax machine is waiting for you to begin faxing cordless handset using the Intercom feature. Replace the fax machine handset to stop the Intercom call, and then pick it up again to answer - Sharp UX CC500 | UXCC500 Operation Manual - Page 119
10. Troubleshooting Messages and Signals Display messages (cordless handset) BUSY CALL TRANSFER CHARGING FAX BUSY HOLD IN CHARGER INTERCOM LOW BATTERY NEW MESSAGES The system is busy, or the fax machine or other cordless handset that you attempted to page is busy and cannot respond. A call is - Sharp UX CC500 | UXCC500 Operation Manual - Page 120
the fax machine. This appears in the display of an accessory cordless handset the first time it is charged. The handset must be registered in order to use it (see the manual for the accessory cordless handset). The REMOTE/FLASH key has been pressed. The TALK key has been pressed to make a phone call - Sharp UX CC500 | UXCC500 Operation Manual - Page 121
10. Troubleshooting Clearing Paper Jams Clearing Paper Jams Clearing a jammed document If the original document doesn't feed properly during transmission or copying, or DOCUMENT JAMMED appears in the display, first try pressing START/MEMORY . If the document doesn't feed out, remove it as explained - Sharp UX CC500 | UXCC500 Operation Manual - Page 122
paper 1 Open the operation panel (press –). 2 Gently pull the jammed paper out of the machine, making sure no torn pieces of paper remain in the print compartment or rollers. 2 1 3 Rotate the front gear until the film is taut, and then close the operation panel (press down on both sides to make - Sharp UX CC500 | UXCC500 Operation Manual - Page 123
tray extension LPLTP3184XHZZ Gears CGERH2566XH01 NGERH2568XHZZ AC adapter RADPA2027XHZZ Cordless handset charger RUNTZ2100XHE2 Part distribution centers Tritronics, Inc. 1306 Continental Drive Abingdon, MD 21009 Tel: 1-800-638-3328 Fax: 1-800-888-FAXD Tritronics, Inc. 1015 NW 52nd Street - Sharp UX CC500 | UXCC500 Operation Manual - Page 124
instructions this product is part of the product service. If trouble is experienced with this equipment, or for repair or warranty information, please contact Sharp problem is resolved. This equipment may not be used on coin service provided by the telephone company. Connection to party line service - Sharp UX CC500 | UXCC500 Operation Manual - Page 125
Product and Company Identification Product Name : IMAGING FILM UX-5CR Supplier Identification : Sharp Corporation 22-22 Nagaike-cho, Abeno-ku, Osaka Section 5. Fire-Fighting Measures Flash Point: about 250°C for ink Autoignition: None Flammability Limits: Not applicable Extinguishing Media: CO2, - Sharp UX CC500 | UXCC500 Operation Manual - Page 126
SHARP Date Revised: . Date Issued :July. 3. 2001 MATERIAL SAFETY DATA SHEET (2/2) MSDS No. B-1026 Section 6. Accidental Release Measures Rumpling the product may cause the wax layer to peel off. Sweep up or vacuum. When sweeping, avoid raising film responsibility of the user. Although certain - Sharp UX CC500 | UXCC500 Operation Manual - Page 127
MODE JAN-02 10:30 TEL FAX TAD JAN-02 10:30 TEL FAX TAD JAN-02 10:30 TEL FAX TAD FAX mode: The fax machine automatically answers and receives faxes. TEL mode: Answer all calls (even faxes) by picking up the handset. To begin fax reception, press START/MEMORY . TAD mode: Select this mode - Sharp UX CC500 | UXCC500 Operation Manual - Page 128
4. Press TALK . Receiving a phone call 1. When the cordless handset rings, pick it up and press any key to answer. 2. When you are ready to end the call, press OOFFFF . Receiving a fax using the cordless handset If you hear a fax tone after answering a call on the cordless handset, or if the other - Sharp UX CC500 | UXCC500 Operation Manual - Page 129
02 10:30 TEL FAX TAD JAN-02 10:30 TEL FAX TAD Modo FAX: El aparato telefax contesta y transmite automáticamente mensajes telefax. Modo TEL: Responda a todas las llamadas (incluso mensajes de fax), levantando el auricular. Para iniciar la recepción de fax, oprima START/MEMORY . Marcación autom - Sharp UX CC500 | UXCC500 Operation Manual - Page 130
3. Oprima o hasta que en el display aparezca el número que desea llamar. 4. Oprima TALK . Recibir una llamada 1. Cuando suene el timbre del teléfono inalámbrico, descuélguelo y oprima una tecla cualquiera para contestar. 2. Oprima OOFFFF cuando esté listo para finalizar la llamada. Recibir un - Sharp UX CC500 | UXCC500 Operation Manual - Page 131
Index A Answering system, activating, 50 Anti Junk Fax, 98 Audible signals, 118 Auto-dial numbers Storing, 36, 74 Using, 38, 77 B Battery Disposing of, 107 Installing, 18 Replacing, 106 C Caller ID, 91-96 Caller ID List, 100 Contrast, 72 Copies, 89 Copy cut-off setting, 90 Cordless handset Auto-dial - Sharp UX CC500 | UXCC500 Operation Manual - Page 132
, 103-104 Priority Call, 95 R Reception mode FAX mode, 30, 83 TAD mode, 30, 50 TEL mode, 30, 84 Reception Ratio setting, 87 Redialing, 41, 79 Remote code number, 62 Remote operations, 62 Resolution, 71 Ringer volume Cordless handset, 33 Fax machine, 32 S Scanning glass, cleaning, 104 Sender's name - Sharp UX CC500 | UXCC500 Operation Manual - Page 133
to remote operation. Cut it out and carry it with you when you go out. Remote Operation Guide 1. Call your fax from a touch-tone telephone, and press # when the outgoing message begins. 2. If you want to listen to a personal box, enter its number. 3. Enter your passcode - Sharp UX CC500 | UXCC500 Operation Manual - Page 134
MESSAGES Erase single message ...... 3 # Erase all messages .......... 3 3 # • RECORDING A MEMO Start End 0 # • RECORDING A NEW OGM Start 4 * • FAX RECEPTION MODES TAD mode 8 1 # FAX mode 8 2 # TEL mode 8 3 # • TRANSFER FUNCTION Turn on 9 1 # (Box#) # Turn off 9 2 # New transfer number - Sharp UX CC500 | UXCC500 Operation Manual - Page 135
- Sharp UX CC500 | UXCC500 Operation Manual - Page 136
Facsimile UX-CC500 Ninety (90) days parts and labor from date of purchase. Any consumable items such as paper or Imaging Film supplied with the Product. What to do to obtain service: Call Sharp at 1-877-794-8675 to obtain a Return Authorization Number and shipping instructions. A technician - Sharp UX CC500 | UXCC500 Operation Manual - Page 137
described in the "Operation Manual". This requires user maintenance including replacement of the imaging film and battery, cleaning of the unit and removal of dust and foreign matter, clearing of paper misfeeds, and proper routine and preventive maintenance. Service After Expiration of Warranty - Sharp UX CC500 | UXCC500 Operation Manual - Page 138
- Sharp UX CC500 | UXCC500 Operation Manual - Page 139
www.sharpusa.com SHARP CORPORATION FOR YOUR RECORDS Please record the model number and serial number below, for easy reference, in case of loss or theft. These numbers are located on the rear side of the unit.Space is also provided for other relevant information. Model Number UX-CC500 Serial Number
-
 1
1 -
 2
2 -
 3
3 -
 4
4 -
 5
5 -
 6
6 -
 7
7 -
8
-
9
-
10
-
11
-
12
-
13
-
14
-
15
-
16
-
17
-
18
-
19
-
20
-
21
-
22
-
23
-
24
-
25
-
26
-
27
-
28
-
29
-
30
-
31
-
32
-
33
-
34
-
35
-
36
-
37
-
38
-
39
-
40
-
41
-
42
-
43
-
44
-
45
-
46
-
47
-
48
-
49
-
50
-
51
-
52
-
53
-
54
-
55
-
56
-
57
-
58
-
59
-
60
-
61
-
62
-
63
-
64
-
65
-
66
-
67
-
68
-
69
-
70
-
71
-
72
-
73
-
74
-
75
-
76
-
77
-
78
-
79
-
80
-
81
-
82
-
83
-
84
-
85
-
86
-
87
-
88
-
89
-
90
-
91
-
92
-
93
-
94
-
95
-
96
-
97
-
98
-
99
-
100
-
101
-
102
-
103
-
104
-
105
-
106
-
107
-
108
-
109
-
110
-
111
-
112
-
113
-
114
-
115
-
116
-
117
-
118
-
119
-
120
-
121
-
122
-
123
-
124
-
125
-
126
-
127
-
128
-
129
-
130
-
131
-
132
-
133
-
134
-
135
-
136
-
137
-
138
-
139
 |
 |

MODEL
UX-CC500
FACSIMILE
OPERATION MANUAL
1.
Installation
2.
Using the Cordless Handset
3.
Using the Answering System
4.
Sending Faxes
5.
Receiving Faxes
6.
Making Copies
7.
Special Functions
8.
Printing Lists
9.
Maintenance
10.
Troubleshooting
Sharp
Place
congratulations
on the purchase of your new Sharp Product!
For your convenience, Genuine Sharp Supplies, Accessories, and
additional Sharp Products can be purchased from the Authorized Sharp
Reseller where you purchased your product or on-line at:
www.SharpPlace.com
visit SharpPlace
to enter periodic contests and drawings!
2002 Sharp Electronics Corporation
Design and specifications are subject to change without notice.
To ensure Sharp
quality, look for
the Sharp Genuine
Supplies Logo on
Your business
products. We
provide a full line
of supplies that
are designed and
tested to maximize
the life and
performance of all
Sharp products.
FROM SHARP MINDS
COME SHARP PRODUCTS
TM
C