Sharp XG-C40XU-S XG-C40XU Operation Manual
Sharp XG-C40XU-S - Notevision XGA LCD Projector Manual
 |
View all Sharp XG-C40XU-S manuals
Add to My Manuals
Save this manual to your list of manuals |
Sharp XG-C40XU-S manual content summary:
- Sharp XG-C40XU-S | XG-C40XU Operation Manual - Page 1
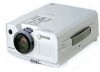
OPERATION MANUAL MODEL XG-C40XU LCD PROJECTOR Important Information Setup & Connections Operation Useful Features Maintenance & Troubleshooting Appendix - Sharp XG-C40XU-S | XG-C40XU Operation Manual - Page 2
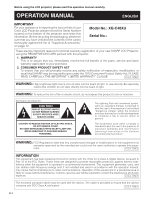
12. Model No.: XG-C40XU Serial No.: There are two important reasons for prompt warranty registration of your new SHARP LCD Projector, using the REGISTRATION CARD packed with the projector. 1. WARRANTY This is to assure that you immediately receive the full benefit of the parts, service and labor - Sharp XG-C40XU-S | XG-C40XU Operation Manual - Page 3
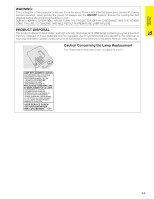
, NEVER TURN THE PROJECTOR OFF BY DISCONNECTING THE POWER CORD. FAILURE TO OBSERVE THIS WILL RESULT IN PREMATURE LAMP FAILURE. PRODUCT DISPOSAL 1 HOUR TO COOL BEFORE REPLACING THE LAMP. SEE OPERATION MANUAL. PRECAUTIONS A OBSERVER LORS DU REMPLACEMENT DE LA LAMPE. DEBRANCHER LE CORDON D'ALIMENTATION - Sharp XG-C40XU-S | XG-C40XU Operation Manual - Page 4
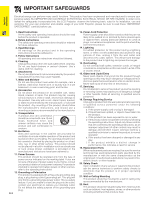
servicing. For your own protection and reliable usage of your LCD Projector, please be sure to read these "IMPORTANT SAFEGUARDS" carefully before use. 1. Read Instructions All the safety and operating instructions the outlet, contact your electrician to replace your obsolete outlet. Do not defeat - Sharp XG-C40XU-S | XG-C40XU Operation Manual - Page 5
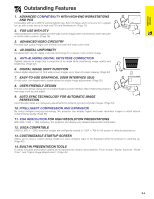
image adjustments. (Page 25) 8. USER-FRIENDLY DESIGN The two-color design along with an intuitive Graphical User Interface (GUI) makes this projector very easy to set up and adjust. 9. AUTO SYNC TECHNOLOGY FOR AUTOMATIC IMAGE PERFECTION Automatically makes any necessary adjustments for perfectly - Sharp XG-C40XU-S | XG-C40XU Operation Manual - Page 6
Function 34 Maintenance & Troubleshooting Air Filter Maintenance 47 Lamp/Maintenance Indicators 49 Replacing the Projection Lamp 50 Using the Kensington Lock 52 Troubleshooting 52 Appendix Transporting the Projector 53 Connection Pin Assignments 54 RS-232C Port Specifications 55 Computer - Sharp XG-C40XU-S | XG-C40XU Operation Manual - Page 7
REPLACE WITH SAME SHARP LAMP UNIT TYPE BQC-XGC40XU/1 ONLY. UV RADIATION: CAN CAUSE EYE DAMAGE. TURN OFF LAMP BEFORE SERVICING. MEDIUM PRESSURE LAMP: RISK OF EXPLOSION. HANDLE WITH CARE. SEE OPERATION MANUAL. ATTENTION SURFACE CHAUDE. NE REMPLACER QUE PAR UNE UNITE DE LAMPE SHARP DE TYPE BQC-XGC40XU - Sharp XG-C40XU-S | XG-C40XU Operation Manual - Page 8
left corner of the picture to advise you to replace the lamp. See pages 50 and 51 for lamp replacement. If the lamp has been used for 2,000 hours, the projector power will automatically turn off and the projector will enter standby mode. Refer to "Lamp/Maintenance Indicators" on page 49, for details - Sharp XG-C40XU-S | XG-C40XU Operation Manual - Page 9
Double click on the "xg-c40xu" folder. 6 Double click on the language (name of the folder) that you want to view. 7 Double click on the "c40" pdf file to access the projector manuals. Double click on the "saps" pdf file to access the Sharp Advanced Presentation Software manual. 8 Double click on the - Sharp XG-C40XU-S | XG-C40XU Operation Manual - Page 10
. Projector MUTE button 19 POWER indicator 18 POWER buttons (ON/OFF) 18 KEYSTONE button 22 INPUT button 19 FREEZE button 35 ENLARGE button 36 BLACK SCREEN button 39 ADJUSTMENT buttons 25 Zoom knob 19 Remote control sensor 23 Focus knob 19 Front and Top View 49 LAMP REPLACEMENT - Sharp XG-C40XU-S | XG-C40XU Operation Manual - Page 11
25 buttons 22 UNDO button 34 AUTO SYNC button 38 RESIZE button 37 GAMMA button 24 BACKLIGHT button Top View 24 LEFT-CLICK button Remote control signal transmitter Laser 6 pointer window Inserting the batteries 1 Press in on the arrow mark and slide in the 2 Insert two AA size batteries - Sharp XG-C40XU-S | XG-C40XU Operation Manual - Page 12
Setup & Connections Setup & Connections E-11 - Sharp XG-C40XU-S | XG-C40XU Operation Manual - Page 13
Remote mouse receiver RUNTK0673CEZZ USB mouse control cable QCNWG0007CEPZ Extra air filter PFILD0076CEZZ Lens cap GCOVH1307CESB CD-ROM UDSKA0053CEN1 LCD projector operation manual TINS-7482CEZZ LCD projector quick reference TINS-7483CEZZ Sharp Advanced Presentation Software operation manual - Sharp XG-C40XU-S | XG-C40XU Operation Manual - Page 14
not to work. When connecting this projector to a computer, select "Computer/RGB" for "Signal Type" on the GUI menu. (See page 29.) • A Macintosh adaptor may be required for use with some Macintosh computers. Contact your nearest Authorized Sharp Industrial LCD Products Dealer or Service Center. E-13 - Sharp XG-C40XU-S | XG-C40XU Operation Manual - Page 15
RGB" for "Signal Type" on the GUI menu. (See page 29.) • Connecting computers other than the recommended types may result in damage to the projector, the computer, or both. • AUDIO INPUT for INPUT 1, 2 can be used input audio corresponding to the INPUT 1 and 2 video. "Plug and Play" function • This - Sharp XG-C40XU-S | XG-C40XU Operation Manual - Page 16
. 3 To use the built-in audio system, connect one end of the audio cable (commercially available) to AUDIO INPUT terminal for INPUT 1, 2 on the projector. Connect the other end to the Audio output terminal on the video source. Select "Computer/RGB" or "Component" for "Signal Type" on the GUI menu - Sharp XG-C40XU-S | XG-C40XU Operation Manual - Page 17
DIN-D-sub RS-232C cable to the RS-232C port on the projector. 2 Connect an RS-232C cable (null modem, cross type is not correctly set up. Please refer to the operation manual of the computer for details on setting up/installing the correct Sharp Industrial LCD Products Dealer or Service Center. E-16 - Sharp XG-C40XU-S | XG-C40XU Operation Manual - Page 18
Connecting the Projector Connecting the Remote Mouse Receiver You can use the remote control as a remote mouse. Setup & connect both the PS/2 and USB mouse control cables to the remote mouse receiver. • Windows 95 does not support USB mouse driver software. • The minimum system requirements for the - Sharp XG-C40XU-S | XG-C40XU Operation Manual - Page 19
can only be used on the remote control. (See page 43.) • After the projector is unpacked and turned on for the first time, a slight odor may be emitted from the exhaust vent. This odor will soon disappear with use. When the power is on, the LAMP REPLACEMENT indicator lights indicating the status of - Sharp XG-C40XU-S | XG-C40XU Operation Manual - Page 20
signal is being received, "NO SIGNAL" will be displayed. When a signal that the projector is not preset to receive is being received, "NOT REG." will be displayed. 6 is turned on, the POWER indicator and the LAMP REPLACEMENT indicator illuminate green. • The POWER indicator flashes if the bottom - Sharp XG-C40XU-S | XG-C40XU Operation Manual - Page 21
the lights when setting up the screen in a sunny or bright room. • A polarizing screen cannot be used with this projector. Standard Setup (Front Projection) Place the projector at the required distance from the screen according X to the desired picture size (see the table below). LH Operation - Sharp XG-C40XU-S | XG-C40XU Operation Manual - Page 22
Ceiling-mount Setup • It is recommended that you use the optional Sharp ceilingmount bracket for this installation. • Before mounting the projector, contact your nearest Authorized Sharp Industrial LCD Products Dealer or Service Center to obtain the recommended ceiling-mount bracket (sold separately - Sharp XG-C40XU-S | XG-C40XU Operation Manual - Page 23
Operation Setting up the Screen Projector Remote control 1, 4a 3 2 4b On-screen Display (Example: 4:3 NORMAL to shift the image up or down. (Slide the MOUSE/ADJUSTMENT switch MOUSE ADJ. on the remote control to the ADJ. position.) 1 Press KEYSTONE to select "DIGITAL SHIFT" as shown on the - Sharp XG-C40XU-S | XG-C40XU Operation Manual - Page 24
Control/Mouse Receiver Positioning Wireless mouse Laser pointer Projector control • The remote control can be used to control the projector within the ranges shown below. • The remote mouse receiver can be used with the remote control to control the mouse functions of a connected computer within - Sharp XG-C40XU-S | XG-C40XU Operation Manual - Page 25
systems, use either the LEFT-CLICK or RIGHT-CLICK button. Using the remote control in a dark room Press BACKLIGHT, and the buttons will lilluminate. Green lights refer to mouse operations, and red lights to projector adjustments. Button name Position of MOUSE/ADJUSTMENT switch MOUSE ADJ. LASER - Sharp XG-C40XU-S | XG-C40XU Operation Manual - Page 26
and various projector settings. These menu screens can be operated from the projector or the remote control remote control to the ADJ. position.) 1 Press MENU to display the INPUT 1, 2, 3 or 4 mode menu bar. 2 Press ß/© to select an adjustment menu on the menu bar. 3 Press ∂/ƒ to select a specific - Sharp XG-C40XU-S | XG-C40XU Operation Manual - Page 27
Sync Disp [ON/OFF] Treble מ30 ם30 Bass מ30 ם30 Reset Lamp Timer BLK SCRN Disp [ON/OFF] OSD Display [ON/OFF] Background Startup Resolution Hor Freq Vert Freq 640ן480 37.5 kHz 72 Hz Sharp Custom Blue None Sharp Custom None Normal Level A Level B Old Password New Password Reconfirm - Sharp XG-C40XU-S | XG-C40XU Operation Manual - Page 28
Operation Selecting the Video Input System Mode (INPUT 3 or 4 mode only) Projector Remote control 1, 6 2, 3, 4 5 (GUI) On-screen Display The video input system mode is preset to "Auto"; however, it can be changed to a specific system mode, if the selected system mode is not compatible with the - Sharp XG-C40XU-S | XG-C40XU Operation Manual - Page 29
"Sharp" adjustment is not available in COMPONENT mode (Input 1 or 2). (Slide the MOUSE/ADJUSTMENT switch MOUSE ADJ. on the remote control to the ADJ. position.) 1 Press MENU. Menu bar and "Picture" menu screen appear. GUI operation guide is also displayed. 2 Press ∂/ƒ to select a specific adjustment - Sharp XG-C40XU-S | XG-C40XU Operation Manual - Page 30
color temperature) (High color temperature) (Slide the MOUSE/ADJUSTMENT switch MOUSE ADJ. on the remote control to the ADJ. position.) 1 Press MENU. Menu bar and "Picture" menu screen appear. GUI operation guide is also displayed. 2 Press ∂/ƒ to select "CLR Temp". 3 Press ß/© to move the mark of - Sharp XG-C40XU-S | XG-C40XU Operation Manual - Page 31
from interlaced source still images. This projector's audio is factory preset to standard settings remote control to the ADJ. position.) 1 Press MENU. Menu bar and "Picture" menu screen appear. GUI operation guide is also displayed. 2 Press ß/© to select "Audio". 3 Press ∂/ƒ to select a specific - Sharp XG-C40XU-S | XG-C40XU Operation Manual - Page 32
the MOUSE/ADJUSTMENT switch MOUSE ADJ. on the remote control to the ADJ. position.) 1 Press MENU. Menu bar and "Picture" menu screen appear. GUI operation guide is also displayed. 2 Press ß/© to select "Fine Sync". 3 Press ∂/ƒ to select a specific adjustment item. 4 Press ß/© to move the mark of - Sharp XG-C40XU-S | XG-C40XU Operation Manual - Page 33
these settings are stored, they can be easily selected each time you connect a computer to the projector. Saving the adjustment setting (Slide the MOUSE/ADJUSTMENT switch MOUSE ADJ. on the remote control to the ADJ. position.) 1 Press MENU. 2 Press ß/© to select "Fine Sync". 3 Press ∂/ƒ to select - Sharp XG-C40XU-S | XG-C40XU Operation Manual - Page 34
stripes). (Flickering may occur, making the image hard to see.) • When inputting DTV 480P signals, select "480P" in step 4 above. Projector Remote control 1, 4 2, 3 (GUI) On-screen Display Checking the Input Signal This function allows you to check the current input signal information. (Slide - Sharp XG-C40XU-S | XG-C40XU Operation Manual - Page 35
Computer Image Adjustments (INPUT 1 or 2 mode Only) Projector Remote control 1, 5 2, 3, 4 AUTO SYNC button (GUI) On-screen Display Auto Sync Adjustment • Used to automatically adjust a computer image. • Auto Sync adjustment can be made manually by pressing AUTO SYNC, or automatically by setting - Sharp XG-C40XU-S | XG-C40XU Operation Manual - Page 36
Useful Features Useful Features Freeze Function Projector Remote control 1, 2 On-screen Display This function allows you to instantly freeze a moving image. This is useful when you want to display a still image from a computer - Sharp XG-C40XU-S | XG-C40XU Operation Manual - Page 37
Digital Image Magnification Projector Remote control 2 1 3 This function allows you to magnify a specific portion of an image. This is useful when you want to display a detailed portion of the image. (Slide the MOUSE/ADJUSTMENT switch MOUSE ADJ. on the remote control to the ADJ.) 1 Press - Sharp XG-C40XU-S | XG-C40XU Operation Manual - Page 38
Gamma Correction Projector Remote control 1 2 STANDARD On-screen Display s PRESENTATION s CINEMA • CUSTOM Allows you to adjust gamma value using Sharp Advanced Presentation Software. (Slide the MOUSE/ADJUSTMENT switch MOUSE ADJ. on the remote control to the ADJ. position.) 1 Press - Sharp XG-C40XU-S | XG-C40XU Operation Manual - Page 39
Selecting the Picture Display Mode Projector COMPUTER Remote control This function allows you to modify or customize the picture display mode to enhance the input image. Depending on the input signal, you can - Sharp XG-C40XU-S | XG-C40XU Operation Manual - Page 40
" " to turn on or " " to turn off the On-screen Display. 5 To exit from the GUI, press MENU. On-screen Display Override Function Projector Remote control 1, 5 2, 3, 4 (GUI) On-screen Display This function allows you to turn off the on-screen messages that appear during input select. Once "OSD - Sharp XG-C40XU-S | XG-C40XU Operation Manual - Page 41
can be uploaded to the projector via an RS-232C cable. See page 16 in this operation manual, and also the supplied Sharp Advanced Presentation Software operation manual for detailed instructions. Description of Startup Images Selected item Sharp Custom None Startup image SHARP default image User - Sharp XG-C40XU-S | XG-C40XU Operation Manual - Page 42
Economy Mode On-screen Display Projector Remote control 1, 5 2, 3, 4 (GUI) On-screen Display Automatic Power Shutoff Function When no input signal is detected for more than 15 minutes, the projector will automatically shut off. The on-screen message on the left will appear five minutes before - Sharp XG-C40XU-S | XG-C40XU Operation Manual - Page 43
Projector Remote control 1, 6 2, 3, 4, 5 (GUI) On-screen Display (GUI) On-screen Display A password can be set by the user and used with the keylock level to prevent adjustments to certain settings on the GUI. Setting the Password (Slide the MOUSE/ADJUSTMENT switch MOUSE ADJ. on the remote - Sharp XG-C40XU-S | XG-C40XU Operation Manual - Page 44
must be entered before adjusting the keylock level. Checking the Lamp Usage Time Projector Remote control 1 2 This function allows you to check the accumulated lamp usage time. (Slide the MOUSE/ADJUSTMENT switch MOUSE ADJ. on the remote control to the ADJ. position.) 1 Press MENU. 2 Press ß/© to - Sharp XG-C40XU-S | XG-C40XU Operation Manual - Page 45
Reverse/Invert Image Function Projector Remote control This projector is equipped with a reverse/invert image function . When "CeilingםFront" is selected. (Slide the MOUSE/ADJUSTMENT switch MOUSE ADJ. on the remote control to the ADJ. position.) 1 Press MENU. 2 Press ß/© to select "PRJ Mode". - Sharp XG-C40XU-S | XG-C40XU Operation Manual - Page 46
all the stamped presentation tools from the screen, press to select " " and then press ENTER. Red Green Blue Yellow Orange White Black Projector Remote control 2, 4 3 1, 5 When selecting Sharp default image Displaying the Break Time (Slide the MOUSE/ADJUSTMENT switch MOUSE ADJ. on the - Sharp XG-C40XU-S | XG-C40XU Operation Manual - Page 47
Status Function Projector Remote control 1, 4 2 3 (GUI) On-screen Display 2 This function can be used to display all the adjusted settings on the screen simultaneously. (Slide the MOUSE/ADJUSTMENT switch MOUSE ADJ. on the remote control to the ADJ. position.) 1 Press MENU. 2 Press ß/© to select - Sharp XG-C40XU-S | XG-C40XU Operation Manual - Page 48
every 100 hours of use. Clean the filters more often when the projector is used in a dusty or smoky location. • Purchase a replacement air filer (PFILD0076CEZZ) from your nearest Authorized Sharp LCD Products Dealer or Service Center when if the filter is torn or become deteriorated. 2 Remove the - Sharp XG-C40XU-S | XG-C40XU Operation Manual - Page 49
new air filter underneath the tabs on the filter frame. 5 Replace the filter cover. Insert the tab on the end of the filter cover into the filter cover opening and press the filter cover into position. Tab Maintenance & Troubleshooting • Be sure the filter cover is securely installed. The power - Sharp XG-C40XU-S | XG-C40XU Operation Manual - Page 50
LCD Products Dealer or Service Center for repair. • Carefully replace the lamp. (See pages 50 and 51.) • Take the projector to your nearest Authorized Sharp Industrial LCD Products Dealer or Service Center for repair. • Securely install the bottom filter cover. Maintenance & Troubleshooting - Sharp XG-C40XU-S | XG-C40XU Operation Manual - Page 51
Sharp Industrial LCD Products Dealer or Service Center for repair. Purchase a replacement lamp unit (lamp/cage module) of the current type BQC-XGC40XU/1 from your nearest Authorized Sharp Industrial LCD Products Dealer or Service Center. Then carefully change the lamp by following the instructions - Sharp XG-C40XU-S | XG-C40XU Operation Manual - Page 52
AC socket of the projector. 2 Reset the lamp timer. While pressing ƒ, © and ENTER on the projector, press POWER ON on the projector. "LAMP 0000H" is displayed, indicating that the lamp timer is reset. Ł • Reset the lamp timer only after replacing the lamp. Maintenance & Troubleshooting E-51 - Sharp XG-C40XU-S | XG-C40XU Operation Manual - Page 53
system for instructions on how to use it to secure the projector. Troubleshooting Problem Check Power projector. (See pages 13-17.) • Remote control batteries have run down. (See page 10.) • Remote control indicator illuminates. • Refer to "Lamp/Maintenance Indicators" on page 49. Picture - Sharp XG-C40XU-S | XG-C40XU Operation Manual - Page 54
Using the Carrying Handle Carrying handle When transporting the projector, carry it by the carrying handle on the side. CAUTION • Always put on the lens cap to prevent damage to the lens when transporting the projector. • Do not lift or carry the projector by the lens or the lens cap as this - Sharp XG-C40XU-S | XG-C40XU Operation Manual - Page 55
Connection Pin Assignments Analog Computer 1 and 2 Signal Input Ports: 15-pin mini D-sub female connector Computer Input Analog 1. Video input (red) 9. Not connected 2. Video input 10. GND (green/sync on green) 11. GND 5 1 3. Video input (blue) 12. Bi-directional data 10 6 4. Reserve - Sharp XG-C40XU-S | XG-C40XU Operation Manual - Page 56
Specifications PC control A computer can be used to control the projector by connecting an RS-232C cable (null modem, cross type, sold separately) to the projector Normal response Parameter 4-digits O K Return code (0DH) Problem response (communication error or incorrect command) E R R Return - Sharp XG-C40XU-S | XG-C40XU Operation Manual - Page 57
RS-232C Port Specifications CONTROL ITEM COMMAND PARAMETER C1 C2 C3 C4 P1 P2 P3 P4 CONTROL CONTENTS INPUT2 SIGNAL TYPE I B S I _ _ _ 1 COLOR (מ30 - ם30) V A T I _ * * * TINT (מ30 - ם30) V A S H _ * * * SHARPNESS (מ30 - ם30) V A R D _ * * * RED (מ30 - ם30) V A B E _ * * * BLUE - Sharp XG-C40XU-S | XG-C40XU Operation Manual - Page 58
mode. Should this occur, turn off the LCD display on the notebook computer and output the display data in "CRT only" mode. Details on how to change display modes can be found in your notebook computer's operation manual. • This projector can receive 640 ן350 VESA format VGA signals, however, "640 - Sharp XG-C40XU-S | XG-C40XU Operation Manual - Page 59
air filter, Lens cap (attached), CD-ROM, LCD projector operation manual, LCD projector quick reference, Sharp Advanced Presentation Software operation manual Replacement parts Lamp unit (Lamp/cage module) (BQC-XGC40XU/1), Remote control (RRMCG1579CESA), AA size batteries, Power cord (CACCU0106DE01 - Sharp XG-C40XU-S | XG-C40XU Operation Manual - Page 60
Units: inches (mm) E-59 Appendix Bottom View 1 13/16 (30) 3 17/64 (83) 3 21/32 (93) Side View 54 33/64 (138.5) 49 1/64 (124.5) 9 11/32 (237.5) 1 5/16 (33.5) 25/64 (10) 63/64 (25) 9 19/32 (243.5) 9 1/64 (229) 3 53/64 (97.5) 7/16 (11) 17/32 (13) 4 49/64 (121) 5 9/32 (134) 13/32 (10.5) - Sharp XG-C40XU-S | XG-C40XU Operation Manual - Page 61
resizing of lower and higher resolution images to fit the projector's native resolution. Magnification Digitally zooms in on a portion of mouse Function to operate the mouse control of a computer with the supplied remote control. XGA resolution Resolution with 1,024 ן768 pixels that uses the - Sharp XG-C40XU-S | XG-C40XU Operation Manual - Page 62
K Kensington Security Standard connector 52 KEYSTONE button 22 L LAMP REPLACEMENT indicator 49 LASER POINTER button 24 Laser pointer window 6 17 R Rear projection 21 Remote control 23 Remote control sensor 23 Remote control signal transmitter 10 Remote mouse receiver 17 RESIZE button - Sharp XG-C40XU-S | XG-C40XU Operation Manual - Page 63
SHARP CORPORATION
-
 1
1 -
 2
2 -
 3
3 -
 4
4 -
 5
5 -
 6
6 -
 7
7 -
8
-
9
-
10
-
11
-
12
-
13
-
14
-
15
-
16
-
17
-
18
-
19
-
20
-
21
-
22
-
23
-
24
-
25
-
26
-
27
-
28
-
29
-
30
-
31
-
32
-
33
-
34
-
35
-
36
-
37
-
38
-
39
-
40
-
41
-
42
-
43
-
44
-
45
-
46
-
47
-
48
-
49
-
50
-
51
-
52
-
53
-
54
-
55
-
56
-
57
-
58
-
59
-
60
-
61
-
62
-
63
 |
 |
LCD PROJECTOR
OPERATION MANUAL
Important
Information
Setup & Connections
Operation
Useful Features
Maintenance &
Troubleshooting
Appendix
MODEL
XG
-
C40XU