Sony DCRDVD508 Operating Guide
Sony DCRDVD508 - Handycam DCR Camcorder Manual
 |
UPC - 027242701717
View all Sony DCRDVD508 manuals
Add to My Manuals
Save this manual to your list of manuals |
Sony DCRDVD508 manual content summary:
- Sony DCRDVD508 | Operating Guide - Page 1
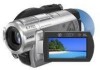
Support Website. http://www.sony.net/ Printed on 70% or more recycled paper using VOC (Volatile Organic Compound) -free vegetable oil based ink. Printed in Japan US 2-319-640-11(1) Digital Video Camera Recorder Operating Guide DCR-DVD408/DVD508/ DVD808/DVD908 Enjoying with your camcorder - Sony DCRDVD508 | Operating Guide - Page 2
" within the product's enclosure that may be of sufficient magnitude to constitute a risk of electric shock to persons. This symbol is intended to alert the user to the presence of important operating and maintenance (servicing) instructions in the literature accompanying the appliance. 2 - Sony DCRDVD508 | Operating Guide - Page 3
supplied to your home, consult your dealer or local power company. For those sets designed to operate from battery power, or other sources, refer to the operating instructions. Polarization This set may be equipped with a polarized ac power cord plug (a plug having one blade wider than the other - Sony DCRDVD508 | Operating Guide - Page 4
disconnect the antenna or cable system. This will prevent damage to the set due to lightning and power-line surges. Service Damage Requiring Service Unplug the set from the wall outlet and refer servicing to qualified service personnel under the following conditions: - When the power cord or plug is - Sony DCRDVD508 | Operating Guide - Page 5
damaged or leaking Lithium-Ion batteries. Owner's Record The model and serial numbers are located on the bottom. Record the serial number in the space provided below. Refer to these numbers whenever you call upon your Sony dealer regarding this product. Model No. DCR-DVD Serial No. Model No. ACNo - Sony DCRDVD508 | Operating Guide - Page 6
.dtsc.ca.gov/hazardouswaste/perchlorate Perchlorate Material: Lithium battery contains perchlorate. Notes on use Your camcorder is supplied with two kinds of operations guides. - "Operating Guide" (This manual) - "First Step Guide" for using your camcorder with the computer connected (stored on the - Sony DCRDVD508 | Operating Guide - Page 7
POWER switch (p. 25) or the access lamps (p. 28, 30) is on: - to remove the battery pack or AC Adaptor from the camcorder. - to apply mechanical shock or vibration to the camcorder. • When connecting your camcorder to another device with a USB cable of the pixels are operational for effective use. - Sony DCRDVD508 | Operating Guide - Page 8
. • Design and specifications of recording media and other accessories are subject to change without notice. • The illustration used in this manual are based on the model DCR-DVD508/ DVD908. • Disc in this Operating Guide refers to 8cm DVD discs. About the Carl Zeiss lens Your camcorder is equipped - Sony DCRDVD508 | Operating Guide - Page 9
12 Choosing a disc 14 Using your camcorder 16 " HOME" and " OPTION" - Taking advantage of two types of menus 18 Getting Started Step 1: Checking supplied items 21 Step 2: Charging the battery pack 22 Step 3: Turning the power on, and setting the date and time 25 Changing the language setting - Sony DCRDVD508 | Operating Guide - Page 10
the "First Step Guide" and software 85 Viewing "First Step Guide 87 Using a Macintosh computer 87 Troubleshooting Troubleshooting 88 Warning indicators and messages 97 Additional Information Using your camcorder abroad 101 Maintenance and precautions 103 Specifications 110 Quick Reference - Sony DCRDVD508 | Operating Guide - Page 11
Subject examples and solutions Shooting Checking your golf swing B SMTH SLW REC 39 Capturing still images during movie recording B Dual Rec 37 Flowers in close-up Getting a good shot of a ski slope or beach B BACK LIGHT 38 B BEACH 80 B SNOW 80 A child on the stage under a spot light B - Sony DCRDVD508 | Operating Guide - Page 12
What you can do with your camcorder Your camcorder records image data on 8cm DVD*. It is more convenient than video tape and far more versatile. Taking beautiful shots easily No rewinding to start recording (p.31, 34) Recorded images are - Sony DCRDVD508 | Operating Guide - Page 13
Enjoying with your camcorder A recorded disc can be played back on a variety of devices Playback on a DVD device or DVD drive (p.46) You can play back recorded and finalized** discs on a home DVD device, DVD recorder or DVD drive of a computer that supports 8cm disc. When finalizing the disc, you - Sony DCRDVD508 | Operating Guide - Page 14
quickly moving and complex images are recorded at a higher bit rate, and this reduces the overall recording time. Recording format for DVD-RW When you use a DVD-RW, you can choose the recording format from VIDEO mode or VR mode. In this manual, VIDEO mode is indicated as and VR mode as - Sony DCRDVD508 | Operating Guide - Page 15
- z *1 Refer to the instruction manual of your DVD device to see whether it supports the VR mode of DVD-RW. *2 Formatting deletes all recordings and returns the recording medium to its original empty state (p.61). Even when using a new disc, format it with your camcorder (p.28). *3 Finalizing is - Sony DCRDVD508 | Operating Guide - Page 16
to delete images and reuse the disc? Yes No For long recording * Select the recording format and format the disc on your camcorder (p.28). z Tips • You can select the disc from [DISC SELECT GUIDE] (p.60). 2Recording, playback, editing (See pages 31, 32, 41, and 52.) What you can do with your - Sony DCRDVD508 | Operating Guide - Page 17
To view a disc recorded on your camcorder on other DVD devices, you need to finalize it first. Finalize DVD device / DVD recorder DVD drive b Notes • The less the compatibility with any DVD device is not guaranteed. Refer to the instruction manual supplied with your DVD device or consult your - Sony DCRDVD508 | Operating Guide - Page 18
DISC/MEMORY) category Items Page FINALIZE* 46 DISC SELECT GUIDE 60 FORMAT* 61 FORMAT* 62 UNFINALIZE 62 DISC INFO 59 (SETTINGS) category To customize your camcorder (p. 64). * You can also set these items during Easy Handycam operation (p. 31). For items available in the (SETTINGS - Sony DCRDVD508 | Operating Guide - Page 19
Using the HOME MENU 1 Turn the POWER switch to turn on your camcorder. 4 Touch the item you want to use. Example: [EDIT] 2 Press (HOME) A (or B). (HOME) B 5 Continue operation by following the guidance on the screen. To hide the HOME MENU screen Touch . When you want to know something about - Sony DCRDVD508 | Operating Guide - Page 20
" HOME" and " OPTION" (Continued) 3 Touch the item you want to know the content. MOVIE Records a movie. Activate? YES NO When you touch an item, its explanation appears on the screen. To apply the option, touch [YES], otherwise, touch [NO]. To deactivate the HELP Touch (HELP) again in step - Sony DCRDVD508 | Operating Guide - Page 21
with your camcorder. The number in the parentheses indicates the number of that item supplied. AC Adaptor (1) (p. 22) CD-ROM "Handycam Application Software" (1) (p. 83) Operating Guide (This manual) (1) Power cord (1) (p. 22) A/V connecting cable (1) (p. 44, 56) USB cable (1) (p. 57) Wireless - Sony DCRDVD508 | Operating Guide - Page 22
Adaptor Jack cover 4 CHG (charge) lamp Power cord 4 To the wall outlet You can charge the "InfoLITHIUM" battery pack (H series) (p. 106) after attaching it to your camcorder. b Notes • You can use only "InfoLITHIUM" battery pack H series. 1 Turn the POWER switch in the direction of the arrow - Sony DCRDVD508 | Operating Guide - Page 23
battery pack 1 Turn the POWER switch to OFF (CHG). 2 Raise the viewfinder. 3 Press the BATT (battery) release button and remove the battery pack. BATT (battery) release button pressing DISP/BATT INFO again while the information is displayed. Remaining battery battery pack. DCR-DVD408/DVD808 Battery - Sony DCRDVD508 | Operating Guide - Page 24
255 545 590 24 DCR-DVD508/DVD908 Battery pack NP-FH50 NP-FH60 battery pack is damaged. - The battery pack is worn-out (For Battery Info only). • The power will not be supplied from the battery as long as the AC Adaptor is connected to the DC IN jack of your camcorder, even when the power cord - Sony DCRDVD508 | Operating Guide - Page 25
the AC Adaptor or battery terminal with any metallic objects. This may cause a malfunction. • Even if your camcorder is turned off, AC power (house current) is the power on, and setting the date and time Set the date and time when using this camcorder for the first time. If you do not set the date - Sony DCRDVD508 | Operating Guide - Page 26
is turned off. • In the setting at the time of purchase, the power turns off automatically if you leave your camcorder without any operation attempted for approximately 5 minutes, to save battery power ([A.SHUT OFF], p. 75). z Tips • The date and time does not appear during recording, but they are - Sony DCRDVD508 | Operating Guide - Page 27
is practical when you use your camcorder in bright conditions or you want to save battery power. The recorded image will not be the camcorder, then rotate it 180 degrees to the lens side, you can close the LCD panel with the LCD screen facing out. This is convenient during playback operations. - Sony DCRDVD508 | Operating Guide - Page 28
cover. [DISC ACCESS] appears on the LCD screen. It may take some time for the camcorder to recognize the disc. x DVD-RW/DVD+RW A window appears to ask whether you will use [DISC SELECT GUIDE]. Using [DISC SELECT GUIDE] lets you format the disc by following the guidance on the screen. If you do not - Sony DCRDVD508 | Operating Guide - Page 29
use a DVD-RW while the Easy Handycam operation (p. 31) power source is connected to your camcorder even when your camcorder DVD-RW/DVD+RW, then to use it again to record new images, see "Deleting all scenes on the disc (Formatting)" on page 61. • You can check the right disc using [DISC SELECT GUIDE - Sony DCRDVD508 | Operating Guide - Page 30
Duo" in once. b Notes • When the access lamp is lit or flashing, your camcorder is reading/writing data. Do not shake or knock your camcorder, turn the power off, eject the "Memory Stick Duo," or remove the battery pack. Otherwise, image data may be damaged. • If you insert the "Memory Stick Duo - Sony DCRDVD508 | Operating Guide - Page 31
playing back with ease (Easy Handycam) Easy Handycam operation makes nearly all settings automatic so that you can perform recording or playing back operation without detailed settings. It also makes screen font size larger for easy viewing. I DH R Movies 1 Turn the POWER switch A until the (Movie - Sony DCRDVD508 | Operating Guide - Page 32
Recording and playing back with ease (Easy Handycam) (Continued) Viewing recorded movies/still images 1 Turn the POWER switch A to turn on your camcorder. 2 Press (VIEW IMAGES) F (or G). The VISUAL INDEX screen appears on the LCD screen. (It may take some time to display the VISUAL INDEX screen.) - Sony DCRDVD508 | Operating Guide - Page 33
VISUAL INDEX screen * [DATA CODE] is fixed to [DATE/TIME] (p. 71). Slide show button (page 43) 64). b Notes • You can neither delete nor edit movies on the disc during Easy Handycam operation DVD-RW are formatted in VIDEO mode (p. 14). • (OPTION) will not appear. • Cancel Easy Handycam operation - Sony DCRDVD508 | Operating Guide - Page 34
Recording (HOME) D (HOME) E PHOTO F START/STOP C POWER switch B START/STOP A Adjusting the grip belt Adjust and fasten the grip belt as illustrated, and hold your camcorder properly. b Notes • If the access lamps (page 28, 30) is on after recording is finished, it means data is still being - Sony DCRDVD508 | Operating Guide - Page 35
For the number of recordable still images, see page 68. 1 Turn the POWER switch B until the (Still) lamp turns on. 2 Press PHOTO F. Recording switch to the movie recording mode using the (HOME) button D (or E) Touch (CAMERA) of HOME MENU t [MOVIE] or [PHOTO]. To record high resolution still images - Sony DCRDVD508 | Operating Guide - Page 36
lever. If you move your finger off the power zoom lever, the operation sound of the power zoom lever may also be recorded. • You cannot change the zoom speed with the zoom buttons on the LCD frame. • The minimum possible distance between camcorder and subject while maintaining sharp focus is about - Sony DCRDVD508 | Operating Guide - Page 37
the flash, and remains lit when the battery charge is complete. • If you use (optional) or a filter (optional) to your camcorder, the flash light does not emit light. z POWER switch is set to (Movie), the size of still images becomes 4.6M (16:9 wide) or 3.4M (4:3) (DCRDVD508/DVD908). • When the POWER - Sony DCRDVD508 | Operating Guide - Page 38
conversion lens (optional). • Adjust the focus manually ([FOCUS], p. 78) when it is hard again. 38 Open the LCD panel 90 degrees to the camcorder (1), then rotate it 180 degrees to the lens side or 4:3) POWER switch WIDE SELECT To select the aspect ratio of the movies Turn the POWER switch until - Sony DCRDVD508 | Operating Guide - Page 39
CAMERA). 4 Touch [SMTH SLW REC]. Recording/Playback To select the aspect ratio of the still images 1 Turn the POWER 16:9 wide) or [6.1M] (4:3) at the maximum (DCRDVD508/DVD908). z Tips • See page 69 for the number (HOME) A 1 Turn the POWER switch to turn on the camcorder. 5 Press START/STOP. An - Sony DCRDVD508 | Operating Guide - Page 40
Recording (Continued) b Notes • Sounds are not recorded during the about 3 second-movie shooting. • Image quality of [SMTH SLW REC] is not as good as that of normal recording. 40 - Sony DCRDVD508 | Operating Guide - Page 41
switch A Recording/Playback (HOME) D (VIEW IMAGES) C (VIEW IMAGES) B Turn the POWER switch A to turn on your camcorder. Press (VIEW IMAGES) B (or C). The VISUAL INDEX screen appears on the LCD screen. (It may take some time to display the VISUAL INDEX screen.) Returns - Sony DCRDVD508 | Operating Guide - Page 42
(OPTION) Previous/Next • One touch makes the reverse/fast forward approximately 5 times faster, two touches makes it approximately 10 times* faster. * Approximately 8 times faster using a DVD+RW 42 - Sony DCRDVD508 | Operating Guide - Page 43
1.1 to 5 times the original size. Magnification can be adjusted with the power zoom lever or the zoom buttons on the LCD frame. Playing back a to stop the slide show. To restart, touch again. b Notes • You cannot operate playback zoom during slide show. z Tips • You can set continuous slide show - Sony DCRDVD508 | Operating Guide - Page 44
to the input jack of TV or VCR using A/V connecting cable 1 or A/V connecting cable with S VIDEO 2. Connect your camcorder to the wall outlet using the supplied AC Adaptor for this operation (p.22). Refer also to the instruction manuals supplied with the devices to be connected. Device without - Sony DCRDVD508 | Operating Guide - Page 45
, set [TV TYPE] to [4:3]. When your TV is monaural (When your TV has only one audio input jack) Connect the yellow plug of the A/V connecting cable to the video input jack and connect the white (left channel) or the red (right channel) plug to the audio input jack of your TV - Sony DCRDVD508 | Operating Guide - Page 46
15 min in LP mode) b Notes • Playback compatibility with all device is not guaranteed. • No DVD menu is created for DVD-RW (VR mode). Operation flow To play back a disc in a DVD device for the first time (p.48) Playback on other DVD device Finalize In case 1, 2 or 3. Make desired settings for the - Sony DCRDVD508 | Operating Guide - Page 47
record additional movies onto the disc after finalizing the disc during Easy Handycam operation. To do so, cancel Easy Handycam operation (p. 33). To play back a disc in a DVD device after adding a recording (p.48) Playback on other DVD device Finalize Only in case 1 Make desired settings for the - Sony DCRDVD508 | Operating Guide - Page 48
for finalizing. • Use the AC Adaptor as the power source to prevent your camcorder from running out of power during finalizing. • When you finalize a double- on your camcorder again. You cannot remove the disc until the finalizing operation is completed. • When using the discs other than DVD-RW (VR - Sony DCRDVD508 | Operating Guide - Page 49
Playback To select a DVD menu style DVD +RW 1 In step 4, touch (OPTION) t [DVD MENU]. 2 Select the desired style from 4 types of pattern with [T]/[t]. Select [NO MENU] if you do not create a DVD menu. 3 Touch . b Notes • The DVD menu style is fixed to [STYLE1] during the Easy Handycam operation. 49 - Sony DCRDVD508 | Operating Guide - Page 50
viewing, editing or creating an original DVD. (OTHERS) category Item list DELETE camcorder. Insert a recorded disc or "Memory Stick Duo" into your camcorder. b Notes • You cannot retrieve the deleted images. • You cannot delete movies during Easy Handycam operation. Cancel the Easy Handycam operation - Sony DCRDVD508 | Operating Guide - Page 51
step 3, touch [ DELETE ALL] t [YES] t [YES] t . To delete the most recently recorded movie DVD +RW In step 3, touch [ LAST SCENE DEL] t t [YES] t . b Notes • Do not remove the battery pack or the AC Adaptor from your camcorder while editing images. It may damage the disc. • If the deleted movie is - Sony DCRDVD508 | Operating Guide - Page 52
recorded on the "Memory Stick Duo," format the "Memory Stick Duo" (p. 62). b Notes • You cannot divide movies during Easy Handycam operation. Cancel the Easy Handycam operation first. 1 Touch (OTHERS) of the (HOME) menu t [EDIT]. 2 Touch [DIVIDE]. 3 Touch the movie that you want to divide. The - Sony DCRDVD508 | Operating Guide - Page 53
they are divided. • Do not remove the battery pack or the AC Adaptor from your camcorder while editing images. It may damage the disc. the recorded disc into your camcorder. b Notes • You cannot add or edit movies during Easy Handycam operation. Cancel the Easy Handycam operation first. 1 Touch ( - Sony DCRDVD508 | Operating Guide - Page 54
all the movies on the disc in the Playlist In step 2, touch [ ADD ALL] t [YES] t [YES] t . b Notes • Do not remove the battery pack or the AC Adaptor from your camcorder while editing the Playlist. It may damage the disc. z Tips • You can add a maximum of 999 movies to the Playlist. • You can - Sony DCRDVD508 | Operating Guide - Page 55
pause toggles as you press . 5 Touch t [YES] t . b Notes • A slight difference may occur from the point where you touch and the actual dividing point, as your camcorder selects the dividing point based on about half-second increments. 55 - Sony DCRDVD508 | Operating Guide - Page 56
to other recording devices, such as VCRs or DVD/HDD recorders. Connect the device in either of the following ways. Connect your camcorder to the wall outlet using the supplied AC Adaptor for this operation (p. 22). Refer also to the instruction manuals supplied with the devices to be connected - Sony DCRDVD508 | Operating Guide - Page 57
or DVD/ HDD recorder) with the A/V connecting cable (supplied) 1 or an A/V connecting cable with S VIDEO (optional) 2. Connect your camcorder to the input jacks of the recording device. 5 Start the playback on your camcorder, and record it on the recording device. Refer to the instruction manuals - Sony DCRDVD508 | Operating Guide - Page 58
b Notes • Refer also to the instruction manual of the printer to be used. • Do not attempt the following operations when is on the screen. The operations may not be performed properly. - To operate the POWER switch. - To press (VIEW IMAGES) - To disconnect the USB cable from the printer. - To remove - Sony DCRDVD508 | Operating Guide - Page 59
other devices by finalizing them (p. 46). DISC SELECT GUIDE Your camcorder advises you of the right disc for your purpose support subtitles can display the recording date and time where the subtitles normally appear (p. 67). Refer to the instruction manual of your device. • If you have created a DVD - Sony DCRDVD508 | Operating Guide - Page 60
For details on operations and procedures, see the "First Step Guide" on the supplied CD-ROM (p. 83). The volume label of the disc The date when the disc folders: - DVD-RW (VR mode) DVD_RTAV folder - Other discs and modes VIDEO_TS folder Finding the right disc (DISC SELECT GUIDE) Select the - Sony DCRDVD508 | Operating Guide - Page 61
DVD menu on a DVD+RW, finalize the disc again (p. 46). 1 Connect the AC Adaptor to the DC IN jack on your camcorder, then connect the power cord to the wall outlet. 2 Turn on your camcorder Tips • When you use a DVD-RW while the Easy Handycam operation (p. 31) is set, the recording format is fixed to - Sony DCRDVD508 | Operating Guide - Page 62
operations when [Executing...] is on the screen: - To operate the POWER switch DVD-RW (VIDEO mode)(Unfinalizing) 1 Connect the AC Adaptor to the DC IN jack on your camcorder, then connect the power cord to the wall outlet. 2 Turn on your camcorder. 3 Insert the finalized disc into your camcorder - Sony DCRDVD508 | Operating Guide - Page 63
disc during the Easy Handycam operation. Cancel the Easy Handycam operation. Utilizing recording media 4 Touch [YES] t [YES]. 5 When [Completed.] appears, touch . b Notes • Use the AC Adaptor as power source to prevent your camcorder from running out of power during the operation. • Do not apply - Sony DCRDVD508 | Operating Guide - Page 64
MENU You can change the recording functions and the operating settings for your convenience. Using the HOME MENU 3 Touch the desired setup item. If the item is not on the screen, touch v/ V to change the page. 1 Turn on your camcorder, then press (HOME). (HOME) (HOME) 4 Touch the desired item - Sony DCRDVD508 | Operating Guide - Page 65
74 LANGUAGE SET*2 74 GENERAL SET (p. 75) Items Page DEMO MODE 75 CALIBRATION 108 A.SHUT OFF 75 REMOTE CTRL 75 *1 DCR-DVD508/DVD908 only *2 Also available during Easy Handycam operation *3 Only [SOUND SETTINGS] is available during Easy Handycam operation. 65 Customizing your camcorder - Sony DCRDVD508 | Operating Guide - Page 66
the screen, touch v/V to change the page. How to set (HOME MENU) t page 64 (OPTION MENU) t page 76 The default settings are marked with B. REC MODE (Recording up to 20 × zoom is performed digitally. 80× (DCR-DVD408/DVD808) Up to 10 × zoom is performed optically, and after that, up to 80 - Sony DCRDVD508 | Operating Guide - Page 67
a guide when date and time when you play back a disc on a device with a subtitle display function. Also refer to the instruction manual of the playback device. FLASH LEVEL You can set this function when you use the built-in flash, or an external flash (optional) that is compatible with your camcorder - Sony DCRDVD508 | Operating Guide - Page 68
or an external flash (optional) that is compatible with your camcorder. You can prevent redeye by activating the flash before recording. Set 64 (OPTION MENU) t page 76 The default settings are marked with B. IMAGE SIZE b Notes • [ IMAGE SIZE] can be set only during recording standby. DCR-DVD508/ - Sony DCRDVD508 | Operating Guide - Page 69
the POWER switch is (Still) (DCR-DVD508/DVD908) POWER switch is (Movie)* (DCR-DVD508 the POWER switch is (Still) (DCR- DVD408/DVD808) 4.0M 2304 × 1728 4.0M 3.0M 2304 × 1296 3.0M 1.9M 1600 × 1200 VGA (0.3M) 640 × 480 64MB 128MB 256MB 512MB 1GB 2GB 4GB 32 81 64 POWER switch is (Movie)* (DCR - Sony DCRDVD508 | Operating Guide - Page 70
numbers measured when using a "Memory Stick Duo" made by Sony Corporation. The number of recordable images varies depending on the recording file number for each "Memory Stick Duo." NIGHTSHOT LIGHT See page 66. STEADYSHOT (DCR-/ DVD508/DVD908) See page 67. GUIDEFRAME See page 67. ZEBRA See page 67. - Sony DCRDVD508 | Operating Guide - Page 71
Displays camera setting data. DATE/TIME SP A Date B Time Still image C SteadyShot off D Brightness E White balance F Gain G Shutter speed H Aperture value I Exposure z Tips • appears for an image recorded using a flash. • The data code is displayed on the TV screen if you connect your camcorder to - Sony DCRDVD508 | Operating Guide - Page 72
v/V to change the page. How to set (HOME MENU) t page 64 (OPTION MENU) t page 76 The default settings are marked with B. VOLUME Touch / (p. 42). to adjust the volume BEEP B ON A melody sounds when you start/stop recording, or operate the touch panel. OFF Cancels the melody and shutter sound. LCD - Sony DCRDVD508 | Operating Guide - Page 73
NORMAL Standard brightness. BRIGHT Brightens the LCD screen. b Notes • When you connect your camcorder to outside power sources, [BRIGHT] is automatically selected for the setting. • When you select [BRIGHT], battery life is slightly reduced during recording. • If you open the LCD panel 180 degrees - Sony DCRDVD508 | Operating Guide - Page 74
screen, touch v/V to change the page. How to set (HOME MENU) t page 64 (OPTION MENU) t page 76 CLOCK SET See page 25. AREA SET You can adjust without stopping the clock. Set your local area using v/V when using your camcorder overseas. Refer to the world time difference on page 102. DST SET/ - Sony DCRDVD508 | Operating Guide - Page 75
page. How to set (HOME MENU) t page 64 (OPTION MENU) t page 76 The default settings are POWER switch to (Still). - When you press (HOME)/ (VIEW IMAGES). CALIBRATION See page 108. A.SHUT OFF (Auto shut off) B 5min The camcorder is automatically turned off when you do not operate your camcorder - Sony DCRDVD508 | Operating Guide - Page 76
and items that appear on the screen depend on the recording/playback status of your camcorder at the time. • Some items appear without a tab. • The OPTION MENU cannot be used during Easy Handycam operation. (OPTION) 1 3 1 Tab 2 Touch the desired item. If you cannot find the desired item, touch - Sony DCRDVD508 | Operating Guide - Page 77
Customizing your camcorder Recording items on the OPTION MENU See page 76 for setting operation. Items tab FOCUS SPOT FOCUS TELE MACRO EXPOSURE SPOT ADD a 53 ADD ALL a 54 -- (No tab) COPIES DATE/TIME SIZE DVD MENU - 58 - 58 - 58 - 49 * Items that are included also in the HOME MENU . - Sony DCRDVD508 | Operating Guide - Page 78
64 (OPTION MENU) t page 76 The default settings are marked with B. FOCUS You can adjust the focus manually The minimum possible distance between camcorder and subject while maintaining sharp at close range, move the power zoom lever to W (wide DCR-DVD408/DVD808: about 37 cm (14 5/ 8in.) To cancel, - Sony DCRDVD508 | Operating Guide - Page 79
If you set [SPOT METER], [EXPOSURE] is automatically set to [MANUAL]. SCENE SELECTION You can record images effectively in various situations with take scene without losing candle mood. SUNRISE&SUNSET* ( ) Customizing your camcorder 1 Touch the point where you want to fix and adjust the exposure - Sony DCRDVD508 | Operating Guide - Page 80
shots of fireworks. LANDSCAPE* ( ) Select to shoot distant subjects clearly. This setting also prevents your camcorder from focusing on glass or metal mesh in windows that comes in between the camcorder and the subject. PORTRAIT ( ) Select to bring out the subject such as people or flowers while - Sony DCRDVD508 | Operating Guide - Page 81
settings or move your camcorder outdoors during white balance setting with [ONE PUSH], you need to repeat the [ONE PUSH] operation. COLOR SLOW SHTR ( • Adjust the focus manually ([FOCUS], p. 78) when it is hard to focus automatically. • The shutter speed of your camcorder changes depending on the - Sony DCRDVD508 | Operating Guide - Page 82
RESET]. To cancel the self-timer, select [OFF]. z Tips • You can also operate by pressing PHOTO on the Remote Commander (p. 117). Images appear as a pale pastel recording sound. Select [LOW] when you want to record exciting and powerful sound in a concert hall, etc. B NORMAL Records various surround - Sony DCRDVD508 | Operating Guide - Page 83
with your camcorder. About "First Step Guide" The "First Step Guide" is an instruction manual you can refer to on your computer. This describes basic operations, from initial hookup of your camcorder and computer and making settings, to general operation the first time you use the software "Picture - Sony DCRDVD508 | Operating Guide - Page 84
DVDs (CD-ROM drive required for software installation) When playing still images recorded on a "Memory Stick Duo" on a computer OS: Microsoft Windows 2000 Professional, Windows XP Home Edition, Windows XP Professional or Windows XP Media Center Edition Standard installation is required. Operation - Sony DCRDVD508 | Operating Guide - Page 85
Using a Computer You need to install the "First Step Guide" and software to your Windows computer before connecting your camcorder to the computer. The installation is required only for the first time. Contents to be installed and procedures may differ depending on your OS. z Tips • - Sony DCRDVD508 | Operating Guide - Page 86
the installation screen appears, follow the instructions to install the required software. x Sonic UDF Reader Software required to recognize a DVD-RW (VR mode) z Tips • Refer to the "First Step Guide" for how to remove the USB cable. After you install the software, a shortcut icon for the customers - Sony DCRDVD508 | Operating Guide - Page 87
Duo" OS: Mac OS 9.1/9.2 or Mac OS X (v10.1/ v10.2/v10.3/v10.4). Others: USB port (this must be provided as standard) About "First Step Guide" The "First Step Guide" is an instruction manual you can refer to on your computer. This describes basic operations, from initial hookup of your camcorder and - Sony DCRDVD508 | Operating Guide - Page 88
If you run into any problems using your camcorder, use the following table to troubleshoot the problem. If the problem persists, disconnect the power source and contact your Sony dealer. • Overall operations/Easy Handycam operation/ Remote Commander 88 • Batteries/Power sources 89 • LCD - Sony DCRDVD508 | Operating Guide - Page 89
) lamp does not light while the battery pack is being charged. • Turn the POWER switch to OFF (CHG) (p. 22). • Attach the battery pack to the camcorder correctly (p. 22). • Connect the power cord to the wall outlet properly. • The battery charge is completed (p. 22). Troubleshooting Continued , 89 - Sony DCRDVD508 | Operating Guide - Page 90
Troubleshooting (Continued) The CHG (charge) lamp flashes while the battery pack is being charged. • Attach the battery pack to the camcorder correctly (p. 22). If the problem persists, disconnect the AC Adaptor from the wall outlet and contact your Sony dealer. The battery pack may be damaged. The - Sony DCRDVD508 | Operating Guide - Page 91
camcorder. You can play back with your camcorder, but you cannot record additional scenes. You cannot operate format may not be supported by your camcorder. Use the supported file format (p. 104 DVD-RW (VIDEO mode) - DVD+RW • The temperature of your camcorder is extremely high. Turn off your camcorder - Sony DCRDVD508 | Operating Guide - Page 92
camcorder disc is DVD+RW. The manually (p. 78). [STEADYSHOT] does not function. • Set [STEADYSHOT] to [ON] (p. 67). • [STEADYSHOT] may not be able to compensate for excessive vibrations. The BACK LIGHT function does not function. • The BACK LIGHT function cannot be used during Easy Handycam operation - Sony DCRDVD508 | Operating Guide - Page 93
[COLOR SLOW SHTR] may not operate correctly in total darkness. Use Super NightShot or [SUPER NIGHTSHOT]. You cannot adjust [LCD BL LEVEL]. • You cannot adjust [LCD BL LEVEL] when: - The LCD panel is closed on your camcorder with the LCD screen facing out. - The power is supplied from the AC Adaptor - Sony DCRDVD508 | Operating Guide - Page 94
Troubleshooting does not support VR mode. Check the compatibility in the instruction manual of the . • In case of a DVD+R DL, the image may freeze camcorder when . is pressed, playback may not move to the previous scene. Select the desired scene from the menu screen. Refer to the instruction manual - Sony DCRDVD508 | Operating Guide - Page 95
camcorder from the computer. • Disconnect the cable from the computer and camcorder, restart the computer, then connect them again correctly. Cannot use the supplied software, Picture Motion Browser, on the Macintosh computer. • You cannot use Picture Motion Browser on a Macintosh. Troubleshooting - Sony DCRDVD508 | Operating Guide - Page 96
Troubleshooting (Continued) Functions that cannot be used simultaneously • The following list shows examples of unworkable combinations of functions and menu items. Cannot use Because of following settings BACK LIGHT [SPOT METER], [FIREWORKS], [MANUAL ] [SMTH SLW REC]* * DCR-DVD408/DVD808 - Sony DCRDVD508 | Operating Guide - Page 97
again, then operate your camcorder again. • Remove the power source. Reconnect it again and operate your camcorder again. • Turn on your camcorder again. E:20:ss / E:31:ss / E:61:ss / E:62:ss / E:91:ss / E:94:ss • A malfunction that you cannot service has occurred. Contact your Sony dealer or local - Sony DCRDVD508 | Operating Guide - Page 98
is nearly used up. • Depending on the operating, environment, or battery conditions, E may flash, even if there are approximately 20 minutes remaining. (High temperature warning) Slow flashing • The temperature of your camcorder is getting higher. Turn off your camcorder and leave it for a while in - Sony DCRDVD508 | Operating Guide - Page 99
the different format code from your camcorder. Formatting the disc may enable you to use the disc on your camcorder (DVDRW/DVD+RW only) (p.61). x printer and switch it on again, then disconnect the USB cable and reconnect it. Cannot print. Check the printer. • short. Troubleshooting Continued , 99 - Sony DCRDVD508 | Operating Guide - Page 100
Warning indicators and messages (Continued) Recovering data Avoid any vibration. • Your camcorder tries to recover data automatically if the data writing was not performed properly. Cannot recover data on disc. • Writing data to the disc has failed. - Sony DCRDVD508 | Operating Guide - Page 101
Additional Information Using your camcorder abroad Power supply You can use your camcorder in any countries/regions using the AC Adaptor supplied with your camcorder within the AC 100 V to 240 V, 50/60 Hz range. Use a commercially available AC plug adaptor [a], if necessary, depending on the design - Sony DCRDVD508 | Operating Guide - Page 102
(Continued) Setting to the local time You can easily set the clock to the local time by setting a time difference when using your camcorder abroad. Set (SETTINGS) t [CLOCK/ LANG] t [AREA SET] and [DST SET]/[SUMMERTIME] on the HOME MENU (p. 25). World time difference Time-zone differences Area - Sony DCRDVD508 | Operating Guide - Page 103
discs which you can use with your camcorder. Notes on use • Hold the disc by its edge while supporting the center hole lightly. Do not the camcorder. When recording/playback of one side is complete, remove the disc and turn it over to access the other side. • Perform the following operations on - Sony DCRDVD508 | Operating Guide - Page 104
camcorder. However, we do not guarantee the operation of all types of "Memory Stick Duo" on your camcorder "Memory Stick" that support high speed data transfer camcorder. - DSC00001.JPG: This file name appears on the display of a computer. • A "Memory Stick Duo" formatted by a computer (Windows OS/Mac - Sony DCRDVD508 | Operating Guide - Page 105
Stick Duo," turn the power off on your camcorder, or remove the battery pack for replacement while your camcorder is reading or writing image camcorder is 4 GB. On image data compatibility • Image data files recorded on a "Memory Stick Duo" by your camcorder conform to the "Design rule for Camera - Sony DCRDVD508 | Operating Guide - Page 106
and an optional AC Adaptor/ charger. The "InfoLITHIUM" battery pack calculates the power consumption according to the operating conditions of your camcorder, and displays the remaining battery time in minutes. With an AC Adaptor/charger, the remaining battery time and charging time appear. To - Sony DCRDVD508 | Operating Guide - Page 107
viewfinder or the LCD screen. - Anywhere very humid. • Operate your camcorder on DC 6.8 V/7.2 V (battery pack) or DC 8.4 V (AC Adaptor). • For DC or AC operation, use the accessories recommended in these operating instructions. • Do not let your camcorder get wet, for example, from rain or sea water - Sony DCRDVD508 | Operating Guide - Page 108
. If this happens, follow the procedure below. It is recommended that you connect your camcorder to the wall outlet using the supplied AC Adaptor during the operation. 1 Turn on your camcorder, then press (HOME). 2 Touch (SETTINGS) t [GENERAL SET] t [CALIBRATION]. 3 Touch "×" displayed on the screen - Sony DCRDVD508 | Operating Guide - Page 109
However, even if the pre-installed rechargeable battery is not charged, the camcorder operation will not be affected as long as you are not recording the date. x Procedures Connect your camcorder to a wall outlet using the supplied AC Adaptor, and leave it with the POWER switch set to OFF (CHG) for - Sony DCRDVD508 | Operating Guide - Page 110
Carl Zeiss Vario-Sonnar T 10 × (Optical), 20 ×, 80 ×*3 (Digital) Filter diameter: 37 mm (1 1/2 in.) Focal length DCR-DVD508/DVD908 F1.8 - 2.9 f=5.4 - 54 mm (7/32 - 2 1/4 in.) When converted to a 35 mm still camera For movies: 40 - 400 mm (1 5/8 - 15 3/4 in.) (16:9) 49 - 490 mm (1 15/16 - 19 3/8 in - Sony DCRDVD508 | Operating Guide - Page 111
your camcorder's setting information at the time of recording. *2The unique pixel array of Sony's Power requirements DC 6.8 V/7.2 V (battery pack) DC 8.4 V (AC Adaptor) Average power consumption DCR-DVD508/DVD908 During camera recording using the viewfinder with normal brightness: 4.5 W During camera - Sony DCRDVD508 | Operating Guide - Page 112
(1 15/16 × 1 3/16 × 3 1/4 in.) (w/h/d) excluding the projecting parts Mass (approx.) 170 g (6 oz) excluding the power cord * See the label on the AC Adaptor for other specifications. Rechargeable battery pack NP-FH60 Maximum output voltage DC 8.4 V Output voltage DC 7.2 V Capacity 7.2 Wh (1 000 mAh - Sony DCRDVD508 | Operating Guide - Page 113
as "LGPL") are included in the camcorder. This informs you that you have a right to have access to, modify, and redistribute source code for these software programs under the conditions of the supplied GPL/LGPL. Source code is provided on the web. To download, go to the following website and select - Sony DCRDVD508 | Operating Guide - Page 114
36, 41) B PHOTO button (31,35) C Eyecup D Viewfinder (27) E Viewfinder lens adjustment lever (27) F BATT (battery) release button (23) G POWER switch (25) H CHG (charge) lamp (22) I START/STOP button (31,35) J Battery pack (22) K (flash) button (36) L (Movie)/ (Still) mode lamps (25) M Grip belt (34 - Sony DCRDVD508 | Operating Guide - Page 115
can be turned on or off as you operate the POWER switch on your camcorder. Refer to the operating instructions supplied with your accessory for details. The Active Interface Shoe has a safety device for fixing the installed accessory securely. To connect an accessory, press down and push it to the - Sony DCRDVD508 | Operating Guide - Page 116
. C LCD screen/touch panel (18, 27) D START/STOP button (31,35) E Zoom buttons (36, 43) F (HOME) button (19, 64) G RESET button Initializes all the settings, including the setting of the date and time. H Tripod receptacle Attach the tripod (optional: the length of the screw must be less than 5.5 mm - Sony DCRDVD508 | Operating Guide - Page 117
date and time or camera , 35) J Power zoom buttons (36 operate your camcorder battery becomes weak, the operating distance of the Remote Commander may shorten, or the Remote Commander may not function properly. In this case, replace the battery with a Sony CR2025 lithium battery. Use of another battery - Sony DCRDVD508 | Operating Guide - Page 118
66) B HOME button (19, 64) C Remaining battery (approx.) (23) D Recording status ([STBY] (standby) or [REC] (recording)) E Counter (hour/minute/second) F Disc type (14) G Recording format (14) Appears for DVD from that during normal operation. • As the number - Sony DCRDVD508 | Operating Guide - Page 119
mode (HQ/SP/LP) (66) B Return button (32, 42) C Remaining battery (approx.) (23) D Playback mode E Counter (hour/minute/second) F Disc type (14) G Previous/Next button (32, 42) H Scene number I OPTION button (76) J Video operation buttons (32, 42) K 5.1ch surround recording (36) L Image size (68 - Sony DCRDVD508 | Operating Guide - Page 120
during recording/playback to indicate the settings of your camcorder. Upper left Upper right SP Bottom Upper left Indicator (79) Tele macro (78) Zebra (67) Data code during recording The date, time, and camera setting data of the recorded images are recorded automatically on the disc and " - Sony DCRDVD508 | Operating Guide - Page 121
x VR mode One of the recording formats you can select when using a DVD-RW. VR mode enables editing (deleting or sequence rearrangement) with your camcorder Finalizing the disc lets you play it back on a VR mode compatible DVD device. x VISUAL INDEX This function displays images of movies and still - Sony DCRDVD508 | Operating Guide - Page 122
(Auto slow shutter 67, 96 A.SHUT OFF (Auto shut off 75 A/V connecting cable .....44, 56 B BACK LIGHT 38, 92 Battery 22, 117 Battery info 23 BEACH 80 BLACK FADER 81 Button-type lithium battery 117 B&W 82 C CALIBRATION 108 CAMERA DATA 71 CANDLE 79 CD-ROM 83 Charging time 23 CLOCK SET 25 - Sony DCRDVD508 | Operating Guide - Page 123
80 Power cord 22 Pre-installed rechargeable battery 109 Preparation 64 Slide show 43 SMTH SLW REC 39 SNOW 80 Software 85 SOUND/DISP SET 72 SP 66 Specifications 110 SPOT FOCUS 78, 96 SPOT METER (Flexible spot meter 79, 96 SPOTLIGHT 80 STEADYSHOT 67 Still Images 31, 35 SUB-T DATE - Sony DCRDVD508 | Operating Guide - Page 124
VR mode 14, 121 W Wall outlet 22 Warning indicators 97 Warning messages 98 WHITE BAL. (White balance 80, 96 WHITE FADER 81 Wide angle 36 Windows 83, 95 World time difference ........102 Write-protect tab 105 Z ZEBRA 67 Zoom 36 124 - Sony DCRDVD508 | Operating Guide - Page 125
el número de componentes suministrados. Adaptador de alimentación de ca (1) CD-ROM "Handycam Application Software" (1) Guía de operaciones (este manual) (1) Cable de alimentación (1) Cable de conexión de A/V (1) Cable USB (1) Control remoto inalámbrico (1) La pila de litio tipo botón ya viene - Sony DCRDVD508 | Operating Guide - Page 126
utilizar una batería "InfoLITHIUM" de la serie H. 1 Gire el interruptor POWER en el sentido de la flecha hasta la posición OFF (CHG) (ajuste deslizándola en el sentido de la flecha hasta que haga clic. 4 Cable de alimentación Indicador CHG (carga) Al tomacorriente de pared 3 Conecte el - Sony DCRDVD508 | Operating Guide - Page 127
restante (Info batería) Ajuste el interruptor POWER en la posición OFF (CHG) y, grabación restante aproximado y Spanish Quick Guide/Guía rápida en español restante de la batería (aprox.) BATTERY INFO NIVEL CARGA BATERÍA 0% 50% una batería completamente cargada. DCR-DVD408/DVD808 Batería NP-FH50 - Sony DCRDVD508 | Operating Guide - Page 128
cerrado 120 160 235 255 545 590 DCR-DVD508/DVD908 Batería NP-FH50 NP-FH60 batería • Antes de reemplazar la batería, gire el interruptor POWER hasta la posición OFF (CHG) y apague el indicador ía no suministrará alimentación, aunque el cable de alimentación esté desconectado del tomacorriente - Sony DCRDVD508 | Operating Guide - Page 129
Spanish Quick Guide/Guía rápida en español • No se recomienda utilizar una batería NP- que encienda la videocámara o cambie la posición del interruptor POWER. Interruptor POWER 1 Mientras presiona el botón verde, gire el interruptor POWER varias veces en el sentido que indica la flecha hasta que - Sony DCRDVD508 | Operating Guide - Page 130
2037. Ajuste la medianoche a las 12:00 AM. Ajuste el mediodía a las 12:00 PM. Para apagar la videocámara Gire el interruptor POWER hacia la posición OFF (CHG). Para restablecer el ajuste de fecha y hora Seleccione (HOME) t (AJUSTES) t [AJ.REL./ IDIOM.] t [AJUS.RELOJ] y, a continuación, ajuste la - Sony DCRDVD508 | Operating Guide - Page 131
Spanish Quick Guide/Guía rápida en español Paso 4: Preparativos para la grabación Panel LCD Abra el panel LCD 90 grados respecto a la videocámara (1) y, a continuación, gírelo en - Sony DCRDVD508 | Operating Guide - Page 132
la cubierta del disco. [ACCESO A DISCO] aparece en la pantalla LCD. Es posible que la videocámara tarde cierto tiempo en reconocer el disco. x DVD-RW/DVD+RW Aparece una ventana que pregunta si se utilizará la opción [GUÍA SELEC.DISCO]. La opción [GUÍA SELEC.DISCO] permite formatear el disco mediante - Sony DCRDVD508 | Operating Guide - Page 133
Spanish Quick Guide/Guía rápida en español x DVD+RW Seleccione el formato de la película, [PANORÁM.16:9] o [4:3] y, podrá empezar a grabar en él. z Sugerencias • Si utiliza un disco DVD-RW mientras está ajustado el modo Easy Handycam, el formato de grabación se fijará en el modo VIDEO. Extracción - Sony DCRDVD508 | Operating Guide - Page 134
Paso 5: Inserción de un disco o un "Memory Stick Duo" (continuación) "Memory Stick Duo" Sólo se puede utilizar un "Memory Stick Duo" con la marca o . z Sugerencias • El número de imágenes que pueden grabarse varía en función de la calidad o el tamaño de la imagen. 1 Abra el panel LCD. 2 - Sony DCRDVD508 | Operating Guide - Page 135
Spanish Quick Guide/Guía rápida en español Grabación (HOME) D (HOME) E PHOTO F START/STOP C Interruptor POWER B START/STOP A Ajuste de la correa de sujeción Ajuste y tense la correa de sujeción como se muestra en la ilustración y sujete la videocámara correctamente. b - Sony DCRDVD508 | Operating Guide - Page 136
ícula). 2 Presione START/STOP A (o C). min ESPERA Imágenes fijas Las imágenes fijas se graban en el "Memory Stick Duo". 1 Gire el interruptor POWER B hasta que se encienda el indicador (imágenes fijas). 2 Presione PHOTO F. min 6,1M [ESPERA]t[GRAB.] Para detener la grabación, presione START/STOP - Sony DCRDVD508 | Operating Guide - Page 137
Reproducción (HOME) E Palanca de zoom F Interruptor POWER A Spanish Quick Guide/Guía rápida en español (HOME) D (VISUALIZAR IMÁGENES) C (VISUALIZAR IMÁGENES) B Gire el interruptor POWERA para encender la videocámara. Presione (VISUALIZAR IMÁGENES) B (o C). - Sony DCRDVD508 | Operating Guide - Page 138
velocidad de rebobinado/ avance rápido será aproximadamente 5 veces mayor y, si lo toca dos veces, será aproximadamente 10 veces mayor*. * Aproximadamente 8 veces luego de utilizar un DVD+RW. 138 - Sony DCRDVD508 | Operating Guide - Page 139
-
 1
1 -
 2
2 -
 3
3 -
 4
4 -
 5
5 -
 6
6 -
 7
7 -
8
-
9
-
10
-
11
-
12
-
13
-
14
-
15
-
16
-
17
-
18
-
19
-
20
-
21
-
22
-
23
-
24
-
25
-
26
-
27
-
28
-
29
-
30
-
31
-
32
-
33
-
34
-
35
-
36
-
37
-
38
-
39
-
40
-
41
-
42
-
43
-
44
-
45
-
46
-
47
-
48
-
49
-
50
-
51
-
52
-
53
-
54
-
55
-
56
-
57
-
58
-
59
-
60
-
61
-
62
-
63
-
64
-
65
-
66
-
67
-
68
-
69
-
70
-
71
-
72
-
73
-
74
-
75
-
76
-
77
-
78
-
79
-
80
-
81
-
82
-
83
-
84
-
85
-
86
-
87
-
88
-
89
-
90
-
91
-
92
-
93
-
94
-
95
-
96
-
97
-
98
-
99
-
100
-
101
-
102
-
103
-
104
-
105
-
106
-
107
-
108
-
109
-
110
-
111
-
112
-
113
-
114
-
115
-
116
-
117
-
118
-
119
-
120
-
121
-
122
-
123
-
124
-
125
-
126
-
127
-
128
-
129
-
130
-
131
-
132
-
133
-
134
-
135
-
136
-
137
-
138
-
139
 |
 |
2-319-640-
11
(1)
© 2007 Sony Corporation
Printed on 70% or more recycled paper
using VOC (Volatile Organic Compound)
-free vegetable oil based ink.
Printed in Japan
Additional information on this product and answers
to frequently asked questions can be found at our
Customer Support Website.
US
Digital Video Camera Recorder
Operating Guide
DCR-DVD408/DVD508/
DVD808/DVD908
Enjoying with your
camcorder
12
Getting Started
21
Recording/Playback
31
Editing
50
Utilizing recording media
59
Customizing your
camcorder
64
Using a Computer
83
Troubleshooting
88
Additional
Information
101
Quick
Reference
114
Spanish Quick Guide/
Guia rapida en espanol
125