Sony DSX-B700 Operating Instructions
Sony DSX-B700 Manual
 |
View all Sony DSX-B700 manuals
Add to My Manuals
Save this manual to your list of manuals |
Sony DSX-B700 manual content summary:
- Sony DSX-B700 | Operating Instructions - Page 1
Car Audio Operating Instructions GB Mode d'emploi FR Owner's Record The model and serial numbers are located on the bottom of the unit. Record the serial number in the space provided below. Refer to these numbers whenever you call upon your Sony dealer regarding this product. Model No. DSX-B700 - Sony DSX-B700 | Operating Instructions - Page 2
://www.sony.com/electronics/support Contact: Sony Customer Information Service Center at 1-800-222-7669 Write: Sony Customer Information Service Center 12451 Gateway Blvd., Fort Myers, FL 33913 Supplier's Declaration of Conformity Trade Name: SONY Model: DSX-B700 Responsible Party: Sony Electronics - Sony DSX-B700 | Operating Instructions - Page 3
services offered by third parties Services offered by third parties may be changed, suspended, or terminated without prior notice. Sony manual or contact the manufacturer of your vehicle or your vehicle dealer, before you install this product into your vehicle. Emergency calls This BLUETOOTH car - Sony DSX-B700 | Operating Instructions - Page 4
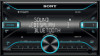
Guide to Parts and Controls Main Unit and Remote Commander Main unit (browse) USB port / (SEEK -/+) During radio reception: Tunes in radio stations automatically. Press and hold to tune manually. / (prev/next) / (fast-reverse/fast-forward) MODE (back) Returns to the previous display. - Sony DSX-B700 | Operating Instructions - Page 5
open the setup menu. Selects a setup item, etc. ENTER Enters the selected item. Press and hold for more than 2 seconds to establish or terminate the "Sony | Music Center" function. / (prev/next) +/- (album +/-) VOL (volume) +/- Remove the insulation film before use. 5GB - Sony DSX-B700 | Operating Instructions - Page 6
returns to normal reception/play mode. Updating the Firmware To update the firmware, visit the support site on the back cover, then follow the online instructions. Notes Using a USB device (not supplied) is required for updating the firmware. Store the updater in the USB device, and connect - Sony DSX-B700 | Operating Instructions - Page 7
inside the car, or problems concerning your unit that are not covered in this manual, consult your nearest Sony dealer. About iPod You can connect to the following iPod models. Update your iPod devices to the latest software before use. Compatible iPhone/iPod models Compatible Model Bluetooth - Sony DSX-B700 | Operating Instructions - Page 8
stereo) Sampling rate: 8 kHz - 48 kHz FLAC (.flac) Bit depth: 16 bit, 24 bit Sampling rate: 44.1 kHz, 48 kHz Supported file system: FAT16, FAT32 Wireless Communication Communication System: BLUETOOTH Standard version 3.0 Output: BLUETOOTH (1): RM-X231 Parts for installation and connections (1 set) - Sony DSX-B700 | Operating Instructions - Page 9
marks and logos are trademarks of Sirius XM Radio Inc. All rights reserved. The Bluetooth® word mark and logos are registered trademarks owned by the Bluetooth SIG, Inc. and any use of such marks by Sony Corporation is under license. Other trademarks and trade names are those of their respective - Sony DSX-B700 | Operating Instructions - Page 10
heater ducts. Use only the supplied mounting hardware for a safe and secure installation. Note on the power supply lead (yellow) When connecting this unit in combination with other stereo components, the amperage rating of the car circuit to which the unit is connected must be higher than the sum - Sony DSX-B700 | Operating Instructions - Page 11
the microphone, see "Installing the microphone" (page 12). *6 Depending on the type of car, use an adaptor (not supplied) if the antenna (aerial) connector does not fit. *7 For more information on how to install the SiriusXM Connect Vehicle tuner, consult the installation guide included with the - Sony DSX-B700 | Operating Instructions - Page 12
aerial) or antenna (aerial) booster, or with a manually-operated telescopic antenna (aerial). To AMP REMOTE IN other system may damage the unit. To a car's illumination signal Be sure to first connect the black on installing the connection cable RC-SR1 (not supplied) Refer to the support sites - Sony DSX-B700 | Operating Instructions - Page 13
97 mm (3 7/8 in) Larger than 172 mm (6 7/8 in) Installation kit (not supplied) Mounting the unit in a Japanese car You may not be able to install this unit in some makes of Japanese cars. In such a case, consult your Sony dealer. To dashboard/center console Bracket Bracket Parts supplied - Sony DSX-B700 | Operating Instructions - Page 14
, car la section arrière de l'appareil devient chaude en cours de fonctionnement. Pour plus de détails, reportez-vous à la section « Raccordement/Installation » services proposés par des tiers Les services proposés par des tiers peuvent être modifiés, suspendus ou clôturés sans avis préalable. Sony - Sony DSX-B700 | Operating Instructions - Page 15
garde SONY NE hicule avant d'installer ce produit dans votre véhicule. Appels d'urgence Cet appareil mains libres BLUETOOTH de véhicule service à proximité de portes automatiques ou d'un avertisseur d'incendie Cet appareil prend en charge les capacités de sécurité conformes à la norme BLUETOOTH - Sony DSX-B700 | Operating Instructions - Page 16
Guide des pièces et commandes Appareil principal et télécommande Appareil principal (navigation) En cours de lecture : Permet d'accéder au mode de navigation. (Non disponible - Sony DSX-B700 | Operating Instructions - Page 17
et maintenez-la enfoncée pendant plus de 2 secondes pour sélectionner le signal BLUETOOTH. Récepteur de télécommande Touches numériques (1 à 6) Permettent ée pendant plus de 2 secondes pour activer ou désactiver la fonction « Sony | Music Center précédente/suivante) +/- (album +/-) VOL (volume - Sony DSX-B700 | Operating Instructions - Page 18
, puis tournez et appuyez sur la molette de réglage pour sélectionner [BLUETOOTH] [PAIRING] [DEVICE 1]/[DEVICE 2]*. clignote pendant que l'appareil est en mode de l'adresse indiquée sur la couverture arrière, puis suivez les instructions en ligne. Remarques L'utilisation d'un périphérique USB ( - Sony DSX-B700 | Operating Instructions - Page 19
audio à l'intérieur du véhicule, car la température élevée résultant du abordés dans ce mode d'emploi, contactez votre détaillant Sony le plus proche. À propos du iPod Cet les utiliser. Modèles de iPhone/iPod compatibles Modèle compatible Bluetooth® USB iPhone XR iPhone Xs max - Sony DSX-B700 | Operating Instructions - Page 20
FAT32 Communication sans fil Système de communication : Norme BLUETOOTH version 3.0 Sortie : Norme BLUETOOTH Power Class 2 (+1 dBm par conduction max.) Portée (1) Télécommande (1) : RM-X231 Composants destinés à l'installation et aux raccordements (1 jeu) Accessoires/appareils en option : - Sony DSX-B700 | Operating Instructions - Page 21
marques de commerce de Sirius XM Radio Inc. Tous droits réservés. La marque et les logos Bluetooth® sont des marques déposées de Bluetooth SIG, Inc. qui sont utilisées sous licence uniquement par Sony Corporation. Les autres marques de commerce et noms de commerce appartiennent à leurs propriétaires - Sony DSX-B700 | Operating Instructions - Page 22
nominale du circuit du véhicule sur lequel l'appareil sera raccordé doit être supérieure à la somme des fusibles de chaque élément. Remarque sur l'installation dans les véhicules avec système de mise en veille L'appareil pourrait redémarrer lors du démarrage du moteur depuis l'état de veille. En - Sony DSX-B700 | Operating Instructions - Page 23
). *6 Selon le type de véhicule, utilisez un adaptateur (non fourni) si le connecteur d'antenne ne s'insère pas. *7 Pour plus d'informations sur la manière d'installer le récepteur SiriusXM Connect Voiture, consultez le guide d'installation fourni avec le récepteur. 11FR - Sony DSX-B700 | Operating Instructions - Page 24
une impédance de 4 Ω à 8 Ω avec une capacité électrique adéquate pour éviter de les endommager. Installation du microphone Pour capter votre voix pendant les appels en mains libres, vous devez installer le microphone . Clip (non fourni) Mises en garde Il est extrêmement dangereux de laisser - Sony DSX-B700 | Operating Instructions - Page 25
lectionnez [STEERING] [EDIT CUSTOM] pour effectuer l'enregistrement. Une fois l'enregistrement terminé, la télécommande du volant devient disponible. Remarques sur l'installation du câble de raccordement RC-SR1 (non fourni) Reportez-vous aux sites d'assistance indiqués sur la couverture arrière - Sony DSX-B700 | Operating Instructions - Page 26
de l'appareil dans un véhicule japonais Cet appareil ne peut pas être installé dans certaines voitures japonaises. Dans ce cas, consultez votre détaillant Sony. Vers le tableau de bord/la console centrale Support Support Pièces fournies avec la voiture Si vous installez cet appareil sur - Sony DSX-B700 | Operating Instructions - Page 27
- Sony DSX-B700 | Operating Instructions - Page 28
techniques sur ce produit, rendez-vous sur le site Web suivant : https://www.sony.com/am/support If you have any questions/problems regarding this product, try the following: 1 Read Troubleshooting in Help Guide (online manual). 2 Please contact (U.S.A. only); Call 1-800-222-7669 URL https://www
-
 1
1 -
 2
2 -
 3
3 -
 4
4 -
 5
5 -
 6
6 -
 7
7 -
8
-
9
-
10
-
11
-
12
-
13
-
14
-
15
-
16
-
17
-
18
-
19
-
20
-
21
-
22
-
23
-
24
-
25
-
26
-
27
-
28
 |
 |

DSX-B700
5-003-283-
22
(1)
FM/AM
Bluetooth® Car Audio
Owner’s Record
The model and serial numbers are located on the bottom of the
unit.
Record the serial number in the space provided below.
Refer to these numbers whenever you call upon your Sony dealer
regarding this product.
Model No. DSX-B700
Serial No.
Operating Instructions
GB
Mode d’emploi
FR
To cancel the demonstration (DEMO) display, see page 6.
For the connection/installation, see page 10.
Pour annuler l’affichage de démonstration (DEMO),
reportez-vous à la page 6.
Pour le raccordement/l’installation, reportez-vous à la page 10.