Sony HXCFB80 Operating Instructions
Sony HXCFB80 Manual
 |
View all Sony HXCFB80 manuals
Add to My Manuals
Save this manual to your list of manuals |
Sony HXCFB80 manual content summary:
- Sony HXCFB80 | Operating Instructions - Page 1
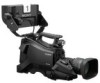
4-734-401-12 (1) HD Color Camera Operating Instructions Before operating the unit, please read this manual thoroughly and retain it for future reference. HXC-FB80 © 2017 Sony Corporation - Sony HXCFB80 | Operating Instructions - Page 2
46 PAINT Menu 53 MAINTENANCE Menu 57 FILE Menu 62 DIAGNOSIS Menu 63 Appendix 65 Usage Precautions 65 Cleaning the Viewfinder 65 Error Messages 66 Supported USB Flash Drives 66 Specifications 67 Pin Assignment 68 Open Software Licenses 70 2 - Sony HXCFB80 | Operating Instructions - Page 3
and the HXCU-FB80 to connect to the unit must both be upgraded to version 1.10 or later for HD-HDR signal support. For details, contact a Sony sales or service representative. Camera System Components The HXC-FB80 camera system comprises the components shown in the figure below. The operation of the - Sony HXCFB80 | Operating Instructions - Page 4
devices shown in the figures may have been discontinued. For advice on choosing devices, please contact your Sony dealer or a Sony service representative. Standalone operation example HDVF-L10 Viewfinder Microphone USB flash drive HXC-FB80 AC-DN10 AC Adaptor RCP-1000 series Remote Control - Sony HXCFB80 | Operating Instructions - Page 5
not set to 1080/50P, 59.94P. c) LAN cable connection is supported only for RCP-1500/1501/1530. Power must be supplied via a PoE hub or power supply must be connected to EXT DC IN connector of RCP-1500/1501/1530. d) For details about a D-Sub remote adapter, contact a Sony service representative. 5 - Sony HXCFB80 | Operating Instructions - Page 6
m (1,150 ft) when using Sony CCFN-25/50/100/ 150/200/250 Hybrid Fiber Cable (with camera head + portable lens + HDVF-L750). b) HD TRUNK output supported when the signal format is set to 1080/50i HDR, 59.94i HDR. c) A LAN cable can be used only to connect the RCP-1500/1501 - Sony HXCFB80 | Operating Instructions - Page 7
System operation example: When connected with HXCE-FB70 Power Supply Unit HDVF-L10 Viewfinder HDVF-L750 Viewfinder Return video input Picture monitor Microphone USB flash drive HXC-FB80 Single-mode optical fiber cable b) Sync signal input VBS prompter video input Video output Lens - Sony HXCFB80 | Operating Instructions - Page 8
Panel (Attach to front of HXCU-TX70) Intercom headset RCP-1000 series Remote Control Panel a) For details about transmission distance, refer to the operating instructions for the HXCU-TX70 HD Camera Control Unit. b) A LAN cable can be used only to connect the RCP-1500/1501/1530. To connect it - Sony HXCFB80 | Operating Instructions - Page 9
Clamp the lens cable and microphone cable. f (USB) connector For details about how to use a USB flash drive and compatible USB flash drives, see "Supported USB Flash Drives" (page 66). g Viewfinder front-to-back positioning lock knob Loosen this knob to adjust the front-to-back position of the - Sony HXCFB80 | Operating Instructions - Page 10
the lens mount, preventing it from coming loose. o Lens mount (special bayonet mount) Attach a lens. Consult your Sony dealer or a Sony service representative for information about available lenses. For details about attaching, see "Attaching and Adjusting the Lens" (page 23). p CCU (Camera Control - Sony HXCFB80 | Operating Instructions - Page 11
Front and Right Side Note When connected to a camera control unit or external remote control device (for example, RCP or RM), the following switch functions are controlled from the connected device. The switches on the camera do not function. • SHUTTER switch • WHT/BLK switch • OUTPUT/AUTO KNEE - Sony HXCFB80 | Operating Instructions - Page 12
f RET (return video) button Displays the return video signal in the viewfinder while this button is pressed. You can assign a function to this button using FRONT RET on the page in the OPERATION menu. Note The display image may be distorted when the video signal is switched. g - Sony HXCFB80 | Operating Instructions - Page 13
Rear For the pin assignment of each connector, see "Pin Assignment" (page 68). For details about removing the rear cover, see "Removing the rear cover" (page 17). (With rear cover removed) a PGM LEVEL (program level) knob/assignable button Adjust the intercom PGM audio level. When connected with the - Sony HXCFB80 | Operating Instructions - Page 14
) button Displays the return video signal in the viewfinder while this button is pressed. b Zoom see-saw switch This is enabled when the zoom servo/manual selector knob is in the SERVO position. The zoom speed increases when you push the switch deeper, and decreases when you push less deeply. 14 - Sony HXCFB80 | Operating Instructions - Page 15
viewfinder, see "Attaching and Adjusting the Viewfinder" (page 18). For details about the viewfinder supplied with the HXC-FB80S, refer to the operation manual for the HDVF-L750. a Connector Connect to the VF connector on the camera. b Slide stopper Prevents the viewfinder from coming off the camera - Sony HXCFB80 | Operating Instructions - Page 16
. When required, secure the cable, using the supplied cable clamp belt. If connecting an HXCU-TX70 HD Camera Control Unit, refer to the operating instructions for the HXCU-TX70. Attaching the cable clamp belt 1 Insert the belt bracket C into hole A or B of the cable clamp belt. C B A 2 1 Remove the - Sony HXCFB80 | Operating Instructions - Page 17
3 1 Release the buckle, 2 bundle the cable with the belt, 3 then close the buckle again. If attaching the AC adaptor Remove the rear cover and attach the AC adaptor to the camera. Removing the rear cover 1 Hold the release button on the camera in, and 2 pull the rear cover up. 4 Adjust the length - Sony HXCFB80 | Operating Instructions - Page 18
To attach the rear cover Align the guide on the inner side of the rear cover with the camera details about attaching and adjusting the viewfinder supplied with the HXCFB80S, refer to the operation manual for the HDVF-L750. Attaching the viewfinder Attach the HDVF-L10 viewfinder supplied with the HXC - Sony HXCFB80 | Operating Instructions - Page 19
Adjusting the position To adjust the viewfinder left-to-right position, loosen the left-toright positioning ring. To adjust the front-to-back position, loosen the front-to-back positioning lever and lock knob. Viewfinder left-to-right positioning ring Raising the viewfinder barrel or eyepiece You - Sony HXCFB80 | Operating Instructions - Page 20
To detach the viewfinder barrel Adjusting the diopter Rotate the diopter adjustment ring until the viewfinder image is sharpest. Diopter adjustment ring Adjusting the screen 1 Push the clip on the bottom to release it. 2 Flip up the viewfinder barrel. 3 Slide the button on the top in the - Sony HXCFB80 | Operating Instructions - Page 21
tally signal is input. c Y TALLY (yellow tally) indicator (yellow) Not supported by the camera. Note In full-screen display mode, the display position of the the default position. For details about attaching, refer to the operation manual for the viewfinder. Using the Camera for the First Time The - Sony HXCFB80 | Operating Instructions - Page 22
(Horizontal × Vertical) 1080 lines (1920×1080) 720 lines (1280×720) SYSTEM SCAN Setting Interlace Progressive PsF Video scanning mode Interlaced Progressive Progressive Supported formats: 1080/59.94i, 1080/59.94P, 1080/50i, 1080/50P, 1080/29.97PsF, 1080/25PsF, 1080/23.98PsF, 720/59.94P - Sony HXCFB80 | Operating Instructions - Page 23
set the DISPLAY/MENU switch to OFF to exit menu mode. Attaching and Adjusting the Lens For information on handling lenses, refer to the operation manual for the particular lens. Attaching the lens Note Before attaching the lens, power off the camera first. 1 Push the lens locking lever up and remove - Sony HXCFB80 | Operating Instructions - Page 24
correction lens. Contact your Sony dealer or a Sony service representative for information about other aberration correction lenses. Adjusting ) enters the screen at the wide-angle end. 1 Set the iris to manual, and open the iris. 2 Position the supplied flange focal length adjustment chart - Sony HXCFB80 | Operating Instructions - Page 25
microphone to the AUDIO 2 IN connector, using an optional CAC-12 microphone holder. For details about attaching the microphone, refer to the operation manual for the microphone. For details about setting the audio input 2 selector switch and input level of the AUDIO 2 IN connector, see steps 4 and - Sony HXCFB80 | Operating Instructions - Page 26
2 Place the camera on the tripod adaptor and slide it forward along the groove of the platform until it clicks into place. Attaching the Shoulder Strap Attach an optional shoulder strap (part number: A-6772-374-C) to the camera. 1 Fit one of the clips to the shoulder strap fitting. Pull up the - Sony HXCFB80 | Operating Instructions - Page 27
well as the contrast and brightness of the viewfinder image (see page 18). For details about the operation of optional viewfinders, refer to the operation manual for the viewfinder. 27 - Sony HXCFB80 | Operating Instructions - Page 28
the external control device, refer to the operating instructions or operation manual for the device. Black balance adjustment The black balance . Manual black balance adjustment can be selected in the menu. For details about manual black balance adjustment, contact a Sony service representative - Sony HXCFB80 | Operating Instructions - Page 29
. If the error message occurs again, consult your Sony dealer or a Sony service representative. Note If the lens cable is not firmly connected to the LENS connector automatic iris control. For details, refer to the operation manual supplied with the lens. If the automatic white balance adjustment - Sony HXCFB80 | Operating Instructions - Page 30
device. They are not controlled using the camera. For details about operations on the external control device, refer to the operating instructions or operation manual for the device. Shutter modes The shutter modes that can be used with the electronic shutter and the shutter speeds that can - Sony HXCFB80 | Operating Instructions - Page 31
Repeat this operation until the desired speed is displayed. To set ECS mode, select "ECS." To set SLS mode, select "SLS." All modes and speeds are displayed in the following order. Example: System frequency of 59.94i Standard mode 1/100 1/125 1/250 1/500 1/1000 1/2000 SLS mode ECS mode To set - Sony HXCFB80 | Operating Instructions - Page 32
FLICKER: Set the function for flickering the detail signal to ON/OFF. (Setting the function to ON makes it easier to check the detail signal on the viewfinder screen.) AREA: Limit the area where to display the detail signal. ZOOM LINK: Set the VF detail level at the full WIDE position. (The VF - Sony HXCFB80 | Operating Instructions - Page 33
To output as SD-SDI Menu page Page No. M11 Item Setting SDI OUT SD-SDI DOWN MAIN CONVERTER SELECT Note SD-SDI output is not available when HDR is set. To output as VBS Menu page Page No. M10 Item Setting OUTPUT VBS DOWN MAIN CONVERTER SELECT Note VBS - Sony HXCFB80 | Operating Instructions - Page 34
Menu Operation The menus displayed in the viewfinder enable various settings of the camera. The following switches are used to operate the menus. Rotate the menu control knob to select menu items or values, and press it to register (enter) the selection. DISPLAY/MENU switch STATUS/CANCEL switch - Sony HXCFB80 | Operating Instructions - Page 35
PAINT (page 53) This menu contains items for making detailed image adjustments while using a waveform monitor to monitor the waveforms output from the camera. Support of a video engineer is usually required to use this menu. Although you can also use an external control device to set the items in - Sony HXCFB80 | Operating Instructions - Page 36
Selecting a Page To select a page from the CONTENTS page Rotate the menu control knob to align the , pointer with the desired page and press the menu control knob. If the screen can be scrolled, arrows will indicate the direction for scrolling. , pointer CONTENTS xx 01. 02. - Sony HXCFB80 | Operating Instructions - Page 37
To return a menu item to the standard value When an item is selected and the , pointer is displayed, pressing and holding the menu control knob for 3 seconds restores the setting value to the state in the reference file. If 10 SEC CLEAR is set to ON on the page in the FILE menu, - Sony HXCFB80 | Operating Instructions - Page 38
3 Move the , pointer to the item to be added (this operation is unnecessary if no item exists on the page, as shown in the figure for the previous step), then press the menu control knob. The EDIT FUNCTION screen appears. EDIT FUNCTION ESC cINSERT MOVE DELETE BLANK 3 Move the , pointer to the - Sony HXCFB80 | Operating Instructions - Page 39
knob until the EDIT PAGE screen appears, then press the menu control knob to select the page. EDIT PAGE xx 01. c02. 03. 04. 05. 06. 07. 08. 09. 10. 11. 12. 13.< - Sony HXCFB80 | Operating Instructions - Page 40
TOP appears at the top right of the USER MENU screen. 3 Select TOP to display the page. 4 Select MAINTENANCE on the TOP MENU screen. 5 Change TOP MENU LOCK on the page from LOCK to OFF. 40 - Sony HXCFB80 | Operating Instructions - Page 41
Menu List This section shows the menus to be displayed on the viewfinder screen in tables. • For the pages that have been registered in the USER menu at the factory, the USER menu page numbers are indicated in parenthesis in the Page No. column of the tables. • A CONTENTS page (numbered 00) is also - Sony HXCFB80 | Operating Instructions - Page 42
VF OUT 08 (U01) SWITCH ASSIGN1 09 (U09) SWITCH ASSIGN2 10 (U10) VR ASSIGN 11 HEADSET MIC 12 (U12) INTERCOM 13 (U13) EARPHONE 14 VF OUT RET MIX VF MIX DIRECTION MIX VF MODE MIX VF LEVEL CHARACTER LEVEL PinP POSITION SIZE MODE GAIN ASSIGNABLE1 ASSIGNABLE2 ASSIGNABLE3 ASSIGN CTEMP RE. ROTATION LENS - Sony HXCFB80 | Operating Instructions - Page 43
SATURATION P06 KNEE P07 WHITE CLIP P08 DETAIL 1 P09 DETAIL 2 P10 SD DETAIL P11 SD CROSS COLOR P12 SKIN DETAIL P13 SATURATION LOW KEY SAT RANGE TEST K POINT K SLOPE KNEE KNEE MAX KNEE SAT AUTO KNEE POINT LIMIT SLOPE ABS W CLIP ABS DETAIL LEVEL LIMITER CRISP LEVEL DEPEND ABS H/V RATIO FREQ MAX RATIO - Sony HXCFB80 | Operating Instructions - Page 44
MAINTENANCE menu AUTO SETUP M01 WHITE SHADING M02 BLACK SHADING M03 AUTO IRIS M04 LENS M05 CIS COMP M06 AUDIO M07 (U14) CALL/TALLY M08 OUTPUT FORMAT M09 (U15) TEST OUT M10 (U16) AUTO BLACK AUTO WHITE AUTO LEVEL AUTO WHITE SHADING AUTO BLACK SHADING TEST V SAW V PARA H SAW H PARA WHITE AUTO WHITE - Sony HXCFB80 | Operating Instructions - Page 45
FILE menu OPERATOR FILE F01 SCENE FILE F02 REFERENCE F03 LENS FILE F04 (U11) FILE CLEAR F05 READ (USBt CAM) WRITE (CAMt USB) PRESET STORE PRESET FILE FILE ID CAM CODE DATE 1 2 3 4 5 STORE STANDARD READ (USBt CAM) WRITE (CAMt USB) FILE ID CAM CODE DATE STORE FILE STANDARD ALL PRESET READ (USBt CAM) - Sony HXCFB80 | Operating Instructions - Page 46
OPERATION Menu OPERATION Page name Page No. 01 (U04) Item EX ZOOM DISP FOCUS ND CC 5600K IRIS WHITE D.EXT GAIN SHUTTER BATT RETURN TALK AUDIO AF MESSAGE Setting ON, OFF ON, OFF LEFT, RIGT ON, OFF ON, OFF ON, OFF ON, OFF ON, OFF ON, OFF ON, OFF ON, OFF ON, OFF ON, OFF ON, OFF ON, OFF - Sony HXCFB80 | Operating Instructions - Page 47
OPERATION Page name Page No. 02 (U05) 03 (U06) Item ND CC WHITE 5600K GAIN SHUTTER FAN EXT FORMAT MARKER LEVEL CENTER SAFETY ZONE EFFECT ASPECT MASK SAFETY Setting Description / Remarks IND: ON, OFF NORMAL: 1, 2, 3, 4 (combination allowed) IND: ON, OFF NORMAL: A, B, C, D ( - Sony HXCFB80 | Operating Instructions - Page 48
OPERATION Page name Page No. 04 (U02) 05 (U03) 06 (U08) Item Setting Description / Remarks VF DETAIL CRISP FREQUENCY FLICKER AREA ZOOM LINK COLOR DETAIL PEAK COLOR CHROMA LEVEL RETURN DISABLE ON, OFF 0 to 100% 8% -99 to +99 0 9M, 14M, 18M ON, OFF 100%, 70%, 60 - Sony HXCFB80 | Operating Instructions - Page 49
OPERATION Page name Page No. 07 (U07) 08 (U01) Item Setting Description / Remarks CURSOR LEVEL BOX/CROSS H POSITION V POSITION WIDTH HEIGHT BOX MEMORY H POSI V POSI WIDTH HEIGHT VF OUT RET MIX VF MIX DIRECTION MIX VF MODE MIX VF LEVEL CHARACTER LEVEL PinP POSITION ON, OFF - Sony HXCFB80 | Operating Instructions - Page 50
OPERATION Page name Page No. 09 (U09) 10 (U10) Item GAIN ASSIGNABLE1 ASSIGNABLE2 ASSIGNABLE3 ASSIGN CTEMP RE.ROTATION LENS VTR S/S FRONT RET REAR ENC SW Setting Description / Remarks L: -6dB, -3dB, 0dB, 3dB, 6dB, 9dB, 12dB M: -6dB, -3dB, 0dB, 3dB, 6dB, 9dB, - Sony HXCFB80 | Operating Instructions - Page 51
GAIN2, MIC GAIN1+2, INTERCOM, EARPHONE, OFF MIC GAIN1, MIC GAIN2, MIC GAIN1+2, INTERCOM, EARPHONE, OFF DYNAMIC, CARBON, MANUAL -60dB, -40dB, -20dB -6dB, 0dB, 6dB ON, OFF ON, OFF MU, 1 to 99 50 DYNAMIC, CARBON, MANUAL -60dB, -40dB, -20dB -6dB, 0dB, 6dB ON, OFF ON, OFF MU, 1 to 99 50 DYNAMIC, CARBON - Sony HXCFB80 | Operating Instructions - Page 52
OPERATION Page name Page No. 14 15 16 See FILE menu F01. Item Setting Description / Remarks EARPHONE RECEIVE SELECT INTERCOM ENG PROD PGM/SDI1 SDI2 AUDIO1 AUDIO2 MODE SEPARATE, MIX RIGHT, LEFT, BOTH, --0 to 99 RIGHT, LEFT, BOTH, --0 to 99 RIGHT, LEFT, BOTH, --0 - Sony HXCFB80 | Operating Instructions - Page 53
PAINT Menu PAINT Page name Page No. P01 P02 P03 P04 Item Setting FLARE GAMMA BLK GAM KNEE WHT CLIP DETAIL LVL DEP SKIN DTL MATRIX WHITE BLACK FLARE GAMMA V MOD FLARE V MOD TEST WHITE AUTO WHITE BALANCE COLOR TEMP BALANCE ATW SPEED MASTER LEVEL COARSE - Sony HXCFB80 | Operating Instructions - Page 54
PAINT Page name Page No. P05 P06 P07 P08 P09 P10 P11 Item Setting LEVEL RANGE TEST SATURATION LOW KEY SAT RANGE TEST K POINT K SLOPE KNEE KNEE MAX KNEE SAT AUTO KNEE POINT LIMIT SLOPE ABS W CLIP ABS DETAIL LEVEL - Sony HXCFB80 | Operating Instructions - Page 55
PAINT Page name Page No. P12 P13 P14 P15 Item Setting Description / Remarks CRS COL REDUCE LEVEL SKIN DTL SKIN GATE ABS ZOOM LINK TELE WIDE CH SW HUE PHASE WIDTH SAT LEVEL R G B MATRIX PRESET USER MULTI ADAPTIVE MATRIX LEVEL PHASE HUE - Sony HXCFB80 | Operating Instructions - Page 56
PAINT Page name Page No. P16 Item SHUTTER ECS FREQ P17 P18 SLOW SHUTTER SLS FRAME SUPPRESSION HDR MODE SDR GAIN HDR BLACK OFFSET HDR KNEE POINT SLOPE HDR WHITE CLIP LEVEL Setting Description / Remarks ON, OFF ( ) display: In standalone operation - Sony HXCFB80 | Operating Instructions - Page 57
PAINT Page name Page No. P19 See FILE menu F02. Item 1 2 3 4 5 STORE STANDARD READ (USBtCAM) WRITE (CAMtUSB) FILE ID Setting CAM CODE DATE MAINTENANCE Menu MAINTENANCE Page name Page No. M01 M02 Item AUTO BLACK AUTO WHITE AUTO LEVEL AUTO WHITE SHADING - Sony HXCFB80 | Operating Instructions - Page 58
MAINTENANCE Page name Page No. M03 M04 M05 M06 Item Setting Description / Remarks V SAW V PARA H SAW H PARA BLK SET BLACK MASTER GAIN AUTO BLACK SHADING 2D BLACK SHAD BLACK SHADE CLEAR AUTO IRIS WINDOW R/G/B: -99 to 99 0 R/G/B: -99 to 99 0 R/G/B: - - Sony HXCFB80 | Operating Instructions - Page 59
MAINTENANCE Page name Page No. M07 (U14) M08 M09 (U15) M10 (U16) Item Setting Description / Remarks AUDIO1 AUDIO2 TEST TONE CCU CALL CAM CALL CURRENT LINE(0dB), 20dB, 30dB, 40dB, 50dB, 60dB ON, OFF ON, OFF, --ON, OFF, --- COUNTRY OUTPUT SYNC-OUT - Sony HXCFB80 | Operating Instructions - Page 60
MAINTENANCE Page name Page No. M11 (U17) M12 (U18) M13 M14 M15 Item Setting Description / Remarks SDI OUT CHARACTER EMB AUDIO SDI IN/OUT FRAME SYNCRO DOWN CONVERTER SELECT ASPECT TRUNK IF REFERENCE GENLOCK STATUS FORMAT PHASE DATE/TIME FILE - Sony HXCFB80 | Operating Instructions - Page 61
MAINTENANCE Page name Page No. M16 M17 M18 M19 Item Setting Description / Remarks ND FILTER 1, 2, 3, 4 ECC FILTER A, B, C, D, − C and D are displayed only when they are enabled. -: Displayed when ELECTRICAL CC is set to DISABLE ELECTRICAL CC DISABLE, - Sony HXCFB80 | Operating Instructions - Page 62
FILE Menu Four types of files can be used for easy adjustments of the camera; Operator, Reference, Scene, and Lens files. You can store the items set with the OPERATION menu and customized USER menu in the Operator file. FILE Page name Page No. F01 Item READ (USBtCAM) WRITE ( - Sony HXCFB80 | Operating Instructions - Page 63
FILE Page name Page No. F03 F04 (U11) F05 Item STORE FILE Setting STANDARD ALL PRESET READ (USBtCAM) WRITE (CAMtUSB) FILE ID CAM CODE DATE STORE FILE No. Camera code Date Execute using ENTER. 1 to 17 NAME Lens file name F NO F1.0 to F3.4 F1.7 CENTER - Sony HXCFB80 | Operating Instructions - Page 64
DIAGNOSIS Page name Page No. D03 (U19) D04 D05 Item CAMERA APP OS SY DPR MODEL NO CA SY SY PLD CD PLD Setting Description / Remarks ROM name, date, and comment are displayed. Vx.xx date Vx.xx Vx.xx Model name Serial number Displayed only when a camera - Sony HXCFB80 | Operating Instructions - Page 65
to be seen in the following cases: • When operating in high-temperature environment • When the master gain (sensitivity) has been increased The problem may be alleviated by executing automatic black balance adjustment. Aliasing When fine patterns, stripes, or lines are shot, they may appear jagged - Sony HXCFB80 | Operating Instructions - Page 66
manual for the HDVF-L750. Note Do not use organic solvents, such as thinners. Error Messages If a problem using the camera menu. Consult Sony service personnel. An access was attempted with to read does not exist in the USB flash drive. Supported USB Flash Drives Connect a USB flash drive to the - Sony HXCFB80 | Operating Instructions - Page 67
(supplied with the HXC-FB80K/HXC-FB80S) Focal length 8.2 mm to 164 mm Zoom Servo/Manual selectable Zoom ratio 20× Maximum relative aperture 1:1.9 Iris Auto/Manual selectable F1.9 to F16 and C (close) Focus Manual Range: 900 mm to ∞ (Macro mode OFF), 10 mm to ∞ (Macro mode ON, wide angle - Sony HXCFB80 | Operating Instructions - Page 68
(1) Cable clamp belt (1) Operating Instructions (CD-ROM) (1) Before Using ) (1) HDVF-L750 Operation Manual (CD-ROM) (1) HDVF-L750 Operation Guide (1 set) Note The connection NOT BE LIABLE FOR THE TERMINATION OR DISCONTINUATION OF ANY SERVICES RELATED TO THIS UNIT THAT MAY RESULT DUE TO CIRCUMSTANCES - Sony HXCFB80 | Operating Instructions - Page 69
IN MIC (X) 3 GND - 4 Intercom Left OUT 5 Intercom Right OUT a) When unbalanced Specifications CARBON: -20 dBu, Unbalanced DYNAMIC: -60 dBu, Balanced/ Unbalanced MANUAL GND 8 dBu (VR max., 250 Ω load) 8 dBu (VR max., 250 Ω load) (0 dBu = 0.775 Vrms) REMOTE connector 217 386 45 No. Signal - Sony HXCFB80 | Operating Instructions - Page 70
OUT +3.4 V (F16) to +6.2 V (F2.8) POSITION 6 UNREG OUT +10.5 V to +17 V 7 IRIS IN POSITION +3.4 V (F16) to +6.2 V (F2.8) 8 IRIS AT/MA OUT AUTO IRIS: 0 V MANUAL IRIS: +5 V 9 EXTENDER IN ON/OFF EX 2 ON: GND EX 0.8 ON: 30 kΩ to GND OFF: OPEN 10 ZOOM IN POSITION WIDE: 2 V TELE: 7 V 11 - Sony HXCFB80 | Operating Instructions - Page 71
Sony Corporation
-
 1
1 -
 2
2 -
 3
3 -
 4
4 -
 5
5 -
 6
6 -
 7
7 -
8
-
9
-
10
-
11
-
12
-
13
-
14
-
15
-
16
-
17
-
18
-
19
-
20
-
21
-
22
-
23
-
24
-
25
-
26
-
27
-
28
-
29
-
30
-
31
-
32
-
33
-
34
-
35
-
36
-
37
-
38
-
39
-
40
-
41
-
42
-
43
-
44
-
45
-
46
-
47
-
48
-
49
-
50
-
51
-
52
-
53
-
54
-
55
-
56
-
57
-
58
-
59
-
60
-
61
-
62
-
63
-
64
-
65
-
66
-
67
-
68
-
69
-
70
-
71
 |
 |

HD Color Camera
Operating Instructions
Before operating the unit, please read this manual thoroughly
and retain it for future reference.
HXC-FB80
4-734-401-
12
(1)
© 2017 Sony Corporation