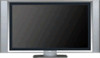
Sony KDE-50XBR950 Instructions
Sony KDE-50XBR950 - 50" Xbr Plasma Wega™ Integrated Television Manual
 |
View all Sony KDE-50XBR950 manuals
Add to My Manuals
Save this manual to your list of manuals |
Sony KDE-50XBR950 manual content summary:
- Sony KDE-50XBR950 | Instructions - Page 1
4-099-792-13 (1) For Customers and Sony Dealers in North and Central America Wall-Mount Bracket Instructions US Mode d'emploi FR Instrucciones ES SU-PW2 © 2003 Sony Corporation - Sony KDE-50XBR950 | Instructions - Page 2
. CAUTION This Wall-Mount Bracket is intended for use only with the following products. Use with other apparatus is capable of resulting in instability causing possible injury. Specified product (As of May 2004) Flat Panel Color Television (Display Model) LCD Color Television (Display Model - Sony KDE-50XBR950 | Instructions - Page 3
which the Wall-Mount Bracket is installed is unstable, uneven, or not perpendicular to the floor, the unit may fall and cause injury or property damage. The wall should be capable of supporting a weight of at least four times the Display Unit weight. (See the Display installing dimensions table on - Sony KDE-50XBR950 | Instructions - Page 4
ventilation hole (with a cloth, etc.), heat may build up inside and cause fire. Do not apply any load other than the Display Unit on the Wall-Mount Bracket. If you do so, the Display Unit may fall and cause injury or property damage. Do not lean on or hang from the Display - Sony KDE-50XBR950 | Instructions - Page 5
not observed, injury or property damage may occur. Do not install the Wall-Mount Bracket on wall surfaces where the corners or the sides of the Display Unit protrude away from the wall surface. Do not install the Wall-Mount Bracket on wall surfaces such as a pillar, where the corners or the sides - Sony KDE-50XBR950 | Instructions - Page 6
manual. If any of the screws are loose or fall out, the Wall-Mount Bracket may fall and cause injury or property damage. Be sure to use the appropriate screws for the material of the wall and install the unit securely, using four or more M8 (or equivalent) screws. Do not allow the AC power - Sony KDE-50XBR950 | Instructions - Page 7
. Be careful not to hurt your hands or fingers when installing the Wall-Mount Bracket or the Display Unit. The screws needed to secure the Wall-Mount Bracket to the wall are not supplied. Use the appropriate screws for the wall material and structure when mounting the Wall-Mount Bracket. US (US) 7 - Sony KDE-50XBR950 | Instructions - Page 8
mauvaise utilisation ou à une installation incorrecte. AVERTISSEMENT Le non-respect support peuvent être instables et entraîner des blessures. Produit spécifié (À partir de mai 2004) Téléviseur couleur à écran plat (Modèle d'écran) Téléviseur couleur ACL (Modèle d'écran) KE-37XS910 KDE42XBR950 - Sony KDE-50XBR950 | Instructions - Page 9
équivalent à au moins quatre fois le poids de l'écran. (Reportez-vous au tableau des dimensions d'installation de l'écran à la page 23 pour obtenir le poids de chaque écran.) • Si l'installation du support de fixation mural n'est pas assez solide, l'appareil risque de tomber et de vous blesser ou de - Sony KDE-50XBR950 | Instructions - Page 10
de ventilation (avec un drap ou autre), l'écran risque de surchauffer et de provoquer un incendie. N'installez aucune charge autre que l'écran sur le support de fixation mural. Dans le cas contraire, l'écran risque de tomber et de provoquer des blessures ou des dommages matériels. Ne vous appuyez - Sony KDE-50XBR950 | Instructions - Page 11
décolorer ou le papier peut se décoller selon le matériau du mur. • Les trous des vis restent apparents si vous démontez le support de fixation mural après son installation. • Si vous avez fait passer des câbles d'alimentation de 300 ohms derrière le mur, nous vous recommandons de les remplacer par - Sony KDE-50XBR950 | Instructions - Page 12
crites ci-dessus et accordez une attention particulière à la sécurité lors de l'installation, de l'entretien et de la vérification de ce produit. Veillez à installer le support de fixation mural correctement au mur en suivant les instructions de ce mode d'emploi. S'il manque des vis ou si elles sont - Sony KDE-50XBR950 | Instructions - Page 13
pas vous blesser les mains ou les doigts au cours de l'installation. Prenez garde à ne pas vous blesser les mains ou les doigts pendant l'installation du support de fixation mural ou de l'écran. Les vis nécessaires à la fixation du support de fixation mural sur le mur ne sont pas fournies. Utilisez - Sony KDE-50XBR950 | Instructions - Page 14
o instalación incorrectas. Proporcione este manual al cliente tras la instalación. Seguridad Los productos de Sony están diseñados pensando en la 2004) Televisor en color de panel plano (Modelo de monitor) KE-37XS910 KDE42XBR950 (PDM-4210) Televisor en color de pantalla de cristal líquido (Modelo - Sony KDE-50XBR950 | Instructions - Page 15
Información para los clientes ADVERTENCIA Si no se tienen en cuenta las siguientes precauciones, pueden provocarse lesiones graves o incluso la muerte a raíz de un incendio, una descarga eléctrica, que el producto vuelque o que se caiga. Asegúrese de contratar la instalación a contratistas - Sony KDE-50XBR950 | Instructions - Page 16
No obstruya el orificio de ventilación del monitor. Si se cubre el orificio de ventilación (con un paño, etc.), el monitor podría sobrecalentarse y provocar un incendio. No aplique ningún peso que no sea propio del monitor en el soporte de montaje mural. Si lo hace, el monitor puede caerse y - Sony KDE-50XBR950 | Instructions - Page 17
con excesiva fuerza cuando realice su limpieza o mantenimiento. No aplique excesiva fuerza en la parte superior del monitor. Si lo hace, el monitor puede caerse y provocar daños personales o materiales. No instale el monitor encima o debajo de un aparato de aire acondicionado. Si el monitor est - Sony KDE-50XBR950 | Instructions - Page 18
de montaje mural firmemente en la pared siguiendo las instrucciones de este manual. Si alguno de los tornillos queda suelto o se desprende, el de utilizar los tornillos adecuados para el material de la pared e instale la unidad firmemente, utilizando cuatro o más tornillos M8 (o equivalentes). - Sony KDE-50XBR950 | Instructions - Page 19
Español Asegúrese de apretar firmemente los tornillos en la posición correspondiente. Si no lo hace, el monitor puede caerse y dañarse o provocar daños personales. Procure no golpear el monitor durante la instalación. Si el monitor se golpea, puede caerse o romperse, lo que puede provocar daños - Sony KDE-50XBR950 | Instructions - Page 20
20 - Sony KDE-50XBR950 | Instructions - Page 21
des pièces requises pour l'installation Español Paso 1: Comprobar las piezas necesarias para la instalación 1 English Prepare a Phillips screwdriver and the appropriate screws (four or more M8 (or equivalent) screws, not supplied), depending on the material of the wall, beforehand. Français Pr - Sony KDE-50XBR950 | Instructions - Page 22
the installation location. Tape the supplied 3 sheets of the paper template together with commercially available adhesive tape. For details, refer to the instructions printed on the paper template. Allow for suitable clearance between the Display Unit and the ceiling and protruding parts of the wall - Sony KDE-50XBR950 | Instructions - Page 23
installing dimensions table Français Tableau des dimensions d'installation Peso Modèle d'écran/ Mounting angle (αº)/ Modelo de (4 19/32) KE-42M1 5º 1075 750 110 288 116 (42 11/32) (29 17/32) (4 11/32) (11 11 wall that the Display Unit will be installed on should be capable of supporting - Sony KDE-50XBR950 | Instructions - Page 24
positions of the screws and the cable hole (if you intend to route the cables in the wall), and work on the wall. WARNING The wall that the Display Unit will be installed on should be capable of supporting a weight of at least four times that of the Display Unit (page 23). Make sure of - Sony KDE-50XBR950 | Instructions - Page 25
wall Français Étape 3 : Installation de la plaque sur le mur Español Paso 3: Instalar la placa en la pared 1 English Fix the Plate Unit to the wall using four or more M8 (or equivalent) screws (not supplied Wall-Mount Bracket to the wall are not supplied. • Be sure fixation du support de - Sony KDE-50XBR950 | Instructions - Page 26
torque setting to approximately 2 N·m. • Make sure that two Mounting Hook Unit support shaft on the lower part of the Plate Unit are screwed in securely. Français Réglez l'angle des bras. Le réglage de l'angle des bras (étapes 1 et 2 ci-dessous) n'est pas nécessaire lors de l'installation de l'écran - Sony KDE-50XBR950 | Instructions - Page 27
removed in Procedure 1. Notes • If you are installing a Display Unit other than KE-37XS910, KE42XS910, KE-50XS910 or KE-42M1, do not change the position of the Mounting Hook Unit support shafts. • When using an electric screwdriver, set the torque setting to approximately 2 N·m. Français Changez les - Sony KDE-50XBR950 | Instructions - Page 28
la instalación del monitor English Preparation varies depending on the Display Unit to be installed. See the procedure for each model and prepare for the installation. Note When using an electric screwdriver, set the torque setting to approximately 2 N·m. Français La préparation varie selon l'écran - Sony KDE-50XBR950 | Instructions - Page 29
the floor. 2 Remove the screws that hold the Display Unit to the Table Top Stand and detach the Table Top Stand Retirez les vis qui maintiennent l'écran sur le support table et détachez le support table de l'écran. 3 Retirez les six vis Retire seis tornillos de la parte posterior del ES monitor. 4 - Sony KDE-50XBR950 | Instructions - Page 30
the floor and supplied with the Wall Mount Bracket). If you intend to use the Display Unit without the speakers, detach the speakers at this stage. For details on detaching the speakers, refer to the instruction manual of the TV avec le support de fixation mural). de la parte inferior del - Sony KDE-50XBR950 | Instructions - Page 31
- Place packing material, etc. on the floor and lay the Display Unit face down on the speakers, refer to the instruction manual of the TV. Speaker (right)/ Haut-parleur supporté par les enceintes, celles-ci risquent de se déformer ou de se desserrer. US Pour éviter cela, observez les instructions - Sony KDE-50XBR950 | Instructions - Page 32
installation before connecting the AC power cord to the wall outlet. If you allow the AC power Mounting Hook Unit on the hooks on the rear side of the Display Unit. Then slide the Mounting Hook Unit and fix it using the supplied Unit/ Arrière de l'écran/ Parte posterior del monitor (The model of the - Sony KDE-50XBR950 | Instructions - Page 33
power cord and the connecting cable(s), refer to the instruction manual of the Display Unit. When you route the cable and the cord in the wall cran installé parte posterior del monitor. Para obtener información sobre cómo conectar el cable de alimentación y los cables de conexión, consulte el manual - Sony KDE-50XBR950 | Instructions - Page 34
Install the Display Unit on the Plate Unit. 1 Insert the screws (+B6 × L20, supplied) for securing the Mounting Hook Unit into the screw holes on the outer left and right sides of the Mounting Hook Unit support shafts, and then tighten them temporarily. 2 Hitch the upper hooks of the two Mounting - Sony KDE-50XBR950 | Instructions - Page 35
Español Instale el monitor en la placa. 1 Inserte los tornillos (+B6 × L20, soporte de las abrazaderas. 3 Coloque los ganchos inferiores de los dos ganchos de montaje de manera que toquen la parte frontal de los ejes de soporte de los ganchos de montaje. 4 Deslice con suavidad el monitor hacia la - Sony KDE-50XBR950 | Instructions - Page 36
are not twisted or pinched. • The two securing screws on the Mounting Hook Unit support shafts are securely tightened. Français Vérifiez les points suivants. Incomplete installation may cause the product falling and result in injury or product damage. Also, improper placement of the AC power cord, - Sony KDE-50XBR950 | Instructions - Page 37
de Sony 1 English Unplug the AC power cord from the wall outlet. Français Débranchez le cordon d'alimentation de la prise murale. Español Desconecte el cable de alimentación de la toma de corriente. 2 English Remove the two securing screws on the right and left Mounting Hook Unit support shafts - Sony KDE-50XBR950 | Instructions - Page 38
3 English Be sure that two or more persons hold the Display Unit and slide it upward to remove the Display Unit. WARNING • Be sure that two or more persons hold the Display Unit when carrying it. • Be careful not to allow the cords and cables to get hung up when removing the Display Unit. • Be - Sony KDE-50XBR950 | Instructions - Page 39
Français Spécifications Español Especificaciones English Unit: mm (inches) Weight: 9.0 kg (19 lb 14 oz) Design and specifications are subject to change without notice. Français Unité : mm (pouces) Poids : 9,0 kg (19 lb 14 oz) La conception et les spécifications du produit - Sony KDE-50XBR950 | Instructions - Page 40
- Sony KDE-50XBR950 | Instructions - Page 41
- Sony KDE-50XBR950 | Instructions - Page 42
- Sony KDE-50XBR950 | Instructions - Page 43
- Sony KDE-50XBR950 | Instructions - Page 44
Printed on 100% recycled paper using VOC (Volatile Organic Compound)-free vegetable oil based ink. Printed in Japan
-
 1
1 -
 2
2 -
 3
3 -
 4
4 -
 5
5 -
 6
6 -
 7
7 -
8
-
9
-
10
-
11
-
12
-
13
-
14
-
15
-
16
-
17
-
18
-
19
-
20
-
21
-
22
-
23
-
24
-
25
-
26
-
27
-
28
-
29
-
30
-
31
-
32
-
33
-
34
-
35
-
36
-
37
-
38
-
39
-
40
-
41
-
42
-
43
-
44
 |
 |
© 2003 Sony Corporation
4-099-792-
13
(1)
Wall-Mount Bracket
Instructions
Mode d’emploi
Instrucciones
SU-PW2
US
FR
ES
For Customers and Sony Dealers
in North and Central America