Sony MHC-GSX75 Operating Instructions
Sony MHC-GSX75 Manual
 |
View all Sony MHC-GSX75 manuals
Add to My Manuals
Save this manual to your list of manuals |
Sony MHC-GSX75 manual content summary:
- Sony MHC-GSX75 | Operating Instructions - Page 1
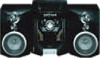
Mini Hi-Fi Component System Operating Instructions Owner's Record The model and serial numbers are located on the rear of the unit. Record the serial number in the space provided below. Refer to them whenever you call upon your Sony dealer regarding this product. Model No Serial No MHC - Sony MHC-GSX75 | Operating Instructions - Page 2
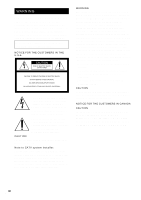
the user to the presence of important operating and maintenance (servicing) instructions in the cable ground shall be connected to the grounding system of the building, as close to the point of or modifications not expressly approved in this manual could void your authority to operate this equipment - Sony MHC-GSX75 | Operating Instructions - Page 3
800-488-7669 The Number below is for the FCC related matters only. Regulatory Information Declaration of Conformity Trade Name: SONY Model No.: HCD-GSX100W Responsible Party:Sony Electronics Inc. Address: 680 Kinderkamack Road, Oradell, NJ. 07649 USA Telephone No.: 201-930-6972 This device - Sony MHC-GSX75 | Operating Instructions - Page 4
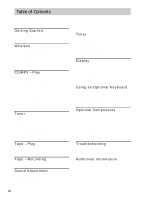
.... 31 Operating the system through the keyboard 31 Optional Components Hooking up optional components......... 32 Listening to audio from a connected component 33 Recording audio from a connected component 33 Recording on a connected component 33 Troubleshooting Problems and remedies 34 - Sony MHC-GSX75 | Operating Instructions - Page 5
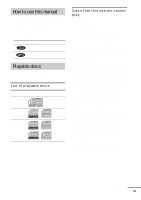
manual • This manual mainly explains operations using the remote, but the same operations can also be performed using the buttons on the system having the same or similar names. • The following symbols are used in this manual . Conventional CDs begin at a CD control area called the Lead-in and end - Sony MHC-GSX75 | Operating Instructions - Page 6
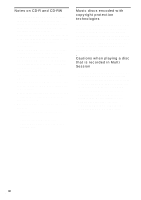
CD-R and CD-RW • This system can play CD-R/CD-RW discs edited by the user. However, note that playback of some -RW discs recorded in multisession that have not ended by "closing the session" are not supported. • The system may be unable to play MP3 format files that do not have the extender ".MP3". - Sony MHC-GSX75 | Operating Instructions - Page 7
Perform the following procedures 1 to 3 to hook up your system using the supplied cords and accessories. AM loop antenna Right speaker FM lead antenna Left speaker 1 Connect the speakers. Connect the right and left speaker - Sony MHC-GSX75 | Operating Instructions - Page 8
on a horizontal place. If the unit is slanted, it may cause malfunction or damage to the system. Inserting two size AA (R6) batteries into the remote Setting the clock 1 Press ?/1 to turn on the system. 2 Press CLOCK/TIMER SET. 3 Press . or > repeatedly to set the hour. 4 Press ENTER. 5 Press . or - Sony MHC-GSX75 | Operating Instructions - Page 9
Wireless Hooking up the transmitter (MHC-GSX100W only) 1 Set the Stereo system, VCR, etc. Unimatch plug adaptor (not supplied) to headphones jack (stereo phone jack) to headphones or LINE OUT jack (stereo mini jack) Personal computer, WALKMAN*, etc. * "WALKMAN" is a registered trademark of Sony - Sony MHC-GSX75 | Operating Instructions - Page 10
In connection A, the switch has no effect. • For connections B and C, if stereo mini jack is connected to line out and the NOISE FILTER is set to ON, audio output The effective areas of the transmitter Wireless system that allows you to use your system free from the restriction of speaker cords. - Sony MHC-GSX75 | Operating Instructions - Page 11
or interfering signals exist in the surroundings due to wireless communication systems installed along roadways. - Transmitter is placed directly on floor on a desk, is recommended. Listening to audio using wireless system (MHC-GSX100W only) 1 Start playing the connected component. 2 Press WIRELESS - Sony MHC-GSX75 | Operating Instructions - Page 12
Notes on sounds from the transmitter When there is no sound, do the following: - Check the connection of the optional component. - Check that the optional component is turned on. - Turn up the volume on the connected optional component, if the transmitter is connected to the headphones jack. - - Sony MHC-GSX75 | Operating Instructions - Page 13
can load up to 60 discs into this unit. Turn on the system before you load discs. You can also load and play discs with MP3 displayed disc number changes to the one at the loading position. Disc number Front cover * MHC-GSX100W is used for illustration purpose. 2 Press DISC + or - (or turn DISC - Sony MHC-GSX75 | Operating Instructions - Page 14
front cover. Playing a disc - Normal Play/Shuffle Play This system lets you play discs in different play modes. Disc number The into the unit and the disc will not go into the slot correctly, consult your nearest Sony dealer. • When transporting the unit, remove all discs from the unit. • If you - Sony MHC-GSX75 | Operating Instructions - Page 15
or the recording media used at the time an MP3 audio track is recorded, you may encounter such problems as disabled playback, sound interruptions, and noise. • When playing back an MP3 audio track, the (variable bit rate) MP3 audio track - When you perform Fast Forward or Rewind (Manual Search) 15GB - Sony MHC-GSX75 | Operating Instructions - Page 16
Playing repeatedly - Repeat Play You can play all the tracks or a single track on a disc. Press REPEAT repeatedly during playback until "REP" or "REP 1" appears. REP*: For all the tracks on a disc up to five times (or endlessly for MP3 tracks when "SHUF" is displayed). REP 1**: For a single track - Sony MHC-GSX75 | Operating Instructions - Page 17
through the keyboard" on page 31). Notes • You cannot label a CD-TEXT disc. • To ensure that Disc Memos are not erased from memory, have the system connected to a wall outlet at least once a day. • You can label a disc only during Normal Play (when "1 DISC", "ALL DISCS" or "ALBM" is displayed) in - Sony MHC-GSX75 | Operating Instructions - Page 18
MENU. 3 Press . or > repeatedly until "NAME CHECK" appears, then press ENTER. 4 Turn DISC SELECT on the unit to select the Disc Memos stored in the system memory between 01 and 60, then press MENU. To check the current Disc Memo Press DISPLAY repeatedly until the Disc Memo appears in stop mode - Sony MHC-GSX75 | Operating Instructions - Page 19
. At that time, "TUNED" and "ST" (for stereo program only) appear. If "TUNED" does not appear and radio station as described in steps 2 and 3 of "Manual tuning preset" (page 19). 3 Press MENU. 4 Press then turn off the system. While holding down ENTER on the unit, turn the system back on. When - Sony MHC-GSX75 | Operating Instructions - Page 20
to select the desired preset station. Listening to non-preset radio station - Manual Tuning 1 Press TUNER/BAND repeatedly to select "FM" or "AM". stereo effect, but the reception will improve. • By pressing and holding TUNING - or +, the frequency indication changes and scanning stops when the system - Sony MHC-GSX75 | Operating Instructions - Page 21
Tape - Play Labeling the preset stations - Station Name You can label each preset station with up to 12 characters (Station Name). 1 Tune in the preset station you want to label (see "Listening to the radio" on page 20). 2 Follow the same procedures as from steps 3 to 9 of "Labeling a disc" on page - Sony MHC-GSX75 | Operating Instructions - Page 22
or M. Press Z PUSH on the tape deck in stop mode. Note If the system stops during tape playback or recording due to a power failure or other reason, the power is restored, then be sure to press ?/1 to turn on the system before ejecting the tape. Tape - Recording Recording on a tape You can record - Sony MHC-GSX75 | Operating Instructions - Page 23
entire track is recorded again from the beginning of the reverse side. Recording manually 1 Load a recordable tape. 2 Press TAPE, then press nN repeatedly source to record. • CD: To record from this system's CD player. • TUNER: To record from this system's tuner. • VIDEO (MD): To record from the - Sony MHC-GSX75 | Operating Instructions - Page 24
Sound Adjustment Adjusting the sound Enjoying the powerful sound - GROOVE/V-GROOVE You can reinforce the bass and create a more powerful sound. The GROOVE setting is ideal for music sources, and the V-GROOVE setting is ideal for video sources (movies, etc.). Press GROOVE. Each time you press the - Sony MHC-GSX75 | Operating Instructions - Page 25
Note The video game machine image may appear on the TV screen even if the system is turned off. Tips • The GAME EQ is automatically selected. • These of "Recording manually" (page 23), and then press REC PAUSE/START on the unit to start the recording. • If you operate the CD controls on the unit - Sony MHC-GSX75 | Operating Instructions - Page 26
display (the turn-off time) changes cyclically as follows: SLEEP AUTO* t SLEEP 90MIN t SLEEP 80MIN t SLEEP 70MIN t ... t SLEEP 10MIN t SLEEP OFF * The system automatically turns off in 100 minutes or after the current disc or tape finishes playing. Other operations To Do this Check the Press - Sony MHC-GSX75 | Operating Instructions - Page 27
Sleep timer at the same time, the Sleep Timer has priority. • Do not operate the system from the time the system turns on until the play starts (about 15 seconds before the preset time). • If the system is on about 15 seconds before the preset time, the Daily Timer will not be activated - Sony MHC-GSX75 | Operating Instructions - Page 28
at the same time. • If you use the recording timer and the Sleep Timer at the same time, the Sleep Timer has priority. • If the system is on at the preset time, the timer- recording will not be activated. • The volume is reduced to minimum during recording. 28GB - Sony MHC-GSX75 | Operating Instructions - Page 29
clock. Note You cannot perform the following operations in Power Saving Mode. - setting the clock - changing the AM tuning interval - turning on the system by pressing the function buttons - switching the VIDEO (MD) function Tips • ?/1 indicator lights up even in the Power Saving Mode. • The timer - Sony MHC-GSX75 | Operating Instructions - Page 30
Effect status Using an Optional Keyboard Setting the keyboard You can use the Sony KB-10 keyboard (not supplied). In principle, you may use any IBM the KEYBOARD INPUT jack. You can connect the keyboard even when the system is turned on. Changing the Power illuminator Press ILLUMINATION on the unit - Sony MHC-GSX75 | Operating Instructions - Page 31
or space preceding the cursor Press [Esc] [T] or [t] [Delete] [Back Space] Operating the system through the keyboard You can operate the system without using the buttons and controls on the unit or on the remote. As the keyboard substitutes Press for the following functions CD PLAY [F5] CD - Sony MHC-GSX75 | Operating Instructions - Page 32
Optional Components Hooking up optional components To enhance your system, you can connect optional components. Refer to the operating instructions provided with each component. Optional TV Optional analog component From the audio output jacks of an analog component From the video output of the - Sony MHC-GSX75 | Operating Instructions - Page 33
Tip If you cannot select "MD" by pressing VIDEO (MD) repeatedly, turn off the system and then press VIDEO (MD) while holding down x on the unit. The function will change See "Hooking up optional components" on page 32. 2 Start recording manually. See "Recording on a tape" on page 22. Recording on a - Sony MHC-GSX75 | Operating Instructions - Page 34
Find your problem in the troubleshooting checklist below and take the indicated corrective action. If the problem persists after doing all of the above, consult your nearest Sony dealer. In case of repairing, please bring the entire system set (except for the speaker) to the service station. General - Sony MHC-GSX75 | Operating Instructions - Page 35
to play back than others. • After the system reads all tracks on the discs, playback may take Sony dealer if the supplied AM antenna has come off the plastic stand. • Try turning off surrounding electrical equipment. A stereo FM program cannot be received in stereo Troubleshooting continued 35GB - Sony MHC-GSX75 | Operating Instructions - Page 36
presetting/timer is canceled." (page 34) and check the condition of the system. • Connect the component properly (page 32) while checking: - if the way. • Turn on the connected component. • Refer to the operating instructions supplied with the connected component and start playing. • Press VIDEO (MD) - Sony MHC-GSX75 | Operating Instructions - Page 37
Press ?/1 (power) to turn off the system. Turn on the system again after a while. If the problem persists after doing above, consult your nearest Sony dealer. PUSH STOP You pressed PLAY MODE/DIRECTION during play. STEP FULL You tried to program 26 or more tracks (steps). Troubleshooting 37GB - Sony MHC-GSX75 | Operating Instructions - Page 38
service shop. On placement • Do not place the system in an inclined position. • Do not place the system system, take out any disc. If you have any questions or problems concerning your system, please consult your nearest Sony dealer. On the speaker system This speaker system panel and controls with a - Sony MHC-GSX75 | Operating Instructions - Page 39
to the instructions of the demagnetising cassette. Specifications Main Unit (HCD-GSX100W/GSX75) Amplifier section MHC-GSX100W/GSX75 For the level 1Vp-p, unbalanced, Sync negative, load impedance 75 ohms PHONES (stereo phone jack): accepts headphones of 8 ohms or more SPEAKER: accepts - Sony MHC-GSX75 | Operating Instructions - Page 40
Recording system Frequency response Wow and flutter 4-track 2-channel stereo 40 - 13,000 Hz (±3 dB), using Sony TYPE stereo mini jack General Power requirements: 120 V AC, 60 Hz Power consumption MHC-GSX100W: 170 W MHC-GSX75: 150 W Dimensions (w/h/d) incl. projecting parts and controls - Sony MHC-GSX75 | Operating Instructions - Page 41
Supplied accessories Remote (1) size AA (R6) batteries (2) AM loop antenna (1) FM lead antenna (1) Transmitter (MHC-GSX100W only) (1) AC adaptor (MHC-GSX100W only) (1) Connecting cord phono plug-stereo miniplug (1m) (MHC-GSX100W only) (1) Design and specifications are subject to change without - Sony MHC-GSX75 | Operating Instructions - Page 42
system that are mentioned in the text. Illustration number r TUNER/BAND wg (19, 20) R R Name of button/part Reference page Main unit For MHC- PHONES jack qk PLAY MODE/DIRECTION 8 (14, 16, 22) POWER ILLUMINATOR wd (30) Remote sensor es TAPE qd (22) Tape deck 3 TUNER/BAND wh (19, 20) VIDEO - Sony MHC-GSX75 | Operating Instructions - Page 43
For MHC-GSX75 ALPHABETICAL ORDER A - H ALBM + qs (15, 16) ALBM - wj (15, 16) AUDIO IN jack w; ql MENU e; (17, 19, 21, 31) PHONES jack qk PLAY MODE/DIRECTION 8 (14, 16, 22) POWER ILLUMINATOR wd (30) Remote sensor ea TAPE qd (22) Tape deck 3 TUNER/BAND wg (19, 20) VIDEO (MD) qf (33) VIDEO IN jack wa - Sony MHC-GSX75 | Operating Instructions - Page 44
Remote control For MHC-GSX100W/GSX75 ALPHABETICAL ORDER A - Q ALBM +/- qf wa (15, 16) CD wl (14, 16, 17, 22) CLEAR q; (17 17, 22) > (go forward) qs (8, 15, 16, 17, 19, 26, 27, 31) Notes for the supplied remote * The WIRELESS button is not available for MHC-GSX75. Sony Corporation Printed in China
-
 1
1 -
 2
2 -
 3
3 -
 4
4 -
 5
5 -
 6
6 -
 7
7 -
8
-
9
-
10
-
11
-
12
-
13
-
14
-
15
-
16
-
17
-
18
-
19
-
20
-
21
-
22
-
23
-
24
-
25
-
26
-
27
-
28
-
29
-
30
-
31
-
32
-
33
-
34
-
35
-
36
-
37
-
38
-
39
-
40
-
41
-
42
-
43
-
44
 |
 |
©2003 Sony Corporation
4-245-586-
12
(2)
Mini Hi-Fi
Component
System
Operating Instructions
Owner’s Record
The model and serial numbers are located on the rear of the unit. Record the serial number
in the space provided below. Refer to them whenever you call upon your Sony dealer
regarding this product.
Model No. ______________
Serial No. ______________
MHC-GSX100W
MHC-GSX75