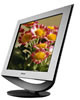
Sony SDM-HS74P Operating Instructions
Sony SDM-HS74P Manual
 |
View all Sony SDM-HS74P manuals
Add to My Manuals
Save this manual to your list of manuals |
Sony SDM-HS74P manual content summary:
- Sony SDM-HS74P | Operating Instructions - Page 1
2-103-459-01(1) TFT LCD Color Computer Display Operating Instructions GB SDM-HS74 SDM-HS94 SDM-HS74P SDM-HS94P © 2004 Sony Corporation - Sony SDM-HS74P | Operating Instructions - Page 2
.com/ Declaration of Conformity Trade Name: SONY Model: SDM-HS74 SDM-HS94 SDM-HS74P SDM-HS94P Responsible Party: Sony Electronics Inc. Address: 16450 W. Bernardo Dr, San Diego, CA 92127 U.S.A. Telephone Number: 858-942-2230 This device complies with part 15 of the FCC rules. Operation - Sony SDM-HS74P | Operating Instructions - Page 3
4 Identifying parts and controls 5 Setup 7 Step 1: Connect the display to your computer 7 Step 2: Connect the power cord 8 Step 3: Secure the cords and replace the back cover 8 Step 4: Turn on the monitor and computer 9 Adjusting the tilt 9 Selecting the input signal (INPUT button - Sony SDM-HS74P | Operating Instructions - Page 4
• Disconnect all cables from the monitor and grasp the support and base sections of the display stand firmly with both hands when transporting. If you drop the monitor, you may be injured or the monitor may be damaged. • When you transport this monitor for repair or shipment, use the original - Sony SDM-HS74P | Operating Instructions - Page 5
buttons are on the lower right part of the front of the monitor. Front of the LCD display SDM-HS94/SDM-HS94P INPUT OK MENU INPUT OK MENU 54 3 21 Rear of the display SDM-HS74/SDM-HS74P 1 1 (Power) switch and indicator (pages 9, 16, 20) To turn the display on or off, press the 1 (power - Sony SDM-HS74P | Operating Instructions - Page 6
of the LCD display Remove the back cover. SDM-HS74/SDM-HS74P 7 Back cover (page 8) Remove this cover when you connect/disconnect cables or cords. 8 AC IN connector (page 8) Connect the power cord (supplied). 9 DVI-D input connector (digital RGB) for INPUT1 (page 7) This connector inputs digital RGB - Sony SDM-HS74P | Operating Instructions - Page 7
cable (analog RGB) • DVI-D video signal cable (digital RGB) • Cord strap • CD-ROM (utility software for Windows/Macintosh, Operating Instructions, etc.) • Warranty card • Quick Setup Guide Step 1: Connect the display to your computer Turn off the monitor and computer before connecting. Notes • Do - Sony SDM-HS74P | Operating Instructions - Page 8
the monitor and computer switched off, first connect the power cord to the monitor, then connect it to a power outlet. SDM-HS74/SDM-HS74P Step ) SDM-HS94/SDM-HS94P Cord strap The illustration of the back of the monitor shown here is that of the SDM-HS74. The same applies for the other models. - Sony SDM-HS74P | Operating Instructions - Page 9
detects all the monitor's information. No specific driver needs to be installed to the computer. The first time you turn on your computer after connecting the monitor, the setup Wizard may appear on the screen. In this case, follow the on-screen instructions. The Plug & Play monitor is automatically - Sony SDM-HS74P | Operating Instructions - Page 10
the computer, and turn them on. Wait for at least 30 minutes before making adjustments for the best result. You can make numerous adjustments to your monitor using the on-screen menu. Adjusting to the desired brightness Pressing the button, you can change the brightness of the screen. Each time you - Sony SDM-HS74P | Operating Instructions - Page 11
INPUT SENSING (page 14) Select the INPUT SENSING menu to change the input automatically before the monitor setting is stored, then the display returns to the previous menu. backlight (BACKLIGHT) If the screen is too bright, adjust the backlight and make the screen easier to see. Note The backlight - Sony SDM-HS74P | Operating Instructions - Page 12
picture's sharpness manually (PHASE/PITCH) You can adjust the picture's sharpness as follows. 1 Set the resolution to 1280 × 1024 on the computer. 2 Load the CD-ROM. 3 Start the CD-ROM, select the region and model, and display the test pattern. For Windows Click [Utility] t [Windows]/[Win Utility - Sony SDM-HS74P | Operating Instructions - Page 13
manually (H CENTER/V CENTER) If the picture is not in the center of the screen, adjust the picture's centering as follows. 1 Set the resolution to 1280 × 1024 on the computer. 2 Load the CD-ROM. 3 Start the CD-ROM, select the region and model, and display the test pattern. For Windows Click - Sony SDM-HS74P | Operating Instructions - Page 14
OK button. The new color setting is stored in 17) and the monitor checks the input signal to another input connector automatically to change the input. When the input is changed, the selected input connector is displayed on the upper left of the screen. When there is no input signal, the monitor - Sony SDM-HS74P | Operating Instructions - Page 15
LANGUAGE) You can change the language used on menus or messages displayed on this monitor. 1 Press the MENU button. The main menu appears on the OK button. Adjust the selected option item according to the following instructions. x Resetting the adjustment data to the defaults You can reset the - Sony SDM-HS74P | Operating Instructions - Page 16
by VESA, ENERGY STAR, and NUTEK. If the monitor is connected to a computer or video graphics board that is DPMS (Display Power Management Signaling) compliant, the monitor will automatically reduce power consumption as shown below. SDM-HS74/SDM-HS74P Power mode Power consumption 1 (power) indicator - Sony SDM-HS74P | Operating Instructions - Page 17
of the following messages appears on the screen. To solve the problem, see "Trouble symptoms and remedies" on page 18. If OUT OF RANGE appears on the screen This indicates that the input signal is not supported by the monitor's specifications. Check the following items. I NFORMA T I ON OUT OF RANGE - Sony SDM-HS74P | Operating Instructions - Page 18
x Problems caused by a computer or other equipment connected, and not caused by the monitor • Check your graphics board manual for the proper monitor setting. • Confirm that the graphics mode (VESA, Macintosh 19" Color, etc.) and the frequency of the input signal are supported by this monitor. Even - Sony SDM-HS74P | Operating Instructions - Page 19
your authorized Sony dealer and give the following information: • Model name: SDM-HS74, SDM-HS94, SDM-HS74P or SDM- HS94P • Serial number • Detailed description of the problem • Date of purchase • Name and specifications of your computer and graphics board Example INFORMATION MODEL : SDM-HS74 SER - Sony SDM-HS74P | Operating Instructions - Page 20
. Reconnect the video signal cables and check the condition of your computer(s). If the color bars do not appear, there is a potential monitor failure. Inform your authorized Sony dealer of the monitor's condition. Be sure to note the model name and serial number of your monitor. Also note the - Sony SDM-HS74P | Operating Instructions - Page 21
Specifications SDM-HS74/SDM-HS74P LCD panel Panel type: a-Si TFT Active Matrix Picture size: 17.0 inch Input signal format RGB operating frequency* Horizontal: 28 - 80 kHz (analog RGB) 28 - 64 kHz (digital RGB) Vertical: 48 - 75 Hz (analog RGB) 60 Hz (digital RGB)
-
 1
1 -
 2
2 -
 3
3 -
 4
4 -
 5
5 -
 6
6 -
 7
7 -
8
-
9
-
10
-
11
-
12
-
13
-
14
-
15
-
16
-
17
-
18
-
19
-
20
-
21
 |
 |

2-103-459-
01
(1)
© 2004 Sony Corporation
TFT LCD Color
Computer Display
SDM-HS74
SDM-HS94
SDM-HS74P
SDM-HS94P
Operating Instructions
GB