Sony VRD MC5 Operating Instructions
Sony VRD MC5 - DVDirect - DVD±RW Drive Manual
 |
UPC - 027242718852
View all Sony VRD MC5 manuals
Add to My Manuals
Save this manual to your list of manuals |
Sony VRD MC5 manual content summary:
- Sony VRD MC5 | Operating Instructions - Page 1
IT W-273-384-11(2) Multi-Function DVD Recorder Operating Instructions JP FR DE ES IT CS VRD-MC5 © 2007 Sony Corporation - Sony VRD MC5 | Operating Instructions - Page 2
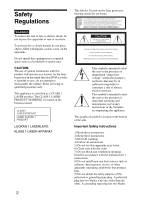
beam used in this multi function DVD recorder is harmful to eyes, do not attempt to disassemble the cabinet. Refer servicing to qualified personnel only. is intended to alert the user to the presence of important operating and maintenance (servicing) instructions in the literature accompanying the - Sony VRD MC5 | Operating Instructions - Page 3
servicing to qualified service personnel. Servicing is required when the apparatus has been damaged in any way, such as power-supply cord Class B digital device, instructions on, the user is encouraged manual could void your authority to operate this equipment. The manufacturer of this product is Sony - Sony VRD MC5 | Operating Instructions - Page 4
The product label is located on the bottom of the unit. Record the serial number in the space provided below. Refer to them whenever you call upon your Sony dealer regarding this product. Model: VRD-MC5 Serial Number: ________ For customers in the United Kingdom and Republic of Ireland A molded - Sony VRD MC5 | Operating Instructions - Page 5
2 Introducing DVDirect Features 8 About this manual 9 Package Contents 11 Parts and Controls 12 Turning the Power On/Off 16 Navigation Display 17 Accessing functions from the menu 18 Inserting a Disc 19 Inserting a Memory Card 21 Creating a Video DVD Creating a Video DVD and AVCHD disc 22 - Sony VRD MC5 | Operating Instructions - Page 6
Previewing a Video DVD and a Photo DVD 68 Setup Using the Setup Menu 71 Rec Quality 72 Auto Stop Timer 72 Auto Chapter 72 DVD Menu 73 Slideshow Music 73 Slideshow Creation 74 Finalize disc 74 Erase disc 76 System Info 77 Demo 77 Color System 77 Language 77 Additional - Sony VRD MC5 | Operating Instructions - Page 7
supplied accessories are used in the specified or recommended system environment, in accordance with the documentation, and applies only to this DVDirect. Our customer service and user support , films, video tapes, discs, and other materials may be copyrighted. Unauthorized recording of such material - Sony VRD MC5 | Operating Instructions - Page 8
on DVD players. AVCHD dubbing You can record HD (High Definition) videos taken with Sony High Definition Handycam® (HDD/Memory Stick) as they are. For detail about compatibility of AVCHD disc, see "Notes on compatibility of AVCHD disc" on page 26. Navigation Display The DVDirect automatically - Sony VRD MC5 | Operating Instructions - Page 9
Functions available for Memory Stick, Memory Stick Duo, SD Card, xDPicture Card, Compact Flash Dubbing videos being recorded on Standard Definition image quality Dubbing videos being recorded on High Definition image quality (AVCHD format) Dubbing still images shot by a digital still camera or Sony - Sony VRD MC5 | Operating Instructions - Page 10
Dubbing videos from DV digital video camera 1 page 48 Create a DVD using video taken with a Handycam® (DV/D8) or DV digital video camera. Connect a Handycam® or DV digital video camera to the DVDirect via a DV (i.LINK) cable. Available functions: Full Dubbing Manual Dubbing Dubbing videos from - Sony VRD MC5 | Operating Instructions - Page 11
contains the following items. If any of these items are missing or damaged, please contact your dealer. • DVDirect • AC adapter • AC power cord • Quick Start Guide • Operating Instructions (this document) • Warranty card Note Use an AC power cord appropriate to the region or country of use. 11 - Sony VRD MC5 | Operating Instructions - Page 12
5 A 1 (power) button Turns the DVDirect on or off. B Top panel The buttons and display for operating the DVDirect are located here (page 13). C Disc tray Insert a disc here with the label side up (page 19). D Z (eject) button Opens and closes the disc tray. E DC IN connector Connect the supplied AC - Sony VRD MC5 | Operating Instructions - Page 13
from a playback device or memory card. B Mm - Sony VRD MC5 | Operating Instructions - Page 14
a camcorder or VCR. C VIDEO IN connector Connect the video plug of an AV cable (not supplied) here when connecting the DVDirect to a video device, such as a camcorder or VCR. D S VIDEO IN connector Connect an S-video cable (not supplied) here when connecting the DVDirect to a video device with an - Sony VRD MC5 | Operating Instructions - Page 15
Introducing DVDirect Right side panel 12 3 4 A Memory card LED Lights amber when accessing the memory card. B Memory Stick Duo slot Insert a "Memory Stick Duo" here. C Multi memory card slot Insert a "Memory Stick," SD Card, or xD-Picture Card here. D CompactFlash card slot Insert a - Sony VRD MC5 | Operating Instructions - Page 16
Introducing DVDirect Turning the Power On/Off 1 Connect the supplied AC power cord to the AC adapter. 2 Insert the power plug of the AC adapter into the DVDirect's DC IN connector. 3 Insert the power plug of the AC power cord into a power outlet. Notes • Be sure to use the supplied AC power cord - Sony VRD MC5 | Operating Instructions - Page 17
storing only HD (High Definition) video, or both HD (High Definition) video and SD (Standard Definition) video, the DVDirect automatically detects HD (High Definition) video and records it on the disc. • When storing only SD (Standard Definition) video, the DVDirect automatically records it on the - Sony VRD MC5 | Operating Instructions - Page 18
Video , DVD Photo , DVD DVD Preview AVCHD Dubbing Setup Function Create a video DVD (page 35, 52). Create a photo DVD (page 60). Playback a created video DVD or photo DVD. (page 68). Record HD (High Definition) video to a disc with a High Definition Handycam® connected to the DVDirect. Configure - Sony VRD MC5 | Operating Instructions - Page 19
To insert a disc, perform the following while the DVDirect is turned on. 1 Press the Z (eject) button. The disc tray ejects. 2 Place the disc in the disc tray with its label facing up, and press the Z (eject) button again. Note Do not touch the recording side of the disc. When the Z (eject) button - Sony VRD MC5 | Operating Instructions - Page 20
message on this display, you can only record video with the VIDEO IN, S VIDEO IN, or DV IN connector. When formatting a DVD+RW or DVDRW disc according to the message on this display, you can use the disc to record in other dubbing modes, for example AVCHD Dubbing, if you erase the contents of the - Sony VRD MC5 | Operating Instructions - Page 21
Introducing DVDirect Inserting a Memory Card Insert the memory card into its corresponding not use more than one memory card slot at a time. • Do not insert another memory card while recording onto a disc. Doing so may cause a writing error. • Do not insert a "Memory Stick Duo" with a Memory - Sony VRD MC5 | Operating Instructions - Page 22
B Creating a Video DVD Creating a Video DVD and AVCHD disc Simply by connecting your camcorder or video device to the DVDirect, you can record videos. If you connect a Sony High Definition Handycam®, you can dub High Definition (AVCHD) video in the same quality. Types of Dubbing Depending on your - Sony VRD MC5 | Operating Instructions - Page 23
Creating a Video DVD Handycam® (DVD) (page 45) The entire video content of the camcorder's 8-cm disc is recorded onto a 12cm disc. One mini DVD Copy One DVD Handycam® (DV/D8) or DV digital video camera (page 49) The entire content of the DV tape or Digital 8 tape is recorded onto a single disc. - Sony VRD MC5 | Operating Instructions - Page 24
created on your Handycam® (HDD/Memory Stick). If you select videos beforehand and create a Playlist on your Handycam®, you can record these videos on DVD easily. For Playlist editing, refer to your camcorder's operating instructions. Copy Scenes added to Playlist Scenes Selection Dubbing (page 41 - Sony VRD MC5 | Operating Instructions - Page 25
on the device connected to the DVDirect. You can record while watching the video you want to record on the display. About Video DVDs and AVCHD discs Video DVDs -SD (Standard Definition) image quality discs- You can create a video DVD while watching a video by connecting multiple camcorders or - Sony VRD MC5 | Operating Instructions - Page 26
vary, depending on the image quality. AVCHD disc (a disc containing High Definition videos) No Yes Yes DVD device Video DVD Yes AVCHD format compatible device Yes Computer* Yes DVD device AVCHD format compatible device supporting DVD playback Computer * Install the application compatible - Sony VRD MC5 | Operating Instructions - Page 27
USB Input jacks on DVDirect DV IN VIDEO IN S VIDEO IN Sony Handycam® (Memory Stick) Sony Handycam® (DVD) Sony Handycam® (DV/D8/HDV) Sony Handycam® (MICROMV) Other camcorders with DV jack Other camcorders/video devices Hints • You can down-convert HD (High Definition) videos to SD (Standard - Sony VRD MC5 | Operating Instructions - Page 28
IN, VIDEO IN, or S VIDEO IN jack on the DVDirect, set the TV type setting on the camcorder to 4:3. • If you erase or edit a video on Recording SD (Standard Definition) video Mode HQ SP LP From a High Definition Handycam® (HDD/Memory Stick) about 20 min about 15 min about 10 min From Handycam® (DVD - Sony VRD MC5 | Operating Instructions - Page 29
onto a disc with video dubbed from a Handycam® (DVD) connected via a USB cable. • You cannot add recordings to a disc created on a PC or other DVD device. • When dubbing HD (High Definition) videos, always use a new disc. You cannot add HD (High Definition) videos to the same AVCHD disc that you - Sony VRD MC5 | Operating Instructions - Page 30
DVD or AVCHD disc with the DVDirect, titles and chapters are created as follows: For video DVDs (Manual Dubbing or Dubbing from DV camcorders connected via DV (i.LINK) cable) Title Chapter DVD menu Previewing on DVDirect Titles are created between the points where you start and stop a recording - Sony VRD MC5 | Operating Instructions - Page 31
date recorded changes. Chapters are created for each scene*2 in the title. DVD menu You can set the display selected from "DVD Menu" or your favorite photo (page 73). Previewing on DVDirect You can play the video on the DVDirect. AVCHD discs Title Chapter DVD menu Previewing on DVDirect One - Sony VRD MC5 | Operating Instructions - Page 32
. Note When storing both HD (High Definition) video and SD (Standard Definition) video on an AVCHD Handycam® (HDD/Memory Stick), the DVDirect automatically detects HD (High Definition) video and records it on the disc. 1 Press the 1 (power) button to turn on the DVDirect. A message prompting you to - Sony VRD MC5 | Operating Instructions - Page 33
Creating a Video DVD 5 Touch [DISC BURN] on the camcorder's LCD screen, or press DISC BURN button on the camcorder or Handycam Station. Touch [DISC BURN] or [DVD BURN]. DISC BURN Note Depending on camcorder type, the display that appears in the camcorder's LCD screen or button names on the - Sony VRD MC5 | Operating Instructions - Page 34
You cannot stop while recording is in progress. You can only cancel dubbing by pressing the (stop) button when replacing a disc. Note on One Touch Dubbing This function is only available when the DVDirect is in the following states: • no button on the DVDirect is pressed after the power is turned on - Sony VRD MC5 | Operating Instructions - Page 35
. Note When storing both HD (High Definition) video and SD (Standard Definition) video on an AVCHD Handycam® (HDD/Memory Stick), the DVDirect automatically detects HD (High Definition) video and records it on the disc. Before selecting a dubbing mode... 1 Press the 1 (power) button to turn on the - Sony VRD MC5 | Operating Instructions - Page 36
instructions of your camcorder. You can complete connecting the DVDirect by the same operation as connecting to the computer. 5 The following appears in the DVDirect's display window. Type of input Dubbing mode Type of disc created • When creating an AVCHD disc: • When creating a video DVD - Sony VRD MC5 | Operating Instructions - Page 37
DVD Full (All) Dubbing You can use Full Dubbing to dub the video contents of the camcorder onto a disc or more than a disc with a single touch of a button. 1 Press < or , until "Full" is displayed at the top right of the display window. 2 Press the (record) button to start dubbing. The DVDirect - Sony VRD MC5 | Operating Instructions - Page 38
, the disc is automatically ejected. The video DVD (or AVCHD disc) is completed, and you can now play it on DVD players or the DVD drives of computers. An AVCHD disc can be played on an AVCHD compatible device. To stop dubbing You cannot stop while recording is in progress. You can only cancel - Sony VRD MC5 | Operating Instructions - Page 39
Note If the camcorder does not contain new video (all of the video contents have already been recorded onto a DVD), Incremental Dubbing is not available. 4 Stop dubbing automatically when dubbing is complete. When dubbing HD (High Definition) video: The disc is automatically ejected. When dubbing SD - Sony VRD MC5 | Operating Instructions - Page 40
been dubbed, you can add videos onto the same disc later. To stop dubbing You cannot stop while recording is in progress. You can only cancel dubbing by pressing the (stop) button when replacing a disc. Note on Incremental Dubbing This function is started over in the following states: • a different - Sony VRD MC5 | Operating Instructions - Page 41
Creating a Video DVD "Recording to disc ..." appears in the display window, and the (record) button lights up during dubbing. 3 Follow steps 3 to 4 of "Incremental Dubbing" (page 38). To stop dubbing You cannot stop a recording once it has started. You can only cancel dubbing by the (stop) button - Sony VRD MC5 | Operating Instructions - Page 42
press the (select) button to mark. Only the marked scenes or videos selected by shooting date is dubbed. Thumbnail: Selected scene Shooting date: in the display. (record) button to start dubbing. "Recording to disc ..." appears in the display window, and the (record) button lights up during - Sony VRD MC5 | Operating Instructions - Page 43
a Video DVD Dubbing From a Handycam® (DVD) When a Handycam® (DVD) is connected to the DVDirect, you can select Full or Consolidation Dubbing, and then record. Before selecting a dubbing mode... 1 Press the 1 (power) button to turn on the DVDirect, and insert a disc (page 19). The DVDirect starts - Sony VRD MC5 | Operating Instructions - Page 44
in the camcorder's LCD screen or button names on the camcorder may differ. Refer to the section on connecting to computers in the operating instructions of your camcorder. You can complete connecting the DVDirect by the same operation as connecting to the computer. 5 The following appears in the - Sony VRD MC5 | Operating Instructions - Page 45
display window, and the (record) button lights up during dubbing. 3 Stop dubbing automatically when dubbing is complete. When dubbing is complete, the disc is automatically ejected. The video DVD is completed, and you can now play it on other DVD players or computer DVD drives. Note You cannot stop - Sony VRD MC5 | Operating Instructions - Page 46
When you have multiple 8-cm discs containing video taken with a DVD camcorder, you can consolidate and dub the video onto one 12-cm disc. 1 Press < or , until "Consolidation" is displayed in the top right of the display window. 2 Press the (record) button to start dubbing. During dubbing, the - Sony VRD MC5 | Operating Instructions - Page 47
current disc, replace the 8-cm disc in the DVD camcorder with the new 8-cm disc, and press the (record) button on the DVDirect. • If you eject a 12-cm disc from the DVDirect without finalizing after videos have been dubbed, you can consolidate videos recorded on other 8-cm discs onto the same 12-cm - Sony VRD MC5 | Operating Instructions - Page 48
® (DV/D8) or DV digital video camera When a Handycam® (DV/D8) or DV digital video camera is connected to the DVDirect via a DV (i.LINK) cable, you can select Full or Manual Dubbing. Before selecting a dubbing mode... 1 Press the 1 (power) button to turn on the DVDirect, and insert a disc (page - Sony VRD MC5 | Operating Instructions - Page 49
Creating a Video DVD 4 The following appears in the DVDirect's display window. Type of input page below. • Full (All) Dubbing page 49 • Manual Dubbing page 50 Full (All) Dubbing You can use Full Dubbing to dub the video contents of a video tape onto a disc. When Full Dubbing is selected, - Sony VRD MC5 | Operating Instructions - Page 50
complete, the disc is automatically ejected. The video DVD is completed, and you can now play it on DVD players, or DVD drives of computers. Hint When a blank portion of the DV tape is reached, dubbing automatically stops and the (record) button dims. Manual Dubbing While you operate the play button - Sony VRD MC5 | Operating Instructions - Page 51
display. To pause dubbing Press the press the (record) button while dubbing is in progress. To restart dubbing, (record) button again. Notes on Manual Dubbing • If you start dubbing after more than 10 minutes since you inserted the disc into the DVDirect, dubbing will takes a few seconds to start - Sony VRD MC5 | Operating Instructions - Page 52
the video device's audio/video output connectors to the DVDirect's AUDIO IN/VIDEO IN connectors using an AV cable (not supplied). To audio/video output or AV cable (not supplied) Hint The connectors on a video device differ depending on the device. Refer to the operating instructions for your - Sony VRD MC5 | Operating Instructions - Page 53
a Video DVD For S-video cables: Connect the video device's S-video out connector to the DVDirect's S VIDEO IN connector using the S-video cable (not supplied). You must also connect an audio cable for audio input. To audio/S-video output Audio cable (not supplied) S-video cable (not supplied) Hint - Sony VRD MC5 | Operating Instructions - Page 54
) button while dubbing is in progress. To restart dubbing, (record) button again. Notes on dubbing from video devices • If you start dubbing after more than 10 minutes since you inserted the disc into the DVDirect, dubbing will takes a few seconds to start. Start dubbing immediately after inserting - Sony VRD MC5 | Operating Instructions - Page 55
DVD Creating a Photo DVD You can easily record photos taken with your digital still camera from a memory card onto a DVD. Still images stored on a Handycam® (HDD/DVD/Memory Stick) can also be recorded onto a disc. If you select to create a slideshow, you can create a DVD playable on the other DVD - Sony VRD MC5 | Operating Instructions - Page 56
be created with the DVDirect. Photo backup DVD Photo backup DVDs allow you to store photos (JPEG files) taken with a digital still camera or Handycam® on a DVD disc. You can view the photo backup DVD created with the DVDirect in the display window or view it using the DVD drive of a computer. And - Sony VRD MC5 | Operating Instructions - Page 57
on which photos are recorded. Type of device Media Sony Handycam® (HDD) Sony Handycam® (Memory Stick) Built-in HDD Memory Stick Duo Memory Stick Duo Sony Handycam® (DVD) 8cm DVD Memory Stick Duo Input jack/memory card slots on DVDirect USB MS Duo Multi Card CF Sony Handycam® (HDV/DV/D8 - Sony VRD MC5 | Operating Instructions - Page 58
a photo DVD. Disc Type DVD+R DVD+R DL (Double layer) DVD+RW DVD-R DVD-R DL (Dual layer) DVD-RW Logo +R +RW -R -R DL -RW Interface on DVDirect USB Memory card slots About Created Photo DVDs Slideshow DVDs The contents of a slideshow DVD consist of titles and chapters as a Video DVD (page 30 - Sony VRD MC5 | Operating Instructions - Page 59
Creating a Photo DVD Storage locations on photos (JPEG files) Some folders are created on a photo DVD, and all photos (JPEG files) are stored in the folder "100VRDMC." Hint File names are automatically created when the photo DVD is created. 59 - Sony VRD MC5 | Operating Instructions - Page 60
power) button to turn on the DVDirect, and insert a disc (page 19). The DVDirect starts reading the inserted disc. Hint You can also operate from the "Menu" display to record connecting to a DVD camcorder, set DVDirect's USB connector (Type A) using a USB cable (not supplied). USB cable (not supplied - Sony VRD MC5 | Operating Instructions - Page 61
[ COMPUTER]. When using a Handycam® (DVD): Touch [ COMUPTER]. The display window on the DVDirect changes. Note Depending on the camcorder you to computers in the operating instructions of your camcorder. You can complete connecting to the DVDirect by the same operation as Compact Flash 61 - Sony VRD MC5 | Operating Instructions - Page 62
or shooting date you want to dub and press the (select) button to mark. Thumbnail Shooting Date Current photo/ The shooting Number of recorded date of current photos photo Marked the shooting date to dub Selected photo Marked photo to dub Pressing the display. (select) button repeatedly - Sony VRD MC5 | Operating Instructions - Page 63
Creating a Photo DVD 4 Press the (record) button to start dubbing. During dubbing, the progress appears in the display window, and the (record) button remains lit. 5 Stop dubbing automatically when dubbing is complete. When all the photos are dubbed onto the disc, "Complete" appears in the display - Sony VRD MC5 | Operating Instructions - Page 64
To display only one photo Press the (stop) button when thumbnails are displayed. The photo selected is displayed in full. The photo can be rotated 90 degrees right with each press of the , button. The photo can be rotated 90 degrees left with each press of the < button. 64 - Sony VRD MC5 | Operating Instructions - Page 65
dubbing is complete: • create the AVCHD disc. • create the video DVD in Full Dubbing mode. • select "ON" on "Slideshow Creation" in the setup menu, and create the photo DVD. 1 Press the Z (eject) button. A message asking whether to finalize the disc just recorded on appears. Finalizing/Viewing the - Sony VRD MC5 | Operating Instructions - Page 66
after recording, the DVDirect asks you if you want to finalize the disc or not. Even if you eject the disc without finalizing, you can finalize the disc from the Setup menu (page 71). Generally, you complete the disc by finalizing. The finalized disc can be played in the same way as DVD-Video - Sony VRD MC5 | Operating Instructions - Page 67
readable on DVD drives of computers. • to create a disc to be distributed to others. • To create a 100% complete disc as a video DVD or photo DVD (you do not intend to add videos or photos later). Do not finalize the disc • when you want to add videos to the same disc with the DVDirect later. • when - Sony VRD MC5 | Operating Instructions - Page 68
previewing the disc on the DVDirect. • You cannot output video images to an external device, such as a TV. • You cannot play back an AVCHD disc. • You cannot play back discs recorded on a device other than the DVDirect, or a disc recorded with commercial DVD. 1 Press the 1 (power) button to turn on - Sony VRD MC5 | Operating Instructions - Page 69
playback, press the (stop) button. When a photo backup DVD or a photo DVD that has not been finalized is inserted: You can select a photo in a DVD manually and be displayed it. The shooting date of current photo Current photo/Number of recorded photos Press M or m to select a photo that you want - Sony VRD MC5 | Operating Instructions - Page 70
" is selected, you can view a photo in a DVD manually. You can view photos as you would view a photo backup DVD. Hints • If you insert a finalized DVD immediately after turning on the DVDirect, Navigation Display activates and the video or photo recorded on the disc appear in the display window - Sony VRD MC5 | Operating Instructions - Page 71
settings for creating discs in the setup menu screen. The default setting is underlined in the following list. 1 Press the 1 (power) button to turn on the DVDirect. 2 Press the RETURN button. The "Menu" display appears. 3 Press m to select "Setup," and press the The setup menu appears. (select - Sony VRD MC5 | Operating Instructions - Page 72
"Auto Stop Timer" setting is cancelled when the recording is completed, the button is pressed during recording, or the power is turned off. (Stop) Auto Chapter Specify a time interval at which to create chapters automatically on a video DVD. Setting OFF 5min 10min 15min Feature No chapter is - Sony VRD MC5 | Operating Instructions - Page 73
favorite photo (JPEG file) for the DVD Menu screen of a video DVD or a Slideshow DVD. Using your computer, store only a single photo (JPEG file) for the DVD Menu on the top directory in the memory card beforehand. Insert the memory card into the DVDirect's memory card slot before creating a disc - Sony VRD MC5 | Operating Instructions - Page 74
whether to display a message prompting slideshow creation when you press the Z (eject) button after recording for a photo DVD. Setting OFF ON Feature When you press the Z (eject) button after recording to a disc, a message asking whether to create a slideshow always appears in the display window - Sony VRD MC5 | Operating Instructions - Page 75
press the The following message appears. (select) button. Setup 3 Press M or m to select "OK," and press the 4 The DVDirect starts finalization. For video DVDs The following message appears. (select) button. For photo DVDs The following message appears. To complete the disc as a photo backup - Sony VRD MC5 | Operating Instructions - Page 76
Erase disc Erase videos or photos recorded on a DVD+RW or DVD-RW disc. The erased disc is reusable as a blank disc. Note Be appears. (select) button. 3 Press M or m to select "Yes," and press the The DVDirect starts erasing. After erasing is completed, the disc can be ejected. (select) button. 76 - Sony VRD MC5 | Operating Instructions - Page 77
's color system is different to the color system of the camcorder connected, you cannot record to a disc. • If the DVDirect's color system that you created the disc is different to the color system of a DVD player for playing the disc created, you cannot play the disc. Language Select the language - Sony VRD MC5 | Operating Instructions - Page 78
The following writable discs are compatible with the DVDirect. However, not all disc operations are supported. Disc type DVD+R Logo Video DVD Photo DVD & AVCHD disc DVD+R DL (Double layer) * DVD+RW DVD+RW High speed DVD-R DVD-R DL (Dual layer) DVD-RW * Only use when connecting to the DV - Sony VRD MC5 | Operating Instructions - Page 79
of data that requires MagicGate functions cannot be performed with the DVDirect. *2Sony "Memory Stick PRO Duo" operation is supported up to 8GB. Notes on using "Memory Stick" • If you slide the write-protect switch to LOCK with a fine-tipped object, you cannot record, edit, or delete images - Sony VRD MC5 | Operating Instructions - Page 80
Stick Duo slot. When inserting a "Memory Stick Duo" with an adapter into the Multi memory card slot, the DVDirect may not work correctly. • Not all memory card operations with other card adapters are supported. • Slide the write protect switch with a thin implement. • Format the "Memory Stick" using - Sony VRD MC5 | Operating Instructions - Page 81
DVDirect, keep the power on, but stop using it for at least an hour. Handling discs • Handle discs only by the edges. Never touch the recording them in areas subject to high humidity. • Avoid using or storing a memory card in a location subject to: − extremely high temperature, such as the interior - Sony VRD MC5 | Operating Instructions - Page 82
, or devices supporting AVCHD format playback) * Requires a Sony High Definition Handycam® (HDD/Memory Stick). Supported input devices • Video devices with video/audio outputs • Sony Handycam® (DV/D8) or DV digital video camera • Sony Handycam® (HDD/DVD/ Memory Stick) PHOTO RECORDING Creatable discs - Sony VRD MC5 | Operating Instructions - Page 83
Additional Information General Power DC 12 V (supplied from the DC IN jack) Consumption Max. 2.5 A AC adapter* Type: AC-NB12A Input: 100 V - 240 V Output: DC 12 V/2.5 A * Use an AC power cord appropriate to the region or country of use. Size Approx. 193 × 65 × 222.5 mm (W×H×D) Weight Approx. 1.5 kg - Sony VRD MC5 | Operating Instructions - Page 84
P/N 7819901869A Sony Corporation Printed in China
-
 1
1 -
 2
2 -
 3
3 -
 4
4 -
 5
5 -
 6
6 -
 7
7 -
8
-
9
-
10
-
11
-
12
-
13
-
14
-
15
-
16
-
17
-
18
-
19
-
20
-
21
-
22
-
23
-
24
-
25
-
26
-
27
-
28
-
29
-
30
-
31
-
32
-
33
-
34
-
35
-
36
-
37
-
38
-
39
-
40
-
41
-
42
-
43
-
44
-
45
-
46
-
47
-
48
-
49
-
50
-
51
-
52
-
53
-
54
-
55
-
56
-
57
-
58
-
59
-
60
-
61
-
62
-
63
-
64
-
65
-
66
-
67
-
68
-
69
-
70
-
71
-
72
-
73
-
74
-
75
-
76
-
77
-
78
-
79
-
80
-
81
-
82
-
83
-
84
 |
 |
Operating Instructions
© 2007 Sony Corporation
IT
JP
FR
DE
ES
IT
CS
Multi-Function
DVD Recorder
W-273-384-
11
(2)
VRD-MC5