Stihl BG 75 Instruction Manual
Stihl BG 75 Manual
 |
View all Stihl BG 75 manuals
Add to My Manuals
Save this manual to your list of manuals |
Stihl BG 75 manual content summary:
- Stihl BG 75 | Instruction Manual - Page 1
STIHL BG 75 III Instruction Manual Owner's Manual Assembling Safety Precautions Operating Instructions Maintenance - Stihl BG 75 | Instruction Manual - Page 2
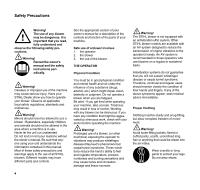
Federal and 12 California Emission Control 14 Warranty Statement 16 16 16 17 18 19 21 This Manual contains operating and 22 safety instructions for all STIHL BG 75 23 blowers. 23 Pay special attention to the safety 23 precautions outlined on pages 4 to 9. Allow only persons who understand - Stihl BG 75 | Instruction Manual - Page 3
12 13 16 14 15 1 = Slide control 2 = Handle 3 = Throttle trigger 4 = Intake screen 5 = Clamp 6 = Blower tube 7 = Nozzle 8 = Spark plug boot 9 = Fuel pump 1 5 6 32 4 7 10 = Choke lever 11 = Filter housing 12 = Carburetor adjusting screws 13 = Starter grip 14 = Fuel filler cap 15 = Fuel tank 16 - Stihl BG 75 | Instruction Manual - Page 4
the fan. Secures blower tube to machine. Directs airstream. Aims and widens the airstream Connects the spark plug to the ignition wire. Provides additional fuel feed for a cold start. Eases engine starting by enriching mixture. Covers the air filter element. For tuning carburetor The grip of the - Stihl BG 75 | Instruction Manual - Page 5
apply to the use of all STIHL blowers. Different models may have different parts and controls. See the appropriate section of your owner's manual for a description of the controls and function of the parts of your machine. 1. the operator 2. the blower 3. the use of the blower . You must be in good - Stihl BG 75 | Instruction Manual - Page 6
(ear plugs or ear mufflers) to protect your hearing. Continual and regular users should have their hearing checked regulary. For illustrations and definitions of the blower parts see the chapter on "Parts and Controls"! Never modify a blower in any way. Only attachments supplied by STIHL or - Stihl BG 75 | Instruction Manual - Page 7
it. Make sure the controls and safety devices are working properly. Your blower is a one-person machine. To reduce the risk of eye or other immediately if you are approached. For specific starting instructions, see the appropriate section of your owner's manual. Place the machine on firm ground or - Stihl BG 75 | Instruction Manual - Page 8
of the air flow could injure eyes and could blow small objects at great speed. Always shut off the engine before cleaning or servicing the unit or replacing parts. The blower fan between the air intake and output openings rotates whenever the engine is running. In order to reduce the risk of injury - Stihl BG 75 | Instruction Manual - Page 9
maintenance or repair work or cleaning the blower. Do not attempt any maintenance or repair work not described in your owner's manual. Have such work performed at your STIHL service shop only. Check fuel filler cap for leaks at regular intervals. Use the specified spark plug and make sure it and the - Stihl BG 75 | Instruction Manual - Page 10
modify or remove any part of the muffler or spark arrestor. Keep spark plug and wire connection tight and clean. The spark plug electrode gap should spark plug if the electrodes are badly pitted. For any maintenance please refer to the maintenance chart near the end of this manual. Store blower in - Stihl BG 75 | Instruction Manual - Page 11
8 13 12 326BA035 KN 326BA036 KN 326BA037 KN The BG 75 comes standard as a blower. A vacuum attachment* is available for user installation which . • Line up the dots on the tube and housing and then push the blower • tube onto the housing stub . Tighten down the clamp . * Special accessory - Stihl BG 75 | Instruction Manual - Page 12
affect elastomers (carburetor diaphragms, oil seals, fuel lines etc.), but magnesium castings as well. This could cause running problems or even damage mixing, pour oil into the canister first, and then add gasoline. Gasoline Oil (STIHL 50:1 or equivalent branded TC oils) US gal. 1 2 1/2 5 US - Stihl BG 75 | Instruction Manual - Page 13
. Before storing your machine for a long period, drain and clean the fuel tank and run engine until carburetor is dry. • Observe safety precautions - see chapter "Safety Precautions" in this manual. To start the engine, move the slide control to position. Squeeze the throttle trigger and move the - Stihl BG 75 | Instruction Manual - Page 14
pull out starter rope more than 30" (75 cm) - it might break. Do not let the starter grip snap back. • Guide it back slowly so that starter rope can fire, the combustion chamber has flooded. Remove spark plug terminal . • Unscrew and dry off the spark plug. ••• Set slide control to "0". Engage - Stihl BG 75 | Instruction Manual - Page 15
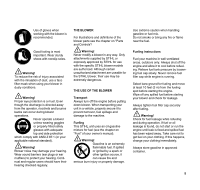
nozzle. The wide nozzle generates a flat airstream which can be used highly specifically and effectively since the outlet is near ground level. The blower's wide nozzle is particularly effective for clearing large areas covered with sawdust, fallen leaves or cut grass etc. (risk of injury due to - Stihl BG 75 | Instruction Manual - Page 16
When using the blower as a vacuum cleaner (vacuum attachment as special accessory), the carrying strap on the catcher bag is placed over the left shoulder and the right arm is guided by the carrying strap. The left hand grips the handle on the housing, the right hand gripping the carrying handle. - Stihl BG 75 | Instruction Manual - Page 17
• filter cover Place felt element (lettering • facing inward) in filter housing . Fit the felt cover so that it snaps into position. The carburetor comes with a standard setting. This is the optimum setting to ensure your machine will operate reliably with the lowest possible emissions under most - Stihl BG 75 | Instruction Manual - Page 18
The carburetor is set at the factory to guarantee an optimum fuel-air mixture under all operating conditions. Idling and part-load check the spark arresting screen in the muffler. • Remove the housing Take out the screw . Take out the spark arresting screen . Clean the spark arresting screen. - Stihl BG 75 | Instruction Manual - Page 19
. Use only resistor type spark plugs of the approved range. Rectify problems which have caused fouling of spark plug: Incorrect carburetor setting, too much oil in fuel mix, dirty air filter, unfavorable running conditions, e.g. operating at part load. 1 • Fit a new spark plug after approx. 100 - Stihl BG 75 | Instruction Manual - Page 20
1 326BA029 KN 326BA026 KN 326BA027 KN 2 4 5 R 3 • Slacken off the housing screws. Remove the three screws . Lift the starter cover off the engine (if vac attachment is fitted, remove handle before starter cover) Take out the screw . • Remove the rope rotor very carefully - the rewind spring - Stihl BG 75 | Instruction Manual - Page 21
release the rotor let go of rope slowly so that it winds onto the rotor. The starter grip must be firmly seated in the rope guide bush. If grip droops to one side: Add one more turn on rope rotor to increase spring tension. - Stihl BG 75 | Instruction Manual - Page 22
unnecessary high loads during the break-in period. As all moving parts have to bed in during the break-in period, the frictional dissipated by flow of cooling air. This protects enginemounted components (ignition, carburetor) from thermal overload. Storing for a short period: Wait for engine - Stihl BG 75 | Instruction Manual - Page 23
Filter in fuel tank Fuel tank Carburetor Spark plug Cylinder fins Spark arresting screen in muffler All accessible manual. Other repair work may be performed only by an authorized STIHL Service dealer. Original STIHL parts can be identified by the STlHL part number, the logo and the STIHL parts - Stihl BG 75 | Instruction Manual - Page 24
(suppressed): Electrode gap: Spark plug thread: Bosch WSR 6 F or NGK BPMR 7 A; 0.02 in (0.5 mm) M 14 x 1.25; 0.37 in (9.5 mm) long Vacuum attachment kit: 4227 007 1000 Gutter cleaning kit: 4227 007 1005 For periods of about 3 months or longer: • Remove the blower tube and nozzle. Drain and clean - Stihl BG 75 | Instruction Manual - Page 25
Your emission control system includes parts such as the carburetor and the ignition system. part has failed due to abuse, neglect, improper maintenance or unapproved modifications. You are responsible for presenting your small off-road equipment engine to a STIHL service center as soon as a problem - Stihl BG 75 | Instruction Manual - Page 26
) Intake manifold Air filter Spark plug Magneto or electronic ignition system (ignition module) Catalytic converter (if applicable) Fasteners Bring the product to any authorized STIHL servicing dealer and present the signed warranty card. The maintenance instructions in this manual are based on the - Stihl BG 75 | Instruction Manual - Page 27
/ & WARNING! The engine exhaust from this product contains chemicals known to the State of California to cause cancer, birth defects or other reproductive harm. englisch/english U.S.A.lCARB/EPA
-
 1
1 -
 2
2 -
 3
3 -
 4
4 -
 5
5 -
 6
6 -
 7
7 -
8
-
9
-
10
-
11
-
12
-
13
-
14
-
15
-
16
-
17
-
18
-
19
-
20
-
21
-
22
-
23
-
24
-
25
-
26
-
27
 |
 |

STIHL
BG
75
III
Instruction
Manual
Owner's Manual
Assembling
Safety
Precautions
Operating
Instructions
Maintenance