Stihl BR 500 Product Instruction Manual
Stihl BR 500 Manual
 |
View all Stihl BR 500 manuals
Add to My Manuals
Save this manual to your list of manuals |
Stihl BR 500 manual content summary:
- Stihl BR 500 | Product Instruction Manual - Page 1
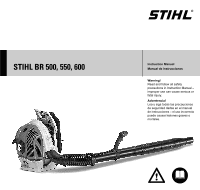
STIHL BR 500, 550, 600 { Instruction Manual Manual de instrucciones Warning! Read and follow all safety precautions in Instruction Manual - improper use can cause serious or fatal injury. Advertencia! Lea y siga todas las precauciones de seguridad dadas en el manual de instrucciones - el uso - Stihl BR 500 | Product Instruction Manual - Page 2
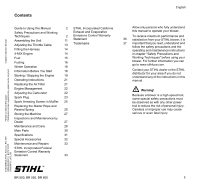
Instruction Manual 1 - 38 Manual de instrucciones 39 - 81 - Stihl BR 500 | Product Instruction Manual - Page 3
persons who fully understand this manual to operate your blower. To receive maximum performance and 35 satisfaction from your STIHL blower, it is 37 important that you read, understand and follow the safety precautions and the operating and maintenance instructions in chapter "Safety Precautions and - Stihl BR 500 | Product Instruction Manual - Page 4
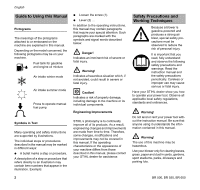
pictograms may be on your machine. Fuel tank for gasoline and engine oil mixture Air intake winter mode Air intake summer mode Press to operate manual fuel pump Symbols in Text Many operating and safety instructions are supported by illustrations. The individual steps or procedures described in the - Stihl BR 500 | Product Instruction Manual - Page 5
of all STIHL blowers. Different models may have different parts and controls. See the appropriate section of your instruction manual for a description of the controls and the function of the parts of your physician and the pacemaker manufacturer before operating this tool. BR 500, BR 550, BR 600 3 - Stihl BR 500 | Product Instruction Manual - Page 6
by your STIHL servicing dealer. Warning! Small particles (e.g. dust) blown through the blower tubes and nozzle can cause a static charging of the blower tubes. blower has features designed to help reduce the build up of static electricity in the blower tubes and equalize the charge with the engine - Stihl BR 500 | Product Instruction Manual - Page 7
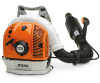
engine before taking the machine off your back and putting it down. When transporting it in a vehicle, properly secure it to prevent turnover, fuel spillage and damage to the unit. Fuel Your STIHL power tool uses an oilgasoline mixture for fuel (see the chapter on "Fuel" of your instruction manual - Stihl BR 500 | Product Instruction Manual - Page 8
and take it to your authorized STIHL dealer for repair. Screw Cap Warning chapter in your Instruction Manual for additional information To reduce the risk of injury from parts thrown by the fan wheel, check engine at least 10 feet (3 m) from the fueling spot, outdoors only. 6 BR 500, BR 550, BR 600 - Stihl BR 500 | Product Instruction Manual - Page 9
the risk of injury from loss of control, never work on a ladder or on any other insecure support. Working Conditions Operate and start your power tool only outdoors in a well-ventilated area. Operate it under good visibility and daylight conditions only. Work carefully. BR 500, BR 550, BR 600 7 - Stihl BR 500 | Product Instruction Manual - Page 10
being blown is a commercial substance, review the material safety data sheet for for instance, have published lists of substances known to cause Instructions Warning! In the event of an emergency, switch off the engine immediately - move the setting lever to 0 or STOP. 8 BR 500, BR 550, BR 600 - Stihl BR 500 | Product Instruction Manual - Page 11
muffler is near dry brush, grass, wood chips or other combustible materials while it is still hot. MAINTENANCE, REPAIR AND STORING Maintenance, replacement, or repair of the emission control devices and systems may be performed by any nonroad engine repair establishment BR 500, BR 550, BR 600 9 - Stihl BR 500 | Product Instruction Manual - Page 12
repair. Use of non-STIHL parts may cause serious or fatal injury. Strictly follow the maintenance and repair instructions in the appropriate section in this instruction manual. Please refer to the maintenance chart in this instruction manual. Warning! Always stop the engine and make sure that the - Stihl BR 500 | Product Instruction Manual - Page 13
in the direction of the arrow and engage it in the appropriate slot (3). BR 550, BR 600 1 2 3 N Depending on your size and reach: Push blower tube (1) up to the appropriate mark on the blower tube (2). N Rotate the blower tube (1) in the direction of the arrow and engage it in the appropriate - Stihl BR 500 | Product Instruction Manual - Page 14
the hose clamp (5) onto the pleated hose (2). N Line up the hose clamp (5) and blower tube (6) - as shown. N Secure the hose clamp (5) with the screw (7). N the nozzle (1) off the blower tube (2). N Engage the throttle cable (4) with sleeve (5) in the retainer (6). 12 BR 500, BR 550, BR 600 - Stihl BR 500 | Product Instruction Manual - Page 15
has worn as far as the wear mark. Fitting the Transport Aid N Secure the blower tube to the handle on the backplate. When storing or transporting the machine: English Adjusting resistance. N Secure the velcro strip to the blower tube - pull the flap through the buckle. BR 500, BR 550, BR 600 13 - Stihl BR 500 | Product Instruction Manual - Page 16
the Harness Loosening the harness straps 4-MIX Engine The STIHL 4-MIX engine features mixture lubrication and must be run on a fuel mixture of gasoline and engine oil. It operates otherwise on the sliding adjusters. 373BA003 KN N Pull the ends of the straps downward. 14 BR 500, BR 550, BR 600 - Stihl BR 500 | Product Instruction Manual - Page 17
could cause running problems or even damage the engine. For this reason STIHL recommends that you use only high-quality unleaded gasoline! Gasoline with an ethanol content of more than 10% can cause running problems and major damage in engines with a manually adjustable carburetor and should not - Stihl BR 500 | Product Instruction Manual - Page 18
001BA218 KN N Remove fuel filler cap. Refueling Take care not to spill fuel while fueling, and do not overfill the tank. STIHL recommends use of the STIHL filling system (special accessory). Closing the toolless filler cap 452BA116 KN With grip in an upright position: 16 BR 500, BR 550, BR 600 - Stihl BR 500 | Product Instruction Manual - Page 19
while fueling and do not overfill the tank. STIHL recommends use of the STIHL filling system (special accessory). Closing the threaded filler cap N Position cap. N Turn the cap clockwise as far as it will go and tighten it as securely as possible by hand. 002BA448 KN BR 500, BR 550, BR 600 17 - Stihl BR 500 | Product Instruction Manual - Page 20
return the shutter (4) to the summer position (s) since there is otherwise a risk of engine running problems due to overheating. 452BA086 KN Information Before You Start 1 2 1 Setting lever 2 back to the normal run position F. 3 452BA085 KN N Loosen the screw (3). 18 BR 500, BR 550, BR 600 - Stihl BR 500 | Product Instruction Manual - Page 21
to full length - it might otherwise break. N Do not let the starter grip snap back. Guide it slowly back into the housing so that the starter rope can rewind properly. N Crank the engine until it begins to fire. After no more than three attempts, turn the choke knob to n. BR 500, BR 550, BR 600 19 - Stihl BR 500 | Product Instruction Manual - Page 22
Engage the throttle trigger (2) in the full throttle position. N Continue cranking until the engine runs. Throttle cable adjustment N Check adjustment of throttle cable - see chapter on " . N Set the choke knob according to engine temperature. N Now start the engine. 20 BR 500, BR 550, BR 600 - Stihl BR 500 | Product Instruction Manual - Page 23
Instructions Replacing the Air Filter English During Operation After a long period of full throttle operation, allow the engine to run for a short while at idle speed so that engine heat can be dissipated by the flow of cooling air. This protects enginemounted components (ignition, carburetor - Stihl BR 500 | Product Instruction Manual - Page 24
Turn the idle speed screw (LA) slowly clockwise until the engine runs smoothly. Machines with adjustable carburetor The carburetor comes from the factory with a standard setting. This setting N The low speed screw (H) is 3/4 turn open. N Start and warm up the engine. 22 BR 500, BR 550, BR 600 - Stihl BR 500 | Product Instruction Manual - Page 25
fuel mix (too much engine oil in the gasoline), a dirty air filter and unfavorable running conditions (mostly at part throttle etc.) affect engine power is not satisfactory when operating at high altitude or at sea level. N Check the standard setting. N Warm up the engine. BR 500, BR 550, BR 600 - Stihl BR 500 | Product Instruction Manual - Page 26
the approved range. Rectify problems which have caused fouling of spark plug: - Too much oil in fuel mix. - Dirty air filter. - Unfavorable running conditions, e.g. operating at part load. 2 Warning! To (3) into the cylinder and fit the boot (2) (press it down firmly). 24 BR 500, BR 550, BR 600 - Stihl BR 500 | Product Instruction Manual - Page 27
in Muffler In some countries the muffler is equipped with a spark arresting screen. N If the engine is down on power, check the spark arresting screen in the muffler. N Wait for the muffler - take care to avoid the risk of injury. wear face protection and work gloves. BR 500, BR 550, BR 600 25 - Stihl BR 500 | Product Instruction Manual - Page 28
that it winds onto the rotor. The starter grip must locate firmly in the guide bushing. If the grip droops to one side: Add one more turn on the the spring housing (1) and the parts of the broken spring. N Lubricate the new spring with a few drops of non-resinous oil. 26 BR 500, BR 550, BR 600 - Stihl BR 500 | Product Instruction Manual - Page 29
persons. English Inspections and Maintenance by Dealer Fuel pickup body in tank N Have the pickup body in the fuel tank replaced every year. STIHL recommends that you have servicing and repair work carried out exclusively by an authorized STIHL servicing dealer. BR 500, BR 550, BR 600 27 - Stihl BR 500 | Product Instruction Manual - Page 30
Maintenance refueling stop weekly monthly every 12 months if problem if damaged if required Complete machine Visual inspection Fuel tank Clean X Check idle adjustment X X Carburetor Readjust idle X Readjust electrode gap X Spark plug Replace dealer1) X X 28 BR 500, BR 550, BR 600 - Stihl BR 500 | Product Instruction Manual - Page 31
labels Replace 1) STIHL recommends a STIHL servicing dealer. 2) not in all versions, market-specific X X before starting work after finishing work or daily after each refueling stop weekly monthly every 12 months if problem if damaged if required English X X X BR 500, BR 550, BR 600 29 - Stihl BR 500 | Product Instruction Manual - Page 32
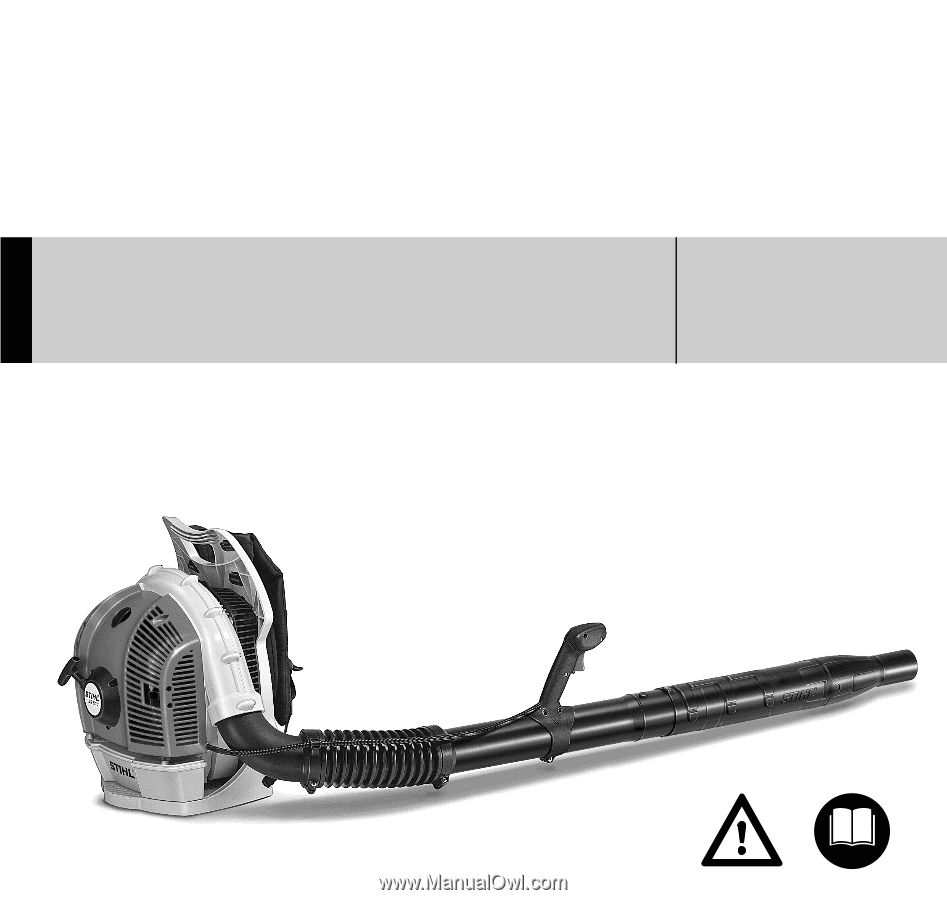
Tube (BR 550 / 600) 3 Blower Tube (BR 500) 4 Blower Tube (BR 500 / 550 / 600) 5 Control Handle 6 Throttle Trigger 7 Setting Lever 8 Pleated Hose 9 Harness 10 Backplate 11 Intake Screen 12 Air Filter Cover 13 Fuel Filler Cap 14 Spark Plug Boot 15 Muffler (with Spark Arresting Screen) 16 Carburetor - Stihl BR 500 | Product Instruction Manual - Page 33
the risk of fire. 16. Carburetor Adjusting Screws For tuning the carburetor. 17. Choke Knob Eases engine starting by enriching mixture. 18. Engine STIHL 4-MIX Engine Displacement: Bore: Stroke: Idle speed: 3.95 cu. in. (64.8 cm3) 1.97 in. (50 mm) 1.3 in. (33 mm) 2,500 rpm BR 500, BR 550, BR 600 - Stihl BR 500 | Product Instruction Manual - Page 34
028 in. (0.7 mm) Fuel System dry BR 500: BR 550: BR 600: All position diaphragm carburetor with integral fuel pump Fuel tank capacity: 47.3 fl.oz (1.4 L) Blower Data Maximum air flow rate BR 500: 812 cf/min (1380 m3/h) BR 550: 877 cf/min (1490 m3/h) BR 600: 1012 cf/min (1720 m3/h) Maximum - Stihl BR 500 | Product Instruction Manual - Page 35
part on your engine is defective, the part will be repaired or replaced by STIHL Incorporated free of charge. Owner's Warranty Responsibilities As the small off-road equipment engine owner, you are responsible for the performance of the required maintenance listed in your instruction manual. STIHL - Stihl BR 500 | Product Instruction Manual - Page 36
and sent back the warranty card to STIHL. If any emission-related part on your engine is defective, the part will be replaced by STIHL Incorporated at no cost to the owner. Any warranted part which is not scheduled for replacement as required maintenance, or which is scheduled only for regular - Stihl BR 500 | Product Instruction Manual - Page 37
part on your equipment is defective, the part will be repaired or replaced by STIHL Incorporated free of charge. Owner's Warranty Responsibilities As the small off-road equipment engine owner, you are responsible for performance of the required maintenance listed in your instruction manual. STIHL - Stihl BR 500 | Product Instruction Manual - Page 38
if it is determined that a warranted part is defective. Any manufacturer approved or equivalent replacement part may be used for any warranty maintenance or repairs on emission-related parts and must be provided without charge to the owner. STIHL Incorporated is liable for BR 500, BR 550, BR 600 - Stihl BR 500 | Product Instruction Manual - Page 39
engine components caused by the failure of a warranted part still under warranty. Emission Warranty Parts List Air Filter, Carburetor STIHL Cutquik® STIHL DUROMATIC® STIHL Quickstop® STIHL ROLLOMATIC® STIHL WOOD BOSS® TIMBERSPORTS® WOOD BOSS® YARD BOSS® BR 500, BR 550, BR 600 English Some of STIHL - Stihl BR 500 | Product Instruction Manual - Page 40
STIHL Protech™ STIHL RAPID™ STIHL SuperCut™ STIHL Territory™ TapAction™ TrimCut™ This listing of trademarks is subject to change. Any unauthorized use of these trademarks without the express written consent of ANDREAS STIHL AG & Co. KG, Waiblingen is strictly prohibited. 38 BR 500, BR 550, BR 600 - Stihl BR 500 | Product Instruction Manual - Page 41
el papel es reciclable. Contenido español / EE.UU Acerca de este manual de instrucciones 40 Medidas de seguridad y técnicas de manejo 41 Armado de en papel libre de cloro. © ANDREAS STIHL AG & Co. KG, 2011 0458-452-8621-F. M47.F11.CP. 0000000717_005_EA { BR 500, BR 550, BR 600 39 - Stihl BR 500 | Product Instruction Manual - Page 42
ía de STIHL es mejorar continuamente todos sus productos. Como resultado de ello, periódicamente se introducen cambios de diseño y mejoras. Por lo tanto, es posible que algunos cambios, modificaciones y mejoras no se describen en este manual. Si las características de 40 BR 500, BR 550, BR 600 - Stihl BR 500 | Product Instruction Manual - Page 43
. La mayoría de las medidas de seguridad y avisos contenidos en este manual se refieren al uso de todos los sopladores de STIHL. Los distintos modelos pueden contar con piezas y controles diferentes. Vea la la fatiga, consulte a su médico antes de utilizar esta máquina. BR 500, BR 550, BR 600 41 - Stihl BR 500 | Product Instruction Manual - Page 44
y del síndrome del túnel carpiano, sírvase notar lo siguiente: - La mayor parte de las herramientas motorizadas de STIHL se ofrecen con un sistema antivibración ("AV") cuyo propósito es reducir la transmisi , pero no tanto que impida la completa libertad de movimiento. 42 BR 500, BR 550, BR 600 - Stihl BR 500 | Product Instruction Manual - Page 45
si está dañada. En caso de dudas, pida que el concesionario de servicio de STIHL la revise. español / EE.UU ¡Advertencia! Las partículas pequeñas (por ej. el polvo) que pasan por los tubos del soplador y , ya que los mismos pueden interferir con la conducción de la carga. BR 500, BR 550, BR 600 43 - Stihl BR 500 | Product Instruction Manual - Page 46
motorizada STIHL utiliza una mezcla de aceite-gasolina como combustible (vea el capítulo "Combustible" en el manual de instrucciones STIHL, levante la empuñadura en la parte superior de la tapa hasta dejarla vertical a un ángulo de 90°. Inserte la tapa en la 452BA116 KN 44 BR 500, BR 550, BR 600 - Stihl BR 500 | Product Instruction Manual - Page 47
Doble la empuñadura dejándola a ras con la parte superior de la tapa. Sujete la tapa y compruebe servicio de inmediato y llévela a un concesionario STIHL autorizado para repararla. 452BA121 KN 001BA227 KN espa ítulo "Combustible" del Manual de instrucciones para obtener BR 500, BR 550, BR 600 45 - Stihl BR 500 | Product Instruction Manual - Page 48
la máquina y comuníquese con el representante STIHL para las reparaciones del caso. ¡Advertencia! de ocasionar lesiones a los ojos u otras partes del cuerpo, asegúrese que las personas vea la sección correspondiente en el manual del usuario. Coloque la herramienta motorizada BR 500, BR 550, BR 600 - Stihl BR 500 | Product Instruction Manual - Page 49
inhalación repetida o de grandes cantidades de polvo u otros contaminantes del aire, especialmente los de partículas pequeñas puede causar enfermedades respiratorias o de otro tipo. Esto incluye el polvo, especialmente /MSHA para el tipo de polvo presente en el lugar. BR 500, BR 550, BR 600 47 - Stihl BR 500 | Product Instruction Manual - Page 50
puede causar lesiones graves al operador o a las demás personas, como resultado de los objetos o partículas lanzados a velocidad alta. No coloque el soplador en el suelo mientras funciona a velocidad alta, puesto apagar la máquina antes de colocarla en el suelo. 48 BR 500, BR 550, BR 600 - Stihl BR 500 | Product Instruction Manual - Page 51
un chispero diseñado para reducir el riesgo de incendio debido a la emisión de partículas calientes. Nunca haga funcionar la unidad sin tener instalado el chispero. Si la mezcla debidamente, o cuando se utilizan repuestos no autorizados, STIHL puede denegar la garantía. BR 500, BR 550, BR 600 49 - Stihl BR 500 | Product Instruction Manual - Page 52
vacíe el tanque de combustible. Consulte el capítulo "Almacenamiento de la máquina" en este manual de instrucciones. Guarde el combustible solamente en un envase de seguridad aprobado para tal uso que tiene un rótulo apropiado. Manipule la gasolina con sumo cuidado. 50 BR 500, BR 550, BR 600 - Stihl BR 500 | Product Instruction Manual - Page 53
(1) a la marca apropiada en el tubo (2). N Gire el tubo del soplador (1) en el sentido de la flecha y engancharlo en la ranura apropiada (3). BR 550, BR 600 12 3 N Alinee el mango de control (1) con la junta del tubo, como se muestra. N Asegure el mango de control (1) con el tornillo (3) de - Stihl BR 500 | Product Instruction Manual - Page 54
la boquilla (1) en el sentido de la flecha hasta que las orejetas (3) no sean visibles. N Extraiga la boquilla (1) del tubo del soplador (2). 452BA112 KN 52 BR 500, BR 550, BR 600 - Stihl BR 500 | Product Instruction Manual - Page 55
cable del acelerador (4) con el manguito (5) en el retenedor (6). N Fije la tira de Velcro al tubo del soplador - tire de la solapa por la hebilla. BR 500, BR 550, BR 600 53 - Stihl BR 500 | Product Instruction Manual - Page 56
de las correas del arnés N Levante las pestañas de los ajustadores deslizantes. 373BA003 KN N Tire hacia abajo de los extremos de las correas. 54 BR 500, BR 550, BR 600 - Stihl BR 500 | Product Instruction Manual - Page 57
equivalente para motores de dos tiempos diseñado para usar exclusivamente con los motores de dos tiempos enfriados por aire. Se recomienda usar aceite STIHL HP Ultra para motores de 2 tiempos, puesto que éste ha sido formulado especialmente para uso en motores STIHL. BR 500, BR 550, BR 600 55 - Stihl BR 500 | Product Instruction Manual - Page 58
Limpie el tanque de combustible de la máquina según sea necesario. Duración de la mezcla de combustible Gasolina Aceite (STIHL 50:1 ó aceite de alta calidad equivalente) gal EE.UU. 1 2 1/2 5 oz fl EE.UU. 2,6 se instala una de dos tipos diferentes de tapas. BR 500, BR 550, BR 600 452BA123 KN - Stihl BR 500 | Product Instruction Manual - Page 59
. STIHL recomienda el uso del sistema de llenado STIHL (accesorio especial). 452BA117 KN 001BA218 KN N Levante la empuñadura a la posición vertical. N Mientras presiona la tapa hacia abajo con firmeza, gírela en sentido horario hasta que tope (aprox. 1/4 de vuelta). BR 500, BR 550, BR 600 57 - Stihl BR 500 | Product Instruction Manual - Page 60
la parte superior STIHL recomienda el uso del sistema de llenado STIHL (accesorio especial). Cierre de la tapa de llenado roscada 002BA448 KN N Coloque la tapa en posición. N Gire la tapa en sentido horario hasta que tope y apriétela hasta donde sea posible con la mano. 58 BR 500, BR 550, BR 600 - Stihl BR 500 | Product Instruction Manual - Page 61
ón máx. y aceleración máxima. Para desenganchar el bloqueo, mueva la palanca de ajuste (1) de vuelta a la posición de funcionamiento normal F. 452BA020 KN 452BA085 KN N Suelte el tornillo (3). BR 500, BR 550, BR 600 59 - Stihl BR 500 | Product Instruction Manual - Page 62
sienta una resistencia definitiva y en seguida dele un tirón fuerte y rápido. No tire de la cuerda de arranque totalmente hasta afuera, se podría romper. 60 BR 500, BR 550, BR 600 - Stihl BR 500 | Product Instruction Manual - Page 63
del estrangulador a n en un tiempo suficientemente corto después que el motor empezó a encenderse, la cámara de combustión se encuentra "ahogada". N Gire la perilla del estrangulador a n. BR 500, BR 550, BR 600 61 - Stihl BR 500 | Product Instruction Manual - Page 64
. Si se nota una pérdida considerable de la potencia del motor N Gire la perilla del estrangulador a l. N Afloje los tornillos (1). N Quite la cubierta del filtro (2). 62 BR 500, BR 550, BR 600 - Stihl BR 500 | Product Instruction Manual - Page 65
ñados. N Coloque el nuevo filtro en la caja del filtro. N Coloque la cubierta del filtro. N Inserte los tornillos y apriételos bien firmes. BR 500, BR 550, BR 600 Estas máquinas han sido ajustadas en fábrica para formar una mezcla óptima de combustible-aire en todas las ubicaciones y condiciones de - Stihl BR 500 | Product Instruction Manual - Page 66
ón insuficiente y sobrecalentamiento. Al nivel del mar N Gire el tornillo de ajuste de velocidad alta (H) en sentido contrahorario (mezcla más rica), pero no más allá del tope. 64 BR 500, BR 550, BR 600 - Stihl BR 500 | Product Instruction Manual - Page 67
! Para reducir el riesgo de incendio y de quemaduras, utilice solamente las bujías autorizadas por STIHL. Siempre empuje el casquillo (1) de la bujía firmemente en el borne (2) del tamaño adecuado voltaico y encender los vapores del combustible, provocando un incendio. BR 500, BR 550, BR 600 65 - Stihl BR 500 | Product Instruction Manual - Page 68
poste del arrancador. El resorte de rebobinado puede saltarse y desenrollarse durante esta operación - tome medidas para evitar lesiones. póngase un protector facial y guantes gruesos. 66 BR 500, BR 550, BR 600 - Stihl BR 500 | Product Instruction Manual - Page 69
Tire del nudo de vuelta en el mango. N Pase el extremo de la cuerda por la parte superior del buje guía (6) y el rotor (7) y fíjela con un nudo de rizo se muestra en la ilustración. Tensado del resorte de rebobinado BR 500, BR 550, BR 600 N Forme un bucle con la cuerda de arranque sin enrollar - Stihl BR 500 | Product Instruction Manual - Page 70
la máquina. N Guarde la máquina en un lugar seco y elevado, o bajo llave - fuera del alcance de los niños y de otras personas no autorizadas. 68 BR 500, BR 550, BR 600 - Stihl BR 500 | Product Instruction Manual - Page 71
mantenimiento por el concesionario Captador de combustible en el tanque N Cada año, pida que le sustituyan el captador de combustible en el tanque. STIHL recomienda que un concesionario STIHL autorizado efectúe los trabajos de mantenimiento y reparación. español / EE.UU BR 500, BR 550, BR 600 69 - Stihl BR 500 | Product Instruction Manual - Page 72
de funcionamiento, y luego X cada 150 horas Chispero 2) en silenciador Revisar Limpiar o reemplazar X X Todos los tornillos y tuercas accesibles (salvo los tornillos de ajuste) Volver a apretar X 70 BR 500, BR 550, BR 600 - Stihl BR 500 | Product Instruction Manual - Page 73
Revisar Limpiar X X Cable del acelerador Ajuste Etiquetas de seguridad Reemplazar 1) STIHL recomienda acudir a un concesionario STIHL para servicio. 2) no se instala en todas las versiones, depende del tiene daños si se requiere español / EE.UU X X X X X BR 500, BR 550, BR 600 71 - Stihl BR 500 | Product Instruction Manual - Page 74
7 6 5 4 9 10 8 11 12 13 # 14 17 16 18 15 19 20 1 Boquilla recta 2 Tubo del soplador (BR 550 / 600) 3 Tubo del soplador (BR 500) 4 Tubo del soplador (BR 500 / 550 / 600) 5 Mango de control 6 Gatillo de aceleración 7 Palanca de ajuste 8 Manguera con pliegues 9 Arnés 10 Placa para la espalda 11 - Stihl BR 500 | Product Instruction Manual - Page 75
del índice de aire CARB tiene las siguientes definiciones: Extended = 300 horas Intermediate = 125 horas Moderate = 50 horas Motor Motor STIHL 4-MIX Cilindrada: Diámetro: Carrera: Marcha en vacío: 64,8 cm3 (3,95 pulg³) 50 mm (1,97 pulg) 33 mm (1,3 pulg) 2500 rpm BR 500, BR 550, BR 600 73 - Stihl BR 500 | Product Instruction Manual - Page 76
pies³/min) Velocidad de aire con boquilla BR 500 BR 550: BR 600: 81 m/s (181 mph) 89 m/s (199 mph) 90 m/s (201 mph) 74 10,1 kg (22,3 lb) 9,9 kg (21,8 lb) 9,8 kg (21,6 lb) Accesorios especiales Comuníquese con su concesionario STIHL para información acerca de accesorios especiales que pueden - Stihl BR 500 | Product Instruction Manual - Page 77
instrucciones. STIHL Incorporated le recomienda guardar todos los recibos comprobantes de los trabajos de mantenimiento hechos a su motor pequeño para equipo de uso fuera de carretera, pero STIHL Incorporated no puede negar garantía basado en el solo hecho de faltar los BR 500, BR 550, BR 600 75 - Stihl BR 500 | Product Instruction Manual - Page 78
usted reclama garantía para un componente y se comprueba que la máquina no está defectuosa, STIHL Incorporated le cobrará el costo de la prueba del sistema de control de emisiones. El trabajo (sistema de refuerzo para arranque en frío) - Varillajes de control 76 BR 500, BR 550, BR 600 - Stihl BR 500 | Product Instruction Manual - Page 79
cualquier centro de servicio autorizado por STIHL y presente la tarjeta de garantía firmada. Requerimientos de mantenimiento Las instrucciones presentadas en este manual se basan en la aplicación , estrangulador (sistema de enriquecimiento para arranque en frío), BR 500, BR 550, BR 600 77 - Stihl BR 500 | Product Instruction Manual - Page 80
responsabilidad de realizar el mantenimiento requerido descrito en su manual de instrucciones. STIHL Incorporated le recomienda guardar todos los recibos comprobantes de en la subsección COBERTURA POR STIHL INCORPORATED, vea más arriba. Si uno de estos componentes falla 78 BR 500, BR 550, BR 600 - Stihl BR 500 | Product Instruction Manual - Page 81
si STIHL Incorporated demuestra el maltrato, negligencia o mantenimiento incorrecto del producto de STIHL, y que tal maltrato, negligencia, o mantenimiento incorrecto era la causa directa de la necesidad de reparación o sustitución del componente. A pesar de lo anterior, BR 500, BR 550, BR 600 79 - Stihl BR 500 | Product Instruction Manual - Page 82
™ Quad Power™ Quiet Line™ STIHL Compact™ STIHL HomeScaper Series™ STIHL Interchangeable Attachment Series™ STIHL M-Tronic™ STIHL Magnum™ STIHL MiniBoss™ STIHL MotoPlus 4™ STIHL Multi-Cut HomeScaper Series™ Stihl Outfitters™ STIHL PICCO™ STIHL PolyCut™ STIHL PowerSweep™ 80 BR 500, BR 550, BR 600 - Stihl BR 500 | Product Instruction Manual - Page 83
SuperCut™ STIHL Territory™ TapAction™ TrimCut™ Esta lista de marcas comerciales está sujeta a cambios. Queda terminantemente prohibido todo uso de estas marcas comerciales sin el consentimiento expreso por escrito de ANDREAS STIHL AG & Co. KG, Waiblingen. español / EE.UU BR 500, BR 550, BR 600 81 - Stihl BR 500 | Product Instruction Manual - Page 84
español / EE.UU 82 BR 500, BR 550, BR 600 - Stihl BR 500 | Product Instruction Manual - Page 85
español / EE.UU BR 500, BR 550, BR 600 83 - Stihl BR 500 | Product Instruction Manual - Page 86
español / EE.UU 84 BR 500, BR 550, BR 600 - Stihl BR 500 | Product Instruction Manual - Page 87
- Stihl BR 500 | Product Instruction Manual - Page 88
! WARNING! The engine exhaust from this product contains chemicals known to the State of California to cause cancer, birth defects or other reproductive harm. 0458-452-8621-F englisch / spanisch USA U G U www.stihl.com ! ADVERTENCIA! El gas de escape del motor de esta máquina contiene productos quí
-
 1
1 -
 2
2 -
 3
3 -
 4
4 -
 5
5 -
 6
6 -
 7
7 -
8
-
9
-
10
-
11
-
12
-
13
-
14
-
15
-
16
-
17
-
18
-
19
-
20
-
21
-
22
-
23
-
24
-
25
-
26
-
27
-
28
-
29
-
30
-
31
-
32
-
33
-
34
-
35
-
36
-
37
-
38
-
39
-
40
-
41
-
42
-
43
-
44
-
45
-
46
-
47
-
48
-
49
-
50
-
51
-
52
-
53
-
54
-
55
-
56
-
57
-
58
-
59
-
60
-
61
-
62
-
63
-
64
-
65
-
66
-
67
-
68
-
69
-
70
-
71
-
72
-
73
-
74
-
75
-
76
-
77
-
78
-
79
-
80
-
81
-
82
-
83
-
84
-
85
-
86
-
87
-
88
 |
 |
{
STIHL BR 500, 550, 600
Warning!
Read and follow all safety
precautions in Instruction Manual –
improper use can cause serious or
fatal injury.
Advertencia!
Lea y siga todas las precauciones
de seguridad dadas en el manual
de instrucciones – el uso incorrecto
puede causar lesiones graves o
mortales.
Instruction Manual
Manual de instrucciones