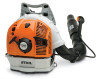
Stihl BR 600 Instruction Manual
Stihl BR 600 Manual
 |
View all Stihl BR 600 manuals
Add to My Manuals
Save this manual to your list of manuals |
Stihl BR 600 manual content summary:
- Stihl BR 600 | Instruction Manual - Page 1
STIHL BR 500, 550, 600 { Instruction Manual Manual de instrucciones WARNING Read Instruction Manual thoroughly before use and follow all safety precautions - improper use can cause serious or fatal injury. ADVERTENCIA Antes de usar la máquina lea y siga todas - Stihl BR 600 | Instruction Manual - Page 2
Instruction Manual 1 - 37 Manual de instrucciones 38 - 78 - Stihl BR 600 | Instruction Manual - Page 3
Harness 14 4-MIX Engine 15 Fuel 15 Fueling 16 Winter Operation 18 Information Before You Start 19 Starting / Stopping the Engine 19 Operating Instructions 21 Replacing the Air Filter 21 Engine Management 22 Adjusting the Carburetor 22 Spark Plug 23 Spark Arresting Screen in - Stihl BR 600 | Instruction Manual - Page 4
, the following pictograms may be on your machine. Fuel tank for gasoline and engine oil mixture Air intake winter mode Air intake summer mode Press to operate manual fuel pump Symbols in Text Many operating and safety instructions are supported by illustrations. The individual steps or procedures - Stihl BR 600 | Instruction Manual - Page 5
of these safety precautions and warnings apply to the use of all STIHL blowers. Different models may have different parts and controls. See the appropriate section of your instruction manual for a description of the controls and the function of the parts of your model. Do not clean your machine with - Stihl BR 600 | Instruction Manual - Page 6
up of static electricity in the blower tubes and equalize the charge with the engine and/or operator: The control handle is designed to conduct static electricity through the throttle cable to the engine and from the handle through the operator to the ground. STIHL offers an optional kit for use - Stihl BR 600 | Instruction Manual - Page 7
(see the chapter on "Fuel" of your instruction manual). WARNING Gasoline is an extremely flammable fuel. If spilled and ignited by a spark or other ignition source, it can cause fire and serious burn injury or property damage. Use extreme caution when handling gasoline or fuel mix. Do not smoke or - Stihl BR 600 | Instruction Manual - Page 8
start the engine if there are leaks or damage - risk of fire! Have the machine repaired by a servicing dealer before using it. WARNING Never operate your power tool if it is damaged, improperly adjusted or maintained, or not completely or securely assembled. WARNING Check that the spark plug boot - Stihl BR 600 | Instruction Manual - Page 9
. If the engine is warm, it may be possible to start it by simply pulling the starter rope, with no further adjustments. To reduce the risk of injury, be particularly alert to keep children away from the unit. For specific starting instructions, see the appropriate section of your manual. Place the - Stihl BR 600 | Instruction Manual - Page 10
support. Working Conditions Operate and start engine is running, this product generates toxic exhaust fumes containing chemicals, such as unburned hydrocarbons (including benzene) and carbon monoxide, that are known to cause respiratory problems substance, review the material BR 500, BR 550, BR 600 - Stihl BR 600 | Instruction Manual - Page 11
injury or hearing loss. You may also permanently damage the engine. Have your muffler serviced and repaired by your STIHL servicing dealer only. English WARNING The muffler and other parts of the engine (e.g. fins of the cylinder, spark plug) become hot during operation and remain hot for a while - Stihl BR 600 | Instruction Manual - Page 12
not described in this instruction manual. Have such work performed by your STIHL servicing dealer only. Do not clean your machine with a pressure washer. The solid jet of water may damage parts of the machine. WARNING Use the specified spark plug and make sure it and the ignition lead are always - Stihl BR 600 | Instruction Manual - Page 13
3 N Depending on your size and reach: Push blower tube (1) up to the appropriate mark on the blower tube (2). N Rotate the blower tube (1) in the direction of the arrow and engage it in the appropriate slot (3). BR 550, BR 600 12 3 N Line up the control handle (1) with the tube's seam - as shown - Stihl BR 600 | Instruction Manual - Page 14
(with retainer for throttle cable) onto the elbow blower tube (2) and engage it on the lugs (3). Removing the Nozzle 2 1 3 N Rotate the nozzle (1) in the direction of the arrow until the lugs (3) are covered. N Pull the nozzle (1) off the blower tube (2). 452BA112 KN 12 BR 500, BR 550, BR 600 - Stihl BR 600 | Instruction Manual - Page 15
the Transport Aid N Secure the blower tube to the handle on the backplate. When storing or transporting the machine: N Secure the velcro strip to the blower tube - pull the flap through the buckle. N Engage the throttle cable (4) with sleeve (5) in the retainer (6). BR 500, BR 550, BR 600 13 - Stihl BR 600 | Instruction Manual - Page 16
straps so that the backplate fits snugly and securely against your back. A Adjust height B Adjust angle Tightening the harness straps Loosening the harness straps N Lift the tabs of the sliding adjusters. 373BA004 KN 373BA003 KN N Pull the ends of the straps downward. 14 BR 500, BR 550, BR 600 - Stihl BR 600 | Instruction Manual - Page 17
idle adjustment, have your STIHL dealer check your power tool and make proper adjustments and repairs. The idle speed and maximum speed of the engine change if you switch from a fuel with a certain ethanol content to another fuel with a much higher or lower ethanol content. This problem can - Stihl BR 600 | Instruction Manual - Page 18
mixing of the oil with the fuel. Gasoline US gal. 1 2 1/2 5 Oil (STIHL 50:1 or equivalent high-quality oils) US fl.oz. 2.6 6.4 12.8 Dispose of empty mixing-oil containers only at authorized disposal locations. Fueling Preparations N Before fueling . 001BA218 KN 16 BR 500, BR 550, BR 600 - Stihl BR 600 | Instruction Manual - Page 19
cap parts may be misaligned with each other, or the cap may be damaged or broken. See the "Fueling Instructions" section of the Safety Precautions for how to correct a misaligned cap and additional information. Never use your machine with a misaligned, damaged or broken cap. BR 500, BR 550, BR 600 - Stihl BR 600 | Instruction Manual - Page 20
problems due to overheating. 452BA084 KN N Remove the filter cover (1) and air filter element (2). 002BA448 KN N Position cap. 3 N Turn the cap clockwise as far as it will go and tighten it as securely as possible by hand. N Loosen the screw (3). 18 452BA085 KN BR 500, BR 550, BR 600 - Stihl BR 600 | Instruction Manual - Page 21
English N Turn the choke knob to l. Warm engine (warm start) N Turn the choke knob to n. Also use this setting if the engine has been running but is still cold. 452BA115 KN N Press the manual fuel pump bulb at least five times - even if the bulb is filled with fuel. BR 500, BR 550, BR 600 19 - Stihl BR 600 | Instruction Manual - Page 22
the setting lever to 0 - the engine stops - the setting lever springs back to the on position. If the engine does not start Choke knob If you did not turn the choke knob to n quickly enough after the engine began to fire, the combustion chamber is flooded. 452BA026 KN 20 BR 500, BR 550, BR 600 - Stihl BR 600 | Instruction Manual - Page 23
components (ignition, carburetor) from thermal overload. After Finishing Work Dirty air filters reduce engine power, increase fuel consumption and make starting more difficult. If there is a noticeable loss of engine power N Move the setting lever (1) to C. N Engage the throttle trigger - Stihl BR 600 | Instruction Manual - Page 24
Adjustable Carburetor The carburetor comes from the factory with a standard setting. This setting provides an optimum fuel-air mixture under most operating conditions. With this carburetor it is only possible to adjust the high speed and low speed screws within fine limits. BR 500, BR 550, BR 600 - Stihl BR 600 | Instruction Manual - Page 25
start or runs poorly at idling speed, first check the spark plug. Fit a new spark plug after approx. 100 operating hours or earlier if the electrodes are badly eroded. Wrong fuel mix (too much engine oil in the gasoline), a dirty air filter and unfavorable running conditions (mostly at part throttle - Stihl BR 600 | Instruction Manual - Page 26
. Rectify problems which have caused fouling of spark plug: - too much oil in fuel mix, - dirty air filter, - unfavorable running conditions, e.g. operating at part load. 2 WARNING To reduce the risk of fire and burn injury, use only spark plugs authorized by STIHL. Always press spark plug boot - Stihl BR 600 | Instruction Manual - Page 27
the starter grip to snap back, guide it back into the housing slowly - see chapter on "Starting / Stopping the Engine." Have a damaged starter rope replaced by your dealer before it breaks completely. STIHL recommends that you have servicing and repair work carried out exclusively by an authorized - Stihl BR 600 | Instruction Manual - Page 28
have servicing and repair work carried out exclusively by an authorized STIHL servicing dealer. Fuel Pickup Body in Tank N Have the pickup body in the fuel tank replaced every year. Spacer N Check spacer for damage. N Have damaged spacer replaced immediately. 26 452BA126 KN BR 500, BR 550, BR 600 - Stihl BR 600 | Instruction Manual - Page 29
before starting work after finishing work or daily after each refueling stop weekly monthly every 12 months if problem if damaged as required Complete machine Control handle Air filter Manual fuel pump (if fitted) Filter in fuel tank Fuel tank Carburetor Spark plug Cooling inlets Valve clearance - Stihl BR 600 | Instruction Manual - Page 30
X X Throttle cable Adjust Safety labels Replace 1) STIHL recommends an authorized STIHL servicing dealer. before starting work after finishing work or daily after each refueling stop weekly monthly every 12 months if problem if damaged as required X X X X X X 28 BR 500, BR 550, BR 600 - Stihl BR 600 | Instruction Manual - Page 31
4 Blower Tube (BR 500 / 550 / 600) 5 Control Handle 6 Throttle Trigger 7 Setting Lever 8 Pleated Hose 9 Harness 10 Backplate 11 Intake Screen 12 Air Filter Cover 13 Fuel Filler Cap 14 Spark Plug Boot 15 Muffler (with Spark Arresting Screen) 16 Carburetor Adjusting Screws 17 Choke Knob 18 Manual Fuel - Stihl BR 600 | Instruction Manual - Page 32
gases away from operator. Spark arresting screen is designed to reduce the risk of fire. 16. Carburetor Adjusting Screws For tuning the carburetor. 17. Choke Knob Eases engine starting by enriching mixture. 18. Manual Fuel Pump Provides additional fuel feed for a cold start. 19. Starter Grip The - Stihl BR 600 | Instruction Manual - Page 33
magneto ignition Spark plug (resistor NGK CMR 6 H, type): BOSCH USR 4AC Electrode gap: 0,02 in. (0,5 mm) Fuel System dry BR 500: BR 550: BR 600: All position diaphragm carburetor with integral fuel pump Fuel tank capacity: 47.3 fl.oz (1.4 l) Blowing performance Maximum air flow rate BR 500 - Stihl BR 600 | Instruction Manual - Page 34
and other emission-related assemblies. Where a warrantable condition exists, STIHL Incorporated will repair your small off-road equipment engine at no cost to you, including diagnosis (if the diagnostic work is performed at an authorized dealer), parts, and labor. 32 BR 500, BR 550, BR 600 - Stihl BR 600 | Instruction Manual - Page 35
owner. STIHL Incorporated is liable for damages to other engine components caused by the failure of a warranted part still under warranty. The following list specifically defines the emission-related warranted parts: - Air Filter - Carburetor (if applicable) - Fuel Pump BR 500, BR 550, BR 600 33 - Stihl BR 600 | Instruction Manual - Page 36
include parts such as the carburetor or fuel-injection system, the ignition system, and catalytic converter. Also included may be hoses, belts, connectors or other emission-related assemblies. Where a warrantable condition exists, STIHL Incorporated will repair your small off-road equipment engine - Stihl BR 600 | Instruction Manual - Page 37
part on your equipment is defective, the part will be repaired or replaced by STIHL Incorporated free of charge. Owner's Warranty Responsibilities As the small off-road equipment engine owner, you are responsible for performance of the required maintenance listed in your instruction manual. STIHL - Stihl BR 600 | Instruction Manual - Page 38
. Emission Warranty Parts List Air Filter, Carburetor (if applicable), Fuel Pump, Choke (Cold Start Enrichment System) (if applicable), Control Linkages, Intake Manifold, Magneto or Electronic Ignition System (Ignition Module or Electronic Control Unit), Fly Wheel, Spark Plug, Injection Valve (if - Stihl BR 600 | Instruction Manual - Page 39
® STIHL Cutquik® STIHL DUROMATIC® STIHL Quickstop® STIHL ROLLOMATIC® STIHL WOOD BOSS® TIMBERSPORTS® WOOD BOSS® YARD BOSS® Some of STIHL's Common Law Trademarks STIHL InjectionTM AUTOCUT® EASYSTART® FARM BOSS® iCademy® MAGNUM® MasterWrench Service® MotoMix® BR 500, BR 550, BR 600 4-MIX ™ BioPlus - Stihl BR 600 | Instruction Manual - Page 40
hombro 53 Motor 4-MIX 53 Combustible 54 filtro de aire 61 Gesti manual de instrucciones está protegido por derechos de propiedad intelectual. Todos los derechos reservados, especialmente los derechos de reproducción, traducción y procesamiento con sistemas electrónicos. BR 500, BR 550, BR 600 - Stihl BR 600 | Instruction Manual - Page 41
cambios, modificaciones y mejoras no se describen en este manual. Si las características de funcionamiento o la apariencia de su español / EE.UU máquina difieren de las descritas en este manual, comuníquese con el concesionario STIHL para obtener la ayuda que requiera. BR 500, BR 550, BR 600 39 - Stihl BR 600 | Instruction Manual - Page 42
soplador tiene un motor de gasolina y produce un chorro de aire fuerte, es necesario tomar medidas especiales de seguridad para reducir el seguridad y avisos contenidos en este manual se refieren al uso de todos los sopladores de STIHL. Los distintos modelos pueden contar 40 BR 500, BR 550, BR 600 - Stihl BR 600 | Instruction Manual - Page 43
y del síndrome del túnel carpiano, sírvase notar lo siguiente: - La mayor parte de las herramientas motorizadas de STIHL se ofrecen con un sistema antivibración ("AV") cuyo propósito es reducir la transmisión de lesiones el operador debe usar el equipo protector adecuado. BR 500, BR 550, BR 600 41 - Stihl BR 600 | Instruction Manual - Page 44
máquina si está dañada. En caso de dudas, pida que el concesionario de servicio de STIHL la revise. ADVERTENCIA Las partículas pequeñas (por ej. el polvo) que pasan por los tubos del soplador y la impedir su vuelco, el derrame de combustible y el daño a la máquina. 42 BR 500, BR 550, BR 600 - Stihl BR 600 | Instruction Manual - Page 45
STIHL utiliza una mezcla de aceite-gasolina como combustible (vea el capítulo "Combustible" en el manual herramienta motorizada en lugares al aire libre bien ventilados. Siempre BR 500, BR 550, BR 600 Para hacer esto con esta tapa STIHL, levante la empuñadura en la parte superior de la tapa - Stihl BR 600 | Instruction Manual - Page 46
de servicio de inmediato y llévela a un concesionario STIHL autorizado para repararla. 452BA121 KN 001BA227 KN Tapa roscada también el capítulo "Combustible" del Manual de instrucciones para obtener información adicional. partes visibles, por ejemplo, la tapa de 44 BR 500, BR 550, BR 600 - Stihl BR 600 | Instruction Manual - Page 47
y comuníquese con el representante STIHL para las reparaciones del caso. ADVERTENCIA por quemaduras, arranque el motor al aire libre, por lo menos 3 lesiones a los ojos u otras partes del cuerpo, asegúrese que sección correspondiente en el manual del usuario. Coloque la BR 500, BR 550, BR 600 45 - Stihl BR 600 | Instruction Manual - Page 48
superficie de soporte poco seguro. Condiciones de trabajo Maneje y arranque su herramienta motorizada solamente al aire libre en un lugar bien ventilado. Manéjela solamente en condiciones de buena visibilidad y a la disipación de los gases antes de que se puedan concentrarse. BR 500, BR 550, BR 600 - Stihl BR 600 | Instruction Manual - Page 49
inserte objetos extraños en la toma de aire de la máquina ni en la boquilla del soplador. Esto puede dañar el rotor del ventilador y puede causar lesiones graves al operador o a las demás personas, como resultado de los objetos o partículas lanzados a velocidad alta. BR 500, BR 550, BR 600 47 - Stihl BR 600 | Instruction Manual - Page 50
polvo, etc. pueden aspirarse por la toma de aire y dañar el rotor del ventilador. Se riesgo de incendio debido a la emisión de partículas calientes. Nunca haga funcionar la unidad sin secas. ADVERTENCIA Algunas herramientas motorizadas STIHL están equipadas con un convertidor BR 500, BR 550, BR 600 - Stihl BR 600 | Instruction Manual - Page 51
o reparación que no esté descrito en este manual de instrucciones. Este tipo de trabajo debe ser realizado únicamente por el concesionario de servicio de STIHL. No limpie la máquina con una lavadora a contacto directo con la piel y evite inhalar los vapores de combustible. BR 500, BR 550, BR 600 49 - Stihl BR 600 | Instruction Manual - Page 52
(1) a la marca apropiada en el tubo (2). N Gire el tubo del soplador (1) en el sentido de la flecha y engancharlo en la ranura apropiada (3). BR 550, BR 600 12 3 N Alinee el mango de control (1) con la junta del tubo, como se muestra. N Asegure el mango de control (1) con el tornillo (3) de - Stihl BR 600 | Instruction Manual - Page 53
hasta que las orejetas (3) no sean visibles. N Extraiga la boquilla (1) del tubo del soplador (2). N Enganche el cable del acelerador (4) con el manguito (5) en el retenedor (6). BR 500, BR 550, BR 600 51 - Stihl BR 600 | Instruction Manual - Page 54
aceleración hasta que se sienta la resistencia inicial. N Fije la tira de Velcro al tubo del soplador - tire de la solapa por la hebilla. 52 BR 500, BR 550, BR 600 - Stihl BR 600 | Instruction Manual - Page 55
. 373BA004 KN español / EE.UU Motor 4-MIX El motor STIHL 4-MIX se lubrica con gasolina y aceite y debe funcionar con una mezcla de gasolina y aceite para motor. Por lo demás, es un motor de cuatro tiempos. 373BA003 KN N Tire hacia abajo de los extremos de las correas. BR 500, BR 550, BR 600 53 - Stihl BR 600 | Instruction Manual - Page 56
dos tiempos diseñado para usar exclusivamente con los motores de dos tiempos enfriados por aire. Se recomienda usar aceite STIHL HP Ultra para motores de 2 tiempos, puesto que éste ha sido formulado especialmente primero y luego agregue la gasolina. Cierre el envase y agítelo 54 BR 500, BR 550, BR 600 - Stihl BR 600 | Instruction Manual - Page 57
el aceite y la gasolina. Gasolina gal EE.UU. 1 2 1/2 5 Aceite (STIHL 50:1 ó aceite de alta calidad equivalente) oz fl EE.UU. 2,6 6,4 12 necesidad de herramientas (con empuñadura plegable) 452BA123 KN 452BA125 KN BR 500, BR 550, BR 600 N Antes de llenar la máquina con combustible, limpie a fondo - Stihl BR 600 | Instruction Manual - Page 58
del cierre N La orejeta de la empuñadura deberá encajar completamente en la hendidura (flecha) y la empuñadura debe quedar completamente a ras con la parte superior de la tapa. 452BA117 KN N Mientras presiona la tapa hacia abajo con firmeza, gírela en sentido horario hasta que tope (aprox. 1/4 de - Stihl BR 600 | Instruction Manual - Page 59
de llenado roscada 002BA447 KN A temperaturas bajo +10°C (50°F): 2 1 N Quite la cubierta del filtro (1) y el elemento del filtro de aire (2). 002BA448 KN BR 500, BR 550, BR 600 452BA085 KN N Coloque la tapa en posición. N Gire la tapa en sentido horario hasta que tope y apriétela hasta donde - Stihl BR 600 | Instruction Manual - Page 60
Apriete el tornillo (3) firmemente. N Vuelva a colocar la cubierta del filtro y el elemento del filtro de aire. A temperaturas sobre +20°C (70°F): N Siempre vuelva a colocar el obturador (4) en la posición de veces, aunque el bulbo esté lleno de combustible. 452BA115 KN 58 BR 500, BR 550, BR 600 - Stihl BR 600 | Instruction Manual - Page 61
el motor está caliente: N continúe haciendo girar el motor hasta que arranque. Tan pronto arranca Déjelo regresar el motor a la velocidad de marcha en vacío. BR 500, BR 550, BR 600 59 - Stihl BR 600 | Instruction Manual - Page 62
bulbo esté lleno de combustible. N Ajuste la perilla del estrangulador según la temperatura del motor. N Ahora arranque el motor. N Gire la perilla del estrangulador a n. 60 BR 500, BR 550, BR 600 - Stihl BR 600 | Instruction Manual - Page 63
en vacío de modo que el calor en el motor sea disipado por la corriente de aire de enfriamiento. Esto ayuda a evitar que los componentes montados en el motor (encendido, perilla del estrangulador a l. N Afloje los tornillos (1). N Quite la cubierta del filtro (2). BR 500, BR 550, BR 600 61 - Stihl BR 600 | Instruction Manual - Page 64
envuelta. HL Estas máquinas han sido ajustadas en fábrica para formar una mezcla óptima de combustible-aire en todas las ubicaciones y condiciones de funcionamiento. Ajuste de marcha en vacío El motor se para vuelta. N Abra el tornillo de velocidad baja (L) 3/4 de vuelta. 62 BR 500, BR 550, BR 600 - Stihl BR 600 | Instruction Manual - Page 65
Si la mezcla del combustible es incorrecta (demasiado aceite en la gasolina), el filtro de aire está sucio, y las condiciones de trabajo no son favorables (especialmente a aceleraciones intermedias) el casquillo de la bujía (1). N Destornille la bujía (2). 452BA092 KN BR 500, BR 550, BR 600 63 - Stihl BR 600 | Instruction Manual - Page 66
aceite en la mezcla de combustible, - filtro de aire sucio, - condiciones desfavorables de funcionamiento, por ejemplo, incendio y de quemaduras, utilice solamente las bujías autorizadas por STIHL. Siempre empuje el casquillo (1) de la bujía firmemente en el firmemente). 64 BR 500, BR 550, BR 600 - Stihl BR 600 | Instruction Manual - Page 67
ñada oportunamente. STIHL recomienda que un concesionario STIHL autorizado efectúe ón especial a las aletas del cilindro y al filtro de aire. N Guarde la máquina en un lugar seco y elevado carbón, instale uno nuevo. N Vuelva a instalar el chispero. N Instale el deflector. BR 500, BR 550, BR 600 65 - Stihl BR 600 | Instruction Manual - Page 68
español / EE.UU Inspección y mantenimiento por el concesionario STIHL recomienda que un concesionario STIHL autorizado efectúe los trabajos de mantenimiento y reparación. Captador de combustible en Solicite la sustitución de un espaciador averiado de inmediato. 66 452BA126 KN BR 500, BR 550, BR 600 - Stihl BR 600 | Instruction Manual - Page 69
X Mango de control Comprobar el funcionamiento X X Filtro de aire Limpiar Reemplazar X X Revisar X Bomba de combustible manual (si la tiene) Solicitar al concesionario de servicio su reparaci de combustión 139 horas de funcionamiento, y luego X cada 150 horas BR 500, BR 550, BR 600 67 - Stihl BR 600 | Instruction Manual - Page 70
STIHL autorizado para servicio. antes de comenzar el trabajo después de completar el trabajo o diariamente después de cada parada para cargar combustible semanalmente mensualmente cada 12 meses si hay problemas si presenta daños según se requiera X X X X X X X X X 68 BR 500, BR 550, BR 600 - Stihl BR 600 | Instruction Manual - Page 71
llenado de combustible 14 Casquillo de bujía 15 Silenciador (con chispero) 16 Tornillos de ajuste del carburador 17 Perilla de estrangulador 18 Bomba de combustible manual 19 Mango de arranque 20 Tanque de combustible 21 Espaciador # Número de serie 452BA127 KN BR 500, BR 550, BR 600 69 - Stihl BR 600 | Instruction Manual - Page 72
manual Suministra aire CARB tiene las siguientes definiciones: Extended = 300 horas Intermediate = 125 horas Moderate = 50 horas Motor Motor STIHL 4-MIX Cilindrada: Diámetro: Carrera: Marcha en vacío: 64,8 cc (3,95 pulg cúb.) 50 mm (1,97 pulg) 33 mm (1,3 pulg) 2500 rpm 70 BR 500, BR 550, BR 600 - Stihl BR 600 | Instruction Manual - Page 73
pies cúb./min) BR 600: 1720 m3/h (1012 pies cúb./min) Caudal de aire con boquilla: BR 500 810 m3/h (477 pies cúb./min) BR 550: 900 m3/h (530 pies cúb./min) BR 600: 1012 m3/h (712 pies cúb./min) español / EE.UU Accesorios especiales Comuníquese con su concesionario STIHL para informaci - Stihl BR 600 | Instruction Manual - Page 74
manual. STIHL recomienda que un concesionario de servicio STIHL STIHL utilizando piezas de repuesto originales de STIHL. Los repuestos originales STIHL se identifican por medio del número de pieza STIHL, el logotipo { y el símbolo de piezas STIHL STIHL STIHL STIHL STIHL comprador. STIHL Incorporated - Stihl BR 600 | Instruction Manual - Page 75
usted tiene la responsabilidad de realizar el mantenimiento requerido descrito en su manual de instrucciones. STIHL Incorporated le recomienda guardar todos los recibos comprobantes de los trabajos de usted reclama garantía para un componente y se comprueba que la BR 500, BR 550, BR 600 73 - Stihl BR 600 | Instruction Manual - Page 76
y relacionadas con las emisiones: - Filtro de aire - Carburador (si corresponde) - Bomba de STIHL Incorporated, y N la sustitución de piezas y otros servicios y ajustes necesarios para el mantenimiento requerido en y después del primer punto de reemplazo programado. 74 BR 500, BR 550, BR 600 - Stihl BR 600 | Instruction Manual - Page 77
por evaporación para el Estado de California Solamente para California Sus derechos y obligaciones de garantía El Consejo de Recursos del Aire del Estado de California (CARB) y STIHL Incorporated se complacen en explicarle la Garantía del sistema de control de emisiones instalado en el motor de su - Stihl BR 600 | Instruction Manual - Page 78
el Consejo de Recursos del Aire (CARB). El uso de cualquier componente adicional o modificado no eximido será motivo para la denegación del reclamo bajo garantía. STIHL Incorporated no es responsable por de control de emisiones, y la misma debe ser suministrada gratis al 76 BR 500, BR 550, BR 600 - Stihl BR 600 | Instruction Manual - Page 79
/ EE.UU Marcas comerciales Marcas registradas de STIHL STIHL® { K La combinación de colores anaranjadogris (Números de registro EE.UU. 2,821,860; 3,010,057, 3,010,058, 3,400,477; y 3,400,476) AUTOCUT® EASYSTART® FARM BOSS® iCademy® MAGNUM® MasterWrench Service® MotoMix® BR 500, BR 550, BR 600 77 - Stihl BR 600 | Instruction Manual - Page 80
RAPID ™ STIHL SuperCut ™ STIHL Territory ™ TapAction ™ TrimCut ™ Esta lista de marcas comerciales está sujeta a cambios. Queda terminantemente prohibido todo uso de estas marcas comerciales sin el consentimiento expreso por escrito de ANDREAS STIHL AG & Co. KG, Waiblingen. BR 500, BR 550, BR 600 - Stihl BR 600 | Instruction Manual - Page 81
español / EE.UU BR 500, BR 550, BR 600 79 - Stihl BR 600 | Instruction Manual - Page 82
español / EE.UU 80 BR 500, BR 550, BR 600 - Stihl BR 600 | Instruction Manual - Page 83
- Stihl BR 600 | Instruction Manual - Page 84
WARNING The engine exhaust from this product contains chemicals known to the State of California to cause cancer, birth defects or other reproductive harm. 0458-452-8621-G eenngglliisscchh // ssppaanniisscchh UUSSAA U G U www.stihl.com ADVERTENCIA El gas de escape del motor de esta máquina contiene
-
 1
1 -
 2
2 -
 3
3 -
 4
4 -
 5
5 -
 6
6 -
 7
7 -
8
-
9
-
10
-
11
-
12
-
13
-
14
-
15
-
16
-
17
-
18
-
19
-
20
-
21
-
22
-
23
-
24
-
25
-
26
-
27
-
28
-
29
-
30
-
31
-
32
-
33
-
34
-
35
-
36
-
37
-
38
-
39
-
40
-
41
-
42
-
43
-
44
-
45
-
46
-
47
-
48
-
49
-
50
-
51
-
52
-
53
-
54
-
55
-
56
-
57
-
58
-
59
-
60
-
61
-
62
-
63
-
64
-
65
-
66
-
67
-
68
-
69
-
70
-
71
-
72
-
73
-
74
-
75
-
76
-
77
-
78
-
79
-
80
-
81
-
82
-
83
-
84
 |
 |

{
STIHL BR 500, 550, 600
WARNING
Read Instruction Manual thoroughly
before use and follow all safety
precautions – improper use can
cause serious or fatal injury.
ADVERTENCIA
Antes de usar la máquina lea y siga
todas las precauciones de
seguridad dadas en el manual de
instrucciones – el uso incorrecto
puede causar lesiones graves o
mortales.
Instruction Manual
Manual de instrucciones