Stihl FS 250 Product Instruction Manual
Stihl FS 250 Manual
 |
View all Stihl FS 250 manuals
Add to My Manuals
Save this manual to your list of manuals |
Stihl FS 250 manual content summary:
- Stihl FS 250 | Product Instruction Manual - Page 1
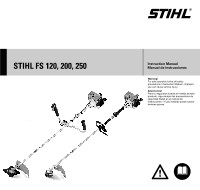
STIHL FS 120, 200, 250 STIH) Instruction Manual Manual de instrucciones Warning! For safe operation follow all safety precautions in Instruction Manual - improper use can cause serious injury. Advertencia! Para su seguridad durante el manejo de este producto, siga siempre las precauciones de - Stihl FS 250 | Product Instruction Manual - Page 2
Cutting Tools 26 Fuel 30 Fueling 31 Fitting the Harness 32 Balancing the Brushcutter 33 Starting / Stopping the Engine ........ 34 Operating Instructions 37 Cleaning the Air Filter 37 Motor Management 38 Adjusting the Carburetor 38 Checking the Spark Plug 40 Engine Running Behavior 41 - Stihl FS 250 | Product Instruction Manual - Page 3
English / USA Guide to Using this Manual Pictograms All the pictograms attached to the machine are shown and explained in this manual. The operating and handling instructions are supported by illustrations. Symbols in text The individual steps or procedures described in the manual may be marked in - Stihl FS 250 | Product Instruction Manual - Page 4
, may result in serious or fatal injury to the operator or bystanders. STIHL does not recommend the use of rigid blades when cutting in stony areas. Use your trimmer/brushcutter equipped with the appropriate cutting attachment only for cutting grass, brush, wood and similar material. It must not be - Stihl FS 250 | Product Instruction Manual - Page 5
apply to the use of all STIHL trimmer/brushcutters. Different models may have different parts and controls. See the appropriate section of your instruction manual for a description of the controls and the function of the parts of your model. Safe use of a trimmer/brushcutter involves 1. the operator - Stihl FS 250 | Product Instruction Manual - Page 6
!Warning! The ignition system of the STIHL unit produces an thrown back by the rotating cutting attachment. Thrown objects may also ricochet sound barriers (ear plugs or ear mufflers) gloves when handling the machine and metal blades. Heavy- FS 120, FS 120 R, FS 200, FS 200 R, FS 250, FS 250 R 5 - Stihl FS 250 | Product Instruction Manual - Page 7
STIHL power tools, their use may, in fact, be extremely dangerous. For the cutting attachments authorized by STIHL for your unit, see the chapter "Approved Combinations of Cutting Attachment, Deflector, Handle and Harness" in the instruction manual or the STIHL "Power Tools and Accessories" catalog - Stihl FS 250 | Product Instruction Manual - Page 8
(see the chapter on "Fuel" of your instruction manual). !Warning! Gasoline is an extremely flammable fuel. If spilled and ignited by a spark or other ignition source, it can cause fire and serious burn injury or property damage. Use extreme caution when handling gasoline or fuel mix. Do not smoke or - Stihl FS 250 | Product Instruction Manual - Page 9
your deflector, handle and/or harness. Keep the deflector (and the attached skirt where appropriate) adjusted properly at all times (see chapters on "Mounting the Deflector" and "Mounting the Cutting Attachments" of your instruction manual). 8 FS 120, FS 120 R, FS 200, FS 200 R, FS 250, FS 250 R - Stihl FS 250 | Product Instruction Manual - Page 10
attachment should not move. For directions on how to adjust idle speed, see the appropriate section of your instruction manual. If you cannot set the correct idle speed, have your STIHL dealer check your power tool and make proper adjustments and repairs. FS 120, FS 120 R, FS 200, FS 200 R, FS 250 - Stihl FS 250 | Product Instruction Manual - Page 11
or on any other insecure support. Never hold the cutting attachment above waist height. Working conditions Operate and start your power tool only outdoors and follow the instructions and warnings that accompanied the substance at issue. 10 FS 120, FS 120 R, FS 200, FS 200 R, FS 250, FS 250 R - Stihl FS 250 | Product Instruction Manual - Page 12
attachment stopped. If the behavior of the attachment changes during use, stop the engine immediately, wait until the cutting attachment stops, and check the nut securing the attachment for tightness and the blade or head for cracks, wear and damage. FS 120, FS 120 R, FS 200, FS 200 R, FS 250, FS - Stihl FS 250 | Product Instruction Manual - Page 13
loosens after being properly tightened, stop work immediately. The retaining nut may be worn or damaged and should be replaced. If the blade or head continues to loosen, see your STIHL dealer. Never use a trimmer/brushcutter with a loose cutting attachment. !Warning! Replace a cracked, or damaged or - Stihl FS 250 | Product Instruction Manual - Page 14
screen, have your muffler maintained by a STIHL servicing dealer. USING THE CUTTING ATTACHMENTS For an illustration of the various cutting attachments and instructions on proper mounting see the chapter on "Mounting the Cutting Attachments" in your instruction manual. Using the Mowing Heads Do not - Stihl FS 250 | Product Instruction Manual - Page 15
002BA177 KN English / USA Mowing heads are to be used only on trimmer/brushcutters equipped with a line-limiting blade in the deflector in order to keep the line at the proper length (see "Parts and Controls" chapter in your instruction manual). If the lawn edges are planted with trees or bordered - Stihl FS 250 | Product Instruction Manual - Page 16
but keep the tool below waist height at all times. Exercise extreme caution when using this method of cutting. The higher the cutting attachment is off the ground, the greater the risk of loss of control and of cuttings being thrown sideways. FS 120, FS 120 R, FS 200, FS 200 R, FS 250, FS 250 R 15 - Stihl FS 250 | Product Instruction Manual - Page 17
as specified - dull teeth may cause the blade to crack or shatter. When a trimmer/brushcutter with a circular saw blade is used to cut down small trees, STIHL recommends that the standard deflector be removed and replaced by the special limit stop deflector (see chapter on "Mounting the Deflector - Stihl FS 250 | Product Instruction Manual - Page 18
STIHL replacement parts for maintenance and repair. Use of non-STIHL parts may cause serious or fatal injury. Strictly follow the maintenance and repair instructions in the appropriate sections of your instruction manual. !Warning! Always stop the engine and make sure that the cutting attachment - Stihl FS 250 | Product Instruction Manual - Page 19
adjustment screws, after each use. Store the power tool in a dry and high or locked location out of reach of children. Before storing for longer than a few days, always empty the fuel tank. See chapter "Storing the Machine" in the instruction manual. 18 FS 120, FS 120 R, FS 200, FS 200 R, FS 250 - Stihl FS 250 | Product Instruction Manual - Page 20
tools and brush knife 16 Limit stop for circular saw blades Handles 17 Loop handle 18 Loop handle with 19 Barrier bar 20 Bike handle Harnesses 21 Shoulder strap may be used 22 Shoulder strap must be used 23 Full harnesss may be used 24 Full harnesss must be used Equipment Among other parts, the - Stihl FS 250 | Product Instruction Manual - Page 21
9 681FK011 681FK006 681FK003 681FK111 KN 681FK037 KN 681FK006 Deflector 12 13 15 16 Handle 17 18 14 20 18 20 Harness / Shoulder Strap 19 21 FS 120, FS 120 R, FS 200, FS 200 R, FS 250, FS 250 R 681FK024 681FK021 681BA002 KN 681FK023 20 24 24 002BA001 K 002BA006 K 002BA026 KN 22 - Stihl FS 250 | Product Instruction Manual - Page 22
cm). : Place the upper clamp in position and hold both clamps together. : Push the wing screw, with washer, through the two clamps as far as stop - hold all parts together and secure them. FS 120, FS 120 R, FS 200, FS 200 R, FS 250, FS 250 R 21 - Stihl FS 250 | Product Instruction Manual - Page 23
assembly on the handle support (8) with the wing screw at the engine side. : Push the wing screw into the handle support as far as stop and then screw it Adjustment : Go to chapter "Adjusting the Throttle Cable". 002BA234 KN 250BA002 KN 22 FS 120, FS 120 R, FS 200, FS 200 R, FS 250, FS 250 - Stihl FS 250 | Product Instruction Manual - Page 24
barrier bar (2) in position. : Note correct position! : Line up the holes. : Insert screws (7) in holes and screw them into the barrier bar as far as stop. : Go to "Securing the loop handle". FS 120, FS 120 R, FS 200, FS 200 R, FS 250, FS 250 R 23 - Stihl FS 250 | Product Instruction Manual - Page 25
starting throttle and idle positions. Adjust the throttle cable only after the unit is fully assembled - the control handle must be in the normal operating position. : Use a suitable tool to push the slide to the bottom of the slot (see illustration). 24 FS 120, FS 120 R, FS 200, FS 200 R, FS 250 - Stihl FS 250 | Product Instruction Manual - Page 26
2 = Deflector approved for use with mowing heads only : Place the deflector on the gearhead. : Fit the plate (3) and line it up. : Insert M 5 x 18 screws and tighten down firmly. 1) Included as standard or available as special accessory FS 120, FS 120 R, FS 200, FS 200 R, FS 250, FS 250 R 25 - Stihl FS 250 | Product Instruction Manual - Page 27
the Cutting Tools 77 4 6 4 1 5 7 Preparations : Lay your brushcutter on its back with the gearhead facing upward. Fitting skirt and blade These parts must be fitted to the deflector (1) when you use a mowing head: : Slide the lower guide slot of the skirt (4) onto the deflector (1) - it must - Stihl FS 250 | Product Instruction Manual - Page 28
are in the parts kit supplied with the Use the combination wrench (6) (supplied with machine or available as special accessory) to unscrew the nut (3) clockwise (left-hand thread) from the shaft (2). : Pull the thrust washer (5) off the shaft (2). FS 120, FS 120 R, FS 200, FS 200 R, FS 250, FS 250 - Stihl FS 250 | Product Instruction Manual - Page 29
(8) in the gearhead as far as stop - apply slight pressure. : Rotate nut or cutting tool on the shaft (2) until the stop pin slips into position and blocks the shaft. Mounting the mowing head Keep instruction sheet for mowing head in a safe place : Screw the STIHL SuperCut 20-2, STIHL AutoCut 25 - Stihl FS 250 | Product Instruction Manual - Page 30
before mounting grass cutting blade 230-4 (1), grass cutting blade 230-8 (2), or brush knife (3) - see "Mounting the Deflector" Fit the appropriate limit stop before mounting the circular saw blade 200 (4,5) - see "Mounting the Deflector". FS 120, FS 120 R, FS 200, FS 200 R, FS 250, FS 250 R 29 - Stihl FS 250 | Product Instruction Manual - Page 31
, fuel lines, etc.), but magnesium castings and catalytic converters as well. This could cause running problems or even damage the engine. For this reason STIHL recommends that you use only nationally recognized high-quality unleaded gasoline! 30 FS 120, FS 120 R, FS 200, FS 200 R, FS 250, FS 250 - Stihl FS 250 | Product Instruction Manual - Page 32
(twostroke water cooled) mix oils or other mix oils that state they are for use in both water cooled and air cooled engines (e.g., outboard motors, snowmobiles, chainsaws, mopeds, etc.). Take care when handling gasoline. Avoid direct contact with the skin and avoid inhaling fuel vapor. When filling - Stihl FS 250 | Product Instruction Manual - Page 33
(1). : Adjust length until the spring hook (2) is about a hand's width below your right hip. : Balance the brushcutter. The use of the harness is described in chapter "Approved Combinations of Cutting Tool, Deflector, Handle and Harness". 32 FS 120, FS 120 R, FS 200, FS 200 R, FS 250, FS 250 R - Stihl FS 250 | Product Instruction Manual - Page 34
, grass cutting blades and brush knife should just touch the ground. B Circular saw blades should "hover" about 8" (20 cm ) above the ground. When the correct floating position has been reached: : Tighten down the screw on the carrying ring. FS 120, FS 120 R, FS 200, FS 200 R, FS 250, FS 250 R 33 - Stihl FS 250 | Product Instruction Manual - Page 35
control (3) Positions of slide control STOP-O (4) - engine off - the ignition is switched off # - normal run position (5) - the engine is running or can start START (6) - the ignition is switched on, the engine can start STOP- START STOP 34 FS 120, FS 120 R, FS 200, FS 200 R, FS 250, FS 250 R - Stihl FS 250 | Product Instruction Manual - Page 36
(8): For cold start to g For warm start to e even if engine has been running but is still cold : Press fuel pump bulb (9) at least five times - even if the bulb is already filled with fuel. 250BA018 KN : Place the unit on the ground: It must rest securely on the engine support and deflector. Check - Stihl FS 250 | Product Instruction Manual - Page 37
to e : Select starting throttle position. : Start the engine by pulling the starter rope firmly. 10 to 20 pulls may be necessary. If the engine still does not start: 10 : Move the slide control to STOP-O. : Pull off the spark plug boot (10). 36 FS 120, FS 120 R, FS 200, FS 200 R, FS 250, FS 250 R - Stihl FS 250 | Product Instruction Manual - Page 38
(ignition, carburetor) from thermal overload. After finishing work Wait for engine to cool down. Drain the fuel tank. Store the machine in a dry place. Check tightness of nuts and screws (not adjusting screws) at regular intervals and retighten as necessary. 1 3 2 Dirty air filters reduce engine - Stihl FS 250 | Product Instruction Manual - Page 39
carburetor comes from the factory with a standard setting. This setting is designed to provide an optimum fuel-air mixture under most operating conditions. With this carburetor it is only possible to adjust the engine idle speed within fine limits. 38 FS 120, FS 120 R, FS 200, FS 200 R, FS 250, FS - Stihl FS 250 | Product Instruction Manual - Page 40
off the engine. : Mount the cutting tool. : Check the air filter and replace if necessary. : Check that throttle cable is properly adjusted - readjust if necessary - see chapter "Adjusting the Throttle Cable". : Turn high speed screw (H) counterclockwise (max. 3/4 turn) as far as stop. : Carefully - Stihl FS 250 | Product Instruction Manual - Page 41
/ Stopping the Engine". : Clean dirty spark plug. : Check the electrode gap (A) and readjust if necessary - see "Specifications". : Use only resistor type spark plugs of the approved range. Rectify problems which have caused fouling of spark plug: : Too much oil in fuel mix. : Dirty air filter - Stihl FS 250 | Product Instruction Manual - Page 42
USA 2 1 If engine running behavior is unsatisfactory even though the air filter is clean and the carburetor and throttle cable are properly adjusted, the cause may be in the muffler. Have your STIHL dealer inspect the muffler for carbonization. STIHL recommends that maintenance and repair work be - Stihl FS 250 | Product Instruction Manual - Page 43
1 32 4 256BA075 KN 5 6 32 4 256BA034 KN 256BA032 KN 256BA033 KN 256BA032 KN Replacing a Broken Starter Rope The rewind spring may pop out and uncoil during this operation. Take care pawl's peg - the spring clip must point clockwise. 42 FS 120, FS 120 R, FS 200, FS 200 R, FS 250, FS 250 R - Stihl FS 250 | Product Instruction Manual - Page 44
use rope guide bush. parts of spring. : Lubricate replacement spring starting outside and working inward. : Fit the screws. : Install the rope rotor as described under "Replacing a Broken Starter Rope". : Tension the rewind spring. : Fit the fan housing. FS 120, FS 120 R, FS 200, FS 200 R, FS 250, FS 250 - Stihl FS 250 | Product Instruction Manual - Page 45
accessory) and rebalanced as necessary. 1 2 1 1 2 2 : Resharpen the cutters (1) uniformly - do not alter the contour of the parent blade (2) in any way. See cutting tool packaging for additional sharpening instructions. 002BA042 KN 44 FS 120, FS 120 R, FS 200, FS 200 R, FS 250, FS 250 R - Stihl FS 250 | Product Instruction Manual - Page 46
handle Air filter Pick up body in fuel tank Fuel tank Carburetor Spark plug Cooling inlets Spark arresting screen* in muffler All accessible screws and nuts (not adjusting screws) Anti-vibration element Visual inspection (condition, leaks) X X Clean X Check operation X X Clean Replace - Stihl FS 250 | Product Instruction Manual - Page 47
. Cutting tools Metal cutting tools Gearbox lubrication Safety labels Inspect X Replace Check tightness X Sharpen X Check Replenish Replace 1) STIHL recommends that this work be done by a STIHL servicing dealer X X X X X X X 46 FS 120, FS 120 R, FS 200, FS 200 R, FS 250, FS 250 R - Stihl FS 250 | Product Instruction Manual - Page 48
Cable Retainer 11= Carrying Ring 12= Fuel Pump 13= Rotary Choke Knob 14= Air Filter Cover 15= Fuel Tank 16= Machine Support 17= Handle Support 18= Wing Screw 19= Loop Handle 20= Barrier Bar # Serial number FS 120, FS 120 R, FS 200, FS 200 R, FS 250, FS 250 R * see "Guide to Using this Manual" 47 - Stihl FS 250 | Product Instruction Manual - Page 49
Cap For closing the fuel tank.. 2. Carburetor Adjusting Screws For tuning the carburetor. 3. Starter Grip The grip of the pull starter, which is the device to start the engine. 4. Spark Plug Boot Connects the spark plug to the ignition lead. 5. Muffler (with spark arresting screen) Reduces exhaust - Stihl FS 250 | Product Instruction Manual - Page 50
Circular Saw Blade Cutting tool made of metal for cutting wood. 8. Limit Stop Is designed to position the brushcutter steady against the wood in order to reduce the risk of injury from loss of control from reactive forces such as thrust out. FS 120, FS 120 R, FS 200, FS 200 R, FS 250, FS 250 R 49 - Stihl FS 250 | Product Instruction Manual - Page 51
gap: 0.02 in (0.5 mm) Spark plug thread: M 14 x 1.25; 0.37 in long (9.5 mm) Fuel System Carburetor: All position diaphragm carburetor with integral fuel pump Air filter: Paper filter element Fuel tank capacity: 21.6 fl.oz (0.64 L) Fuel mix: See "Fuel" Rewind Starter Starter rope: Ø 0.11 - Stihl FS 250 | Product Instruction Manual - Page 52
described in this manual. Other repair work may be performed only by authorized STIHL service shops. Warranty claims following repairs can be accepted only if the repair has been performed by an authorized STIHL servicing dealer using original STIHL replacement parts. Original STlHL parts can be - Stihl FS 250 | Product Instruction Manual - Page 53
part on your engine is defective, the part will be repaired or replaced by STIHL Incorporated free of charge. Owner's Warranty Responsibilities: As the small off-road equipment engine owner, you are responsible for the performance of the required maintenance listed in your owner's manual. STIHL - Stihl FS 250 | Product Instruction Manual - Page 54
warranted parts: Carburetor Choke (Cold start enrichment system) Intake manifold Air filter Spark plug Magneto or electronic ignition system (ignition module) Catalytic converter (if applicable) Fasteners Where to make a claim for Warranty Service Bring the product to any authorized STIHL servicing - Stihl FS 250 | Product Instruction Manual - Page 55
part on your engine is defective, the part will be repaired or replaced by STIHL Incorporated free of charge. Owner's Warranty Responsibilities: As the small off-road equipment engine owner, you are responsible for the performance of the required maintenance listed in your owner's manual. STIHL - Stihl FS 250 | Product Instruction Manual - Page 56
warranted parts: Carburetor Choke (Cold start enrichment system) Intake manifold Air filter Spark plug Magneto or electronic ignition system (ignition module) Catalytic converter (if applicable) Fasteners Where to make a claim for Warranty Service Bring the product to any authorized STIHL servicing - Stihl FS 250 | Product Instruction Manual - Page 57
STIHL SuperCut™ STIHL Territory™ TapAction™ TrimCut™ This listing of trademarks is subject to change. Any unauthorized use of these trademarks without the express written consent of ANDREAS STIHL AG & Co. KG, Waiblingen is strictly prohibited. 56 FS 120, FS 120 R, FS 200, FS 200 R, FS 250, FS 250 - Stihl FS 250 | Product Instruction Manual - Page 58
/ parada del motor 90 Instrucciones de manejo 93 Limpieza del filtro de aire 93 Manejo del motor 94 Ajuste del carburador 94 Revisión de la buj STIHl FS 120, FS 120 R, FS 200, FS 200 R, FS 250, FS 250 R Permita que solamente las personas que comprenden la materia tratada en este manual - Stihl FS 250 | Product Instruction Manual - Page 59
máquina difieren de las descritas en este manual, comuníquese con el concesionario STIHL para obtener la ayuda que requiera. Por lo tanto, es posible que algunos cambios, modificaciones y mejoramientos no hayan sido descritos en este manual. 58 FS 120, FS 120 R, FS 200, FS 200 R, FS 250, FS 250 R - Stihl FS 250 | Product Instruction Manual - Page 60
en su modelo FS. Pida a su concesionario STIHL que le enseñe el manejo de la herramienta motorizada. Respete todas las disposiciones, reglamentos y normas de seguridad locales del caso. !Advertencia! No preste ni alquile nunca su herramienta motorizada sin entregar el manual de instrucciones. Aseg - Stihl FS 250 | Product Instruction Manual - Page 61
STIHL. Los distintos modelos pueden contar con piezas y controles diferentes. Vea la sección correspondiente de su manual sírvase notar lo siguiente: La mayor parte de las herramientas motorizadas de STIHL se ofrecen con un sistema antivibración ( FS 120, FS 120 R, FS 200, FS 200 R, FS 250, FS 250 R - Stihl FS 250 | Product Instruction Manual - Page 62
encendido de la máquina STIHL produce un campo electromagné ón adecuada en las partes superior y laterales que Use pantalones largos hechos de un material grueso para protegerse las piernas. No use pantalones cortos, sandalias o pies descalzos. FS 120, FS 120 R, FS 200, FS 200 R, FS 250, FS 250 - Stihl FS 250 | Product Instruction Manual - Page 63
aprobadas herramienta de corte, deflector, mango y arnés", en el manual de instrucciones o en el catálogo STIHL "Herramientas motorizadas y accesorios". Si la máquina experimenta cargas excesivas de corte detrás de usted. 389BA019 KN 62 FS 120, FS 120 R, FS 200, FS 200 R, FS 250, FS 250 R - Stihl FS 250 | Product Instruction Manual - Page 64
a ras con la parte superior de la tapa. Si no queda totalmente a ras y el tope en la empuñadura no encaja en el hueco correspondiente en el cuello de llenado, la tapa está mal asentada y apretada, se deberán repetir los pasos anteriores. FS 120, FS 120 R, FS 200, FS 200 R, FS 250, FS 250 R 63 - Stihl FS 250 | Product Instruction Manual - Page 65
Nunca intente modificar los controles o los dispositivos de seguridad. Nunca use una herramienta motorizada que esté dañada o mal cuidada. manual de instrucciones los capítulos de "Montaje del deflector" y "Montaje de los accesorios de corte"). 64 FS 120, FS 120 R, FS 200, FS 200 R, FS 250, FS 250 - Stihl FS 250 | Product Instruction Manual - Page 66
el motor al aire libre, por lo movimiento, no use una má manual de instrucciones. Si no puede regular correctamente el ralentí, pida a su concesionario STIHL que revise la herramienta motorizada y haga los ajustes o reparaciones correspondientes. FS 120, FS 120 R, FS 200, FS 200 R, FS 250, FS 250 - Stihl FS 250 | Product Instruction Manual - Page 67
corte. No toque nunca con las manos ni con cualquier parte del cuerpo un accesorio de corte en movimiento. !Advertencia! de trabajo Maneje y arranque su herramienta motorizada solamente al aire libre en un lugar bien ventilado. Manéjela solamente FS 120, FS 120 R, FS 200, FS 200 R, FS 250, FS 250 R - Stihl FS 250 | Product Instruction Manual - Page 68
inhalación repetida o de grandes cantidades de polvo u otros contaminantes del aire, especialmente los de partículas pequeñas puede causar enfermedades respiratorias o de otro tipo. Controle el cabezal en busca de grietas, desgaste y daños. FS 120, FS 120 R, FS 200, FS 200 R, FS 250, FS 250 R 67 - Stihl FS 250 | Product Instruction Manual - Page 69
continúa aflojándose, consulte al concesionario STIHL. No use nunca una orilladora/cortadora de matorrales con del hilo de nilón en las cabezas segadoras de ajuste manual. !Advertencia La caja de engranajes está caliente durante STIHL. 68 FS 120, FS 120 R, FS 200, FS 200 R, FS 250, FS 250 R - Stihl FS 250 | Product Instruction Manual - Page 70
de incendio debido a la emisión de partículas calientes. Debido al calor de la silenciador por un concesionario de servicio STIHL. USO DE LOS ACCESORIOS DE corte" en su manual de instrucciones. Uso de las cabezas segadoras No use con un hilo FS 120, FS 120 R, FS 200, FS 200 R, FS 250, FS 250 R 69 - Stihl FS 250 | Product Instruction Manual - Page 71
capítulo "Piezas y controles" en el manual de instrucciones). Si las orillas del césped KN Sin embargo, el cabezal PolyCut de STIHL con cuchilla de polímero produce un el riesgo de lesiones graves, nunca use un hilo de alambre o reforzado con FS 120, FS 120 R, FS 200, FS 200 R, FS 250, FS 250 R - Stihl FS 250 | Product Instruction Manual - Page 72
cortar pasto y malezas. Tiene 4 cuchillos con filo en los dos lados, esto es, en las partes delantera y trasera. Cuando los bordes cortantes en un lado se desafilan, es posible invertir la cuchilla en uno y otro sentido, describiendo un arco. FS 120, FS 120 R, FS 200, FS 200 R, FS 250, FS 250 R 71 - Stihl FS 250 | Product Instruction Manual - Page 73
la orilladora/cortadora de matorrales con una sierra circular para cortar árboles pequeños, STIHL recomienda retirar el deflector estándar y sustituirlo con el deflector de tope especial ( (descrito más arriba y brevemente otra vez más abajo). 72 FS 120, FS 120 R, FS 200, FS 200 R, FS 250, FS 250 R - Stihl FS 250 | Product Instruction Manual - Page 74
de la herramienta motorizada. No intente hacer ningún trabajo de mantenimiento o reparación que no esté descrito en su manual de instrucciones. Este tipo de trabajo debe ser realizado únicamente por el concesionario de servicio de STIHL. FS 120, FS 120 R, FS 200, FS 200 R, FS 250, FS 250 R 73 - Stihl FS 250 | Product Instruction Manual - Page 75
para manipular o reparar las cuchillas. !Advertencia! Use la bujía especificada y asegúrese de que ella y el cable de encendido están el tanque de combustible. Consulte el capítulo "Almacenamiento de la máquina" en el manual de instrucciones. 74 FS 120, FS 120 R, FS 200, FS 200 R, FS 250, FS 250 R - Stihl FS 250 | Product Instruction Manual - Page 76
para el tipo de accesorio de corte que está usando. ! Advertencia Las cortadoras de matorrales STIHL con mango tórico y sin barra de defensa sólo pueden usarse con la cabeza segadora arriba indicada matorrales con manillar tipo bicicleta. FS 120, FS 120 R, FS 200, FS 200 R, FS 250, FS 250 R 75 - Stihl FS 250 | Product Instruction Manual - Page 77
KN 681FK037 KN 681FK006 Deflector 12 13 15 Mango 17 18 14 20 18 20 Arnés / Correa para hombro 19 21 FS 120, FS 120 R, FS 200, FS 200 R, FS 250, FS 250 R 681FK024 681FK021 681BA002 KN 681FK023 20 24 24 002BA001 K 002BA006 K 002BA026 KN 22 19 002BA001 K 002BA003 K 002BA001 K 22 23 - Stihl FS 250 | Product Instruction Manual - Page 78
7 250BA046 KN 1 Los accesorios de herramientas motorizadas STIHL están disponibles para convertir rápidamente la máquina FS de un solo uso en otras herramientas motorizadas muy ú el tope - mantenga juntas todas las piezas y sujételas. FS 120, FS 120 R, FS 200, FS 200 R, FS 250, FS 250 R 77 - Stihl FS 250 | Product Instruction Manual - Page 79
cable del acelerador (14) en los retenedores (15). Ajuste del cable del acelerador : Pase al capítulo "Ajuste del cable del acelerador". 250BA002 KN 78 FS 120, FS 120 R, FS 200, FS 200 R, FS 250, FS 250 R - Stihl FS 250 | Product Instruction Manual - Page 80
! : Alinee los agujeros. : Inserte los tornillos (7) en los aguje- ros y atorníllelos en la barra de defensa hasta donde topen. : Prosiga a "Fijación del mango tórico". FS 120, FS 120 R, FS 200, FS 200 R, FS 250, FS 250 R 79 - Stihl FS 250 | Product Instruction Manual - Page 81
específico al país y debe colocarse entre el mango tórico y el mango de control. : Utilice una herramienta adecuada para empujar la pieza deslizante hasta la parte inferior de la ranura (vea la ilustración). 80 FS 120, FS 120 R, FS 200, FS 200 R, FS 250, FS 250 R - Stihl FS 250 | Product Instruction Manual - Page 82
Colocación de la argolla de transporte español / EE.UU Montaje del deflector STOP 2 1 : Oprima el bloqueo (1) y oprima el gatillo de aceleración (2) ételos firmemente. 1) Parte del equipo estándar o disponible como un accesorio especial FS 120, FS 120 R, FS 200, FS 200 R, FS 250, FS 250 R 81 - Stihl FS 250 | Product Instruction Manual - Page 83
Apoye la cortadora de matorrales en el suelo sobre su parte trasera con el mecanismo vuelto hacia arriba. Instalación de primer agujero. : Coloque el tornillo y apriételo firmemente. Montaje del tope : Siempre instale el tope (6) cuando se use FS 120, FS 120 R, FS 200, FS 200 R, FS 250, FS 250 R - Stihl FS 250 | Product Instruction Manual - Page 84
de salida". : Use la llave combinada (6) (suministrada con la máquina o disponible como un accesorio especial) para destornillar la tuerca (3) en sentido horario (rosca izquierda) del eje (2). : Quite la arandela de empuje (5) del eje (2). FS 120, FS 120 R, FS 200, FS 200 R, FS 250, FS 250 R 83 - Stihl FS 250 | Product Instruction Manual - Page 85
cabeza segadora en un lugar seguro. : Atornille la cabeza segadora STIHL SuperCut 20-2, STIHL AutoCut 25-2, 30-2 STIHL TrimCut 30-2 ó STIHL PolyCut 20-3 en sentido horario en el eje (1) hasta donde étela firmemente Quite el pasador de tope. 84 FS 120, FS 120 R, FS 200, FS 200 R, FS 250, FS 250 R - Stihl FS 250 | Product Instruction Manual - Page 86
Si la tuerca de montaje está demasiado floja, instale una nueva Ajuste del hilo de nilón STIHL SuperCut El hilo se avanza automáticamente si la longitud del hilo restante es de por lo (4,5) - Consulte el capítulo "Montaje del deflector". FS 120, FS 120 R, FS 200, FS 200 R, FS 250, FS 250 R 85 - Stihl FS 250 | Product Instruction Manual - Page 87
sobre su parte trasera con el aire. Use gasolina sin plomo regular con un octanaje mínimo de 89 (R+M/2). Si el octanaje de la gasolina regular en su zona es más bajo, use STIHL recomienda el uso exclusivo de gasolina sin plomo de buena calidad. 86 FS 120, FS 120 R, FS 200, FS 200 R, FS 250, FS 250 - Stihl FS 250 | Product Instruction Manual - Page 88
dos tiempos enfriados por aire. Recomendamos el aceite STIHL para motores de dos tiempos 50:1 pues está especialmente formulado para usarse en motores STIHL. No use aceites para mezclar con como sea posible con la mano. 256BA060 KN FS 120, FS 120 R, FS 200, FS 200 R, FS 250, FS 250 R 87 - Stihl FS 250 | Product Instruction Manual - Page 89
. : Equilibre la cortadora de matorrales. El uso del arnés se describe en el capítulo "Combinaciones aprobadas de herramienta de corte, deflector, mango y arnés". 88 FS 120, FS 120 R, FS 200, FS 200 R, FS 250, FS 250 R - Stihl FS 250 | Product Instruction Manual - Page 90
quedar "suspendidas" aproximadamente 20 cm (8 pulg) sobre el suelo. Cuando se alcanza el punto de flotación correcto: : Apriete el tornillo en la argolla de transporte. FS 120, FS 120 R, FS 200, FS 200 R, FS 250, FS 250 R 89 - Stihl FS 250 | Product Instruction Manual - Page 91
del control deslizante STOP-O (4) - motor apagado - el encendido está desactivado # - posición de funcionamiento normal (5) - el motor está en marcha o puede arrancarse START (6) - el encendido está conectado y es posible arrancar el motor 90 FS 120, FS 120 R, FS 200, FS 200 R, FS 250, FS 250 R - Stihl FS 250 | Product Instruction Manual - Page 92
sentido de la flecha en el símbolo de parada (h) a STOP-O. Arranque : Mantenga oprimido el bloqueo del gatillo y oprima el en esta posición, mueva el control deslizante a la posición START y sujételo allí. : Ahora suelte el gatillo de aceleraci FS 120, FS 120 R, FS 200, FS 200 R, FS 250, FS 250 R 91 - Stihl FS 250 | Product Instruction Manual - Page 93
deslizante en el sentido de la flecha en el símbolo de parada (h) a STOP-O. A temperaturas ambiente muy bajas Tan pronto arranque: : Accione momentáneamente el gati el control deslizante a la posición STOP-O. : Saque la funda (10) de la bujía. 92 FS 120, FS 120 R, FS 200, FS 200 R, FS 250, FS 250 R - Stihl FS 250 | Product Instruction Manual - Page 94
empújelo firmemente). : Mueva el control deslizante a la posición START (ARRANQUE. : Mueva la perilla del estrangulador a e - aun calor en el motor sea disipado por la corriente de aire de enfriamiento. Esto ayuda a evitar que los componentes FS 120, FS 120 R, FS 200, FS 200 R, FS 250, FS 250 R 93 - Stihl FS 250 | Product Instruction Manual - Page 95
fábrica. Este ajuste está diseñado para asegurar que la mezcla de combustible/aire sea óptima bajo la mayoría de las condiciones de trabajo. Con este carburador es posible ajustar la velocidad de ralentí del motor dentro de una gama pequeña. 94 FS 120, FS 120 R, FS 200, FS 200 R, FS 250, FS 250 R - Stihl FS 250 | Product Instruction Manual - Page 96
: Monte la herramienta de corte. : Revise el filtro de aire y sustitúyalo si es necesario. : Revise que el cable en el deflector). Si desea instalar una herramienta de corte metálica, use el ajuste estándar. : Lleve a cabo el ajuste normal. FS 120, FS 120 R, FS 200, FS 200 R, FS 250, FS 250 R 95 - Stihl FS 250 | Product Instruction Manual - Page 97
: Filtro de aire sucio. : Condiciones desfavorables de fun- cionamiento, por ejemplo, funcionando bajo carga parcial. Instale una bujía nueva después de aprox. 100 horas de funcionamiento, o más temprano si los electrodos están muy gastados. 96 FS 120, FS 120 R, FS 200, FS 200 R, FS 250, FS 250 R - Stihl FS 250 | Product Instruction Manual - Page 98
riesgo de incendio y de quemaduras, utilice solamente las bujías autorizadas por STIHL. Siempre inserte el casquillo (2) de la bujía bien apretado en el del motor es insatisfactorio aunque el filtro de aire está limpio y el carburador y el cable FS 120, FS 120 R, FS 200, FS 200 R, FS 250, FS 250 R 97 - Stihl FS 250 | Product Instruction Manual - Page 99
en el extremo de la cuerda de arranque nueva - vea "Especificaciones" - y después pase la cuerda por la parte superior del mango y por el buje de la cuerda (6). : Vuelva a instalar la tapa en el mango. : debe apuntar en sentido horario. 98 FS 120, FS 120 R, FS 200, FS 200 R, FS 250, FS 250 R - Stihl FS 250 | Product Instruction Manual - Page 100
su posición - la placa inferior debe quedar orientada hacia arriba. Si el resorte se sale de la caja durante la instalación: Colóquelo nuevamente en sentido horario, empezando desde el resorte de rebobinado. : Instale la caja del ventilador. FS 120, FS 120 R, FS 200, FS 200 R, FS 250, FS 250 R 99 - Stihl FS 250 | Product Instruction Manual - Page 101
las aletas del cilindro y al filtro de aire. : Guarde la máquina en un lugar os y de otras personas no autorizadas. : Use una lima (accesorio especial) para afilar las trabajo se lo haga el concesionario STIHL. : Afile frecuentemente, quitando FS 120, FS 120 R, FS 200, FS 200 R, FS 250, FS 250 R - Stihl FS 250 | Product Instruction Manual - Page 102
de control Comprobar funcionamiento X X Filtro de aire Limpiar Reemplazar Cuerpo aspirador en el tanque de n1) 1) STIHL recomienda acudir a un concesionario STIHL para servicio * no en todas las versiones, de acuerdo con el mercado FS 120, FS 120 R, FS 200, FS 200 R, FS 250, FS 250 R X X - Stihl FS 250 | Product Instruction Manual - Page 103
metálicas Lubricación de caja de engranajes Etiquetas de seguridad Inspección Reemplazar Comprobar el apriete Afilar Revisar Llenar Reemplazar 1) STIHL recomienda acudir a un concesionario STIHL para servicio X X X X X X X X X X 102 FS 120, FS 120 R, FS 200, FS 200 R, FS 250, FS 250 R - Stihl FS 250 | Product Instruction Manual - Page 104
Piezas y controles FS 120, FS 120 R, FS 200, FS 200 R, FS 250, FS 250 R español / EE.UU 1= Tapa de llenado de transporte 12= Bomba de combustible 13= Perilla giratoria de estrangulador 14= Tapa del filtro de aire 15= Tanque de combustible 16= Soporte de la máquina 17= Soporte del mango 18= - Stihl FS 250 | Product Instruction Manual - Page 105
Facilita el arranque del motor al enriquecer la mezcla. 14. Tapa del filtro de aire Encierra y protege el filtro de aire. 15. Tanque de combustible Contiene la mezcla de combustible y aceite. 16. de corte y los pies y piernas del operador. 104 FS 120, FS 120 R, FS 200, FS 200 R, FS 250, FS 250 R - Stihl FS 250 | Product Instruction Manual - Page 106
contener las cuchillas metálicas fragmentadas. 5. Faldilla La faldilla que se encuentra en la parte inferior del deflector debe ser ajustada de la manera que se explica en los capítulos de de reacción, tales como el empuje hacia afuera. FS 120, FS 120 R, FS 200, FS 200 R, FS 250, FS 250 R 105 - Stihl FS 250 | Product Instruction Manual - Page 107
aire: Elemento de papel para filtro Capacidad del tan- 0,64 l (21,6 oz que de combustible: fluidas) Mezcla de combus- Vea "Combusti- tible: ble" Arrancador de cuerda Cuerda de arranque: 3 mm (0,11 pulg) de diámetro, 850 mm (33,5 pulg) de largo 106 FS 120, FS 120 R, FS 200, FS 200 R, FS 250 - Stihl FS 250 | Product Instruction Manual - Page 108
FS 120, 200, 250 1765 mm (70 pulg) Comuníquese con su concesionario STIHL para información acerca de los accesorios especiales que pueden estar disponibles para su producto. Los usuarios de esta máquina deben efectuar únicamente los trabajos de mantenimiento descritos en este manual. Solamente - Stihl FS 250 | Product Instruction Manual - Page 109
de realizar el mantenimiento requerido descrito en su manual del usuario. STIHL Incorporated le recomienda guardar todos los recibos comprobantes aplicables. Además, STIHL Incorporated garantiza al comprador inicial y a cada comprador 108 FS 120, FS 120 R, FS 200, FS 200 R, FS 250, FS 250 R - Stihl FS 250 | Product Instruction Manual - Page 110
Múltiple de admisión Filtro de aire Bujía Magneto o sistema de encendido STIHL Incorporated, y : la sustitución de piezas y otros servicios y ajustes necesarios para el mantenimiento requerido en y después del primer punto de reemplazo programado. FS 120, FS 120 R, FS 200, FS 200 R, FS 250, FS 250 - Stihl FS 250 | Product Instruction Manual - Page 111
de realizar el mantenimiento requerido descrito en su manual del usuario. STIHL Incorporated le recomienda guardar todos los recibos comprobantes aplicables. Además, STIHL Incorporated garantiza al comprador inicial y a cada comprador 110 FS 120, FS 120 R, FS 200, FS 200 R, FS 250, FS 250 R - Stihl FS 250 | Product Instruction Manual - Page 112
Múltiple de admisión Filtro de aire Bujía Magneto o sistema de encendido STIHL Incorporated, y : la sustitución de piezas y otros servicios y ajustes necesarios para el mantenimiento requerido en y después del primer punto de reemplazo programado. FS 120, FS 120 R, FS 200, FS 200 R, FS 250, FS 250 - Stihl FS 250 | Product Instruction Manual - Page 113
™ STIHL Territory™ TapAction™ TrimCut™ Esta lista de marcas comerciales está sujeta a cambios. Queda terminantemente prohibido todo uso de estas marcas comerciales sin el consentimiento expreso por escrito de ANDREAS STIHL AG & Co. KG, Waiblingen. 112 FS 120, FS 120 R, FS 200, FS 200 R, FS 250, FS - Stihl FS 250 | Product Instruction Manual - Page 114
! WARNING! The engine exhaust from this product contains chemicals known to the State of California to cause cancer, birth defects de cáncer, defectos de nacimiento u otros efectos nocivos para los órganos de la reproducción. 0458 250 8621 C englisch / English USA / spanisch / español EE.UU / EPA
-
 1
1 -
 2
2 -
 3
3 -
 4
4 -
 5
5 -
 6
6 -
 7
7 -
8
-
9
-
10
-
11
-
12
-
13
-
14
-
15
-
16
-
17
-
18
-
19
-
20
-
21
-
22
-
23
-
24
-
25
-
26
-
27
-
28
-
29
-
30
-
31
-
32
-
33
-
34
-
35
-
36
-
37
-
38
-
39
-
40
-
41
-
42
-
43
-
44
-
45
-
46
-
47
-
48
-
49
-
50
-
51
-
52
-
53
-
54
-
55
-
56
-
57
-
58
-
59
-
60
-
61
-
62
-
63
-
64
-
65
-
66
-
67
-
68
-
69
-
70
-
71
-
72
-
73
-
74
-
75
-
76
-
77
-
78
-
79
-
80
-
81
-
82
-
83
-
84
-
85
-
86
-
87
-
88
-
89
-
90
-
91
-
92
-
93
-
94
-
95
-
96
-
97
-
98
-
99
-
100
-
101
-
102
-
103
-
104
-
105
-
106
-
107
-
108
-
109
-
110
-
111
-
112
-
113
-
114
 |
 |

Instruction Manual
Manual de instrucciones
Warning!
For safe operation follow all safety
precautions in Instruction Manual - improper
use can cause serious injury.
Advertencia!
Para su seguridad durante el manejo de este
producto, siga siempre las precauciones de
seguridad dadas en el manual de
instrucciones - el uso indebido puede causar
lesiones graves.
STIH)
STIHL FS 120, 200, 250