Stihl FSA 65 Product Instruction Manual
Stihl FSA 65 Manual
 |
View all Stihl FSA 65 manuals
Add to My Manuals
Save this manual to your list of manuals |
Stihl FSA 65 manual content summary:
- Stihl FSA 65 | Product Instruction Manual - Page 1
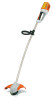
STIHL FSA 65, 85 { Instruction Manual Manual de instrucciones Warning! Read and follow all safety precautions in Instruction Manual - improper use can cause serious or fatal injury. Advertencia! Lea y siga todas las precauciones de seguridad dadas en el manual de instrucciones - el uso incorrecto - Stihl FSA 65 | Product Instruction Manual - Page 2
Instruction Manual 1 - 31 Manual de instrucciones 33 - 65 - Stihl FSA 65 | Product Instruction Manual - Page 3
the Machine 20 Replacing Nylon Line 21 Maintenance and Care 23 Main Parts 24 Specifications 25 Special Accessories 26 Troubleshooting 27 Maintenance and Repairs 29 Battery Recycling 29 Disposal 29 Trademarks 30 Addresses 31 { FSA 65, FSA 85 English Allow only persons - Stihl FSA 65 | Product Instruction Manual - Page 4
is dusty. 6. Use Right Tool - Do not use tool for any job except that for which it is intended. 7. Avoid Unintentional Starting - Do not carry trimmer with battery plugged in. Be sure trigger switch is not depressed when inserting the battery. 2 FSA 65, FSA 85 - Stihl FSA 65 | Product Instruction Manual - Page 5
From Cutting Area And Cutting Attachment 16. Replacement Parts - When servicing, use only identical STIHL replacement parts SAVE THESE INSTRUCTIONS English Safety Precautions and Working Techniques Because this trimmer is a high-speed, fast-cutting power tool and is batterypowered, special safety - Stihl FSA 65 | Product Instruction Manual - Page 6
move retaining latch to ƒ and remove the battery from the power tool. Most of these safety precautions and warnings apply to the use of all STIHL trimmers. Different models may have different parts and controls. See the appropriate section of your instruction manual for a description of the controls - Stihl FSA 65 | Product Instruction Manual - Page 7
for your unit, see the chapter "Approved Combinations of Cutting Attachment and Deflector" in the instruction manual or the STIHL "Cutting Attachments, Parts & Accessories" catalog. If your power tool is subjected to unusually high loads for which it was not designed (e.g. heavy impact or a fall - Stihl FSA 65 | Product Instruction Manual - Page 8
battery from direct sunlight. Warning! Use STIHL batteries only with STIHL power tools and charge them only with STIHL chargers. Replace battery with STIHL AP battery only. Use only original STIHL rechargeable batteries. Charge the battery objects into the charger's cooling slots. 6 FSA 65, FSA 85 - Stihl FSA 65 | Product Instruction Manual - Page 9
! To reduce the risk of injury from loss of control and line contact, never carry or transport your power tool with the cutting attachment moving. Warning! Always switch off the power tool, move retaining latch to ƒ and remove the battery - even when you carry the unit for short distances. When - Stihl FSA 65 | Product Instruction Manual - Page 10
you to maintain a firm grip and properly control your power tool. For specific starting instructions, see the appropriate section of your instruction manual. Left-Handers Warning! To reduce the risk of personal injury to the operator from line contact and thrown objects, make sure your unit is - Stihl FSA 65 | Product Instruction Manual - Page 11
any dust raised by the power tool away from the operator. Instructions Warning! In the event of an emergency, switch off the motor immediately, move retaining latch to ƒ and remove the battery on this trimmer. Only the provided cutting attachment with nylon line is authorized. FSA 65, FSA 85 9 - Stihl FSA 65 | Product Instruction Manual - Page 12
mounting see the chapter on "Replacing Nylon Line" in your instruction manual. Mowing heads are to be used only on trimmers equipped with a line-limiting blade in the deflector in order to keep the line at the proper length (see "Main Parts" chapter in your instruction manual.) Do not use with - Stihl FSA 65 | Product Instruction Manual - Page 13
pressure washer. The solid jet of water may damage parts of the machine. Keep the battery guides free from foreign matter - clean as necessary. English Store the power tool in a dry, locked location with the retaining latch on ƒ, the battery removed and out of reach of children. FSA 65, FSA 85 11 - Stihl FSA 65 | Product Instruction Manual - Page 14
Operation Using the Unit The power tool is operated with a rechargeable battery. Use only STIHL chargers to recharge the battery. Mowing Working with bump guard The bump guard comes standard with the FSA 85. It is available as a special accessory for the FSA 65. 3905BA002 KN 3905BA003 KN Data - Stihl FSA 65 | Product Instruction Manual - Page 15
knob (1) on the handle. 3905BA005 KN 3905BA006 KN The trimmer is supplied with a deflector. Only this deflector may be mounted to the trimmer - no other deflectors are permitted. For further information see "Mounting the Deflector". N Turn the handle to the vertical position. FSA 65, FSA 85 13 - Stihl FSA 65 | Product Instruction Manual - Page 16
than 1.0 in: N Switch off the trimmer. N Move the retaining latch to ƒ and remove the battery. N Turn the trimmer on its back. N Press down the cap on the spool as far as stop. N Pull the ends of the lines out of the spool. If the spool is empty, see "Replacing Nylon Line". 14 FSA 65, FSA 85 - Stihl FSA 65 | Product Instruction Manual - Page 17
to the power supply. During battery has cooled down. The time required for cooling may prolong the charge time. The battery and charger become warm during the charging process. AL 300 charger This charger is equipped with a battery cooling fan which is audible when it is running. FSA 65, FSA 85 - Stihl FSA 65 | Product Instruction Manual - Page 18
by a flashing green LED. 0 - 20 % 20 - 40 % 40 - 60 % 60 - 80 % 80 - 100 % When the charging process is completed, the LEDs on the battery switch off automatically. If the LEDs on the battery are continuously red or flash red - see "If the red LEDs are continuously red / flash". 16 FSA 65, FSA 85 - Stihl FSA 65 | Product Instruction Manual - Page 19
in machine 4) 1) During charging: The charging process starts automatically after the battery has cooled down / warmed up. 2) During work: Machine switches off automatically - let the battery cool off for a while, it may help to remove the battery from the machine for this. FSA 65, FSA 85 17 - Stihl FSA 65 | Product Instruction Manual - Page 20
- the battery slides into the compartment - press it down carefully until it snaps into position - the battery must be flush with the top of the housing. Switching On N Make sure you have a secure and balanced footing. N Stand upright - hold the power tool in a relaxed position. 18 FSA 65, FSA 85 - Stihl FSA 65 | Product Instruction Manual - Page 21
trigger switch lockout (1) and the trigger switch (2). 3 2 N Move the retaining latch (3) to ƒ - the trigger switch (2) cannot be operated - the power tool is locked to prevent start-up. Always remove the battery from the power tool during work breaks and after finishing work. FSA 65, FSA 85 19 - Stihl FSA 65 | Product Instruction Manual - Page 22
Storing the battery N Take the battery out of the power tool or Remove the battery. N Disconnect the plug from the wall outlet. N Store the charger in a dry, locked location. Keep it out of the reach of children and other unauthorized persons and protected from contamination. 20 FSA 65, FSA 85 - Stihl FSA 65 | Product Instruction Manual - Page 23
until it can be removed. N Remove the mowing head. N Pull the spool (2) out of the mowing head (3) and remove the remaining line. 4 2 3 N Fit the empty spool in the mowing head (3). If the spring (4) has popped out: N Push the spring into the spool (2) as far as stop. FSA 65, FSA 85 21 - Stihl FSA 65 | Product Instruction Manual - Page 24
in the spool (2), press it down as far as stop and turn it clockwise at the same time. N Turn the cap (1) as far as stop and tighten it down by hand. 3905BA022 KN 3905BA021 KN N Slip the mowing head (6) over the shaft (7) and engage hex recess (8) on the external hexagon (9). 22 FSA 65, FSA 85 - Stihl FSA 65 | Product Instruction Manual - Page 25
Retighten Visual inspection Clean Check operation (eject battery) Visual inspection Replace Check tightness Replace X X X X X X X X X before starting work after finishing work or daily weekly monthly every 12 months if problem if damaged if required English X X X X X X X FSA 65, FSA 85 23 - Stihl FSA 65 | Product Instruction Manual - Page 26
7 Wing Screw 8 Drive Tube 9 Battery Locking Tabs 10 Battery 11 Light Emitting Diodes (LED) on Battery 12 Push Button 13 Mowing Head 14 Line Limiting Blade 15 Deflector 16 Charger 17 Light Emiting Diode (LED) on Charger 18 Power Supply Cord # Serial Number 17 16 24 3905BA023 KN FSA 65, FSA 85 - Stihl FSA 65 | Product Instruction Manual - Page 27
) on Charger Indicates charger operating mode and certain problems. 18. Power Supply Cord Supplies electric current to charger. Specifications English Battery Type: Lithium-Ion The power tool can be operated with STIHL type AP batteries. Power tool running time depends on the stored energy of - Stihl FSA 65 | Product Instruction Manual - Page 28
and deflector FSA 65: 6.0 lbs (2.7 kg) FSA 85: 6.2 lbs (2.8 kg) Transport Contact your STIHL dealer for information regarding special accessories that may be available for your product. STIHL batteries fulfill the requirements stated in UN-Manual ST/SG/AC.10/11/Rev.5 Part III, Subsection - Stihl FSA 65 | Product Instruction Manual - Page 29
power tool - if the light emitting diodes still flash, the power tool is faulty and must be checked by a servicing dealer 1). Allow power tool/battery to dry Take the battery out of the power tool; allow the battery and power tool to cool down Remove the battery and refit it again FSA 65, FSA 85 - Stihl FSA 65 | Product Instruction Manual - Page 30
40°F (5°C) and 105°F (5°C- 40°C). Remove the battery and refit it again Take the battery out of the power tool and refit it. Switch on the power tool - if the light emitting diodes still flash, the battery is faulty and must be replaced. Have charger checked by servicing dealer1) 28 FSA 65, FSA 85 - Stihl FSA 65 | Product Instruction Manual - Page 31
by an authorized STIHL servicing dealer using original STIHL replacement parts. Original STIHL parts can be identified by the STIHL part number, the { logo and, in some cases, by the STIHL parts symbol K. The symbol may appear alone on small parts. Battery Recycling Information STIHL is committed - Stihl FSA 65 | Product Instruction Manual - Page 32
Series™ STIHL Protech™ STIHL RAPID™ STIHL SuperCut™ STIHL Territory™ TapAction™ TrimCut™ This listing of trademarks is subject to change. Any unauthorized use of these trademarks without the express written consent of ANDREAS STIHL AG & Co. KG, Waiblingen is strictly prohibited. 30 FSA 65, FSA 85 - Stihl FSA 65 | Product Instruction Manual - Page 33
Addresses STIHL Inc. 536 Viking Drive P.O. Box 2015 Virginia Beach VA 23452-2015 FSA 65, FSA 85 English 31 - Stihl FSA 65 | Product Instruction Manual - Page 34
English 32 FSA 65, FSA 85 - Stihl FSA 65 | Product Instruction Manual - Page 35
de las baterías 63 Desecho 63 { FSA 65, FSA 85 español / EE.UU 64 Permita que solamente las personas 65 que comprenden la materia tratada en este manual manejen su motoguadaña. Para obtener el rendimiento y satisfacción máximos de la motoguadaña STIHL, es importante que lea, obedezca - Stihl FSA 65 | Product Instruction Manual - Page 36
o la apariencia de su máquina difieren de las descritas en este manual, comuníquese con el concesionario STIHL para obtener la ayuda que requiera. Instrucciones importantes de seguridad Advertencia! Para para ninguna tarea distinta de aquellas para las cuales fue diseñada. 34 FSA 65, FSA 85 - Stihl FSA 65 | Product Instruction Manual - Page 37
repuestos STIHL genuinos. manual para designar la herramienta motorizada variarán de acuerdo con los tipos de accesorios de corte que pueden instalarse en la misma. El término "motoguadaña" se usa para describir a una máquina FSA provista con una cabeza segadora con hilo de nilón. FSA 65, FSA 85 - Stihl FSA 65 | Product Instruction Manual - Page 38
entregar el manual de instrucciones. STIHL. Éstas han sido diseñadas específicamente para usar con su modelo y satisfacen sus necesidades de rendimiento. El uso seguro de una motoguadaña atañe a 1. el operador 2. la herramienta motorizada 3. el uso de la herramienta motorizada. 36 FSA 65, FSA 85 - Stihl FSA 65 | Product Instruction Manual - Page 39
de seguridad bien ajustados con una protección adecuada en las partes superior y laterales que satisfagan la norma ANSI Z 87.1 accesorio de corte y deflector", en el manual de instrucciones o en el catálogo STIHL "Accesorios de corte, piezas y accesorios". de seguridad funcionen FSA 65, FSA 85 37 - Stihl FSA 65 | Product Instruction Manual - Page 40
herramienta motorizada si están dañados. En caso de dudas, pida al concesionario de servicio de STIHL que revise la máquina. Batería Advertencia! Riesgo de incendio, explosión y/o quemaduras, inclusive aquellas manteniéndolos abiertos. También busque atención médica de inmediato. 38 FSA 65, FSA 85 - Stihl FSA 65 | Product Instruction Manual - Page 41
- 122 °F]). Cargador Utilice sólo cargadores STIHL originales. Úselo solamente para cargar baterías tipo AP de STIHL con forma geométrica correspondiente y con modo. No abra ni desarme el cargador - adentro no hay partes útiles para el usuario. Guarde el cargador fuera del alcance FSA 65, FSA 85 39 - Stihl FSA 65 | Product Instruction Manual - Page 42
y/o marcado como para que no se lo pise, cause tropiezos, esté en contacto con bordes cortantes o partes móviles o, de otro modo expuesto a daños o esfuerzos. No debería usarse un alargador a menos que ni transporte la herramienta motorizada con el accesorio de corte en marcha. 40 FSA 65, FSA 85 - Stihl FSA 65 | Product Instruction Manual - Page 43
las instrucciones específicas de arranque, vea la sección correspondiente en el manual de instrucciones. Advertencia! Su herramienta motorizada es una máquina que debe con las manos ni con cualquier parte del cuerpo un accesorio de corte en movimiento. 3905BA026 KN 3905BA001 KN FSA 65, FSA 85 41 - Stihl FSA 65 | Product Instruction Manual - Page 44
distancia directa o indirectamente. 15m (50ft) Para reducir el riesgo de ocasionar lesiones a los ojos u otras partes del cuerpo (vea el capítulo "Vestimenta adecuada"), asegúrese que las personas estén a por lo Apague el motor inmediatamente si se le aproxima alguna persona. 42 FSA 65, FSA 85 - Stihl FSA 65 | Product Instruction Manual - Page 45
dañada y debe ser sustituida. Si la cabeza continúa suelta, consulte al concesionario STIHL. Nunca use una motoguadaña con un accesorio de corte suelto. Advertencia! Sustituya inmediatamente una posición ƒ. - Retire la batería. - Revise la condición y el apriete, busque grietas. FSA 65, FSA 85 43 - Stihl FSA 65 | Product Instruction Manual - Page 46
Sustitución del hilo de nilón" en su manual de instrucciones. Las cabezas segadoras deben usarse STIHL. Advertencia! Nunca repare los cabezales dañados o rotos. Esto puede causar el desprendimiento de alguna pieza del accesorio de corte y producir lesiones graves o mortales. 44 FSA 65, FSA 85 - Stihl FSA 65 | Product Instruction Manual - Page 47
correctamente. Por tal motivo, debe hacer funcionar la herramienta motorizada únicamente con baterías y cargadores STIHL apropiados. Uso español / EE.UU Corte de césped N Sujete la unidad con ambas manos motoguadaña describiendo un arco en uno y otro sentido. 3905BA002 KN FSA 65, FSA 85 45 - Stihl FSA 65 | Product Instruction Manual - Page 48
acelera el ritmo de desgaste. Uso del protector contra golpes El protector contra golpes es equipo estándar del modelo FSA 85. Se ofrece como accesorio especial para el modelo FSA 65. 1 El protector contra golpes (1) - Limita el alcance del hilo de corte - reduce el riesgo de que el hilo giratorio - Stihl FSA 65 | Product Instruction Manual - Page 49
(3) y apriételos bien firmes. 3905BA007 KN El mango tórico puede ajustarse de acuerdo con la talla y el alcance del operador y la aplicación, variando la distancia (A). FSA 65, FSA 85 47 - Stihl FSA 65 | Product Instruction Manual - Page 50
el pestillo de retención a la posición ƒ y saque la batería. N Apoye la motoguadaña sobre la parte trasera. N Empuje hasta el tope la tapa en el carrete. N Extraiga los extremos de los hilos del que perciba una resistencia notable - luego presione hasta el tope. 3901BA009 KN 48 FSA 65, FSA 85 - Stihl FSA 65 | Product Instruction Manual - Page 51
continua. El diodo fotoemisor destella en rojo. Este cargador está equipado con un ventilador para enfriar la batería, que emite un sonido cuando está funcionando. FSA 65, FSA 85 49 - Stihl FSA 65 | Product Instruction Manual - Page 52
- Defecto en la batesores destellan en ría 4) rojo: 1) Durante la carga: La carga se inicia automáticamente una vez que la batería se enfría / calienta. 50 FSA 65, FSA 85 - Stihl FSA 65 | Product Instruction Manual - Page 53
la batería y vuelva a colocarla. - Batería averiada - vea también "Diodos fotoemisores (LED) de la batería". - Cargador averiado - solicite a un concesionario de servicio que lo revise. STIHL recomienda acudir a un concesionario de servicio de STIHL. ... significa lo siguiente: FSA 65, FSA 85 51 - Stihl FSA 65 | Product Instruction Manual - Page 54
ía debe estar a ras con la parte superior de la caja. N Desbloquee la herramienta motorizada moviendo el pestillo de retención (2) a la posición ,. 2 3 4 N Empuje el bloqueo del gatillo (3) hacia abajo, oprima el gatillo (4) y mantenga ambos en dichas posiciones. 52 3905BA013 KN FSA 65, FSA 85 - Stihl FSA 65 | Product Instruction Manual - Page 55
la contaminación. 1 N Una vez terminados los trabajos, deslice la tapa (1) a su posición inicial hasta que se escuche que se engancha en su posición. 3905BA027 KN FSA 65, FSA 85 53 - Stihl FSA 65 | Product Instruction Manual - Page 56
personas no autorizadas, y protegido de la contaminación. Sustitución del hilo de nilón AutoCut C 4-2 de STIHL Revise siempre la cabeza segadora en busca de desgaste antes de sustituir el hilo de nilón. Si hay se el carrete (2) de la cabeza segadora (3) y saque el hilo restante. 54 FSA 65, FSA 85 - Stihl FSA 65 | Product Instruction Manual - Page 57
10 cm (4 pulg) de largo. N De ser necesario, corte el hilo más largo a una longitud aproximada de 10 cm (4 pulg). Ahora, la cabeza segadora está llena. FSA 65, FSA 85 55 - Stihl FSA 65 | Product Instruction Manual - Page 58
tope y girándola en sentido horario al mismo tiempo. N Gire la tapa (1) hasta el tope y apriétela con la mano. 3905BA021 KN 3905BA022 KN 56 FSA 65, FSA 85 - Stihl FSA 65 | Product Instruction Manual - Page 59
después de terminar el trabajo o diariamente semanalmente mensualmente cada 12 meses si hay problema si tiene daños si se requiere español / EE.UU X X X X X X X FSA 65, FSA 85 57 - Stihl FSA 65 | Product Instruction Manual - Page 60
limitadora del hilo 15 Deflector 16 Cargador 17 Diodo fotoemisor (LED) del cargador 18 Cordón eléctrico N.º Número de serie 17 16 58 3905BA023 KN FSA 65, FSA 85 - Stihl FSA 65 | Product Instruction Manual - Page 61
español / EE.UU Especificaciones Batería Tipo: Ion de litio La herramienta mecánica puede accionarse con baterías STIHL tipo AP. El tiempo de funcionamiento de la herramienta Hz Consumo de corriente: 330 W Corriente de carga: Aislamiento: 6,5 A II, E (aislamiento doble) FSA 65, FSA 85 59 - Stihl FSA 65 | Product Instruction Manual - Page 62
corte y deflector FSA 65: 2,7 kg (6,0 lb) FSA 85: 2,8 kg (6,2 lb) Transporte Comuníquese con su concesionario STIHL para información acerca de accesorios especiales que pueden estar disponibles para su producto. Las baterías STIHL satisfacen los requisitos establecidos en el Manual de la ONU - Stihl FSA 65 | Product Instruction Manual - Page 63
calientes el funcionamiento El sistema eléctrico no funciona bien motorizada y deje que ambas se enfríen Extraiga la batería y vuelva a colocarla en su lugar FSA 65, FSA 85 61 - Stihl FSA 65 | Product Instruction Manual - Page 64
mecánica - si los diodos fotoemisores continúan destellando, la batería está averiada y es necesario reemplazarla. Defecto en el cargador 1) STIHL recomienda acudir a un concesionario STIHL para servicio. Solicite al concesionario de servicio que revise el cargador1) 62 FSA 65, FSA 85 - Stihl FSA 65 | Product Instruction Manual - Page 65
descritos en este manual. Solamente los talleres autorizados por STIHL deben llevar as de ion de litio STIHL en los Estados Unidos y Canadá. En todas las baterías recargables STIHL se STIHL para obtener la información más actualizada sobre la eliminación de desechos. 264BA050 KN FSA 65, FSA 85 63 - Stihl FSA 65 | Product Instruction Manual - Page 66
™ STIHL RAPID™ STIHL SuperCut™ STIHL Territory™ TapAction™ TrimCut™ Esta lista de marcas comerciales está sujeta a cambios. Queda terminantemente prohibido todo uso de estas marcas comerciales sin el consentimiento expreso por escrito de ANDREAS STIHL AG & Co. KG, Waiblingen. 64 FSA 65, FSA 85 - Stihl FSA 65 | Product Instruction Manual - Page 67
Direcciones STIHL Inc. 536 Viking Drive P.O. Box 2015 Virginia Beach VA 23452-2015 EE.UU. español / EE.UU FSA 65, FSA 85 65 - Stihl FSA 65 | Product Instruction Manual - Page 68
to the State of Californinia to cause cancer, birth defects or other reproductive harm. 0458-284-8621-A englisch / spanisch USA U G U www.stihl.com ! ADVERTENCIA! Este producto contiene sustancias químicas consideradas por el Estado de California como causantes de cáncer, defectos de nacimiento
-
 1
1 -
 2
2 -
 3
3 -
 4
4 -
 5
5 -
 6
6 -
 7
7 -
8
-
9
-
10
-
11
-
12
-
13
-
14
-
15
-
16
-
17
-
18
-
19
-
20
-
21
-
22
-
23
-
24
-
25
-
26
-
27
-
28
-
29
-
30
-
31
-
32
-
33
-
34
-
35
-
36
-
37
-
38
-
39
-
40
-
41
-
42
-
43
-
44
-
45
-
46
-
47
-
48
-
49
-
50
-
51
-
52
-
53
-
54
-
55
-
56
-
57
-
58
-
59
-
60
-
61
-
62
-
63
-
64
-
65
-
66
-
67
-
68
 |
 |

{
STIHL FSA 65, 85
Warning!
Read and follow all safety
precautions in Instruction Manual –
improper use can cause serious or
fatal injury.
Advertencia!
Lea y siga todas las precauciones
de seguridad dadas en el manual
de instrucciones – el uso incorrecto
puede causar lesiones graves o
mortales.
Instruction Manual
Manual de instrucciones