Stihl HT 130 Product Instruction Manual
Stihl HT 130 Manual
 |
View all Stihl HT 130 manuals
Add to My Manuals
Save this manual to your list of manuals |
Stihl HT 130 manual content summary:
- Stihl HT 130 | Product Instruction Manual - Page 1
STIHL HT 100, 101, 130, 131 { Instruction Manual Manual de instrucciones Warning! Read and follow all safety precautions in Instruction Manual - improper use can cause serious or fatal injury. Advertencia! Lea y siga todas las precauciones de seguridad dadas en el manual de instrucciones - el uso - Stihl HT 130 | Product Instruction Manual - Page 2
Instruction Manual 1 - 49 Manual de instrucciones 51 - 104 - Stihl HT 130 | Product Instruction Manual - Page 3
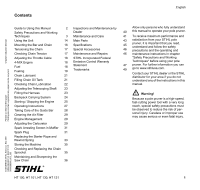
35 Checking and Replacing the Chain Sprocket 35 Maintaining and Sharpening the Saw Chain 36 { HT 100, HT 101, HT 130, HT 131 Inspections and Maintenance by Dealer Maintenance and Care Main Parts Specifications Special Accessories Maintenance and Repairs STIHL Incorporated Federal Emission - Stihl HT 130 | Product Instruction Manual - Page 4
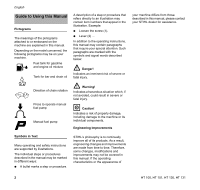
instructions are supported by illustrations. The individual steps or procedures described in the manual may be marked in different ways: N A bullet marks a step or procedure. STIHL not be covered in this manual. If the operating characteristics or the appearance of 2 HT 100, HT 101, HT 130, HT 131 - Stihl HT 130 | Product Instruction Manual - Page 5
STIHL pole pruners. Different models may have different parts and controls. See the appropriate section of your instruction manual for a description of the controls and the function of the parts of your model. Safe use of a pole pruner the development of whitefinger HT 100, HT 101, HT 130, HT 131 3 - Stihl HT 130 | Product Instruction Manual - Page 6
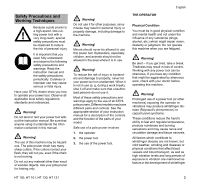
advice immediately. Warning! The ignition system of the STIHL unit produces an electromagnetic field your hearing. Wear sound barriers (ear plugs or ear mufflers) to protect your illustrations and definitions of the power tool parts see the chapter on "Main Parts". 4 HT 100, HT 101, HT 130, HT 131 - Stihl HT 130 | Product Instruction Manual - Page 7
STIHL power tool uses an oilgasoline mixture for fuel (see the chapter on "Fuel" of your instruction manual). Warning! Gasoline is an extremely flammable fuel. If spilled and ignited by a spark or other ignition injury from escaping gas vapor and fumes, remove the fuel filler cap on your power - Stihl HT 130 | Product Instruction Manual - Page 8
cap by hand as securely as possible. See also the "Fueling" chapter in your Instruction Manual for additional information. Before Starting Take off the chain guard (scabbard) and inspect the pole pruner for . Never attempt to modify the controls or safety devices. 6 HT 100, HT 101, HT 130, HT 131 - Stihl HT 130 | Product Instruction Manual - Page 9
oil, fuel mix, grease or resin in order for you to maintain a firm grip and properly control your power tool. For proper assembly of the bar and chain follow the procedure described in the chapter "Mounting the Bar and Chain" of your instruction manual. STIHL Oilomatic chain, guide bar and sprocket - Stihl HT 130 | Product Instruction Manual - Page 10
instruction manual. If you cannot set the correct idle speed, have your STIHL dealer check your power tool and make proper adjustments and repairs. Proper chain tension is very important at all times. Check it at regular intervals (whenever the pole pruner . 8 HT 100, HT 101, HT 130, HT 131 - Stihl HT 130 | Product Instruction Manual - Page 11
cause respiratory problems, cancer, smaller particle size, may cutting with a properly sharpened chain (which produces wood chips rather saw, never work alone. Keep within calling distance of others in case help is needed. Stop the engine immediately if you are approached. HT 100, HT 101, HT 130, HT - Stihl HT 130 | Product Instruction Manual - Page 12
least 50 feet (15 m) between the pole pruner (including any branches it is contacting) and any electrical line carrying live current. Before working with less clearance, contact your electric utility and make sure the current is turned off. Operating Instructions Warning! Do not operate your power - Stihl HT 130 | Product Instruction Manual - Page 13
and caught in the branch so that the chain can no longer move, shut off the pole pruner and carefully move the branch to open the pinch and release the bar. Warning! The muffler and other parts of the engine (e. g. fins of the cylinder, spark plug) become hot during operation and remain hot for - Stihl HT 130 | Product Instruction Manual - Page 14
the pole pruner, the chain is not rotating at full speed before it contacts the wood. To Avoid Pull-in 1. Be alert to forces or situations that may cause material to pinch the chain at the bottom of the bar. 2. Always start a cut with the chain rotating at full speed. 12 HT 100, HT 101, HT 130, HT - Stihl HT 130 | Product Instruction Manual - Page 15
maintenance or repair work not described in your instruction manual. Have such work performed by your STIHL servicing dealer only. Wear gloves when handling or performing maintenance on the cutting attachment. English Warning! Use the specified spark plug and make sure it and the ignition lead are - Stihl HT 130 | Product Instruction Manual - Page 16
parts of the machine. Store the power tool in a dry and high or locked location out of reach of children. Before storing for longer than a few days, always empty the fuel tank. See chapter "Storing the machine" in this manual. Store fuel and chain oil shaft to the required length (HT 101, HT - Stihl HT 130 | Product Instruction Manual - Page 17
without the risk of the lift bucket damaging other branches. The tool angle in this case depends on the position of the branch. 390BA058 KN HT 100, HT 101, HT 130, HT 131 15 - Stihl HT 130 | Product Instruction Manual - Page 18
angle drive (special accessory) 1 Mounting the Bar and Chain Removing the chain sprocket cover Fitting the chain 390BA042 KN 2 N Unscrew the nut and remove the cover. 390BA003 KN 390BA053 KN The angle drive keeps the cutting attachment at an angle of 30° to the drive tube. The angle drive may - Stihl HT 130 | Product Instruction Manual - Page 19
still be possible to pull the chain along the bar by hand. N If necessary, retension the chain. A new chain has to be retensioned more often than one that has been in use for some time. N Check chain tension frequently - see chapter on "Operating Instructions". HT 100, HT 101, HT 130, HT 131 17 - Stihl HT 130 | Product Instruction Manual - Page 20
problems and major damage in engines with a manually adjustable carburetor and should not be used in such engines. The ethanol content in gasoline affects engine running speed - it may be necessary to readjust the carburetor if you use fuels with various ethanol contents. 18 HT 100, HT 101, HT - Stihl HT 130 | Product Instruction Manual - Page 21
repairs. The idle speed and maximum speed of the engine change if you switch from a fuel with a certain ethanol content to another fuel with a much higher or lower ethanol content. This problem can be avoided by always using fuel with the same ethanol content. Use only STIHL two-stroke engine oil - Stihl HT 130 | Product Instruction Manual - Page 22
care not to spill fuel while fueling and do not overfill the tank. STIHL recommends use of the STIHL filling system (special accessory). 249BA056 KN 249BA054 KN N Turn the cap counterclockwise (approx. 1/4 turn). N Remove the filler cap. N Fold the grip down so that it is flush with the surface - Stihl HT 130 | Product Instruction Manual - Page 23
to resin. This results in hard deposits that are difficult to remove, especially in the area of the chain drive and chain. It may even cause the oil pump to seize. The service life of the chain and guide bar depends on the quality of the lubricant. It is therefore essential to use only a specially - Stihl HT 130 | Product Instruction Manual - Page 24
dealer for assistance if necessary STIHL recommends that you have servicing and repair work carried out exclusively by an authorized STIHL servicing dealer. The saw chain must always throw off a small amount of oil. Never operate your saw without chain lubrication. If the chain runs dry, the whole - Stihl HT 130 | Product Instruction Manual - Page 25
Adjusting the Telescoping Shaft HT 101, HT 131 only Always shut off the engine and fit the chain guard Fitting the Harness The type and style of the harness depend on the market. Shoulder strap 1 English Full harness (HT 100, HT 101 only) 1 390BA049 KN 390BA040 KN 386BA012 KN 2 3 N Loosen the - Stihl HT 130 | Product Instruction Manual - Page 26
straps (4) and the carrying strap (5). N Put the backpack carrying system (1) on your back and adjust it as described in the instruction sheet provided. N Secure the sliding adjuster (2) to the shaft. N Attach the pole pruner to the carrying strap when cutting. 24 HT 100, HT 101, HT 130, HT 131 - Stihl HT 130 | Product Instruction Manual - Page 27
3 Slide control Positions of slide control 4 STOP-0 - engine off - the ignition is switched off 5 F - normal run position - the engine is running or can start 6 START - the ignition is switched on - the engine can start 9 8 N Set the choke knob (8): 249BA007 KN HT 100, HT 101, HT 130, HT 131 25 - Stihl HT 130 | Product Instruction Manual - Page 28
the fuel pump bulb (9) at least five times - even if the bulb is already filled with fuel. Starting N Remove the blade scabbard. Check that the chain is engine settles down to idle speed. Make sure the carburetor is correctly adjusted. The saw chain must not rotate when the engine is idling. Your - Stihl HT 130 | Product Instruction Manual - Page 29
be retensioned more often than one that has been in use for some time. Chain cold Tension is correct when the chain fits snugly against the underside of the bar and can still be pulled along the bar by hand. Retension if necessary - see "Tensioning the Saw Chain". HT 100, HT 101, HT 130, HT 131 27 - Stihl HT 130 | Product Instruction Manual - Page 30
Chain pitch Minimum groove depth 3/8" P 0.20" (5.0 mm) 1/4" 0.16" (4.0 mm) If groove depth is less than specified: N Replace the guide bar. The drive link tangs will otherwise scrape along the bottom of the groove - the cutters and tie straps will not ride on the bar rails. 28 HT 100, HT 101 - Stihl HT 130 | Product Instruction Manual - Page 31
wash. N Replace damaged parts. Installing the filter 273BA006 KN Exhaust emissions are controlled by the design of the fundamental engine parameters and components (e.g. carburation, ignition, timing and valve or port timing) without the addition of any major hardware. The carburetor comes from - Stihl HT 130 | Product Instruction Manual - Page 32
to 3/4 turn in the same direction. If the chain continues moving when the engine is idling, have your saw machine and repaired by your servicing dealer. Erratic idling behavior, engine stops even though than stop, until the engine runs and accelerates smoothly. 30 HT 100, HT 101, HT 130, HT 131 - Stihl HT 130 | Product Instruction Manual - Page 33
(too much engine oil in the gasoline), a dirty air filter and unfavorable running conditions (mostly at part throttle etc.) affect the condition of the spark plug. These factors cause deposits to form on the insulator nose which may result in trouble in operation. Removing the spark plug N Move the - Stihl HT 130 | Product Instruction Manual - Page 34
electrode gap (A) and readjust if necessary - see "Specifications". N Use only resistor type spark plugs of the approved range. Rectify problems which have caused fouling of spark plug: - Too much oil in fuel mix. - Dirty air filter. - Unfavorable running conditions, e.g. operating at part load - Stihl HT 130 | Product Instruction Manual - Page 35
the Starter Rope and Rewind Spring Replacing the Starter Rope 3 4 5 English 6 249BA014 KN 1 1 2 249BA013 KN 1 non-resinous oil. N Slip the rotor over the starter post - turn it back and forth to engage the anchor loop of the rewind spring. 249BA015 KN HT 100, HT 101, HT 130, HT 131 33 - Stihl HT 130 | Product Instruction Manual - Page 36
the new spring with a few drops of non-resinous oil. Tensioning the rewind spring 249BA013 KN 249BA018 KN 249BA016 KN illustration. N Go to "Tensioning the Rewind Spring". Replacing a broken rewind spring N Remove the rope rotor as described in chapter on "Replacing HT 100, HT 101, HT 130, HT 131 - Stihl HT 130 | Product Instruction Manual - Page 37
(0.5 mm) since this would reduce the life of the chain. Use a gauge (special accessory) to check the depth of the wear marks. It is best to use two saw chains in rotation with one sprocket. STIHL recommends the use of original STIHL chain sprockets. 000BA054 KN HT 100, HT 101, HT 130, HT 131 35 - Stihl HT 130 | Product Instruction Manual - Page 38
English The chain sprocket is driven via a friction clutch. Have the chain sprocket replaced by a servicing dealer. STIHL recommends that you have servicing and repair work carried out exclusively by an authorized STIHL servicing dealer. Maintaining and Sharpening the Saw Chain Cutting effortlessly - Stihl HT 130 | Product Instruction Manual - Page 39
and groove depth. It also cleans the guide bar groove and oil inlet holes. File correctly N Select sharpening tools according to chain pitch. N If you use an FG 2, HOS or USG sharpener: Remove the chain from the bar and sharpen according to the instructions supplied with the tool. 001BA203 KN - Stihl HT 130 | Product Instruction Manual - Page 40
Saw chains with humped drive link (2) - upper part of humped drive link (2) (with service mark) is lowered along with the depth gauge. The other parts of the humped drive chain - the highest point of the depth gauge must be level with the filing gauge. 689BA052 KN 38 HT 100, HT 101, HT 130, HT 131 - Stihl HT 130 | Product Instruction Manual - Page 41
dust - lubricate the chain thoroughly. N Before a long out-of-service period, clean the chain and store it in a welloiled condition. Sharpening Tools (special accessories) Chain Pitch Round file ^ Round file File holder inch (mm) mm (inch) Part No. Part No. 1/4 P (6,35) 3,2 (1/8) 5605 - Stihl HT 130 | Product Instruction Manual - Page 42
English Inspections and Maintenance by Dealer Fuel pickup body in tank N Have the pickup body in the fuel tank replaced every year. STIHL recommends that you have servicing and repair work carried out exclusively by an authorized STIHL servicing dealer. 40 HT 100, HT 101, HT 130, HT 131 - Stihl HT 130 | Product Instruction Manual - Page 43
X Control handle Check operation X X Air filter Clean Replace Pickup body in fuel tank Check Replace Fuel tank Clean Carburetor Check idle adjustment - chain must not rotate X X Readjust idle Spark plug Adjust electrode gap Replace after every 100 operating hours Visual inspection - Stihl HT 130 | Product Instruction Manual - Page 44
Have replaced by dealer1) Safety labels Replace 1) STIHL recommends a STIHL servicing dealer. X X X X X before starting work after finishing work or daily after each refueling stop weekly monthly every 12 months if problem if damaged if required X X X X X X 42 HT 100, HT 101, HT 130, HT - Stihl HT 130 | Product Instruction Manual - Page 45
Trigger 7 Spark Plug Boot 8 Choke Knob 9 Air Filter Cover 10 Fuel Tank 11 Machine Support 12 Machine Support (HT 130, HT 131) 13 Oilomatic Saw Chain 14 Guide Bar 15 Oil Tank 16 Oil Filler Cap 17 Telescopic Drive Tube (Shaft) (HT 101, HT 131) 18 Clamp Screw (HT 101, HT 131) 19 Chain Sprocket Cover 20 - Stihl HT 130 | Product Instruction Manual - Page 46
and drive links. 14 Guide Bar Supports and guides the saw chain. 15 Oil Tank Tank for chain lubricating oil. 16 Oil Filler Cap For closing the oil tank. 17 Telescopic Drive Tube (Shaft) (HT 101, HT 131) Adjustable drive tube enables user to optimize machine's reach. 18 Clamp Screw (HT 101, HT 131 - Stihl HT 130 | Product Instruction Manual - Page 47
output shaft speed (chain sprocket): 10,500 rpm Valve clearance Inlet valve: 0.004 in. (0.10 mm) Exhaust valve: 0.004 in. (0.10 mm) Ignition System Electronic magneto ignition English HT 100, HT 101 Spark plug (resistor type): Bosch USR 7AC Electrode gap: 0.02 in. (0.5 mm) HT 130, HT - Stihl HT 130 | Product Instruction Manual - Page 48
repair has been performed by an authorized STIHL servicing dealer using original STIHL replacement parts. Original STIHL parts can be identified by the STIHL part number, the { logo and, in some cases, by the STIHL parts symbol K. The symbol may appear alone on small parts. 46 HT 100, HT 101, HT - Stihl HT 130 | Product Instruction Manual - Page 49
part on your engine is defective, the part will be repaired or replaced by STIHL Incorporated free of charge. Owner's Warranty Responsibilities As the small off-road equipment engine owner, you are responsible for the performance of the required maintenance listed in your instruction manual. STIHL - Stihl HT 130 | Product Instruction Manual - Page 50
warranty. The following list specifically defines the emission-related warranted parts: - Air Filter - Carburetor - Fuel Pump - Choke (Cold Start Enrichment System) - Control Linkages - Intake Manifold - Magneto or Electronic Ignition System (Ignition Module) - Spark Plug - Catalytic Converter (if - Stihl HT 130 | Product Instruction Manual - Page 51
4-MIX® AUTOCUT® EASYSTART® FARM BOSS® iCademy® OILOMATIC® STIHL Cutquik® STIHL DUROMATIC® STIHL Quickstop® STIHL ROLLOMATIC® STIHL WOOD BOSS® TIMBERSPORTS® WOOD BOSS® YARD BOSS® HT 100, HT 101, HT 130, HT 131 Some of STIHL's Common Law Trademarks BioPlus™ Easy2Start™ EasySpool™ ElastoStart™ Ematic - Stihl HT 130 | Product Instruction Manual - Page 52
English 50 HT 100, HT 101, HT 130, HT 131 - Stihl HT 130 | Product Instruction Manual - Page 53
manual. Para obtener el rendimiento y satisfacción máximos del podador de varilla STIHL, es importante que lea, comprenda y respete las medidas de seguridad y las instrucciones de uso y mantenimiento dadas en el cap incluso mortales. { HT 100, HT 101, HT 130, HT 131 51 © ANDREAS STIHL AG & Co. - Stihl HT 130 | Product Instruction Manual - Page 54
pasos individuales o procedimientos descritos en el manual pueden estar señalados en diferentes maneras: STIHL es mejorar continuamente todos sus productos. Como resultado de ello, periódicamente se introducen cambios de diseño y mejoras. Por lo tanto, es posible que 52 HT 100, HT 101, HT 130, HT - Stihl HT 130 | Product Instruction Manual - Page 55
muchos cortadores afilados. Si los cortadores entran en contacto con alguna parte del cuerpo del operador, le causarán una herida, aunque la contenidos en este manual se refieren al uso de todos los podadores de varilla español / EE.UU STIHL. Los distintos modelos HT 100, HT 101, HT 130, HT 131 53 - Stihl HT 130 | Product Instruction Manual - Page 56
síndrome del túnel carpiano, sírvase notar lo siguiente: - La mayor parte de las herramientas motorizadas de STIHL se ofrecen con un sistema antivibración ("AV") cuyo propósito es reducir la gruesos y antideslizantes mejoran el manejo y ayudan a proteger las manos. HT 100, HT 101, HT 130, HT 131 - Stihl HT 130 | Product Instruction Manual - Page 57
motorizada, vea el capítulo sobre "Piezas principales". HT 100, HT 101, HT 130, HT 131 Advertencia! Nunca modifique, de ninguna manera, esta herramienta motorizada. Utilice únicamente los accesorios y repuestos suministrados por STIHL o expresamente autorizados por STIHL para usarse con el - Stihl HT 130 | Product Instruction Manual - Page 58
correcta y apriétela en la boca de llenado del tanque. Para hacer esto con esta tapa STIHL, levante la empuñadura en la parte superior de la tapa hasta dejarla vertical a un ángulo de 90°. Inserte la tapa en horario hasta que tope (aprox. un cuarto de vuelta). 56 HT 100, HT 101, HT 130, HT 131 - Stihl HT 130 | Product Instruction Manual - Page 59
girado prematuramente (con relación a la parte superior) hasta la posición cerrada. y llévela a un concesionario STIHL autorizado para repararla. Tapa roscada Advertencia también el capítulo "Combustible" del Manual de instrucciones para manual de instrucciones.) HT 100, HT 101, HT 130, HT 131 57 - Stihl HT 130 | Product Instruction Manual - Page 60
cadena, siga el procedimiento descrito en el capítulo "Montaje de la espada y la cadena" del manual de instrucciones. La cadena Oilomatic, la espada y la rueda dentada STIHL deben coincidir entre sí en cuanto a calibre el motor se desacelere a la marcha en vacío. 58 HT 100, HT 101, HT 130, HT 131 - Stihl HT 130 | Product Instruction Manual - Page 61
al gancho de resorte de su arnés (vea el capítulo correspondiente en este manual). Advertencia! Cuando tire del mango de arranque, no correspondiente del manual de instrucciones. Si no puede regular correctamente el ralentí, pida a su concesionario STIHL que revise HT 100, HT 101, HT 130, HT 131 59 - Stihl HT 130 | Product Instruction Manual - Page 62
inhalación repetida o de grandes cantidades de polvo u otros contaminantes del aire, especialmente los de partículas pequeñas puede causar enfermedades respiratorias o de otro tipo. Esto incluye el polvo, especialmente para el tipo de polvo presente en el lugar. 60 HT 100, HT 101, HT 130, HT 131 - Stihl HT 130 | Product Instruction Manual - Page 63
las manos y los pies alejados de la cadena de aserrado. No toque nunca con las manos o cualquier parte del cuerpo la cadena que está en movimiento. La cadena de aserrado sigue en marcha por un rato movimiento de la cadena cuando el motor está en marcha a vacío. HT 100, HT 101, HT 130, HT 131 61 - Stihl HT 130 | Product Instruction Manual - Page 64
gruesa o pesada, haga un corte de distensión no muy profundo en la parte inferior de la rama antes de cortarla por su parte superior para evitar que la rama se parta. Advertencia! Para reducir el riesgo caer, apártese y guarde una distancia adecuada de la rama. 62 HT 100, HT 101, HT 130, HT 131 - Stihl HT 130 | Product Instruction Manual - Page 65
de rejillas diseñadas para reducir el riesgo de incendio debido a la emisión de partículas calientes. Debido al calor de la reacción catalítica, estas rejillas normalmente permanecen obstruidas, haga reparar el silenciador por un concesionario de servicio STIHL. HT 100, HT 101, HT 130, HT 131 63 - Stihl HT 130 | Product Instruction Manual - Page 66
aprisione la cadena en la parte inferior de la espada. 2. Siempre empiece el corte con la cadena girando a velocidad máxima. B = Rechazo B El rechazo ocurre cuando la cadena en la parte superior de la espada se detiene repentinamente cuando queda 001BA038 KN 64 HT 100, HT 101, HT 130, HT 131 - Stihl HT 130 | Product Instruction Manual - Page 67
o situaciones que pueden permitir que el material aprisione la cadena en la parte superior de la espada. 2. No corte más de una rama a la vez su manual de instrucciones. Este tipo de trabajo debe ser realizado únicamente por el concesionario de servicio de STIHL. HT 100, HT 101, HT 130, HT 131 65 - Stihl HT 130 | Product Instruction Manual - Page 68
siempre vacíe el tanque de combustible. Consulte el capítulo "Almacenamiento de la máquina" en este manual. Guarde el combustible y el aceite de la cadena seguridad. N Ajuste la varilla telescópica a la longitud requerida (HT 101, HT 131 solamente). N Arranque del motor N Colóquese la correa sobre - Stihl HT 130 | Product Instruction Manual - Page 69
ón 390BA052 KN N Para hacer esto, coloque el accesorio de corte y tire del mismo a lo ancho de la parte inferior de la rama en forma de arco, hasta llegar a la punta de la espada. N Haga el corte transversal caso depende de la posición de la rama. 390BA058 KN HT 100, HT 101, HT 130, HT 131 67 - Stihl HT 130 | Product Instruction Manual - Page 70
. 390BA043 KN Use guantes para proteger las manos de los cortadores afilados. N Coloque la cadena - empiece por la punta de la espada. 390BA003 KN 68 HT 100, HT 101, HT 130, HT 131 - Stihl HT 130 | Product Instruction Manual - Page 71
la espada. N Vuelva a colocar la cubierta y apriete la tuerca con los dedos. N Pase al capítulo "Tensado de la cadena de aserrado" 1 Tensado durante el trabajo de corte: N Parada del motor de la cadena frecuentemente - vea el capítulo "Instrucciones de manejo". HT 100, HT 101, HT 130, HT 131 69 - Stihl HT 130 | Product Instruction Manual - Page 72
íticos. Esto podría causar problemas de funcionamiento e incluso daño del motor. Por esta razón, STIHL recomienda el uso exclusivo de gasolina sin plomo reconocida de buena calidad. La gasolina con un contenido lo cual no debe utilizarse en este tipo de motores. 70 HT 100, HT 101, HT 130, HT 131 - Stihl HT 130 | Product Instruction Manual - Page 73
el aceite y la gasolina. Gasolina español / EE.UU Aceite (STIHL 50:1 ó aceite de alta calidad equivalente) gal EE.UU. 1 2 1/2 5 oz fl EE.UU. 2,6 6,4 12,8 Deseche los envases vacíos usados para mezclar el aceite únicamente en vertederos autorizados para ello. HT 100, HT 101, HT 130, HT 131 71 - Stihl HT 130 | Product Instruction Manual - Page 74
el combustible al llenar el tanque y de tampoco llenarlo en exceso. STIHL recomienda el uso del sistema de llenado STIHL (accesorio especial). Cierre de la tapa de llenado sin herramientas 002BA420 KN empuñadura hacia abajo de modo que quede a ras con la superficie. HT 100, HT 101, HT 130, HT 131 - Stihl HT 130 | Product Instruction Manual - Page 75
Tenga cuidado de no derramar el combustible y no llene en exceso el tanque. STIHL recomienda el uso del sistema de llenado STIHL (accesorio especial). 200BA421 KN 200BA422 KN Cierre de la tapa de llenado roscada y no es adecuado para la lubricación de cadenas. HT 100, HT 101, HT 130, HT 131 73 - Stihl HT 130 | Product Instruction Manual - Page 76
llenado en su posición, con la empuñadura vertical, asegurándose que las partes hendidas queden alineadas. N Gire la tapa de llenado en sentido horario hasta que STIHL recomienda que un concesionario STIHL autorizado efectúe los trabajos de mantenimiento y reparación. 74 HT 100, HT 101, HT 130, HT - Stihl HT 130 | Product Instruction Manual - Page 77
de la cadena Ajuste de la varilla telescópica HT 101, HT 131 solamente Siempre apague el motor e instale el Después del rodaje inicial de la cadena, revise su tensión y ajústela de ser necesario - vea el capítulo "Revisión de la tensión de la cadena". N Suelte el tornillo. N Ajuste el eje al largo - Stihl HT 130 | Product Instruction Manual - Page 78
386BA012 KN 246BA015 KN 246BA016 KN español / EE.UU Arnés completo (HT 100, HT 101 solamente) Sistema de transporte tipo mochila HT 100, HT 130 solamente 1 1 2 3 4 5 2 3 N Colóquese el arnés completo (1) y la eslinga (2) de la manera indicada en la hoja de instrucciones provista. N Ajuste el - Stihl HT 130 | Product Instruction Manual - Page 79
HT 101, HT 131 solamente 1 2 español / EE.UU Arranque / parada del motor Controles 4 7 5 4 STOP- START STOP 002BA181 KN funcionamiento normal - el motor está en marcha o puede arrancarse 6 START - el encendido está conectado y es posible arrancar el motor HT 100, HT 101, HT 130, HT 131 77 - Stihl HT 130 | Product Instruction Manual - Page 80
daño permanente. Método alternativo: N Quite el protector de la cadena. Coloque el eje sobre una rama, de modo que quede fijado por el gancho. 78 HT 100, HT 101, HT 130, HT 131 - Stihl HT 130 | Product Instruction Manual - Page 81
"Bujía". N Seque la bujía. N Haga girar el motor varias veces con el arrancador para despejar la cámara de combustión. N Vuelva a colocar la bujía - vea "Bujía". HT 100, HT 101, HT 130, HT 131 79 - Stihl HT 130 | Product Instruction Manual - Page 82
acelerador N Revise el ajuste del cable del acelerador - vea el capítulo "Ajuste del cable del acelerador". Se agotó completamente el combustible tensión es correcta cuando la cadena encaja ajustadamente contra la parte inferior de la espada y todavía puede ser tirada a HT 100, HT 101, HT 130, HT 131 - Stihl HT 130 | Product Instruction Manual - Page 83
, de ser necesario. Almacenamiento por largo tiempo Consulte el capítulo "Almacenamiento de la máquina". Cuidado de la espada De lo contrario las pestañas de los eslabones impulsores rasparán la parte inferior de la ranura - los cortadores y las amarras no viajarán HT 100, HT 101, HT 130, HT 131 81 - Stihl HT 130 | Product Instruction Manual - Page 84
Revise que el cable del acelerador esté debidamente ajustado - reajústelo de ser necesario - vea el capítulo "Ajuste del cable del acelerador". N Revise el chispero del silenciador (no se instala en todas la cubierta. N Inserte el tornillo y apriételo bien firme. 82 HT 100, HT 101, HT 130, HT 131 - Stihl HT 130 | Product Instruction Manual - Page 85
más allá del tope) hasta que el motor funcione y se acelere de modo uniforme. Funcionamiento irregular a marcha en vacío Marcha en vacío con mezcla muy rica HT 100, HT 101, HT 130, HT 131 83 - Stihl HT 130 | Product Instruction Manual - Page 86
tornillo y apriételo bien firme. N Instale la envuelta. 1 249BA059 KN N Saque el tornillo (1). 249BA060 KN 3 2 2 N Saque los tornillos (2) y quite la cubierta (3). N Saque el tornillo (4). 84 HT 100, HT 101, HT 130, HT 131 - Stihl HT 130 | Product Instruction Manual - Page 87
! Para reducir el riesgo de incendio y de quemaduras, utilice solamente las bujías autorizadas por STIHL. Siempre empuje el casquillo (1) de la bujía firmemente en el borne (2) del tamaño adecuado N Quite el casquillo de la bujía (1). N Destornille la bujía. HT 100, HT 101, HT 130, HT 131 85 - Stihl HT 130 | Product Instruction Manual - Page 88
. N Quite cuidadosamente el rotor de la cuerda con la arandela (4) y el trinquete (5). N Quite el resto de la cuerda del rotor y del mango de arranque. 86 HT 100, HT 101, HT 130, HT 131 - Stihl HT 130 | Product Instruction Manual - Page 89
el extremo de la cuerda de arranque nueva y después pase la cuerda por la parte superior del mango y por el buje de la cuerda (6). N Pase la cuerda a lado para engranar la espiral terminal del resorte de rebobinado. HT 100, HT 101, HT 130, HT 131 249BA015 KN N Instale el trinquete (5) en el rotor - Stihl HT 130 | Product Instruction Manual - Page 90
rebobinado". N Si el resorte se sale y se desenrolla: vuélvalo a STIHL BioPlus, llene completamente el tanque de aceite de la cadena. N Guarde la máquina en un lugar seco y elevado, o bajo llave, fuera del alcance de los niños y de otras personas no autorizadas. 88 HT 100, HT 101, HT 130, HT - Stihl HT 130 | Product Instruction Manual - Page 91
. Es mejor usar dos cadenas en rotación con una rueda dentada. STIHL recomienda el uso de piñones de cadena originales de STIHL. 000BA054 KN El piñón de la cadena es impulsado por medio de riesgo de contragolpes y de las lesiones resultantes de los mismos. HT 100, HT 101, HT 130, HT 131 89 - Stihl HT 130 | Product Instruction Manual - Page 92
especiales para cadenas de aserrado. Las limas de otros tipos tienen forma y patrón de corte incorrectos. Para comprobar los ángulos Utilice un calibrador de rectificación STIHL (accesorio especial - vea la tabla "Herramientas de afilado"). Esta es una HT 100, HT 101, HT 130, HT 131 001BA203 KN - Stihl HT 130 | Product Instruction Manual - Page 93
y el borde de corte. Este ajuste puede aumentarse en 0,2 mm (0,008 pulg) para cortar maderas blandas cuando el tiempo está templado - sin escarcha. 689BA023 KN HT 100, HT 101, HT 130, HT 131 91 - Stihl HT 130 | Product Instruction Manual - Page 94
vez que afile la cadena, use un calibrador de rectificación para verificar el ajuste. Las otras partes de la pletina de amarre con saliente no deben afilarse ya que eso podría aumentar la tendencia aumenta si los calibradores de profundidad están demasiado bajos. 92 HT 100, HT 101, HT 130, HT 131 - Stihl HT 130 | Product Instruction Manual - Page 95
252 3356 0814 252 3356 0814 252 3356 Kit de afilar 1) N° de pieza - - 5605 007 1027 5605 007 1027 5605 007 1028 5605 007 1029 HT 100, HT 101, HT 130, HT 131 93 - Stihl HT 130 | Product Instruction Manual - Page 96
ón y mantenimiento por el concesionario Captador de combustible en el tanque N Cada año, pida que le sustituyan el captador de combustible en el tanque. STIHL recomienda que un concesionario STIHL autorizado efectúe los trabajos de mantenimiento y reparación. 94 HT 100, HT 101, HT 130, HT 131 - Stihl HT 130 | Product Instruction Manual - Page 97
horas Revisar X Chispero en silenciador Limpiar o reemplazar Todos los tornillos y tuercas accesibles (salvo los tornillos de ajuste) Volver a apretar HT 100, HT 101, HT 130, HT 131 antes de comenzar el trabajo después de terminar el trabajo o diariamente después de cada parada para cargar - Stihl HT 130 | Product Instruction Manual - Page 98
STIHL para servicio. X X X X X antes de comenzar el trabajo después de terminar el trabajo o diariamente después de cada parada para cargar combustible semanalmente mensualmente cada 12 meses si hay problema si tiene daños si se requiere X X X X X X X X X 96 HT 100, HT 101, HT 130, HT - Stihl HT 130 | Product Instruction Manual - Page 99
Cadena de aserrado Oilomatic 14 Espada 15 Tanque de aceite 16 Tapa de llenado de aceite 17 Tubo de mando telescópico (eje) (HT 101, HT 131) 18 Tornillo de fijación (HT 101, HT 131) 19 Cubierta del piñón de la cadena 20 Gancho 21 Protector de cadena (funda) 22 Piñón de la cadena 23 Tensor - Stihl HT 130 | Product Instruction Manual - Page 100
de aceite Para tapar el tanque de aceite. 17 Tubo de mando telescópico (eje) (HT 101, HT 131) El tubo de mando ajustable permite al operador optimizar el alcance de la máquina. 18 Tornillo de fijación (HT 101, HT 131) Para ajustar la longitud del tubo de mando telescópico. 19 Cubierta del piñón de - Stihl HT 130 | Product Instruction Manual - Page 101
Categoría A = 300 horas B = 125 horas C = 50 horas Motor Motor de un cilindro, cuatro tiempos, lubricado por una mezcla de gasolina con aceite HT 100, HT 101 Cilindrada: 31,4 cm3 (1,92 pulg cúb.) Diámetro: 40 mm (1,57 pulg) Carrera: 25 mm (0,98 pulg) Potencia del motor según ISO 8893: 1,05 - Stihl HT 130 | Product Instruction Manual - Page 102
HT 100: 5,5 kg (12,1 lb) HT 101: 7,6 kg (16,8 lb) HT 130 5,7 kg (12,6 lb) HT 131 7,8 kg (17,2 lb) Accesorio de corte Cadena Picco de 3/8 pulg Cadena de aserrado STIHL la publicación de este manual. Accesorios especiales Comuníquese con su concesionario STIHL para información acerca de - Stihl HT 130 | Product Instruction Manual - Page 103
manual de instrucciones. STIHL Incorporated le recomienda guardar todos los recibos comprobantes de los trabajos de mantenimiento hechos a su motor pequeño para equipo de uso fuera de carretera, pero STIHL Incorporated no puede negar garantía basado en el solo hecho de faltar los HT 100, HT 101, HT - Stihl HT 130 | Product Instruction Manual - Page 104
STIHL llamando al 1-800-467-8445, o si lo prefiere puede escribir a STIHL Inc., 536 Viking Drive el primer punto STIHL Incorporated es responsable por daños a otros componentes del motor causados por la falla de una pieza garantizada que todavía está bajo garantía. 102 HT 100, HT 101, HT 130, HT - Stihl HT 130 | Product Instruction Manual - Page 105
servicio autorizado por STIHL y presente la tarjeta de garantía firmada. Requerimientos de mantenimiento Las instrucciones presentadas en este manual se basan en la aplicación de la mezcla recomendada para motores de 2 tiempos (vea también la instrucción HT 100, HT 101, HT 130, HT 131 "Combustible - Stihl HT 130 | Product Instruction Manual - Page 106
STIHL RAPID™ STIHL SuperCut™ STIHL Territory™ TapAction™ TrimCut™ Esta lista de marcas comerciales está sujeta a cambios. Queda terminantemente prohibido todo uso de estas marcas comerciales sin el consentimiento expreso por escrito de ANDREAS STIHL AG & Co. KG, Waiblingen. 104 HT 100, HT 101, HT - Stihl HT 130 | Product Instruction Manual - Page 107
- Stihl HT 130 | Product Instruction Manual - Page 108
to the State of California to cause cancer, birth defects or other reproductive harm. 0458-246-8621-D englisch / spanisch USA U G U www.stihl.com ! ADVERTENCIA! El gas de escape del motor de esta máquina contiene productos químicos que en el estado de California son considerados como causantes de
-
 1
1 -
 2
2 -
 3
3 -
 4
4 -
 5
5 -
 6
6 -
 7
7 -
8
-
9
-
10
-
11
-
12
-
13
-
14
-
15
-
16
-
17
-
18
-
19
-
20
-
21
-
22
-
23
-
24
-
25
-
26
-
27
-
28
-
29
-
30
-
31
-
32
-
33
-
34
-
35
-
36
-
37
-
38
-
39
-
40
-
41
-
42
-
43
-
44
-
45
-
46
-
47
-
48
-
49
-
50
-
51
-
52
-
53
-
54
-
55
-
56
-
57
-
58
-
59
-
60
-
61
-
62
-
63
-
64
-
65
-
66
-
67
-
68
-
69
-
70
-
71
-
72
-
73
-
74
-
75
-
76
-
77
-
78
-
79
-
80
-
81
-
82
-
83
-
84
-
85
-
86
-
87
-
88
-
89
-
90
-
91
-
92
-
93
-
94
-
95
-
96
-
97
-
98
-
99
-
100
-
101
-
102
-
103
-
104
-
105
-
106
-
107
-
108
 |
 |

{
STIHL HT 100, 101, 130, 131
Warning!
Read and follow all safety
precautions in Instruction Manual –
improper use can cause serious or
fatal injury.
Advertencia!
Lea y siga todas las precauciones
de seguridad dadas en el manual
de instrucciones – el uso incorrecto
puede causar lesiones graves o
mortales.
Instruction Manual
Manual de instrucciones