Stihl MS 362 R Product Instruction Manual
Stihl MS 362 R Manual
 |
View all Stihl MS 362 R manuals
Add to My Manuals
Save this manual to your list of manuals |
Stihl MS 362 R manual content summary:
- Stihl MS 362 R | Product Instruction Manual - Page 1
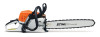
STIHL MS 362 { Instruction Manual Manual de instrucciones Warning! To reduce the risk of kickback injury use STIHL reduced kickback bar and STIHL RMC3 or RSC3 (3/8") chain depending on sprocket pitch or other available low kickback components. Advertencia! Para reducir el riesgo de lesionarse como - Stihl MS 362 R | Product Instruction Manual - Page 2
Instruction Manual 1 - 61 Manual de instrucciones 63 - 128 - Stihl MS 362 R | Product Instruction Manual - Page 3
Chain Lubrication 32 Chain Brake 32 Winter Operation 33 Electric Handle Heating 34 Starting / Stopping the Engine 35 Operating Instructions 38 Oil Quantity Control 39 Taking Care of the Guide Bar 39 Air Filter System 40 Cleaning the Air Filter 40 Engine Management 41 Adjusting - Stihl MS 362 R | Product Instruction Manual - Page 4
Direction of chain rotation Ematic; chain oil quantity control Tension the chain Intake air preheating for winter operation Intake air for summer operation Handle heating Operate decompression valve Operate manual fuel pump Symbols in Text Many operating and safety instructions are supported by - Stihl MS 362 R | Product Instruction Manual - Page 5
STIHL chain saws. Different models may have English different parts and controls. See the appropriate section of your instruction manual for a description of the controls and the function of the parts of your model. Safe use of a chain saw (Raynaud's phenomenon) or carpal tunnel syndrome. MS 362 3 - Stihl MS 362 R | Product Instruction Manual - Page 6
immediately. Warning! The ignition system of the STIHL unit produces an electromagnetic field of a Chain saw noise may damage your hearing. Wear sound barriers (ear plugs or ear mufflers) to help protect your hearing. Continual and regular users should have their hearing checked regularly. MS 362 - Stihl MS 362 R | Product Instruction Manual - Page 7
of doubt, have it checked by your STIHL servicing dealer. THE USE OF THE POWER TOOL Transporting the Power Tool Warning! To reduce the risk of injury from saw chain contact, never carry or transport your power tool with the saw chain moving. Always engage the chain brake when taking more than a few - Stihl MS 362 R | Product Instruction Manual - Page 8
unit and take it to your authorized STIHL dealer for repair. 001BA227 KN 001BA226 KN 001BA220 KN To do this with this STIHL cap, raise the grip on the top of the cap until it is upright at a 90° angle. Insert the cap in the fuel tank opening with the raised positioning 6 MS 362 - Stihl MS 362 R | Product Instruction Manual - Page 9
Chain" of your instruction manual. STIHL Oilomatic chain, guide bar and sprocket must match each other in gauge and pitch. Before replacing any bar and chain, see the chapter entitled "Specifications" in the instruction manual and the section "Kickback" and the "ANSI B 175.1-2000 chain saw chain saw - Stihl MS 362 R | Product Instruction Manual - Page 10
. There are two recommended methods for starting your chain saw. With the first recommended method, the chain saw is started on the ground. Make sure the chain brake is engaged (see "Chain Brake" chapter in your instruction manual) and place the chain saw on firm ground or other solid surface in an - Stihl MS 362 R | Product Instruction Manual - Page 11
or any other part of your body. Warning! To reduce the risk of injury from loss of control, never work on a ladder or any other insecure support. Never hold operating the chain saw in a cramped environment and have taken proper precautions to avoid injury from falling limbs or branches. MS 362 9 - Stihl MS 362 R | Product Instruction Manual - Page 12
and daylight conditions only. Work carefully. Warning! Your chain saw is a one-person machine. Do not allow other monoxide, that are known to cause respiratory problems, cancer, birth defects, or other in particular those with a smaller particle size, may cause respiratory or other illnesses. MS 362 - Stihl MS 362 R | Product Instruction Manual - Page 13
employer or a local OSHA representative. Operating Instructions Warning! Do not operate your power tool the saw chain or cause the saw to kickback. Warning! The muffler and other parts of the engine (e.g. fins of the cylinder, serviced and repaired by your STIHL servicing dealer only. MS 362 11 - Stihl MS 362 R | Product Instruction Manual - Page 14
STIHL STIHL servicing dealer. Reactive Forces including Kickback Warning! Reactive forces may occur any time the chain mounted cylinder shroud or the rotating chain is suddenly chain causes a rotational force on the chain saw in the direction opposite to the chain example, when the chain near the upper - Stihl MS 362 R | Product Instruction Manual - Page 15
Take the saw to your local STIHL servicing dealer. Do not use the saw until the problem has been rectified. STIHL Quickstop Chain Brake STIHL has developed a chain stopping system designed to reduce the risk of injury in certain kickback situations. It is called a Quickstop chain brake. MS 362 13 - Stihl MS 362 R | Product Instruction Manual - Page 16
in the chapter entitled "Chain Brake" of your instruction manual. Also make sure that the chain is not turning at idle speed (see above at "Important Adjustments"). Low Kickback Saw Chain and Reduced Kickback Bars STIHL offers a variety of bars and chains. STIHL reduced kickback bars and low - Stihl MS 362 R | Product Instruction Manual - Page 17
more aggressive chains, these bars may be less effective in reducing kickback. Warning! For a properly balanced saw and in order to comply with § 5.12.1 of ANSI B 175.1-2000, use only bar lengths listed in the specifications chapter of the instruction manual for your chain saw powerhead. MS 362 15 - Stihl MS 362 R | Product Instruction Manual - Page 18
Warning! Do not mount a bow guide on any STIHL chain saw. Any chain saw equipped with a bow guide is potentially very dangerous. The risk of kickback is increased with a bow guide because of the increased kickback contact area. Low kickback chain will not significantly reduce the risk of kickback - Stihl MS 362 R | Product Instruction Manual - Page 19
operator should stand on the uphill side if possible. Felling Instructions 1 1/2 1 21/2 When felling, maintain a distance . 001BA088 LÄ 001BA040 KN Escape Path English B 45° A 45° B First clear the tree base and work area about at a 45° angle. Place all tools and equipment a safe distance away - Stihl MS 362 R | Product Instruction Manual - Page 20
to check the desired direction of fall: Position the saw so that the gunning sight points exactly in the approx. 45° angle to a depth of about 1/5 to 1/4 of the trunk diameter. N Make second cut horizontal. N Remove resulting 45° piece 40 degree angle. N Remove resulting 90° piece. 18 MS 362 - Stihl MS 362 R | Product Instruction Manual - Page 21
001BA144 KN 001BA145 KN N For medium sized or larger trees make cuts at both sides of the trunk, at same height as subsequent felling cut. N Cut to no more than width of guide bar. This is especially important in softwood be of wood or plastic - never steel, which can damage the chain. MS 362 19 - Stihl MS 362 R | Product Instruction Manual - Page 22
spikes of the chain saw directly behind the location of the intended hinge and pivot the saw around this point only guide bar requires the use of the plunge-cut method before making the felling cut. First, cut a large, wide felling notch. Make a plunge cut in the center of the notch. 20 MS 362 - Stihl MS 362 R | Product Instruction Manual - Page 23
previously. If you are inexperienced with a chain saw, plunge-cutting should not be attempted. Seek the help of a professional. Warning! In order to reduce the risk of personal injury, never stand directly behind the tree when it is about to fall, since part of the trunk may split and come back - Stihl MS 362 R | Product Instruction Manual - Page 24
STIHL parts may cause serious or fatal injury. Strictly follow the maintenance and 2 repair instructions in the appropriate section of your instruction manual. Please refer to the maintenance chart in 1 this manual. 001BA152 KN When cutting small logs, place log through "V"-shaped supports - Stihl MS 362 R | Product Instruction Manual - Page 25
clean your machine with a pressure washer. The solid jet of water may damage parts of the machine. Store chain saw in a dry place and away from children. Before storing for longer than a few days, always empty the fuel tank (see chapter "Storing the Machine" in the instruction manual). MS 362 23 - Stihl MS 362 R | Product Instruction Manual - Page 26
Attachment STIHL is the only manufacturer in the industry to produce its own chain saws, guide bars, saw chains and chain sprockets. A cutting attachment consists of the saw chain, guide bar and chain sprocket. The cutting attachment that comes standard is designed to exactly match the chain saw - Stihl MS 362 R | Product Instruction Manual - Page 27
screw on the nuts only fingertight. N Go to chapter on "Tensioning the Saw Chain" 1 3 2 N Pull out the hinged clip (1) so that it snaps against the guide bar (3) so that the stud (4) projects through the upper hole and the short guide peg (5) locates in the lower hole. 172BA009 KN MS 362 25 - Stihl MS 362 R | Product Instruction Manual - Page 28
screws locate in the guide bar slot. 172BA011 KN 1 001BA186 KN N Pull the hand guarad towards the front handle until there is an audible click - the chain brake is disengaged. 172BA013 KN 172BA014 KN N Fit the chain sprocket cover so that the wingnut locates on the collar screw (3). 26 MS 362 - Stihl MS 362 R | Product Instruction Manual - Page 29
as stop. N Tighten down the wingnut (2) firmly by hand. N Fold down the hinged clip. N Go to "Tensioning the Saw Chain" A new chain has to be retensioned more often than one that has been in use for some time. N Check chain tension frequently - see chapter on "Operating Instructions". MS 362 27 - Stihl MS 362 R | Product Instruction Manual - Page 30
, retension the chain. A new chain has to be retensioned more often than one that has been in use for some time. N Check chain tension frequently - see chapter on "Operating Instructions". 143BA007 KN Fuel This engine is certified to operate on unleaded gasoline and the STIHL twostroke engine oil - Stihl MS 362 R | Product Instruction Manual - Page 31
Oil (STIHL 50:1 or equivalent high-quality oils) US gal. 1 2 1/2 5 US fl.oz 2.6 6.4 12.8 Dispose of empty mixing-oil canisters only at authorized disposal locations. Fueling Preparations Opening English 001BA218 KN N Raise the grip into an upright position. 001BA229 KN MS 362 001BA219 - Stihl MS 362 R | Product Instruction Manual - Page 32
for tightness. N If the cap can be moved, it is not properly installed. Misalignment of the cap parts N If the cap does not drop fully into the opening when the positioning marks line up and/or if immediately stop use of the unit and take it to your authorized STIHL dealer for repair. 30 MS 362 - Stihl MS 362 R | Product Instruction Manual - Page 33
chain and guide bar - use only an environmentally compatible quality chain and bar lubricant. Rapidly biodegradable STIHL Bioplus is recommended. Biological chain oil must be resistant to aging (e.g. STIHL and is unsuitable for chain lubrication. MS 362 Filling Chain Oil Tank Preparations N - Stihl MS 362 R | Product Instruction Manual - Page 34
in the tank before starting work. Every new chain has to be broken in for about 2 to 3 minutes. After breaking in the chain, check chain tension and adjust if necessary - see "Checking Chain Tension". - in an emergency - when starting - at idling speed The chain is stopped and locked when the hand - Stihl MS 362 R | Product Instruction Manual - Page 35
r facing up. N Fit the shroud. Heated air is now drawn in from around the cylinder to warm the carburetor - this helps prevent carburetor icing. At temperatures above +70°F (+20°C): N Always return the shutter to the summer position (s ) to avoid engine running problems and overheating. MS 362 33 - Stihl MS 362 R | Product Instruction Manual - Page 36
(L) 1/8 of a turn (45°) counterclockwise. It is usually necessary Adjusting the Carburetor". N If your saw is very cold (frost or ice on machine), start the engine and keep it at a high idle speed (with chain problems, first check that conditions for use of the cover plate still apply. 34 MS 362 - Stihl MS 362 R | Product Instruction Manual - Page 37
KN Adjust Master Control lever To adjust the saw chain must not touch any objects and also must not touch the ground N With the left hand on handlebar, press the chain saw firmly against the ground - thumb wrapped around the handlebar N Place your right foot through the rear handle MS 362 - Stihl MS 362 R | Product Instruction Manual - Page 38
back - guide it slowly back into the housing so that it can rewind properly With a new engine or after a long period of disuse, with machines without an additional manual fuel pump, it may be necessary to pull the starter rope several times - to prime the fuel line. Starting the chain saw There must - Stihl MS 362 R | Product Instruction Manual - Page 39
if engine is warm (once the engine has been running for approx. one minute) N Hold and start the chain saw When the engine has turned over for the first time STOP 1 0 Once the engine is running STOP 1 the Master Control lever to starting acceleration n - even if the engine is cold MS 362 37 - Stihl MS 362 R | Product Instruction Manual - Page 40
engine - see "Adjusting the Carburetor". Open the throttle only when the chain brake is off. Running the engine at high revs with the chain brake engaged (chain locked) will quickly damage the shortblock and chain drive (clutch, chain brake). Check chain tension frequently A new saw chain must be - Stihl MS 362 R | Product Instruction Manual - Page 41
chain - this helps avoid one-sided wear, especially at the nose and underside of the bar. N Regularly clean the oil inlet hole (1), the oilway (2) and the bar groove (3). N Measure the groove depth - with the scale on the filing gauge (special accessory) - in the area used most for cutting. MS 362 - Stihl MS 362 R | Product Instruction Manual - Page 42
twist locks (1) by turning them 1/4 turn counterclockwise with the combination wrench. N Remove the shroud (2). Removing the air filter N Clean away loose dirt from around the filter. To avoid damaging the filter, do not use tools for removing and installing the air filter. 001BA199 KN 40 MS 362 - Stihl MS 362 R | Product Instruction Manual - Page 43
) or a clean, non-flammable solution (e.g. warm soapy water) and then dry. Do not use a brush to clean the fleece filter. 0001BA012 KN N Engage the tabs (1) in the recesses (2). N Swing the air filter in the direction of the filter housing and lock with retainer. N Fit the shroud. MS 362 41 - Stihl MS 362 R | Product Instruction Manual - Page 44
carburetor it is only possible to correct the adjusting screws within fine limits. If the setting is too lean there is a risk of engine damage due to insufficient lubrication and overheating. Standard setting LA N Shut off the engine N Check the air filter and clean or replace if necessary. N Check - Stihl MS 362 R | Product Instruction Manual - Page 45
readjust if necessary - see "Specifications". N Use only resistor type spark plugs of the approved range. Rectify problems which have caused fouling of spark plug: - Too much oil in fuel mix. - Dirty air filter. - Unfavorable running conditions, e.g. operating at part load. 000BA039 KN MS 362 43 - Stihl MS 362 R | Product Instruction Manual - Page 46
use only spark plugs authorized by STIHL. Always press spark plug boot (1) snugly onto spark plug terminal (2) of the proper size. (Note: If terminal has Master Control lever to stop position (0) N Push the hand guard forward - the chain is locked. 1 2 1 1 N Open the twist locks (1) by turning - Stihl MS 362 R | Product Instruction Manual - Page 47
KN N Thread the new rope through the guide bushing (5) and rope rotor (6) and secure it with a simple overhand knot. N Coat rope rotor bearing bore with non-resinous oil. N Slip the rotor over the starter post (7) - turn it back and forth to engage the anchor loop of the rewind spring. MS 362 45 - Stihl MS 362 R | Product Instruction Manual - Page 48
flush with the top of the grip. Replacing a broken rewind spring N Place the new spring with frame in position in the fan housing - the anchor loop (arrow) must to carefully remove the parts of the spring from the housing. N Lubricate the new spring with a few drops of non-resinous oil. 46 MS 362 - Stihl MS 362 R | Product Instruction Manual - Page 49
sticking together. N Remove the saw chain and guide bar, clean them and spray with corrosion inhibiting oil. N Thoroughly clean the machine - pay special attention to the cylinder fins and air filter. N If you use a biological chain and bar lubricant, e.g. STIHL BioPlus, completely fill the - Stihl MS 362 R | Product Instruction Manual - Page 50
rivets. N Replace any damaged or worn parts of the chain and match the new parts to the shape and size of the original parts. Carbide-tipped saw chains (Duro) are particularly wear resistant. STIHL recommends you have your chain resharpened by a STIHL servicing dealer. It is absolutely essential to - Stihl MS 362 R | Product Instruction Manual - Page 51
file holder must be used for manual resharpening (see table "Sharpening Tools guide bar groove and oil inlet holes. File correctly N Select sharpening tools according to chain pitch. N Clamp the bar in a vise if necessary. N Lock the chain - push hand guard forward. N To rotate the chain MS 362 49 - Stihl MS 362 R | Product Instruction Manual - Page 52
season - no frost. Chain pitch inch 1/4 3/8 P part of the humped drive link (with service marking) is lowered along with the depth gauge. The other parts of the humped drive link must not be filed since this may increase the kickback tendency of the saw. 689BA052 KN 689BA044 KN 50 MS 362 - Stihl MS 362 R | Product Instruction Manual - Page 53
or grinding dust - lubricate the chain thoroughly. N Before a long out-of-service period, clean the chain and store it in a welloiled condition. Sharpening Tools (special accessories) Chain pitch Round file ^ Round file File holder inch (mm) mm (inch) Part No. Part No. 1/4 (6,35) 4,0 (5/32 - Stihl MS 362 R | Product Instruction Manual - Page 54
also check sharpness X X Saw chain Check chain tension X X Sharpen X Check (wear, damage) X Guide bar Clean and turn over Deburr X X Replace X X Chain sprocket Check X Air filter Clean Replace X X X Antivibration elements Check X Have replaced by dealer1) X X 52 MS 362 - Stihl MS 362 R | Product Instruction Manual - Page 55
hours Check X Chain catcher Replace Safety labels Replace 1) STIHL recommends a STIHL servicing dealer. 2) see chapter on "Chain Brake" 3) Firmly tighten down the cylinder base screws of professional saws (3.4 kW or more) after 10 to 20 hours of operation. X X X X X X X X X X X X MS 362 53 - Stihl MS 362 R | Product Instruction Manual - Page 56
13 Bumper Spike 14 Guide Bar 15 Oilomatic Saw Chain 16 Oil Filler Cap 17 Muffler 18 Front Hand Guard 19 Front Handle 20 Starter Grip 21 Fuel Filler Cap 22 Master Control Lever 23 Throttle Trigger 24 Throttle Trigger Lockout 25 Rear Handle 26 Rear Hand Guard # Serial Number 0001BA011 KN 54 MS 362 - Stihl MS 362 R | Product Instruction Manual - Page 57
version). Permits precise adjustment of chain tension. 13 Bumper Spike. Toothed stop for holding saw steady against wood. 14 Guide Bar. Supports and guides the saw chain. 15 Oilomatic Saw Chain. A loop consisting engine and cutting attachment to the operator's hands. (not illustrated) MS 362 55 - Stihl MS 362 R | Product Instruction Manual - Page 58
(0.5 mm) Rollomatic E guide bars Reduced kickback STIHL guide bar (with green label) Bar lengths: 16, 18, 20 in (40, 45, 50 cm) Pitch: 3/8" (9.32 mm) Groove width: 0.050 in. (1.3 mm)/ 0.063 in. (1.6 mm) Sprocket nose: 10-tooth 3/8" chains Reduced kickback STIHL saw chains (with green label - Stihl MS 362 R | Product Instruction Manual - Page 59
inches on the other. 1 234 cm INCH 1 234 N Determine the parts, always quote the saw model, the part numbers and names of the parts. Model Serial number Guide bar part number Chain part number See "Specifications" in this manual for the recommended reduced kickback cutting attachments. MS 362 - Stihl MS 362 R | Product Instruction Manual - Page 60
Incorporated may deny you warranty coverage if your small off-road equipment engine or a part has failed due to abuse, neglect, improper maintenance or unapproved modifications. You are responsible for presenting your small off-road equipment engine to a STIHL service center as soon as a 58 MS 362 - Stihl MS 362 R | Product Instruction Manual - Page 61
- Fasteners Where to make a Claim for Warranty Service Bring the product to any authorized STIHL servicing dealer and present the signed warranty card. Maintenance Requirements The maintenance instructions in this manual are based on the application of the recommended 2-stroke fuel-oil MS 362 59 - Stihl MS 362 R | Product Instruction Manual - Page 62
affect performance and/or durability, and alterations or modifications not recommended or approved in writing by STIHL Incorporated, and N replacement of parts and other services and adjustments necessary for required maintenance at and after the first scheduled replacement point. Trademarks - Stihl MS 362 R | Product Instruction Manual - Page 63
Series™ STIHL Protech™ STIHL RAPID™ STIHL SuperCut™ STIHL Territory™ TapAction™ TrimCut™ This listing of trademarks is subject to change. Any unauthorized use of these trademarks without the express written consent of ANDREAS STIHL AG & Co. KG, Waiblingen is strictly prohibited. MS 362 English 61 - Stihl MS 362 R | Product Instruction Manual - Page 64
English 62 MS 362 - Stihl MS 362 R | Product Instruction Manual - Page 65
papel libre de cloro. Acerca de este manual de instrucciones 64 Medidas de seguridad y técnicas espada 105 Sistema de filtro de aire 105 Limpieza del filtro de aire 106 Gestión del motor 107 Ajuste graves e incluso mortales. MS 362 63 © ANDREAS STIHL AG & Co. KG, 2011 0458 - Stihl MS 362 R | Product Instruction Manual - Page 66
lo tanto, es posible que algunos cambios, modificaciones y mejoras no se describen en este manual. Si las características de funcionamiento o la apariencia de su máquina difieren de las descritas en este manual, comuníquese con el concesionario STIHL para obtener la ayuda que requiera. 64 MS 362 - Stihl MS 362 R | Product Instruction Manual - Page 67
cortadores afilados. Si los cortadores entran en contacto con alguna parte del cuerpo del operador, le causarán una herida, aunque de seguridad y avisos contenidos en este manual se refieren al uso de todas las motosierras de STIHL. Los distintos modelos pueden contar con está fatigado. MS 362 65 - Stihl MS 362 R | Product Instruction Manual - Page 68
blancos y del síndrome del túnel carpiano, sírvase notar lo siguiente: - La mayor parte de las herramientas motorizadas de STIHL se ofrecen con un sistema antivibración ("AV") cuyo propósito es reducir la transmisión riesgo de lesiones el operador debe usar el equipo protector adecuado. 66 MS 362 - Stihl MS 362 R | Product Instruction Manual - Page 69
ANSI Z 87.1 (o la norma nacional correspondiente). Para reducir el riesgo de lesionarse la cara, STIHL recomienda usar también una careta o protector facial adecuado sobre las gafas o anteojos de seguridad. ñada. En caso de dudas, pida que el concesionario de servicio de STIHL la revise. MS 362 67 - Stihl MS 362 R | Product Instruction Manual - Page 70
Combustible La herramienta motorizada STIHL utiliza una mezcla de aceite-gasolina como combustible (vea el capítulo "Combustible" en el manual del propietario). Advertencia Cargue de combustible su herramienta motorizada en lugares al aire libre bien ventilados. Siempre apague el motor y . 68 MS 362 - Stihl MS 362 R | Product Instruction Manual - Page 71
correcta y apriétela en la boca de llenado del tanque. Para hacer esto con esta tapa STIHL, levante la empuñadura en la parte superior de la tapa hasta dejarla vertical a un ángulo de 90°. Inserte la tapa en la , la misma podría estar averiada o rota; ponga la máquina fuera de servicio de MS 362 69 - Stihl MS 362 R | Product Instruction Manual - Page 72
STIHL u otra herramienta similar. Consulte también el capítulo "Combustible" del Manual este manual de del manual de instrucciones. La cadena Oilomatic, la espada y la rueda dentada STIHL deben se describen en su manual. Para fijar la quemaduras, arranque el motor al aire libre, por lo menos 3 - Stihl MS 362 R | Product Instruction Manual - Page 73
úrese que el freno de la cadena esté aplicado (vea el capítulo "Freno de la cadena" en el manual de instrucciones) y apoye la motosierra sobre terreno firme u otra superficie sólida en un lugar abierto. Mantenga el equilibrio la mano o los dedos y también dañar el mecanismo de arranque. MS 362 71 - Stihl MS 362 R | Product Instruction Manual - Page 74
ón correspondiente del manual de instrucciones. Si no puede regular correctamente el ralentí, pida a su concesionario STIHL que revise la de corte. No toque nunca con las manos ni con cualquier parte del cuerpo una herramienta de corte en movimiento. Advertencia! Mantenga puede oponer y 72 MS 362 - Stihl MS 362 R | Product Instruction Manual - Page 75
que la cadena golpee al operador. Condiciones de trabajo Maneje y arranque su herramienta motorizada solamente al aire libre en un lugar bien ventilado. Manéjela solamente en condiciones de buena visibilidad y a la permitir la disipación de los gases antes de que se puedan concentrarse. MS 362 73 - Stihl MS 362 R | Product Instruction Manual - Page 76
personas sensibles. La inhalación repetida o de grandes cantidades de polvo u otros contaminantes del aire, especialmente los de partículas pequeñas puede causar enfermedades respiratorias o de otro tipo. Esto incluye el polvo, si el gancho de la cadena está dañado o se ha perdido. 74 MS 362 - Stihl MS 362 R | Product Instruction Manual - Page 77
de los elementos antivibración, consulte a su concesionario de servicio STIHL. Advertencia! La motosierra no está diseñada para ser cercas, clavos y cosas por el estilo. Estos objetos pueden salir lanzados al aire y dañar la cadena de la sierra o hacer que ésta retroceda caliente. MS 362 75 - Stihl MS 362 R | Product Instruction Manual - Page 78
ñadas para reducir el riesgo de incendio debido a la emisión de partículas calientes. Debido al calor de la reacción catalítica, estas obstruidas, haga reparar el silenciador por un concesionario de servicio STIHL. Fuerzas reactivas, incluido el contragolpe Advertencia! Las fuerzas la 76 MS 362 - Stihl MS 362 R | Product Instruction Manual - Page 79
inferior a 62 cm³ (3,8 pulg³) - deben tener, en su condición original, un ángulo de contragolpe de 45° calculado por aparecen en la sección "Especificaciones" del manual de instrucciones u - otras combinaciones de STIHL en su localidad. No use la sierra hasta haber corregido la avería. MS 362 77 - Stihl MS 362 R | Product Instruction Manual - Page 80
las motosierras STIHL están cadena" en el manual de instrucciones. 001BA174 KN mano izquierda y otras partes del cuerpo. Adem ítulo del manual de instrucciones freno de la cadena" del manual de instrucciones. Asegúrese reducido STIHL ofrece de STIHL están los contragolpes. STIHL desarrolló - Stihl MS 362 R | Product Instruction Manual - Page 81
verdes con una cilindrada inferior a 62 cm³ (3,8 pulg³) con espadas y cadenas verde y un freno rápido de cadena Quickstop STIHL, tanto para los usuarios con experiencia como para satisfactorias con respecto al ángulo de contragolpe de 45° calculado por computadora indicado en la sección 5. MS 362 79 - Stihl MS 362 R | Product Instruction Manual - Page 82
en el capítulo de especificaciones del manual de instrucciones para el motor de su arco en ninguna de las motosierras de STIHL. Toda motosierra equipada con una guía A El tirón ocurre cuando la cadena en la parte inferior de la espada se detiene repentinamente cuando queda aprisionada MS 362 - Stihl MS 362 R | Product Instruction Manual - Page 83
Para evitar el rechazo 1. Esté alerta a las fuerzas o situaciones que pueden permitir que el material aprisione la parte superior de la cadena. 2. No corte más de un tronco a la vez. 3. No tuerza la sierra , avise a la policía, empresas de servicios públicos o autoridades del ferrocarril. MS 362 81 - Stihl MS 362 R | Product Instruction Manual - Page 84
advertencia. Ruta de escape B 45° A 45° Raíces de zancos y lugar de trabajo y limpie la parte inferior con un hacha. Después, establezca (A) y en un ángulo aproximado de 45°. Coloque todas las herramientas y equipo a en un ángulo de unos 45° hasta una profundidad de aproximadamente 1/5 a - Stihl MS 362 R | Product Instruction Manual - Page 85
Haga un segundo corte desde abajo en un ángulo de unos 40°. N Quite el pedazo de 90° resultante. MS 362 N En árboles de tamaño mediano o más grandes, caer el árbol. Técnica convencional y de cara libre: N Comience de 2,5 a 5 cm (1 a 2 pulg) más arriba que el centro de la entalla de tala. N Corte - Stihl MS 362 R | Product Instruction Manual - Page 86
técnicas deben ser empleadas únicamente por profesionales competentes. Método de corte por secciones Para el método de corte por secciones haga la primera parte del corte de tala moviendo la espada en abanico hacia el eje de inclinación. Después, usando la púa de tope como pivote, cambie de posici - Stihl MS 362 R | Product Instruction Manual - Page 87
la entalla. El corte por penetración se hace con la punta de la espada. Comience el corte aplicando la parte inferior de la punta de la espada contra el árbol en un ángulo. Corte hasta que la profundidad de . Sea precavido y evite tocar el tronco o las ramas con la punta de la espada. MS 362 85 - Stihl MS 362 R | Product Instruction Manual - Page 88
sostengan el tronco elevado del suelo. Cuando corte de abajo hacia arriba las ramas que están en el aire, la sierra puede quedar aprisionada o la rama puede caerse, causando la pérdida del control de la má y salir lanzadas hacia el operador. 2 1 001BA152 KN Troncos bajo tensión: 86 MS 362 - Stihl MS 362 R | Product Instruction Manual - Page 89
reparación que no esté descrito en su manual de instrucciones. Este tipo de trabajo debe ser realizado únicamente por el concesionario de servicio de STIHL. Por ejemplo, si se utilizan herramientas inadecuadas , la espada y el piñón; sustituya las ruedas o cadenas desgastadas. Mantenga MS 362 87 - Stihl MS 362 R | Product Instruction Manual - Page 90
íe el tanque de combustible (vea el capítulo "Almacenamiento de la máquina" en el manual de instrucciones). Accesorio de corte STIHL es el único fabricante en la industria que produce sus propios motosierras, espadas, cadenas de de corte dentro de poco tiempo de uso. 001BA191 KN 88 MS 362 - Stihl MS 362 R | Product Instruction Manual - Page 91
espada. 143BA003 KN N Coloque la espada sobre los espárragos (1) - los bordes de corte en la parte superior de la espada deben quedar apuntando hacia la derecha. N Enganche la espiga del tensor deslizante en el con los dedos. N Pase al capítulo "Tensado de la cadena de aserrado" MS 362 89 - Stihl MS 362 R | Product Instruction Manual - Page 92
espada (3) de tal modo que el espárrago (4) sobresalga por el agujero superior y la clavija guía corta (5) quede en el agujero inferior. 001BA186 KN 90 MS 362 - Stihl MS 362 R | Product Instruction Manual - Page 93
modo que se trabe en su lugar. N Empiece a enroscar la tuerca mariposa y apriétela ligeramente. N Pase al capítulo "Tensado de la cadena de aserrado" MS 362 91 - Stihl MS 362 R | Product Instruction Manual - Page 94
que las que han estado en uso por algún tiempo. N Revise la tensión de la cadena frecuentemente - vea el capítulo "Instrucciones de manejo". 92 MS 362 - Stihl MS 362 R | Product Instruction Manual - Page 95
STIHL para motores de dos tiempos. Su motor requiere una mezcla de gasolina de alta calidad y aceite de calidad para motores de dos tiempos enfriados por aire STIHL aceite STIHL para aire. Se recomienda usar aceite STIHL HP STIHL por aire ( gasolina. Gasolina Aceite (STIHL 50:1 ó aceite de - Stihl MS 362 R | Product Instruction Manual - Page 96
en esta posición. N Mientras presiona la tapa hacia abajo, gírela con firmeza en sentido horario hasta que haga tope (aprox. 1/4 de vuelta). 001BA221 KN 94 MS 362 - Stihl MS 362 R | Product Instruction Manual - Page 97
debe quedar totalmente a ras con respecto a la parte superior de la tapa. 001BA223 KN 001BA222 KN Alineaci hasta salir de posición con respecto a la parte superior. N El manejo, la limpieza o inmediato y llévela a su concesionario autorizado de STIHL para que la reparen. 001BA225 KN N Agarre la - Stihl MS 362 R | Product Instruction Manual - Page 98
lubricante de calidad, compatible con el medio ambiente, diseñado para uso con cadenas y espadas. Se recomienda el aceite STIHL Bioplus, el cual concesionario para obtener ayuda. STIHL recomienda que un concesionario STIHL autorizado efectúe los trabajos de mantenimiento y reparación. 96 MS 362 - Stihl MS 362 R | Product Instruction Manual - Page 99
, freno de la cadena). El freno de la cadena también ha sido diseñado para activarse por la inercia del protector delantero de la mano MS 362 97 - Stihl MS 362 R | Product Instruction Manual - Page 100
competente, como el concesionario STIHL, cada vez que se Instale la envuelta. Ahora, el aire caliente es aspirado de alrededor 20°C (+70°F): N Siempre devuelva el obturador a la posición de verano (s) para evitar problemas de funcionamiento y calor excesivo. 0001BA003 KN 0001BA002 KN 98 MS 362 - Stihl MS 362 R | Product Instruction Manual - Page 101
errática, o la aceleración es débil N Gire el tornillo de velocidad baja (L) 1/8 de vuelta (45°) en sentido contrahorario. Generalmente es necesario cambiar el ajuste del tornillo de ralentí (LA) después de cada las condiciones todavía ameritan la colocación de la placa de cierre. MS 362 99 - Stihl MS 362 R | Product Instruction Manual - Page 102
ón de la cámara de combustión, si el motor está "ahogado" Sujeción de la motosierra Hay dos maneras de sujetar la motosierra durante el arranque. 100 MS 362 - Stihl MS 362 R | Product Instruction Manual - Page 103
o después de un período prolongado sin uso, puede ser necesario tirar de la cuerda de arranque varias veces para cebar la línea de combustible. MS 362 101 - Stihl MS 362 R | Product Instruction Manual - Page 104
de aceleración y accione el gatillo de aceleración (2); la palanca de control maestro (1) salta a la posición de funcionamiento F y el motor comienza a funcionar a ralentí 0001BA023 KN 102 MS 362 - Stihl MS 362 R | Product Instruction Manual - Page 105
el freno de la cadena aplicado (cadena bloqueada) dañará rápidamente el bloque de motor y el mando de la cadena (embrague, freno de la cadena). MS 362 103 - Stihl MS 362 R | Product Instruction Manual - Page 106
Cadena fría La tensión es correcta cuando la cadena encaja ajustadamente contra la parte inferior de la espada pero todavía puede ser tirada a lo largo de modo que el calor en el motor sea disipado por la corriente de aire de enfriamiento. Esto ayuda a evitar que los componentes montados en el MS 362 - Stihl MS 362 R | Product Instruction Manual - Page 107
Paso Profundidad mínima de ranura 3/8 pulg P 5,0 mm (0,20 pulg) 1/4" 4,0 mm (0,16 pulg) 3/8"; 0.325" as de los eslabones impulsores rasparán la parte inferior de la ranura - los cortadores y las filtro de aire Es posible adaptar el sistema de filtro de aire para diferentes MS 362 105 - Stihl MS 362 R | Product Instruction Manual - Page 108
STIHL (accesorio especial) o una solución limpia y no inflamable (por ejemplo, agua jabonosa tibia) y séquelo. 1 2 0001BA007 KN N Enganche las lengüetas (1) en las muescas (2). N Gire el filtro de aire hacia la caja del filtro y fíjelo con el retenedor. N Instale la envuelta. 106 MS 362 - Stihl MS 362 R | Product Instruction Manual - Page 109
en la fábrica al ajuste estándar. Este ajuste provee una mezcla óptima de combustible y aire bajo la mayoría de las condiciones de funcionamiento. Con este carburador sólo es posible corregir los tornillos en vacío, pida a su concesionario de servicio que revise y repare la motosierra. MS 362 107 - Stihl MS 362 R | Product Instruction Manual - Page 110
Limpie el chispero. Si el chispero está dañado o con depósitos gruesos de carbón, instale uno nuevo. N Vuelva a instalar el chispero. N Inserte el tornillo y apri incorrecta (demasiado aceite en la gasolina), el filtro de aire está sucio, y las condiciones de trabajo no son bloqueada. 108 MS 362 - Stihl MS 362 R | Product Instruction Manual - Page 111
Demasiado aceite en la mezcla de combustible. - Filtro de aire sucio. - Condiciones desfavorables de funcionamiento, por ejemplo, funcionando de incendio y de quemaduras, utilice solamente las bujías autorizadas por STIHL. Siempre empuje el casquillo (1) de la bujía firmemente en el KN MS 362 109 - Stihl MS 362 R | Product Instruction Manual - Page 112
1 1 N Saque los tornillos (1). N Empuje el protector de mano hacia arriba. N Aparte del cárter la parte inferior de la caja del ventilador y retírela hacia abajo. Sustitución de una cuerda de arranque rota 2 3 el rotor de la cuerda con la arandela (3) y los trinquetes (4). 110 MS 362 - Stihl MS 362 R | Product Instruction Manual - Page 113
Quite el resto de la cuerda del rotor y del mango de arranque. N Pase el extremo de la cuerda por la parte superior del buje (5) y el rotor (6) y fíjela con un nudo de rizo simple. N Cubra la cavidad del hacia uno y otro lado para engranar la espiral terminal del resorte de rebobinado. MS 362 111 - Stihl MS 362 R | Product Instruction Manual - Page 114
en el mango de arranque hasta que la boquilla quede al ras con la parte superior del mango. Sustitución del resorte de rebobinado roto N Forme un bucle con y empuje el resorte hasta su asiento en la caja del ventilador; se sale del marco de retención durante este proceso. N Instale el rotor y - Stihl MS 362 R | Product Instruction Manual - Page 115
preste atención especial a las aletas del cilindro y al filtro de aire. N Si se usa lubricante biodegradable para cadenas y espadas, tal como STIHL BioPlus, llene completamente el tanque de aceite de la cadena. N Guarde Quickstop Plus, pulse primero el bloqueo del gatillo de aceleración MS 362 113 - Stihl MS 362 R | Product Instruction Manual - Page 116
de dientes rectos / piñón flotante N Limpie la punta del cigüeñal y la jaula de agujas y lubrique con grasa STIHL (accesorio especial) N Deslice la jaula de agujas en la punta del cigüeñal N Después de la reinstalación, gire el cortador de la cadena. A 689BA021 KN B A Angulo de limado 114 MS 362 - Stihl MS 362 R | Product Instruction Manual - Page 117
están marcados en el portalima. Para comprobar los ángulos Utilice un calibrador de rectificación STIHL (accesorio especial - vea la tabla "Herramientas de afilado"). Esta es una herramienta universal para la lima del cortador para la pasada de retorno. 689BA043 KN 689BA018 KN MS 362 115 - Stihl MS 362 R | Product Instruction Manual - Page 118
. N Lime el calibrador de profundidad hasta que esté a nivel con el de rectificación. N Lime la parte superior del calibrador de profundidad en sentido paralelo a la marca de servicio estampada (vea la flecha) - pero paso en la cadena y empújelo contra el cortador - si el calibrador de 116 MS 362 - Stihl MS 362 R | Product Instruction Manual - Page 119
- el punto más alto del calibrador de profundidad debe estar a nivel con el de rectificación. Las otras partes de la pletina de amarre con saliente no deben afilarse ya que eso podría aumentar la tendencia de la 5605 007 1027 5605 007 1027 5605 007 1028 5605 007 1029 5605 007 1030 MS 362 117 - Stihl MS 362 R | Product Instruction Manual - Page 120
aserrado Revisar la tensión de la cadena X X Afilar X Revisar (desgaste, daño) X Espada Limpiar e invertir Quitar las rebabas X X Reemplazar X X Piñón de la cadena Revisar X Filtro de aire Limpiar Reemplazar X X X 118 MS 362 - Stihl MS 362 R | Product Instruction Manual - Page 121
X Toma de aire en caja del ventilador STIHL recomienda acudir a un concesionario STIHL para servicio. 2) vea el capítulo "Freno de la cadena" 3) Apriete firmemente los tornillos de la base del cilindro de sierras profesionales (3,4 kW o más) después de 10 a 20 horas de funcionamiento. MS 362 - Stihl MS 362 R | Product Instruction Manual - Page 122
5 # 1 3 7 12 13 8 14 9 11 10 15 19 18 17 20 22 24 21 25 23 16 26 1 Bloqueo de envuelta 2 Tornillos de ajuste del carburador de aceite 17 Silenciador 18 Protector delantero de la mano 19 Mango delantero 20 Mango de arranque 21 Tapa de llenado de combustible 22 Palanca de control - Stihl MS 362 R | Product Instruction Manual - Page 123
/ EE.UU 19 Mango delantero. Barra de empuñadura para la mano izquierda ubicada en la parte delantera de la sierra. 20 Mango de arranque. El mango del arrancador usado para arrancar el motor. 21 Tapa de llenado de cuando se acelera el motor sobre la velocidad de ralentí. (no se muestra) MS 362 121 - Stihl MS 362 R | Product Instruction Manual - Page 124
STIHL 20,3 fl oz) Lubricación de la cadena Bomba de aceite de émbolo giratorio controlada por velocidad y plenamente automática. Control manual adicional de caudal de aceite Capacidad del tan- que de aceite: 0,325 l (11,0 fl oz) Peso seco, sin espada y cadena MS 362: 5,9 kg (13,0 lb) MS 362 - Stihl MS 362 R | Product Instruction Manual - Page 125
de seguridad". Espadas Rollomatic E Espada STIHL de contragolpe reducido (con etiqueta verde) Largos de espada: 40, 45, 50 cm (16, 18, 20 in.) Paso: 9,32 mm (3/8 ón de este manual. español / EE.UU Accesorios especiales Comuníquese con su concesionario STIHL para información . MS 362 123 - Stihl MS 362 R | Product Instruction Manual - Page 126
1 234 cm INCH 1 234 STIHL por el número de pieza STIHL, el logotipo de { y, en ciertos casos, el símbolo K de piezas STIHL. En las piezas pequeñas el símbolo puede aparecer solo. Vea "Especificaciones", en este manual, para los accesorios de corte de contragolpe reducido recomendados. 124 MS 362 - Stihl MS 362 R | Product Instruction Manual - Page 127
a sus derechos y responsabilidades bajo esta garantía, sírvase contactar al representante de atención al cliente STIHL llamando al 1-800-467-8445, o si lo prefiere puede escribir a STIHL Inc., 536 Viking Drive, P.O. Box 2015, Virginia Beach, VA 23450-2015 EE.UU. www.stihlusa.com MS 362 125 - Stihl MS 362 R | Product Instruction Manual - Page 128
las emisiones: - Filtro de aire - Carburador - Bomba de STIHL y presente la tarjeta de garantía firmada. Requerimientos de mantenimiento Las instrucciones presentadas en este manual se basan en la aplicación de la mezcla recomendada para motores de 2 tiempos (vea también la instrucción MS 362 - Stihl MS 362 R | Product Instruction Manual - Page 129
™ Micro™ Pro Mark™ Quad Power™ Quiet Line™ STIHL Compact™ STIHL HomeScaper Series™ STIHL Interchangeable Attachment Series™ STIHL M-Tronic™ STIHL Magnum™ STIHL MiniBoss™ STIHL MotoPlus 4™ STIHL Multi-Cut HomeScaper Series™ Stihl Outfitters™ STIHL PICCO™ STIHL PolyCut™ STIHL PowerSweep™ MS 362 127 - Stihl MS 362 R | Product Instruction Manual - Page 130
Protech™ STIHL RAPID™ STIHL SuperCut™ STIHL Territory™ TapAction™ TrimCut™ Esta lista de marcas comerciales está sujeta a cambios. Queda terminantemente prohibido todo uso de estas marcas comerciales sin el consentimiento expreso por escrito de ANDREAS STIHL AG & Co. KG, Waiblingen. 128 MS 362 - Stihl MS 362 R | Product Instruction Manual - Page 131
- Stihl MS 362 R | Product Instruction Manual - Page 132
known to the State of California to cause cancer, birth defects or other reproductive harm. 0458-553-8621-B englisch / spanisch USA U G U www.stihl.com ! ADVERTENCIA! El gas de escape del motor de esta máquina contiene productos químicos que en el estado de California son considerados como
-
 1
1 -
 2
2 -
 3
3 -
 4
4 -
 5
5 -
 6
6 -
 7
7 -
8
-
9
-
10
-
11
-
12
-
13
-
14
-
15
-
16
-
17
-
18
-
19
-
20
-
21
-
22
-
23
-
24
-
25
-
26
-
27
-
28
-
29
-
30
-
31
-
32
-
33
-
34
-
35
-
36
-
37
-
38
-
39
-
40
-
41
-
42
-
43
-
44
-
45
-
46
-
47
-
48
-
49
-
50
-
51
-
52
-
53
-
54
-
55
-
56
-
57
-
58
-
59
-
60
-
61
-
62
-
63
-
64
-
65
-
66
-
67
-
68
-
69
-
70
-
71
-
72
-
73
-
74
-
75
-
76
-
77
-
78
-
79
-
80
-
81
-
82
-
83
-
84
-
85
-
86
-
87
-
88
-
89
-
90
-
91
-
92
-
93
-
94
-
95
-
96
-
97
-
98
-
99
-
100
-
101
-
102
-
103
-
104
-
105
-
106
-
107
-
108
-
109
-
110
-
111
-
112
-
113
-
114
-
115
-
116
-
117
-
118
-
119
-
120
-
121
-
122
-
123
-
124
-
125
-
126
-
127
-
128
-
129
-
130
-
131
-
132
 |
 |

{
STIHL MS 362
Instruction Manual
Manual de instrucciones
Warning!
To reduce the risk of kickback injury use
STIHL reduced kickback bar and STIHL
RMC3 or RSC3 (3/8") chain depending on
sprocket pitch or other available low kickback
components.
Advertencia!
Para reducir el riesgo de lesionarse como
resultado de un culatazo, utilice la barra de
contragolpe reducido y la cadena RMC3 o
RSC3 (3/8 pulg) de STIHL, dependiendo de la
rueda dentada usada y de otros componentes
reductores de contragolpe.
Read and follow all safety precautions in
Instruction Manual – improper use can cause
serious or fatal injury.
Lea y siga todas las precauciones de
seguridad dadas en el manual de
instrucciones – el uso incorrecto puede causar
lesiones graves o mortales.