Synology RS4021xs Hardware Installation Guide
Synology RS4021xs Manual
 |
View all Synology RS4021xs manuals
Add to My Manuals
Save this manual to your list of manuals |
Synology RS4021xs manual content summary:
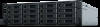
- Synology RS4021xs | Hardware Installation Guide - Page 1
Synology NAS RS4021xs+ Hardware Installation Guide - Synology RS4021xs | Hardware Installation Guide - Page 2
11 Safety Instructions 12 Chapter 2: Hardware Setup Tools and Parts for Drive Installation 13 Install Drives 13 Install Memory Modules 15 Install PCle Add-in Cards 18 Install and Remove Rail Kits 19 Expansion Unit Deployment and Topology 21 Start up Your Synology NAS 22 Chapter - Synology RS4021xs | Hardware Installation Guide - Page 3
Chapter Before You Start 1 Synology NAS RS4021xs+ is an enterprise server consisting of both system hardware and the software operating system, DiskStation Manager (DSM). This manual will guide you through all configuration aspects of your RS4021xs+, including the hardware components, setup - Synology RS4021xs | Hardware Installation Guide - Page 4
Synology RS4021xs+ at a Glance Front 123 4 5 7 Back1 A. 6 7 B. 4 Chapter 1: Before You Start - Synology RS4021xs | Hardware Installation Guide - Page 5
for more information. 2 For more information about the rail kit installation, please refer to the Quick Installation Guide that comes with the rail kit. 3 For more information about Synology Expansion Unit supported by your Synology NAS, please visit www. synology.com. 5 Chapter 1: Before You Start - Synology RS4021xs | Hardware Installation Guide - Page 6
or operation in DSM. DSM is not ready for use. This could either be: • Synology NAS is powered on, but DSM is not properly installed. • Synology NAS is currently powering on and initializing services necessary for DSM to fully function. • The attached UPS device has insufficient power; DSM stops - Synology RS4021xs | Hardware Installation Guide - Page 7
ready > DSM is ready for use • Enter hibernation then wake up from hibernation: DSM is ready for use > Hibernation > DSM is ready for use • Shutdown Synology NAS: DSM is ready for use > Shutting down > Powered off • Power failure with UPS attached: DSM is ready for use > DSM not ready (due to power - Synology RS4021xs | Hardware Installation Guide - Page 8
NAS or re-insert the drives, then run the HDD/SSD manufacturer's diagnostic tool to check the health status of the drives. If you can sign in to DSM, please run the built-in S.M.A.R.T. test to scan the drives. If the problem remains unresolved, please contact Synology Technical Support for help - Synology RS4021xs | Hardware Installation Guide - Page 9
Compatible Drive Type External Port LAN Port PCIe Slot Size (H x W x D) (mm) Weight (kg) Supported Client File System Supported RAID Type Agency Certification HDD Hibernation Scheduled Power On/Off Wake on LAN RS4021xs 1 • RAID 5 • RAID 6 • RAID 10 • Synology RAID F1 • FCC Class A • CE Class A • - Synology RS4021xs | Hardware Installation Guide - Page 10
Spare Parts Visit www.synology.com/products/spare_parts if you need to replace system fans, disk trays, or power supply units. Model Name Picture Description Disk Tray (Type R7) 3.5"/2.5" Drive - Synology RS4021xs | Hardware Installation Guide - Page 11
model is supported. For a list of PSU modules for your device, see this document. Optional Accessories With Synology accessories, you can customize your expansion unit to fit different business environments without worrying about compatibility and stability. Visit www.synology.com/compatibility for - Synology RS4021xs | Hardware Installation Guide - Page 12
Safety Instructions Keep away from direct sunlight and away from chemicals. Make sure the environment does not experience abrupt changes in temperature or humidity. Place the product - Synology RS4021xs | Hardware Installation Guide - Page 13
NAS: • A screwdriver • At least one 3.5" or 2.5" SATA drive (please visit www.synology.com for compatible drive models) Warning: If you install a drive that contains data, the system will format the drive and erase all existing data. Please back up any important data before installation. • Rail - Synology RS4021xs | Hardware Installation Guide - Page 14
Push the handle inward to secure the drive tray. 5 Push the switch to the left on the drive tray handle to lock the drive tray. RS4021xs+ 6 Repeat the steps above to install the other drives you have prepared. 7 Drives are numbered as shown below. 1 2 3 4 5 6 7 8 9 10 11 12 13 14 15 - Synology RS4021xs | Hardware Installation Guide - Page 15
Memory Modules Genuine Synology memory modules must be installed to ensure system compatibility and reliability. Failure remove a memory module on your RS4021xs+. To install the RAM module 1 Shut down your RS4021xs+. Disconnect all cables connected to your RS4021xs+ to prevent any possible damage. - Synology RS4021xs | Hardware Installation Guide - Page 16
position. b Put back and fasten the screw you removed in step 2. To confirm that your RS4021xs+ recognizes the new memory capacity 1 Install DiskStation Manager (DSM). Please see "Install DSM on Synology NAS" for more information. 2 Sign in to DSM as admin or a user belonging to the administrators - Synology RS4021xs | Hardware Installation Guide - Page 17
Module 1 Follow step 1 and 2 of the "To install the RAM module" section to shut down your RS4021xs+, disconnect the cables, and then remove the rear top cover as described above. 2 Cut the cable tie before removing the memory module. (The pre-installed - Synology RS4021xs | Hardware Installation Guide - Page 18
to be installed. To install network interface cards 1 Shut down your RS4021xs+. Disconnect all cables connected to your RS4021xs+ to prevent any possible damages. 2 Open your RS4021xs+ by following step 2 of the "To install the RAM module" section. 3 Install the network interface card: a Remove the - Synology RS4021xs | Hardware Installation Guide - Page 19
use RKS1317 as an example to illustrate how to install or remove the rail kits. For more information about the rail kit installation, please refer to the Quick Installation Guide that comes with the rail kit. To install the rail kit 1 To install the rail kit to the rack: e Attach the rear end of the - Synology RS4021xs | Hardware Installation Guide - Page 20
and pull the chassis out of the rack. 2 With the help of another person, carefully remove the chassis from the rack. Then, slide the inner rail attached to the chassis toward the front panel of the chassis to detach it. 20 Chapter 2: Hardware Setup - Synology RS4021xs | Hardware Installation Guide - Page 21
Unit Deployment and Topology RS4021xs+ supports RX1217/RX1217RP (12-bay) expansion units, providing seamless storage expansion whenever needed. This section will guide you through how to connect the expansion units to your Synology NAS. To connect RX1217/RX1217RP with RS4021xs+ 1 Here we use - Synology RS4021xs | Hardware Installation Guide - Page 22
the host device is still powered on. Doing so may result in data loss. Start up Your Synology NAS 1 Connect one end of each power cord to the power ports located on the back of the RS4021xs+ and the other end to a power outlet. 2 Connect at least one LAN cable to one of - Synology RS4021xs | Hardware Installation Guide - Page 23
Fan If a system fan malfunctions, please see the instructions below to open the RS4021xs+ and replace the malfunctioning fan. 1 Press the small buttons located on the sides of the RS4021xs+. Chapter 3 RS4021xs+ 2 Lift to remove the fan cover. RS4021xs+ 3 Fans are numbered as shown below: 11 22 - Synology RS4021xs | Hardware Installation Guide - Page 24
to remove it. 5 Prepare a new fan and slide it into the the RS4021xs+. Make sure that the fan is aligned properly, as shown below. Replace Power Supply Unit (PSU) If a PSU or its fan malfunctions, please see the instructions below to replace the malfunctioning PSU. 1 Unplug the power cord from the - Synology RS4021xs | Hardware Installation Guide - Page 25
. It will search for and find the Synology NAS within the local network. The status of the RS4021xs+ should be Not Installed. Chapter 4 RS4021xs+ 5 Click Connect to start the setup process and follow the onscreen instructions. Note: • The Synology NAS must be connected to the Internet to install - Synology RS4021xs | Hardware Installation Guide - Page 26
from providing any services hosted by Synology NAS server to any services or other items provided by anyone other than Synology; or (z) your failure to comply with this EULA. Section 10. Support. During the period specified in the Section 9, Synology will make available to you the support services - Synology RS4021xs | Hardware Installation Guide - Page 27
and remedies as it may have at law or equity for any actual or threatened breach of any provision of this EULA relating to Synology's intellectual property rights. Section 19. Attorneys' Fees. In any arbitration, mediation, or other legal action or proceeding to enforce rights or remedies under this - Synology RS4021xs | Hardware Installation Guide - Page 28
-installed on the Product by Synology, and includes any firmware, associated media, images, animations the Warranty Period for each New Product at Product Support Status. For the Refurbished Product or repaired parts, Product registered with EW201/EW202 optional service will be extended by two years - Synology RS4021xs | Hardware Installation Guide - Page 29
the warranty support does not apply to rescue of the data stored in Synology Product or its backup. Customer shall make a backup copy of the stored data before it returns the Product to Synology, Synology may weed up all information or data in the Product while it performs the warranty services and - Synology RS4021xs | Hardware Installation Guide - Page 30
or any successor thereto does not apply. 5.5 Dispute Resolution. Any dispute, controversy or claim arising out of or relating to this Warranty, the Product or services provided by Synology with respect to the Product or the relationship between Customers residing within the United States and - Synology RS4021xs | Hardware Installation Guide - Page 31
remain in full force and effect. 5.9 Entire Agreement. This Warranty constitutes the entire agreement, and supersedes any and all prior agreements, between Synology and Customer related to the subject matter hereof. No amendment, modification or waiver of any of the provisions of this Warranty will - Synology RS4021xs | Hardware Installation Guide - Page 32
FCC Declaration of Conformity This device complies with Part 15 of the FCC Rules. Operation is subject to the following two conditions: (1) this device may not cause harmful interference, and (2) this device must accept any interference received, including interference that may cause undesired - Synology RS4021xs | Hardware Installation Guide - Page 33
A VCCI 一 A
-
 1
1 -
 2
2 -
 3
3 -
 4
4 -
 5
5 -
 6
6 -
 7
7 -
8
-
9
-
10
-
11
-
12
-
13
-
14
-
15
-
16
-
17
-
18
-
19
-
20
-
21
-
22
-
23
-
24
-
25
-
26
-
27
-
28
-
29
-
30
-
31
-
32
-
33
 |
 |

Synology NAS RS4021xs+
Hardware Installation Guide