TP-Link RE450 RE450EU V1 Quick Install Guide
TP-Link RE450 Manual
 |
View all TP-Link RE450 manuals
Add to My Manuals
Save this manual to your list of manuals |
TP-Link RE450 manual content summary:
- TP-Link RE450 | RE450EU V1 Quick Install Guide - Page 1
Guide Applicable Model: RE450 Option ONE: Using a Web Browser WPS Option TWO: Using WPS (Wi-Fi Protected Setup extender, press the Power button. ©2015 TP-LINK Option ONE Using a Web Browser Power for both Username and Password to log in. http://tplinkrepeater.net admin admin Login If the log in - TP-Link RE450 | RE450EU V1 Quick Install Guide - Page 2
Setup) Please use Option ONE if your router does not support refer to the router manufacturer's user guide. 2 If you are connecting the network name) and password as your host TP-LINK Tether App Tether app provides a simple, intuitive way to access Reset button until all the LEDs turn on momentarily.
-
 1
1 -
 2
2
 |
 |
Quick
Installation
Guide
RE450
©2015 TP-LINK
7106505765
REV1.1.0
Applicable Model:
Option TWO:
Using WPS (Wi-Fi Protected Setup)
WPS
Option ONE:
Using a Web Browser
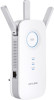
LED Explanation
Button Explanation
2.4GHz/5GHz
On:
The extender is connected to the
2.4GHz/5GHz wireless network of your host
network.
Off:
No connection.
POWER
On:
The extender is on.
Blinking:
The extender is initializing.
Off:
The extender is off.
Solid blue:
The extender is connected to the
router, and is in a good location.
Solid red:
The extender is connected to the
router, but is too far away from the router.
Blinking:
WPS connection is in process.
Off:
No active connection.
(RE)
Power button
:
To turn on or off the extender, press the Power button.
LED button
:
To turn all LEDs on or off, press the LED button.
Plug the extender into an electrical
outlet near your router, and wait until the
POWER
LED
is lit and solid blue.
or
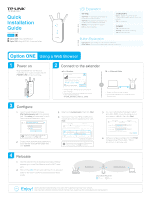
1. Disconnect the Ethernet (wired) connection to
your computer.
Connections are available
Not connected
Wireless Network Connection
Connect automatically
Connect
TP-LINK_Extender_2.4GHz
√
2. Click the Wi-Fi icon on the taskbar and connect
to the extender's network
:
TP-LINK_Extender_2.4GHz or _5GHz
.
via
Wireless
2. Connect the extender to your computer via an
Ethernet cable.
1. Disable the Wi-Fi on your computer.
via
Ethernet Cable
Connect to the extender
Power on
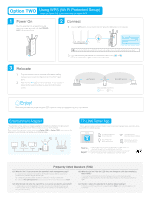
Configure
4
If your router does not support 5GHz wireless
network, please click
Skip
to continue.
Select your router's 2.4GHz or 5GHz host
network and enter the password, then click
Next
.
Next
Please select 2.4GHz Host network or skip this network.
SSID
Signal
MAC Address
Security
Your router wireless name
30:B5:C1:33:99:76
Host 2.4GHz Password:
TP_LINK_123456
23:B5:C0:30:90:06
Back
Other...
Rescan
Skip
Region
2.4GHz Host Network
5GHz Host Network
Wireless Settings
Summary
12345678
http://tplinkrepeater.net
admin
admin
Login
Launch a web browser and type
http://tplinkrepeater.net
in the address
field. Use
admin
(all lowercase) for both
Username and Password to log in.
If the log in window does not pop up,
please refer to the
FAQ > Q1
.
3
5
6
Select your
country/region
, then click
Next
.
Verify your wireless settings and click
Finish
.
Corresponding LEDs (2.4GHz/ 5GHz)
should turn on and stay solid.
Region
2.4GHz Host Network
5GHz Host Network
Wireless Settings
Summary
Extended 2.4GHz SSID:
Your network name
Copy Host SSID
Hide SSID broadcast
The extended 2.4GHz password is the same as your Host password.
Extended 5GHz SSID:
Your network name_5G
Copy Host SSID
Hide SSID broadcast
The extended 5GHz password is the same as your Host password.
Back
Next
Create a new username and password to
log in the web management page, then
click
Confirm
.
You can customize the Extended 2.4GHz
and 5GHz SSIDs or use the same as your
host network (default), then click
Next
.
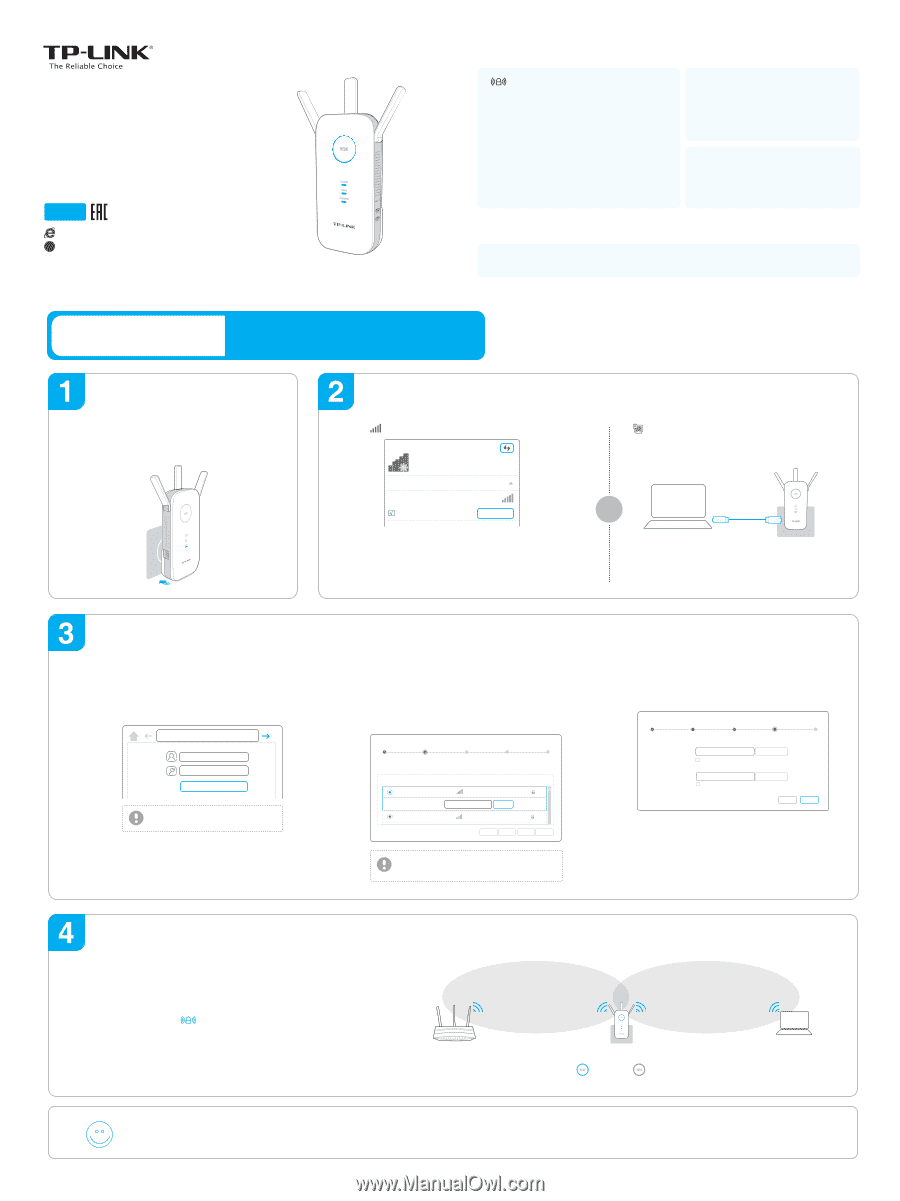
Relocate
Both extended networks share the same Wi-Fi password as your host network,
but may have different wireless network names if you customize the names during the configuration.
Enjoy!
Plug the extender into an electrical outlet about halfway
between your router(Host Network) and the Wi-Fi dead
zone.
Wait until the
LED is lit and solid blue. If not, relocate it
closer to the router to achieve a good (or better) signal
quality.
1
2
Using a Web Browser
Option ONE
1
2
Ideal extender Placement
Host Network
Extended Network
Red
Too far away
Blue
Ideal location