TRENDnet 15AH28B User Guide
TRENDnet 15AH28B Manual
 |
View all TRENDnet 15AH28B manuals
Add to My Manuals
Save this manual to your list of manuals |
TRENDnet 15AH28B manual content summary:
- TRENDnet 15AH28B | User Guide - Page 1
15AH28B User's Guide Version 09.23.05 TRENDnet TRENDware, USA What's Next in Networking Copyright ©2005. All Rights Reserved. TRENDware International, Inc. - TRENDnet 15AH28B | User Guide - Page 2
Table of Contents English ...1 1. Prepare for Installation 1 2. Install Hardware 2 Troubleshooting 9 - TRENDnet 15AH28B | User Guide - Page 3
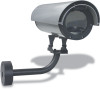
This guide will help you set-up your Outdoor Internet Camera Server Housing. Following the installations should be quick and easy. If you run into problems, please refer to the Troubleshooting section. If you need further technical support, please visit www.TRENDNET.com or call technical support by - TRENDnet 15AH28B | User Guide - Page 4
2. Install Hardware 1. Depress the levers to unlatch the roof of the camera enclosure, and pull the roof upward. 2. Unscrew the metal bracket from the camera enclosure. 3. Use the following screw to mount the metal bracket onto the base of the IP Camera. 2 English - TRENDnet 15AH28B | User Guide - Page 5
4. Take the assembly in step 3, and mount the assembly inside the camera enclosure. 5. Caution: Before cutting any power cord, make sure that the power cord is NOT PLUGGED into an electrical source. Now take a power cord with a - TRENDnet 15AH28B | User Guide - Page 6
you use a wire stripper to remove the plastic sheath effectively. 8. You should have two halves of exposed copper wire as shown below. 9. Turn the camera enclosure upside down to remove one of the rubber stoppers. This will give you an opening for your power cord, antenna cable, or network patch - TRENDnet 15AH28B | User Guide - Page 7
patch cable or antenna cable through the opening of the camera enclosure. Note: For security purposes, attach the metal arm assembly to the camera enclosure and run the wires through the metal arm assembly. Please refer to the camera enclosure's attachment for setup details. 11. Pair one half of - TRENDnet 15AH28B | User Guide - Page 8
12. Place the yellow wire connector over the assembly in step 11, and twist the wire connector clockwise to secure the contact between the wired pair. 13. Pair the other half of the power cable with the black terminal of the enclosure's power supply. 14. Place the yellow wire connector over the - TRENDnet 15AH28B | User Guide - Page 9
15. Take the DC plug and connect the terminals into the DC box of the camera enclosure. 16. Turn the screw counter-clockwise to insert the DC Plug's terminal into the DC box. Insert one end of the DC plug terminal - TRENDnet 15AH28B | User Guide - Page 10
between the DC plug terminal and DC box by turning the screw clockwise. 18. Connect the DC plug with the IP Camera's power connector. 19. Make sure all internal wires are inside the camera enclosure, and carefully close the lid. Then plug in the two-prong cord into any power outlet. The - TRENDnet 15AH28B | User Guide - Page 11
If you are using a wireless camera, make sure that your antenna connection is properly connected to your camera's antenna connector. Double-check with your wireless access point. If you have any questions regarding the 15AH28B, please contact Trendware Technical Support Department. Certifications - TRENDnet 15AH28B | User Guide - Page 12
, under normal use and service, for the following lengths of time from the date of purchase. Wireless Products 3 Years Warranty If subject to conditions more severe than those specified in the manual. Warranty service may be obtained by contacting TRENDware office within the applicable warranty - TRENDnet 15AH28B | User Guide - Page 13
WARRANTIES EXCLUSIVE: IF THE TRENDWARE PRODUCT DOES NOT OPERATE AS WARRANTED ABOVE, THE CUSTOMER'S SOLE REMEDY SHALL BE, AT TRENDWARE'S OPTION, REPAIR OR REPLACEMENT. THE FOREGOING WARRANTIES AND REMEDIES ARE EXCLUSIVE AND ARE IN LIEU OF ALL OTHER WARRANTIES, EXPRESSED OR IMPLIED, EITHER IN FACT OR - TRENDnet 15AH28B | User Guide - Page 14
product online. Go to TRENDware's website at http://www.TRENDNET.com TRENDnet Technical Support US/Canada Support Center European Support Center Contact Telephone: 1(310) 626-6252 Fax: 1(310) 626-6267 Email: [email protected] Tech Support Hours 7:30am - 6:00pm Pacific Standard Time Monday
-
 1
1 -
 2
2 -
 3
3 -
 4
4 -
 5
5 -
 6
6 -
 7
7 -
8
-
9
-
10
-
11
-
12
-
13
-
14
 |
 |
