Thermador HMCB36WS Installation instructions
Thermador HMCB36WS Manual
 |
View all Thermador HMCB36WS manuals
Add to My Manuals
Save this manual to your list of manuals |
Thermador HMCB36WS manual content summary:
- Thermador HMCB36WS | Installation instructions - Page 1
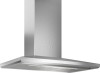
Installation INSTRUCTIONS Thermador Masterpiece® Chimney Wall Hoods THERMADOR.COM - Thermador HMCB36WS | Installation instructions - Page 2
Installation INSTRUCTIONS Thermador Masterpiece® Chimney Wall Hoods Table of Contents (English 3 Table de Matières (Français 22 Índice de Capitulos (Español 41 Models | Modèles | Modelos: HMCB30WS HMCB36WS THERMADOR.COM - Thermador HMCB36WS | Installation instructions - Page 3
12 Hood Transition 12 Installation Instructions 13 Installer Checklist and Service 21 Installer Checklist 21 Before Calling Service 21 Product Data you to important information and/or tips. Installation Instructions This THERMADOR® appliance is made by BSH Home Appliances Corporation 1901 - Thermador HMCB36WS | Installation instructions - Page 4
injury or property damage. Refer to this manual for guidance. All other servicing should be done by an authorized servicer. WARNING ELECTRICAL SHOCK HAZARD •• DO NOT remove connections. •• DO NOT use an extension cord. •• Failure to follow these instructions can result in death, fire, or electrical - Thermador HMCB36WS | Installation instructions - Page 5
READ AND SAVE THESE INSTRUCTIONS Grounding Instructions WARNING Improper grounding can result in a risk of electric shock. This appliance must be grounded. In wiring and other hidden utilities. •• Ducted fans must always be vented to the outdoors. Installation Instructions English | 5 | - Thermador HMCB36WS | Installation instructions - Page 6
READ AND SAVE THESE INSTRUCTIONS WARNING TO REDUCE THE RISK OF A RANGE TOP GREASE FIRE: •• Never leave surface units unattended at high settings. Boilovers cause smoking and greasy spillovers that may ignite. Heat oils slowly on low or medium settings. •• Always turn hood ON when cooking at - Thermador HMCB36WS | Installation instructions - Page 7
service panel. Lock service panel to prevent power from being turned ON accidentally. Parts Included Hood assembly (lamps and blower already installed) Optional accessories available for separate purchase. Refer to www.thermador appliance is fully installed. Installation Instructions English | 7 | - Thermador HMCB36WS | Installation instructions - Page 8
General Information Overall Dimensions HMCB30WS and HMCB36WS This model series is 233⁄16'' (588 mm) in depth and feature brushed stainless-steel canopy with LED 186"" ((982144)) MAX: 575⁄1166" (1455) 7" (177) 209⁄16" (522) 250"9⁄16" (1(2572)2) 233⁄16" (588) English | 8 | Installation Instructions - Thermador HMCB36WS | Installation instructions - Page 9
could incur some damage from heat if a THERMADOR MASTERPIECE® series cooktop is operated with multiple burners at high settings under a hood that is installed at minimum clearances. Unit Weight This vent hood is heavy. Adequate structure and support must be provided in all types of installations - Thermador HMCB36WS | Installation instructions - Page 10
circuit. The hood should only through a duct. The hood can be mounted only ductwork exits the house. Hood must be vented to the garage or into any enclosed space). THERMADOR® recommends not exceeding 50 equivalent length (ft a remote blower gives the best delivery. Hoods are supplied with a 8" (203 mm) - Thermador HMCB36WS | Installation instructions - Page 11
cap 8 2 10 2 1 2' long, 3¼" x 10" ex N/A 20 10 5 3¼" x 10", Roof jack and shutter N/A 2 2 NOTE: These commonly used installation parts can be purchased at a local hardware store. Thermador does not manufacture all these parts. Installation Instructions English | 11 | - Thermador HMCB36WS | Installation instructions - Page 12
is to be used as a guide ONLY. Venting Methods This hood is factory set for venting through Hood Transition Vertical Discharge Transition The hood is shipped ready for vertical discharge. The transition supplied with the hood fumes and vapors to the outside, the hood can be used in the non-vented - Thermador HMCB36WS | Installation instructions - Page 13
hood so the bottom is at least 30" (76.2 cm) above the cooking surface. NOTICE: The hood could incur some damage from heat if a THERMADOR MASTERPIECE® series cooktop is operated with multiple burners at high settings under a hood that is installed at minimum clearances. Installation Instructions - Thermador HMCB36WS | Installation instructions - Page 14
service panel. Lock service panel to prevent power from being turned ON. 2. Ensure that the minimum height of 30" (762 mm) from the bottom of the hood template with hood bottom line and with the centerline marked on the wall. A DRILL 2 (TWO) 3/16" PILOT HOLES THROUGH STUDS OR REAR WALL SUPPORT Ver - Thermador HMCB36WS | Installation instructions - Page 15
the air deflector to the bottom of the hood outlet. Cut the ductwork at the measured Electrical Shock Hazard Disconnect power before servicing. Replace all parts and panels before , into terminal box. B A D F C E Installation Instructions A. Home power supply cable B. UL listed or CSA approved - Thermador HMCB36WS | Installation instructions - Page 16
When using both upper and lower vent covers, push lower cover down onto hood and lift upper cover to ceiling and install with two mounting screws. NOTE duct cover at an angle and swivel toward the wall. 3. From inside of hood, screw the supplied 5⁄8'' (16 mm) sheet metal screws through the holes on - Thermador HMCB36WS | Installation instructions - Page 17
Remote Control Installation (optional) Before you begin, read these instructions carefully. It is recommended that the Remote Control be wired to the hood after the hood is installed. REMCPW Parts Included •• 1 - Remote control •• 1 - 30 ft. extension harness IMPORTANT: Cutting off a connector to - Thermador HMCB36WS | Installation instructions - Page 18
Bracket 1. Ensure that the minimum height of 30" (762 mm) from the bottom of the hood to the cooking surface will be maintained. 2. Locate two studs at the mounting location. 4. :N3:2319⁄16""(9(891)4) MMAAXX: 5: 757⁄1"6"(1(710405)5) English | 18 | 250"9⁄16" (1(2572)2) Installation Instructions - Thermador HMCB36WS | Installation instructions - Page 19
6. From inside of hood, screw the supplied 5⁄8'' quantity is dependent on hood size. Recirculating Kit (optional to the outside, the hood can be used in the air deflector to the bottom of the hood outlet. A. Air deflector A B. Vent clamp the exhaust outlet from the hood. 7. Reassemble the air - Thermador HMCB36WS | Installation instructions - Page 20
Position the charcoal filter inside the structure of the motor as shown in picture. •• Reinstall the grease filter onto the bottom of the hood. NOTE: The charcoal filters cannot be cleaned. It should be replaced every 4-6 months (depending on hood usage). English | 20 | Installation Instructions - Thermador HMCB36WS | Installation instructions - Page 21
and Care Guide for troubleshooting information. Refer to the Warranty in the Use and Care Guide. Please be prepared with the information printed on your product data rating label when calling. To reach a service representative, see the contact information at the back of the manual. Before calling - Thermador HMCB36WS | Installation instructions - Page 22
39 Liste de vérification de l'installateur 40 Avant d'appeler le service de réparation 40 Données de la plaque signalétique du l'information et/ou des conseils importants. Français | 22 | Cet appareil THERMADOR® est fabriqué par BSH Home Appliances Corporation 1901 Main Street, Suite 600 Irvine - Thermador HMCB36WS | Installation instructions - Page 23
Respecter les directives du fournisseur de gaz. •• S'il s'avère impossible de joindre le fournisseur de gaz, communiquer avec les pompiers. -- Utiliser les services d'un technicien en réparation ou d'une agence de réparations autorisés, ou le fournisseur de gaz, pour procéder à l'installation et aux - Thermador HMCB36WS | Installation instructions - Page 24
électroménager. Par exemple, ne pas retirer les panneaux, les couvre-fils, les supports, les équerres de fixation ou les vis. MISE EN GARDE Uniquement aux fins de des systèmes de gaines/conduites en métal. Utilisez les services d'un installateur qualifié. Retirez tout le ruban et l'emballage avant - Thermador HMCB36WS | Installation instructions - Page 25
çant un mur ou un plafond pour l'installation de l'appareil, s'assurer de ne pas endommager le câblage électrique et les autres services publics masqués. •• Les ventilateurs raccordés à une conduite doivent toujours évacuer l'air vers l'extérieur. AVERTISSEMENT POUR RÉDUIRE LE RISQUE D'INCENDIE DE - Thermador HMCB36WS | Installation instructions - Page 26
électroménager. Il est possible d'acheter d'autres accessoires facultatifs séparément Pour de plus amples renseignements, veuillez consulter www.thermador.com. •• CHXTHMCB - Trousse du caisson télescopique •• RECHMCB - Trousse de recirculation •• CHFHMCD - Trousse de remplacement du filtre à charbon - Thermador HMCB36WS | Installation instructions - Page 27
Généralités Dimension hors tout HMCB30WS et HMCB36WS Cette série de modèles, d'une profondeur de 23 ⁄3 16 po (588 mm), comporte un auvent en acier inoxydable brossé avec éclairage à DEL.. pouces (mm) - Thermador HMCB36WS | Installation instructions - Page 28
plusieurs brûleurs d'une table de cuisson de la série MASTERPIECE® de THERMADOR fonctionnent à feu vif sous une hotte installée avec les dégagements minimums. poids de l'unité de ventilation lors du calcul de la charge du système de support du boîtier. Appareil Modèle de 30 po (76 cm) Modèle de 36 - Thermador HMCB36WS | Installation instructions - Page 29
Exigences électriques L'appareil exige un circuit de dérivation de 120 V c.a., 60 Hz et de 15 A. La hotte doit être le seul appareil raccordé au circuit (avec mise à la terre), le tout installé en conformité à la réglementation en vigueur. Consultez les codes du bâtiment locaux pour connaître les - Thermador HMCB36WS | Installation instructions - Page 30
THERMADOR® conseille de ne pas excéder l'équivalent de 50 pieds (15,24 m) de d'obturation, S.O. 2 3¼ x 10 po REMARQUE: Ces pièces courantes pour installation sont offertes dans les quincailleries locales. Thermador ne fabrique pas toutes ces pièces. Français | 30 | Directives d'Installation - Thermador HMCB36WS | Installation instructions - Page 31
Dispositions courantes de conduites MODE RECIRCULATION D VENTILATION PAR LE MUR VENTILATION PAR LE PLAFOND B A E C B A E B A B E A. Pièce ronde de transition, 8 po (203 mm) B. Système de gaines, rond, 8 po (203 mm) C. Coude de 90 degrés D. Trousse de recirculation E. Hauteur d'installation : - Thermador HMCB36WS | Installation instructions - Page 32
surface de cuisson. AVIS: La hotte pourrait être endommagée par la chaleur si plusieurs brûleurs d'une table de cuisson de la série MASTERPIECE® de THERMADOR fonctionnent à feu vif sous une hotte installée avec les dégagements minimums. Français | 32 | Directives d'Installation - Thermador HMCB36WS | Installation instructions - Page 33
CL ALIGN BOTTOM EDGE WITH PENCIL LINE INDICATING BOTTOM OF THE HOOD Horizontal Line Installation Height B C A. Axe central B. Emplacement des deux (2) vis de 5 x 45 mm. A C D B A. Ancrages pour cloison sèche C. Support de l'abat-vent de 8 x 40 mm D. Vis de 5 x 45 mm B. Axe central au - Thermador HMCB36WS | Installation instructions - Page 34
2. Avec un crayon, marquez l'emplacement des trous de montage inférieurs. 3. Retirez la hotte du mur et percez des avant-trous de ⁄3 16 po (4,8 mm) aux endroits marqués. 4. Suspendez de nouveau la hotte de cuisinière sur les deux (2) vis de montage supérieur. 5. Mettez la hotte de niveau et serrez - Thermador HMCB36WS | Installation instructions - Page 35
• Utilisez les connecteurs de fils homologués UL et raccordez les fils noirs (C) ensemble. •• Utilisez des connecteurs pour fil homologués UL et raccordez les fils blancs (E) ensemble. 2. Tirez délicatement la partie supérieure du caisson vers le haut. Vissez les côtés gauche et droite du caisson à - Thermador HMCB36WS | Installation instructions - Page 36
comme illustré ci-dessous (vue face au mur) 25/8 po (65) 13 5/8 po (346) 5. Raccordez le connecteur du faisceau de fil à l'intérieur du support à la borne au dos de la télécommande. Utilisez une borne ou l'autre. pouces (mm) 2. Accédez au câblage de la hotte. Acheminez le faisceau d'extension - Thermador HMCB36WS | Installation instructions - Page 37
Caisson pour masquer les conduites (facultative) Pour certains modèles, il existe des caissons pour masquer les gaines et des caissons télescopiques facultatifs pouvant être utilisés pour combler l'espace entre la hotte et le plafond à l'installation d'une hotte murale. Les caissons de cheminée, - Thermador HMCB36WS | Installation instructions - Page 38
5. Tirez délicatement la partie supérieure du caisson vers le haut. Vissez les côtés gauche et droit du caisson à l'équerre de fixation avec les vis en acier inoxydable fournies. Trousse de recirculation (facultative) Lors d'une utilisation en mode de recirculation, utilisez uniquement la trousse - Thermador HMCB36WS | Installation instructions - Page 39
Remplacement du filtre à charbon (facultative) En mode recirculation, l'air sera recirculé par des filtres à charbon jetables pour aider à éliminer la fumée et les odeurs. •• Retirez le filtre à graisse de la hotte. •• Positionnez le filtre à charbon à l'intérieur de la structure du moteur comme - Thermador HMCB36WS | Installation instructions - Page 40
et protéger la surface. Pouvez acheter le revitalisant pour acier inoxydable Thermador à la boutique en ligne. (www.thermadoreshop.com). Commandez le num un chiffon propre. Avant d'appeler le service de réparation Dépannage Consultez le Guide d'utilisation et d'entretien pour les renseignements de - Thermador HMCB36WS | Installation instructions - Page 41
o en los bienes si no se cumple con este aviso. Nota: Esto alerta sobre información y/o sugerencias importantes. Instrucciones de Instalación Este aparato THERMADOR® está fabricado por BSH Home Appliances Corporation 1901 Main Street, Suite 600 Irvine, CA 92614 ¿Tiene preguntas? 1-800-735-4328 www - Thermador HMCB36WS | Installation instructions - Page 42
futura. ADVERTENCIA Si no sigue la información de este manual exactamente, se puede ocasionar un incendio o una descarga el materiales o lesiones personales. ADVERTENCIA Si no sigue la información de este manual exactamente, se puede ocasionar un incendio o una descarga eléctrica que pueden - Thermador HMCB36WS | Installation instructions - Page 43
INSTRUCCIONES DE SEGURIDAD IMPORTANTES LEER Y CONSERVAR ESTAS INSTRUCCIONES Instrucciones para la conexión a tierra ADVERTENCIA La conexión incorrecta a tierra puede causar una descarga eléctrica. Este electrodoméstico debe estar conectado a tierra. En caso de cortocircuito, la conexión a tierra - Thermador HMCB36WS | Installation instructions - Page 44
INSTRUCCIONES DE SEGURIDAD IMPORTANTES LEER Y CONSERVAR ESTAS INSTRUCCIONES ADVERTENCIA PARA REDUCIR EL RIESGO DE UN INCENDIO POR GRASA: •• No dejar nunca las unidades de la superficie desatendidas con ajustes de calor elevado. •• Los derrames provocan humo y salpicaduras de grasa que pueden - Thermador HMCB36WS | Installation instructions - Page 45
fijación para otro tipo de situaciones de instalación. Los accesorios opcionales están disponibles para su compra por separado Consultar www.thermador.com para obtener más información. •• CHXTHMCB: kit de extensión con cubierta telescópica del ducto •• RECHMCB: kit de recirculación •• CHFHMCD: kit - Thermador HMCB36WS | Installation instructions - Page 46
Información general Dimensiones generales HMCB30WS y HMCB36WS Esta serie de modelos tiene una profundidad de 233⁄16'' (588 mm) y posee un armazón de acero inoxidable cepillado con iluminación LED. pulgadas (mm) 1013⁄ - Thermador HMCB36WS | Installation instructions - Page 47
instalación necesaria sobre una placa de cocción, estufa de sobreponer o estufa, consultar el manual de instalación del aparato. 209⁄16" (522) Mín. 30" (762) sobre zonas de cocción de la placa de cocción de la serie THERMADOR MASTERPIECE® con ajustes de calor elevado debajo de una campana extractora - Thermador HMCB36WS | Installation instructions - Page 48
seguridad, el ducto debe evacuar directamente el aire hacia el exterior (y no en el ático, bajo la casa, en el garaje o en un espacio cerrado). THERMADOR® recomienda que la longitud equivalente del ducto no exceda de 50 pies (15.24 m). Instalar el ducto lo más corto y recto posible. Los codos y las - Thermador HMCB36WS | Installation instructions - Page 49
, 3¼" x 10" N/D 20 flexible 3¼" x 10", soporte de fijación y toma de techo N/D 2 NOTA: Estas partes de instalación de uso frecuente se pueden adquirir en ferreterías locales. Thermador no fabrica todas estas piezas. Instrucciones de Instalación Español | 49 | - Thermador HMCB36WS | Installation instructions - Page 50
Configuraciones comunes de ductos MODO DE RECIRCULACIÓN VENTILACIÓN A TRAVÉS DEL MURO VENTILACIÓN A TRAVÉS DEL TECHO D B A E C B A E B A B E NOTA: La gráfica no representa todas las configuraciones o los métodos de instalación. La imagen se debe usar SOLO como una guía A. Transición circular de - Thermador HMCB36WS | Installation instructions - Page 51
ÓN: El calor puede dañar la campana extractora si se utilizan a la vez varias zonas de cocción de la placa de cocción de la serie THERMADOR MASTERPIECE® con ajustes de calor elevado debajo de una campana extractora instalada con las distancias mínimas. Instrucciones de Instalación Español | 51 | - Thermador HMCB36WS | Installation instructions - Page 52
(TWO) 3/16" PILOT HOLES THROUGH STUDS OR REAR WALL SUPPORT Ver tical Cente r line REAR WALL MOUNTING TEMPLATE CL ALIGN BOTTOM EDGE WITH PENCIL LINE INDICATING BOTTOM OF THE HOOD Horizontal Line Installation Height B A. Línea central C B. Ubicación - Thermador HMCB36WS | Installation instructions - Page 53
2. Marcar con un lápiz la ubicación de los agujeros de montaje inferiores. 3. Desmontar el ensamblaje de la campana extractora y taladrar agujeros guía de 3⁄16" (4.8 mm) en las ubicaciones marcadas. 4. Colocar de nuevo la campana extractora en los 2 tornillos de montaje superiores. 5. Nivelar la - Thermador HMCB36WS | Installation instructions - Page 54
•• Usar los conectores de cable UL certificados y conectar los cables negros (C) conjuntamente. •• Usar los conectores de cable UL certificados y conectar los cables blancos (E) conjuntamente. 2. Tirar con cuidado hacia arriba de la parte superior de la extensión. Atornillar los laterales izquierdo - Thermador HMCB36WS | Installation instructions - Page 55
Instalación del control remoto (opcional) Antes de empezar, leer con atención estas instrucciones. Se recomienda conectar el control remoto a la campana después de instalar la campana. REMCPW, piezas incluidas • 1 control remoto • 1 arnés de extensión de 30 pies IMPORTANTE: Cortar un conector al - Thermador HMCB36WS | Installation instructions - Page 56
Extensión de la cubierta del ducto (opcional) En algunos modelos se pueden usar cubiertas del ducto opcionales y extensiones telescópicas para llenar el espacio entre la campana extractora y el techo en instalaciones en pared. La cubierta del ducto de la chimenea incluida con la campana extractora - Thermador HMCB36WS | Installation instructions - Page 57
5. Jalar con cuidado hacia arriba de la parte superior de la extensión. Atornillar los laterales izquierdo y derecho de la extensión a la placa de fijación del montaje con los tornillos de acero inoxidable suministrados. 6. Desde el interior de la campana extractora, atornillar los tornillos para - Thermador HMCB36WS | Installation instructions - Page 58
Reemplazar el filtro de carbón (opcional) En el modo de recirculación, el aire recircula a través de filtros de carbón desechables que ayudan a retirar el humo y los olores. •• Retirar el filtro antigrasa de la campana extractora. •• Colocar el filtro de cabrón dentro de la estructura del motor, - Thermador HMCB36WS | Installation instructions - Page 59
de acero inoxidable con un paño suave. El acondicionador de acero inoxidable Thermador se puede comprar en la tienda electrónica en línea. (www.thermadoreshop de servicio, consulte la información de contacto en la parte posterior del manual. Antes de llamar, anotar el modelo completo y el número de - Thermador HMCB36WS | Installation instructions - Page 60
1901 MAIN STREET, SUITE 600, IRVINE, CA 92614 // 800-735-4328 // WWW.THERMADOR.COM © 2018 BSH Home Appliances Corporation LIB0138446/9001396686
-
 1
1 -
 2
2 -
 3
3 -
 4
4 -
 5
5 -
 6
6 -
 7
7 -
8
-
9
-
10
-
11
-
12
-
13
-
14
-
15
-
16
-
17
-
18
-
19
-
20
-
21
-
22
-
23
-
24
-
25
-
26
-
27
-
28
-
29
-
30
-
31
-
32
-
33
-
34
-
35
-
36
-
37
-
38
-
39
-
40
-
41
-
42
-
43
-
44
-
45
-
46
-
47
-
48
-
49
-
50
-
51
-
52
-
53
-
54
-
55
-
56
-
57
-
58
-
59
-
60
 |
 |

Installation
INSTRUCTIONS
Thermador Masterpiece
®
Chimney Wall Hoods
THERMADOR.COM